TELCARE TELCBGM01 User manual
Telcare Blood Glucose
Monitoring System
User Manual
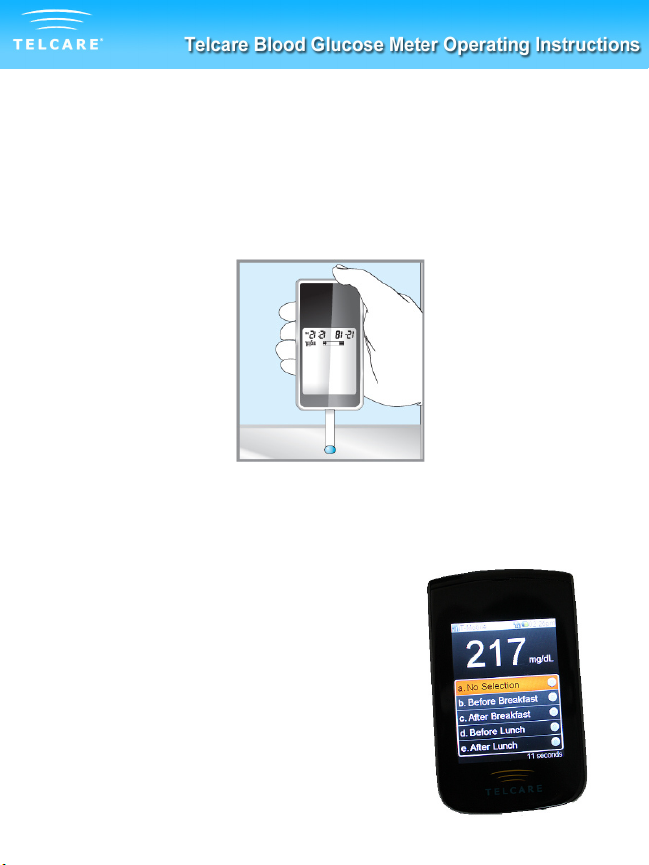
This meter contains a rechargeable internal baery. In order to save
baery power, it will power down (go dark) aer 20 seconds. If this
happens while you are using the meter, there is nothing wrong. To
wake up the meter, either insert a test strip or turn the power buon
“o” and then “on”.
This device will not transmit data when it is not in use. The data
transmission me is no more than six minutes.

Home glucose monitoring is
universally recognized as essential
to the management of diabetes and
prevention of complications.
“
”
Thank you for choosing the Telcare Blood Glucose Meter (BGM) to
help you manage your diabetes.
The Telcare BGM is an advanced wireless monitoring system
that connects you, the paent, with your healthcare provider to
enhance your ability to manage your blood glucose levels. The
Telcare BGM has been designed to be accurate and easy to use.
This manual contains all of the informaon needed to use and
maintain your new blood glucose meter. Please read it carefully
before using your new Telcare BGM.
Telcare BGM provides an easy and precise way to measure blood
glucose using fresh capillary whole blood taken from your ngerp.
The added convenience of autocoding can help reduce the chance
of inaccurate readings caused by incorrect coding of the meter. The
test results are plasma-calibrated for easy comparison to lab results.
When your test is complete your results are securely transmied
to the Telserve Web Portal (www.MyTelcare.com), where they may
be accessed by you (the paent) and any other authorized person
(doctor, educator, family member, etc.), eliminang the need to
manually record your results.
Telcare BGM is a rechargeable baery operated meter intended
for use as an aid by persons with diabetes and by healthcare
professionals to monitor glucose concentraon in whole blood.
If you have quesons or simply need more informaon, please visit our website
at www.telcare.com. Thank you again for choosing the Telcare BGM.
Table of Contents
Your Telcare Blood Glucose Meter
The Telcare BGM Device 1
Telcare Test Strips 3
The Display Screen 4
Seng Up Your Telcare BGM 5
Control Soluon Modes
Performing the Control Test 8
Tesng Your Blood Sugars
Checklist 14
Preparing Your Lancing Device 16
Understanding Your Results 26
Viewing Your Meter’s Memory 27
Maintenance of Your Telcare BGM
Cleaning and Storage 28
Charging the Telcare BGM 29
Troubleshoong 30
Terms of Warranty 33
About Telcare / Contact 34
Your Telcare BGM
Unboxing the Telcare BGM for the rst me
Before we begin, take a moment to go over the contents of your
Telcare BGM kit. Your kit should include all of the following items:
- Telcare Blood Glucose Meter (baery included)
- AC Charger
- Lancing Device
- Lancets
- Instrucon Manual
Make sure you charge your glucose meter for at least 12 hours
before rst use. To charge your glucose meter, use the AC Charger
included in your kit.
You should use the Telcare BGM for:
- Tesng blood glucose
- Tesng only with fresh capillary whole blood samples
You should NOT use the Telcare BGM for:
- The diagnosis of diabetes
- Tesng blood glucose on newborns
- Tesng of arterial blood
1
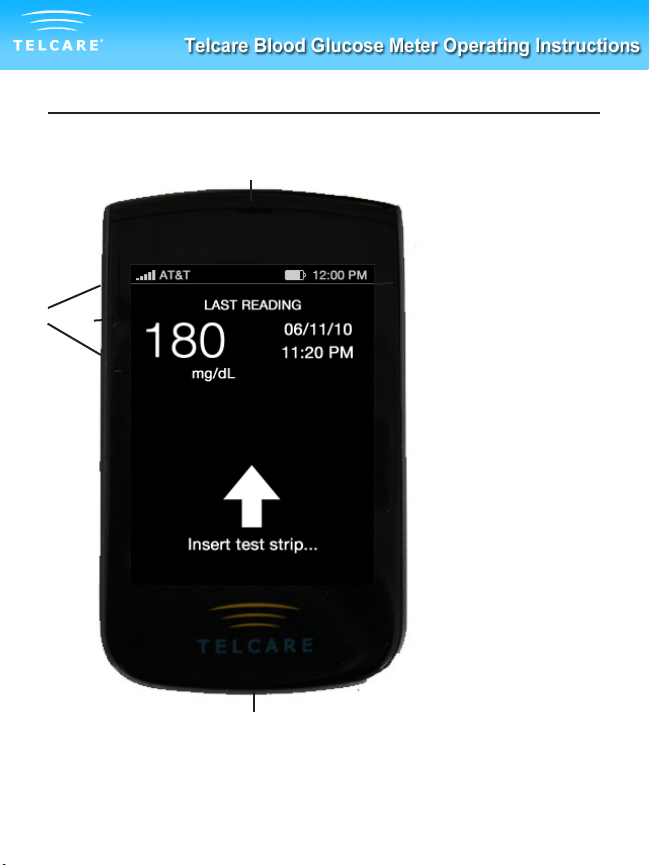
The Telcare BGM Device
q
weq
w
e
r
Power Buon
UP / DOWN Keys
Enter Buon
Display Screen
2
t
y
t
y
Insert Test Strip
(White side up)
Charging Port
(Do not aempt
to insert strip
here)
r
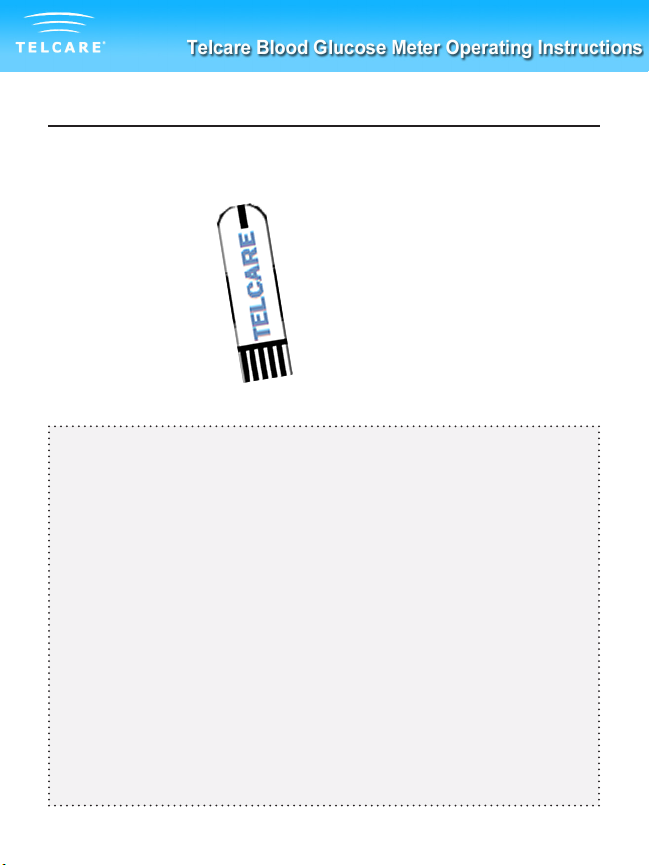
Telcare Test Strips
q
w
Blood Sample End
Contact End
(Put into device)
IMPORTANT NOTES ON TEST STRIPS:
• Check the expiraon date printed on the test strip bole
and its package. Do not use expired test strips.
• Use each test strip immediately aer removing it from the
bole.
• Do not use wet or damaged test strips.
• Keep away from direct sunlight and heat. Store the test
strip bole in a dry, cool place.
• Record the “date opened” on the bole label. Discard the
bole and any remaining test strips 3 months aer the
date of opening.
• Do not operate the meter outside the temperature range of
50˚F to 104˚F.
3
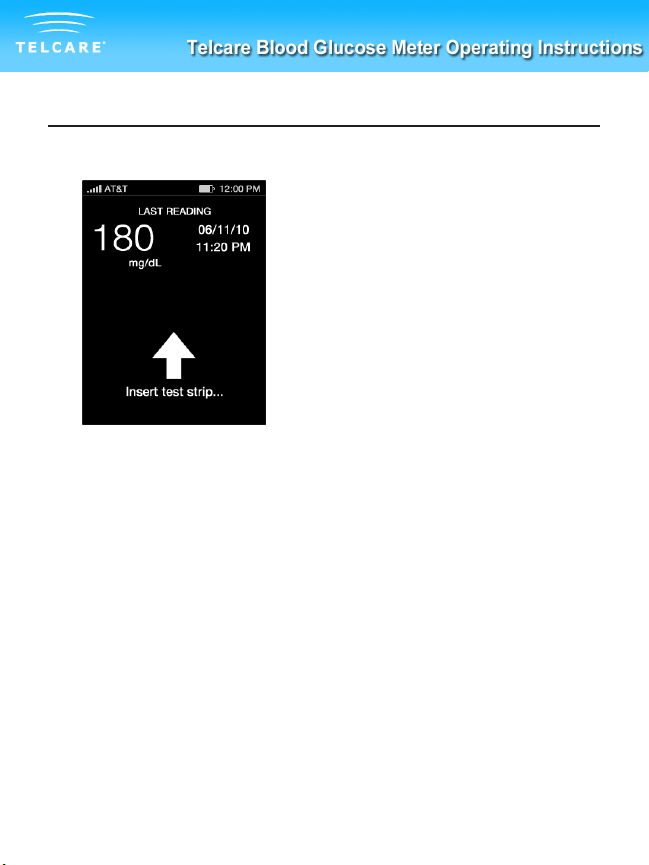
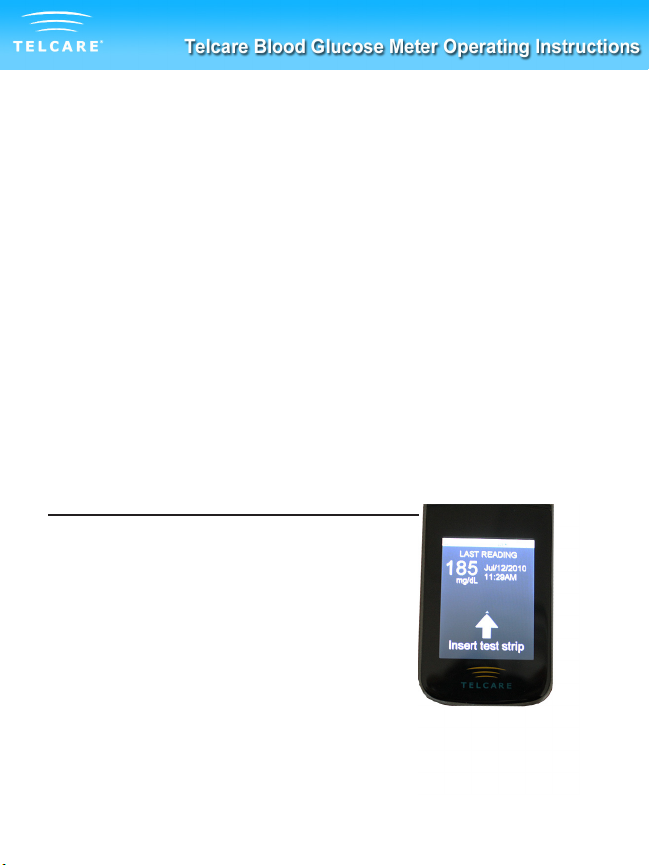
The Display Screen
The Display Screen
Wireless Signal Strength
Current Time
Baery Level
Last Test Reading
Time of Last Reading
qwe
rtq
w
e
r
t
4
From the Display screen, you can see the following things:
- Wireless Signal Strength
- Current Time
- Baery Level
- Last Test Reading
- Time of Last Reading
In this Display screen, use the UP/DOWN buons (located on the
le of your meter) to access the meter’s opons:
- Test Mode
- L1 Control Soluon Mode (Low)
- L2 Control Soluon Mode (High)
- Sengs Menu

Seng Up Your Telcare BGM
Your Telcare BGM is precongured with your informaon already
stored, including your me zone. During each cellular connecon
(which occurs aer a glucose reading has been saved), the web
server will recognize and validate that the me displayed on your
Telcare BGM is accurate. The web server will automacally update
your Telcare BGM me, if appropriate. Also, if your physical locaon
changes the web server will recognize your me zone change and
update your meter’s clock.
If you would like to view your meter’s precongured sengs,
navigate to the Sengs screen.
Geng to the Sengs Screen
1. PWR your Telcare BGM Device On
2. Use the UP/DOWN Buons to reach the “Sengs” screen
5
Sengs Opons
Alarms
Create up to 3 alarms to help remind yourself when to test next.
Date and Time
This page allows you to view the Date and Time sengs of your
device.
Volume
This page allows you to select the volume of your meter. Use the
UP/DOWN keys to select the appropriate volume. There are six
possible volumes you may select from.
Mobile Network
This is an advanced feature. This page allows you to view the details
of the mobile network your device uses for communicaon to the
MyTelcare.com Web Portal.
Auto-Sync
Disabling Auto-sync will prevent the meter from communicang
with the MyTelcare.com Web Portal. Readings will sll be stored in
the Glucose Meter.
6
Retrieve Blood Glucose History
Your last 300 glucose and control test readings are stored within
the meter. Please see ‘Viewing Your Meter’s Memory’ for further
details.
Airplane Mode
Turning on Airplane Mode disables cellular network access. You will
not be able to transmit your readings while Airplane Mode is turned
on. Your meter’s clock will connue to work properly while in this
mode.
If a me zone change occurs, your meter will not automacally
update to the new me unl Airplane Mode has been disabled.
About
This is an advanced feature. You may view detailed informaon
regarding your device from this page. Push the Enter buon to exit
the About page.
To exit the Sengs Menu, scroll to “Back” and press the “Enter”
buon.
7
Control Soluon Modes
Control soluon tesng is to make sure your Telcare BGM and Test
Strips are working well. You should perform control soluon tesng
when:
• Using the meter for the rst me
• Using a new bole of Telcare No Code Test Strips
• You le the test strip bole cap open
• You dropped the meter
• You suspect, for any reason, that the meter and test strips
are not working
• The blood glucose test results do not reect how you feel
• Praccing the tesng procedure
Step by Step Guide to Control Tesng
qPower on the Telcare BGM
device with the PWR buon
wThe device will automacally
start in “Normal Test Mode”,
ready to check blood glucose.
You will see “Insert Test Strip”
on the display.
8
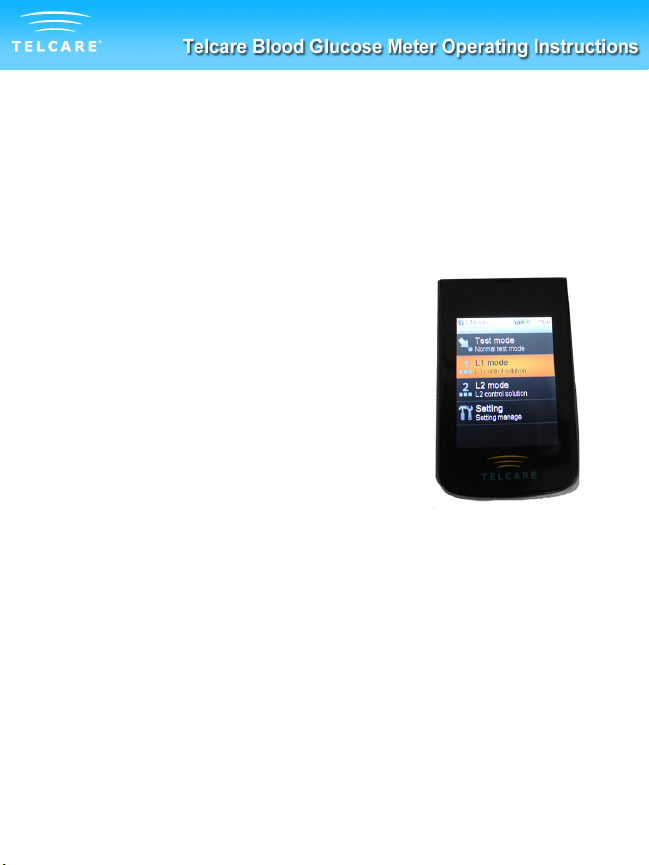
Use the UP / DOWN keys to access the
main menu. Switch modes from “Normal
Test Mode” to L1 Control Soluon Mode
or L2 Control Soluon Mode. You can
also access the “Sengs” menu.
To test Level 1 (L1) control soluon, use
the UP/DOWN buons to highlight L1
mode. Press the middle (ENTER) buon
to select L1 mode.
To test Level 2 (L2) control soluon, use
the UP/DOWN buons to highlight L2
mode. Press the middle (ENTER) buon
to select L2 mode.
e
9
t
y
You can select any Mode you
want by pushing the ENTER
buon.
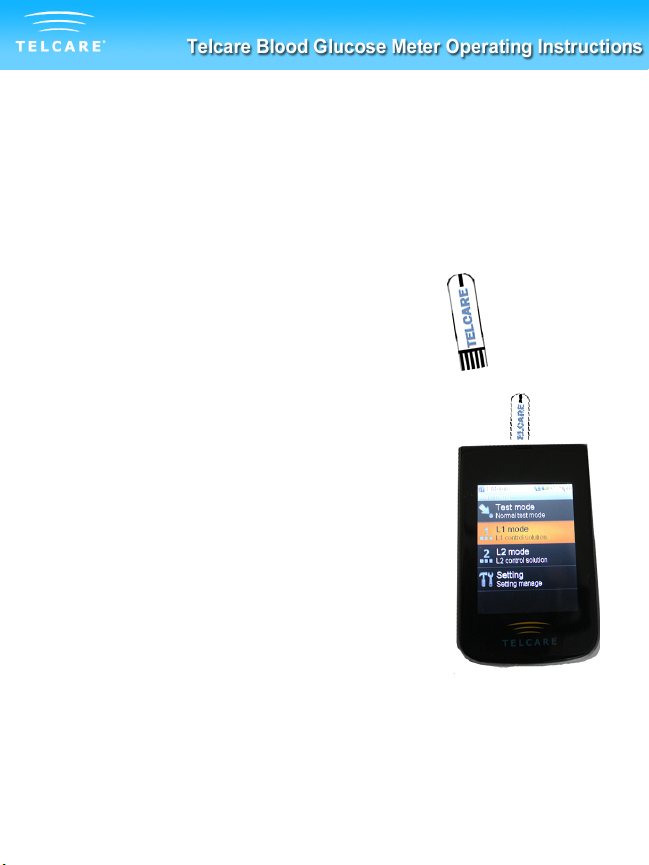
Take out a Telcare test strip
from the test strip bole.
Close the bole immediately.
r
Insert the test strip into
the meter. Make sure the
“Telcare” label on the strip is
facing you.
10
u
Squeeze a drop of control soluon onto a clean,
dry surface. Use Level 1 soluon for L1 mode. Use
Level 2 soluon for L2 mode. Do not apply control
soluon to the test strip directly from the bole.
Immediately replace the bole cap on the control
soluon bole.
i
Gently touch the p of the test
strip to the drop of control
soluon. You should see the
top half of the test strip ll
with the liquid.
oThe screen will start to count
down. Aer 7 seconds, the
control test result will appear
on the meter’s display screen.
11
a
Compare the reading on the screen to the “L1
Control Soluon” or “L2 Control Soluon” range
printed on the test strip bole or package. If the
reading falls outside the level printed on the test
strip bole that you used, please see Control
Soluon Trouble Shoong below.
IMPORTANT TIPS
1. Only use Telcare Glucose Control Soluon with the
Telcare Test Strips. Other brands of control soluon
may produce inaccurate results.
2. Always check the expiraon date. DO NOT use
expired control soluon.
3. DO NOT FREEZE. Store the control soluon at room
temperature.
12
Control Soluon Troubleshoong
If your control soluon tesng is out of range (too high or too
low), it may be caused by the following:
• Wrong brand of control soluon
• Control soluon not at room temperature
• Expired or contaminated control soluon
• Damaged test strip
• Meter malfuncon
• Wrong ambient temperature (should be between 50˚F~104˚F).
• Check the expiraon and open bole date on the control
soluon and on the test strips. Repeat tesng using a new
test strip. If the result is sll out of range, use a new bole of
control soluon and retest.
• If the problem persists, call Telcare at (877) 777-4710. Do not
perform any blood glucose tests unl you resolve this issue.
13
Tesng Your Blood Sugar
Before you begin, make sure to:
• Set up your Telcare BGM properly. Run a control
test before rst use. (See Step by Step Guide to Control
Tesng on page 8.)
• Wash your hands and tesng site thoroughly with warm
water and soap. Dry your hands well.
• Test in a place where the temperature range is between
50˚F~104˚F. (See Troubleshoong Your Telcare BGM on page
31 for more informaon.)
You will need:
- Your Telcare Blood Glucose Meter
- A new Telcare Blood Glucose Test Strip
- A lancing device with a clean, unused lancet
(or safety lancets)
- The clear cap for Alternate Site Tesng (AST) if
tesng on palm
14

Step by Step Blood Sugar Tesng
qPower on the Telcare BGM
device with the PWR buon.
The device will automacally
start in “Normal Test Mode”.
It will ready to check blood
and “Insert test strip” will be
displayed.
15
wTake out a Telcare No Code
Test Strip from the test strip
bole, and close the bole
immediately.
eInsert the test strip into your
Telcare BGM device.
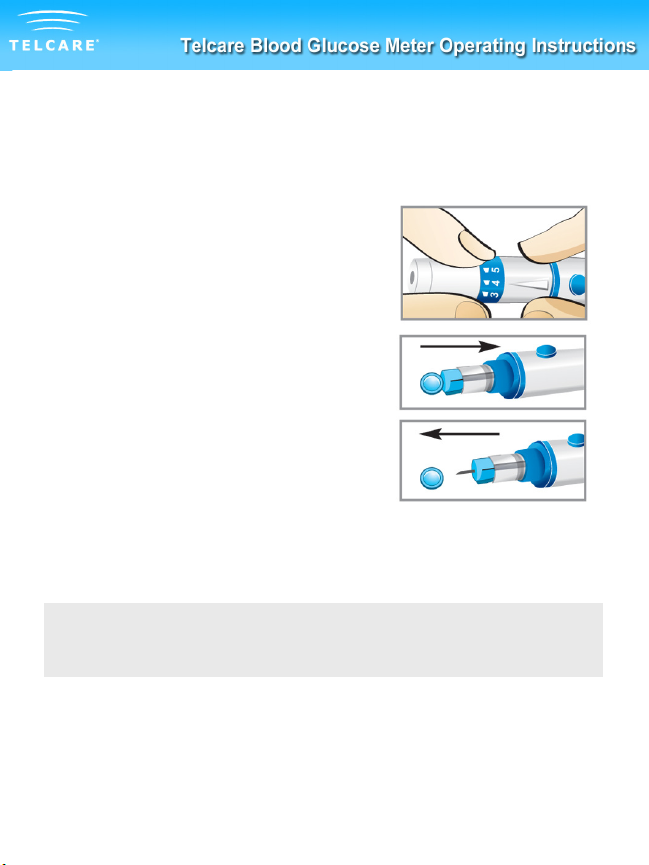
Prepare Your Lancing Device
r
16
A) Unscrew the cap of the lancing device
and push the lancet into the device
rmly unl it is fully seated.
B) Twist the protecve cover o the
lancet. Twist the adjustable cover
clockwise onto the lancing device.
IMPORTANT:
Use a new sterile lancet every me you test to avoid cross contaminaon.
If alcohol wipes are used to clean the area, make sure it is dry before the
blood sample is obtained.
Table of contents
Other TELCARE Blood Glucose Meter manuals


