TeleSynergy AbovEdge SS-7010 User manual
Quick Installation Guide
Table of Content
Startup and Shut down........................................................................................................ 1
IP Network connection ....................................................................................................... 1
Connect power cord and power on the AbovEdge SS-7010/MV6432............................... 6
Connect power cord and power on the Extension Expansion Module ES-0624/0030....... 7
Log in the AbovEdge Administrator Interface through Host PC ....................................... 8
Startup and Shut down
Plug power cord into the AbovEdge SS-7010/MV-6432, the system will power up and
start running.
When shut down the system, press and hold the red power switch for one
seconds for AbovEdge SS-7010/MV-6432 to do a “soft” shutdown. Do not
hold more than 4 seconds, which will result in a “forced shutdown” of the
system.
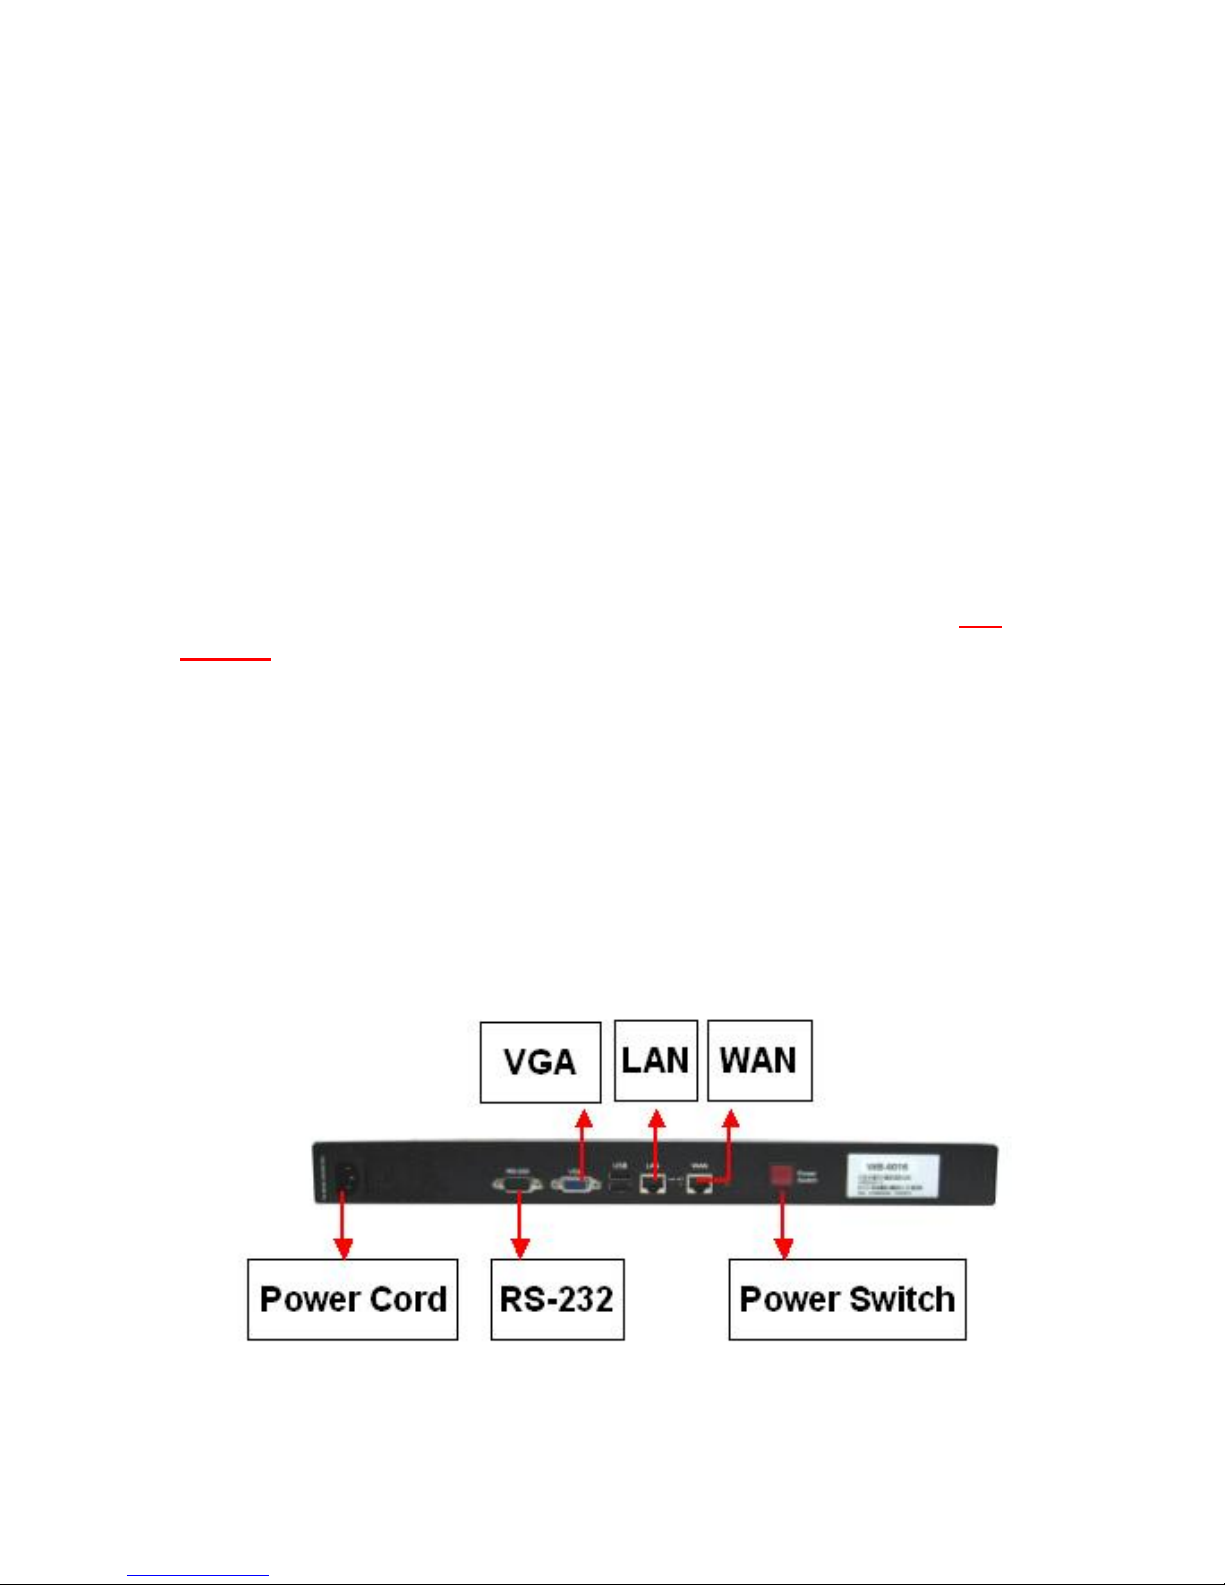
IP Network connection
Connect AbovEdge SS-7010/MV-6432’s WAN port to a network Switch. Do NOT
connect to the LAN port. LAN port is for TeleSynergy’s internal usage only. Wait for
AbovEdge finish startup, you can configure AbovEdge through HOST PC by default IP
address.
Picture 1. AbovEdge-SS7010/MV-6432 Rear View
AbovEdge Default Network Setting:
SS-7010
WAN Port
IP Address
192.168.1.5
Subnet Mask
255.255.255.0
Default Gateway
192.168.1.1
MV-6432
WAN Port
IP Address
192.168.1.5
Subnet Mask
255.255.255.0
Default Gateway
192.168.1.1
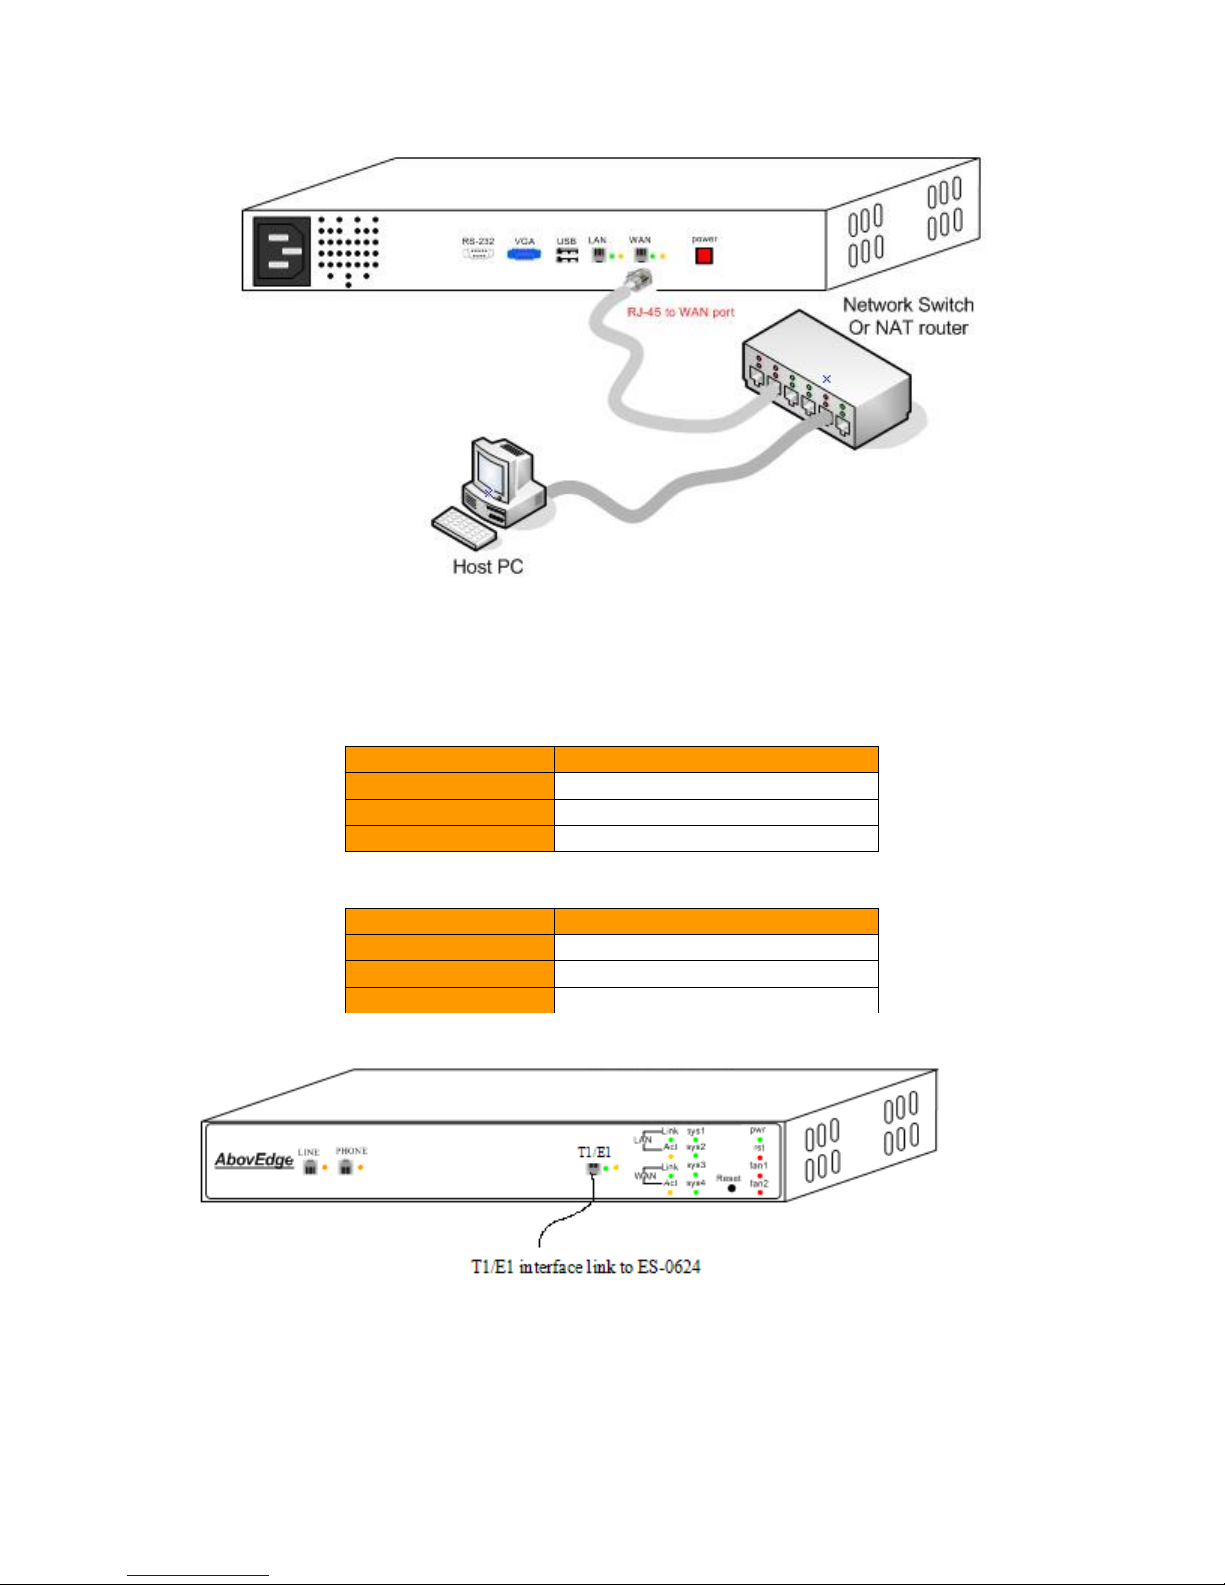
Picture 2. AbovEdge-SS7010 Front View
The Link and Act LED beside the WAN port will display its status when the
power-up process of the AbovEdge is completed.
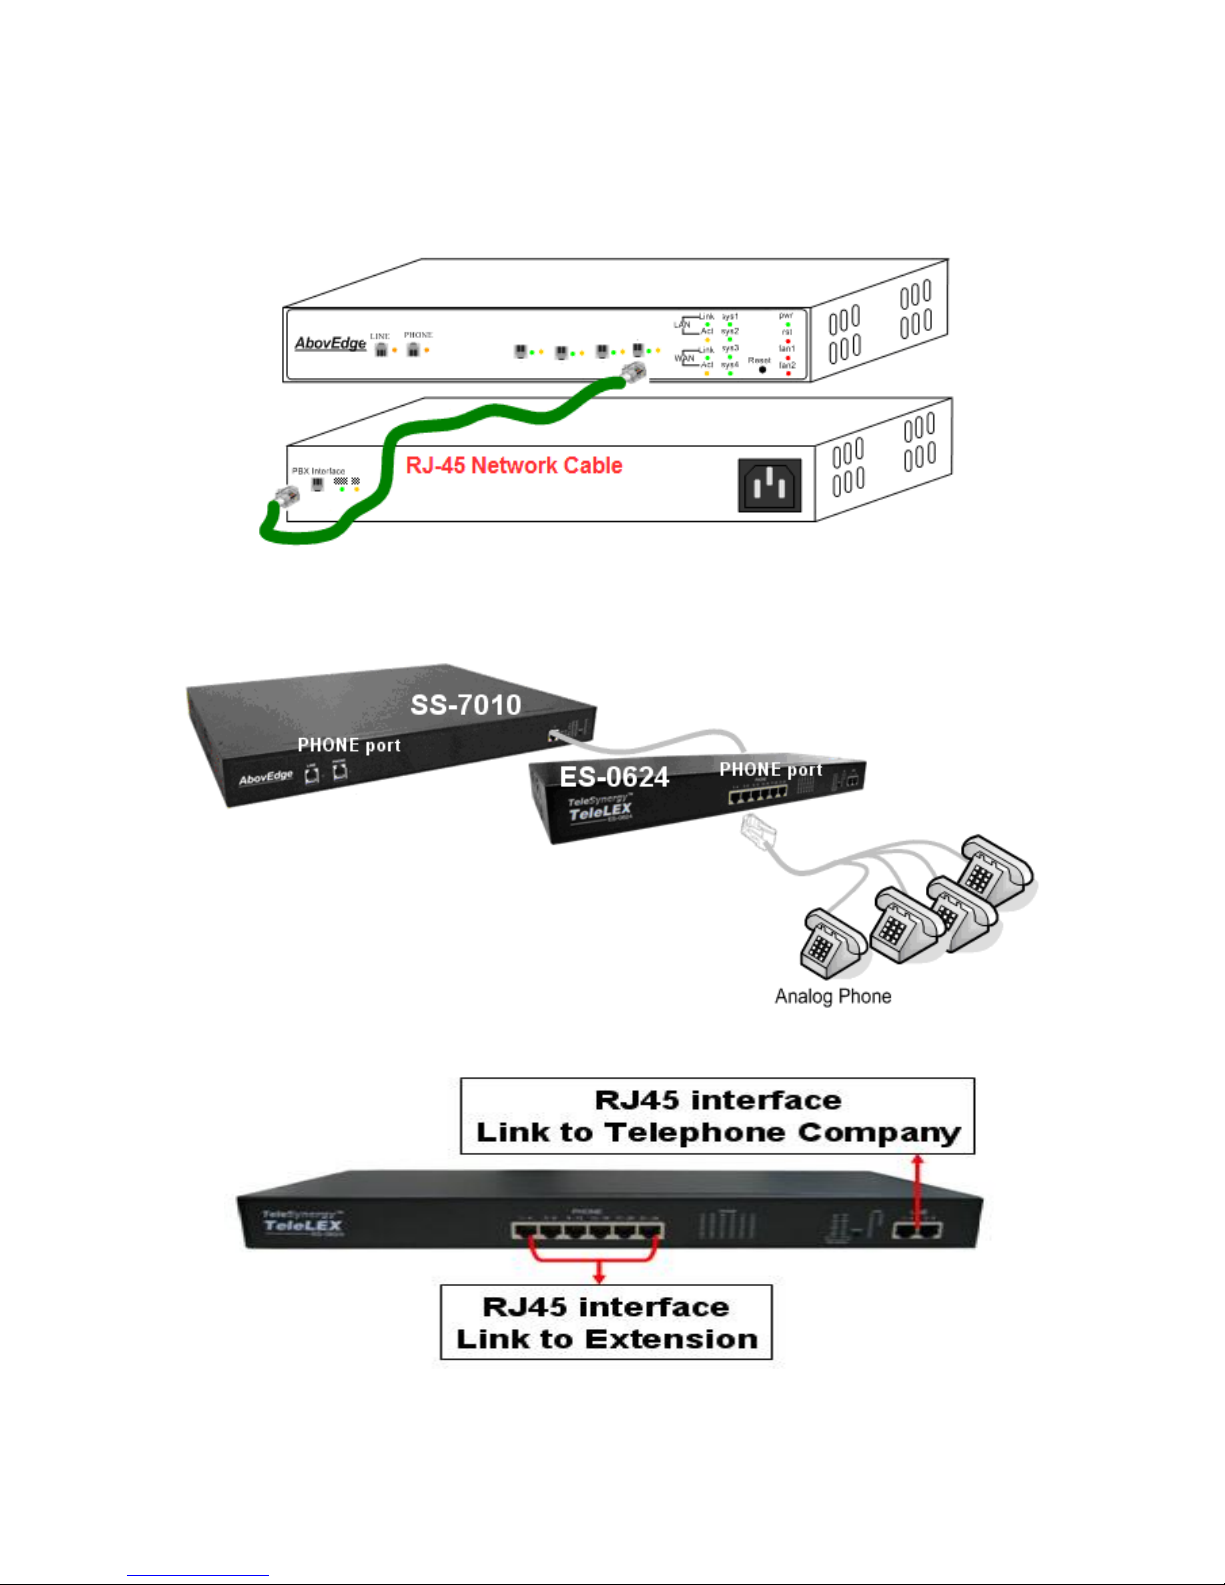
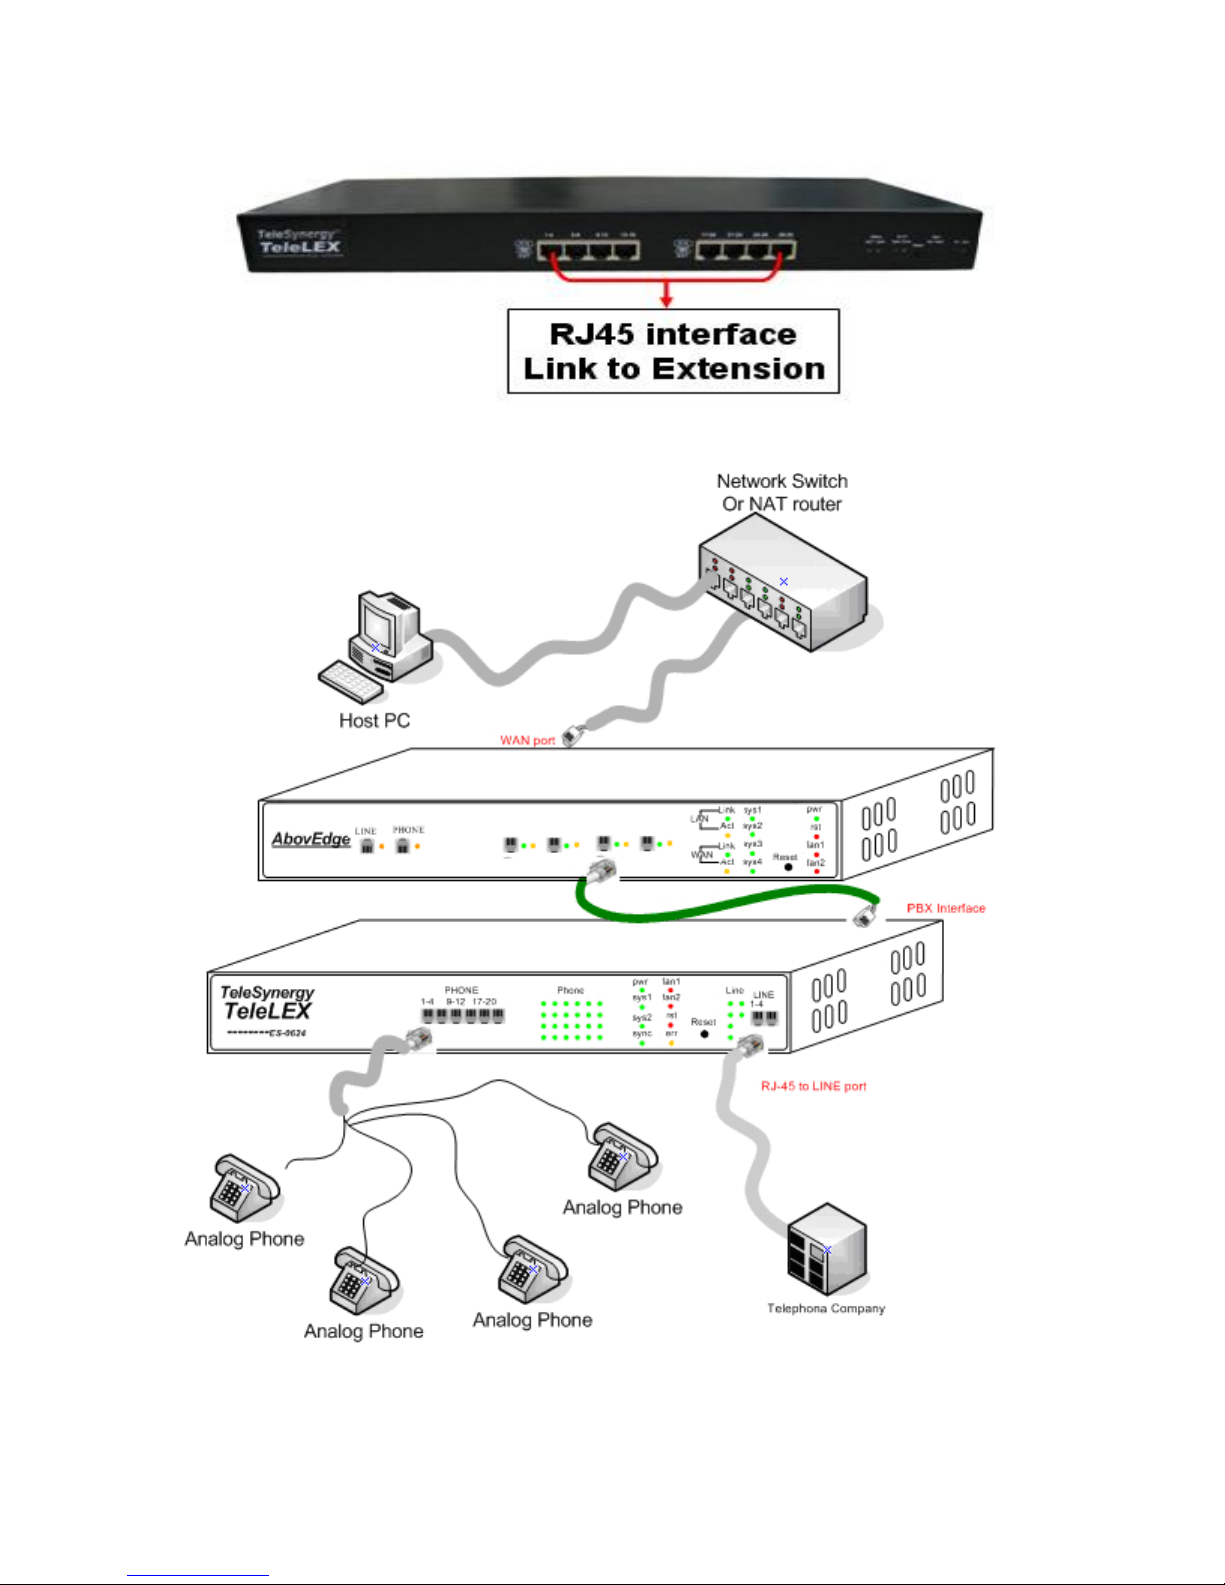
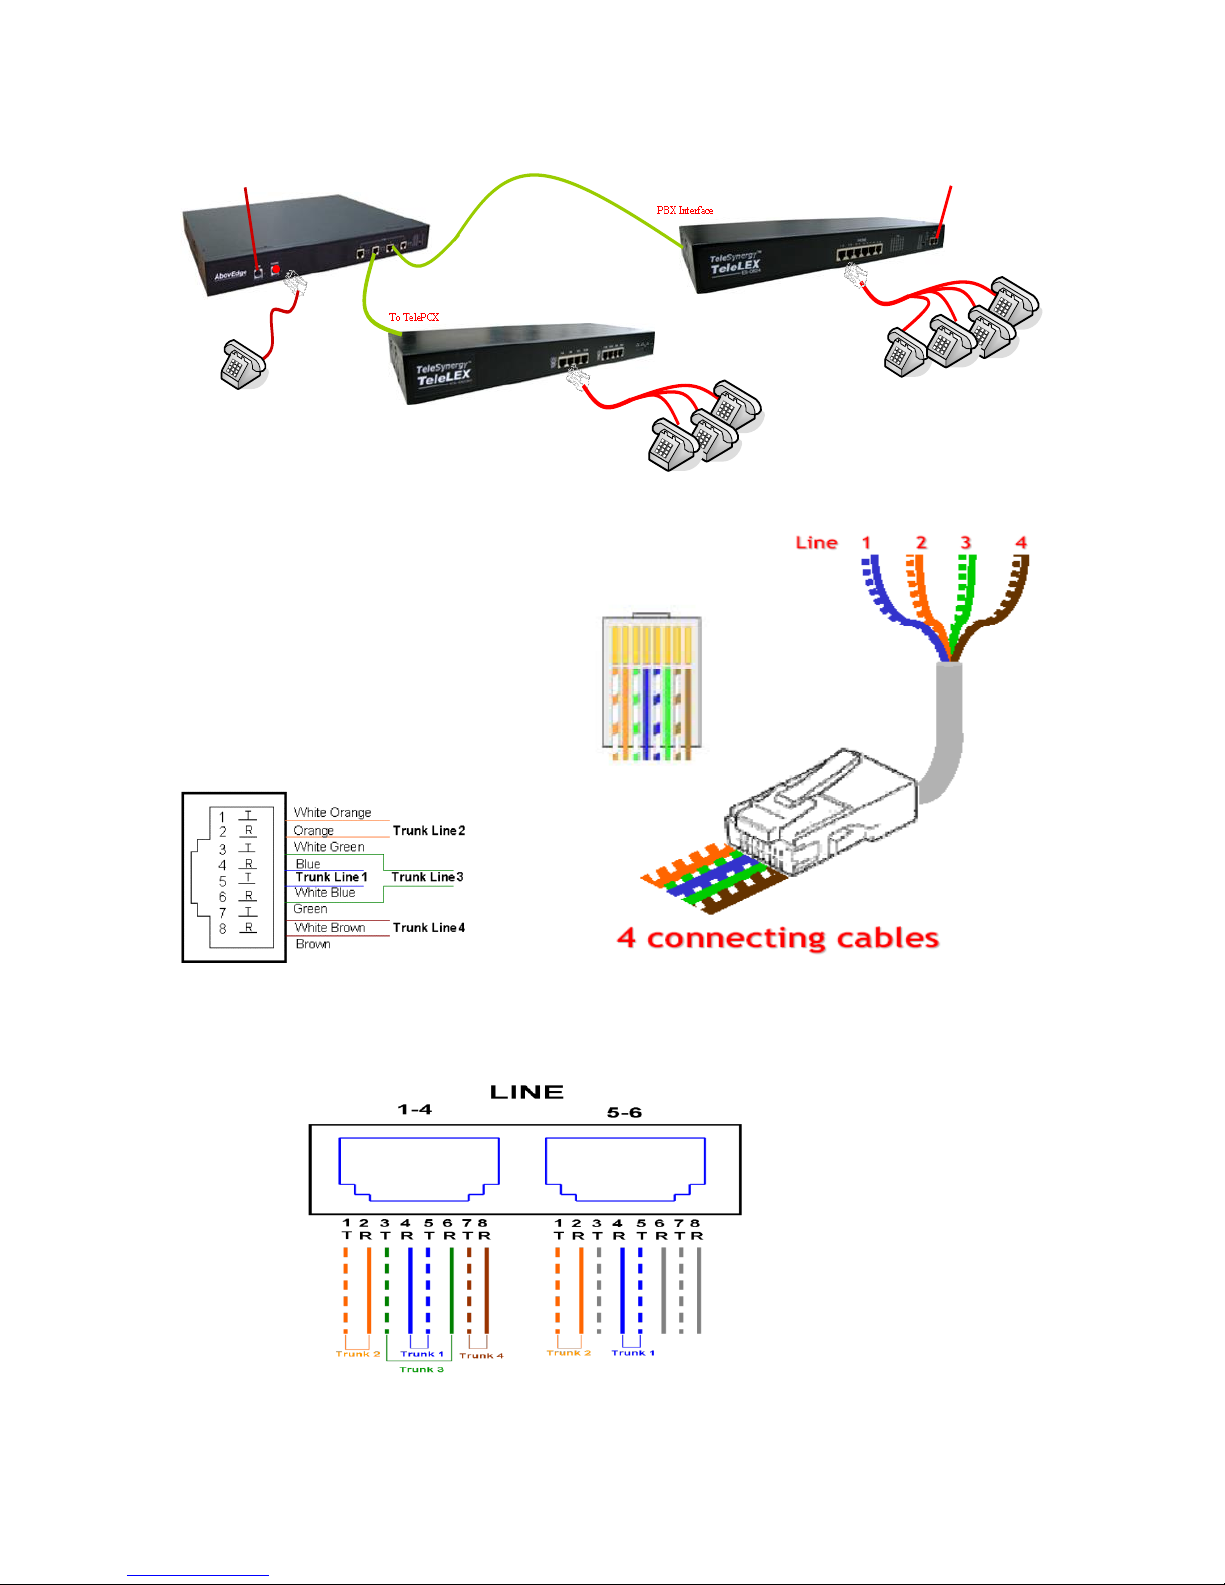
Use a network cable to connect between SS-7010 and ES-0624; MV-6432
and ES-0624/0030.
Picture 3. Connecting AbovEdge SS-7010 and Extension Expansion Module ES-0624
Picture 4. ES-0624 Front View
Picture 5. ES-0030 Front View
Picture 6. Cable connection: AbovEdge MV-6432 and ES-0624
MV-6432
PHONE port
Analog Phone
RJ-11
RJ-45
Analog
Trunk x 1
PHONE port
ES-0624 PHONE ports
Analog Phone
RJ-45
Analog Trunk x 6
ES-0030
Picture 7. Cable connection: AbovEdge MV-6432 and ES-0624/0030
Picture 8. RJ45 to 4 RJ11 extension cable
ES-0624 LINE Port RJ-45 line layout,
Picture 9. ES-0624 Trunk RJ45 Line layout
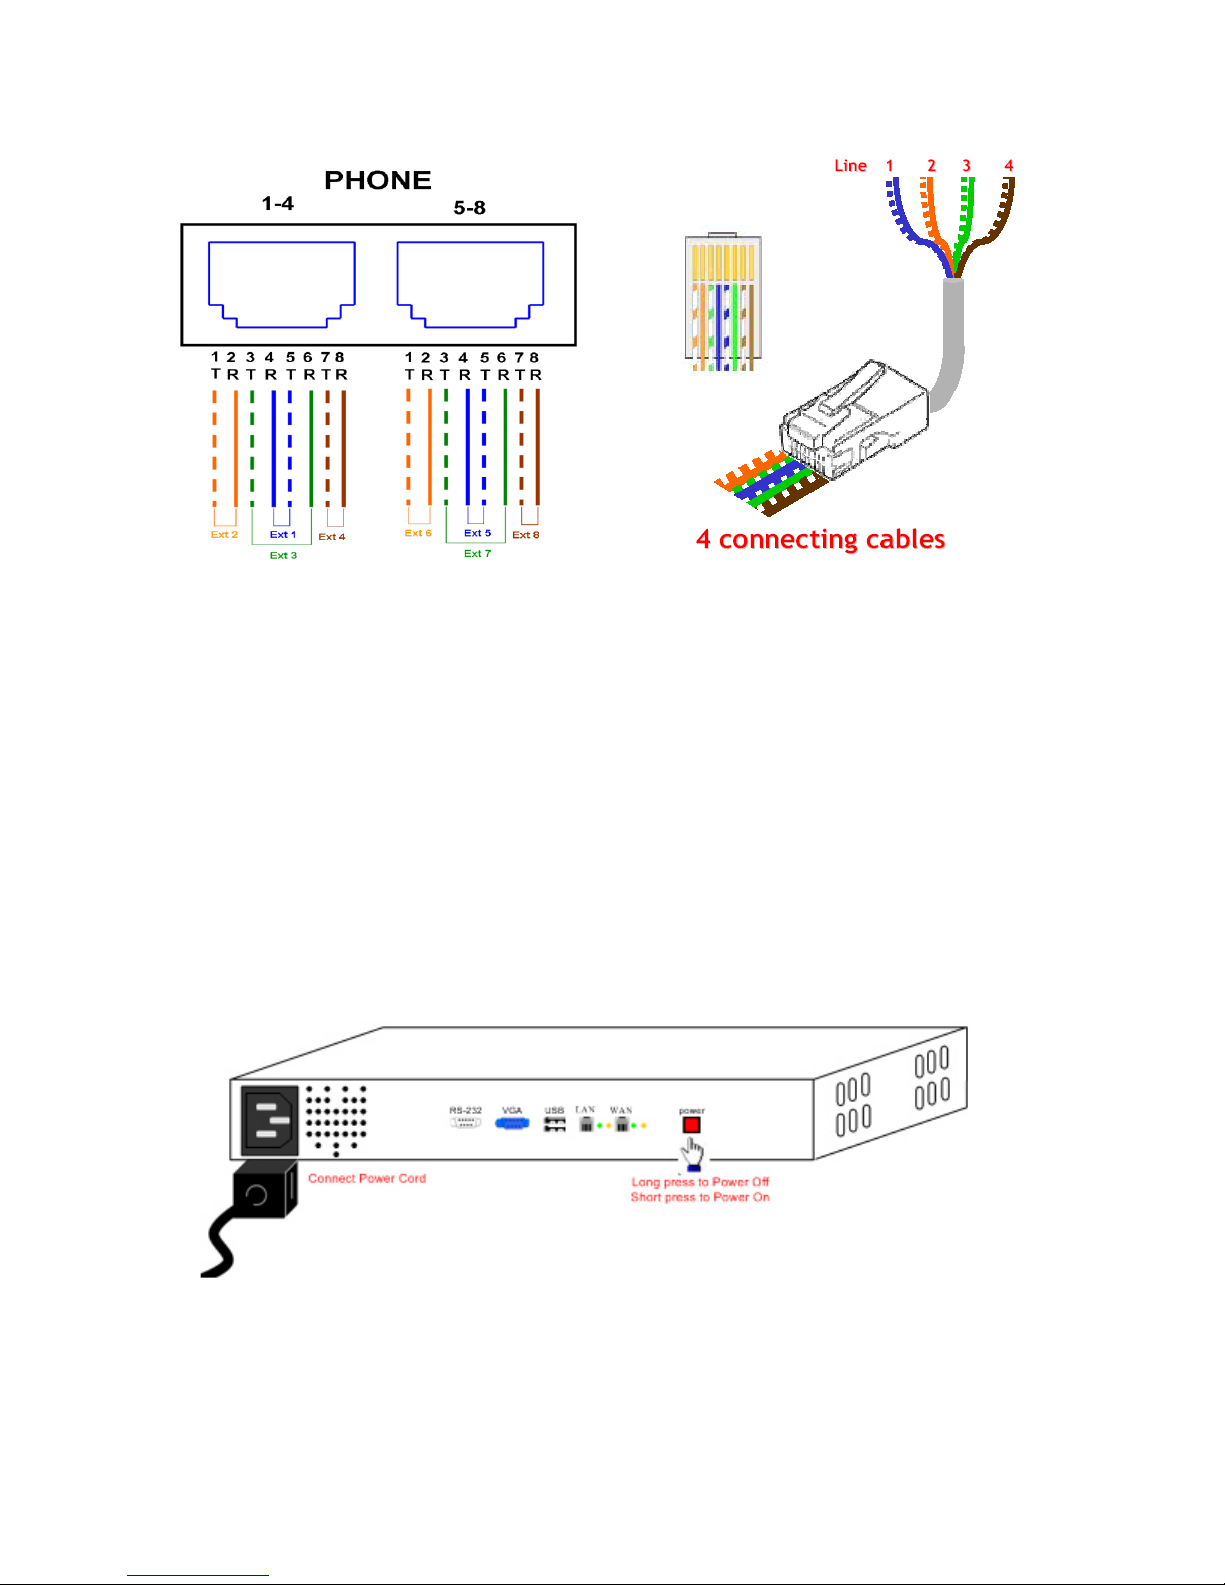
Picture 10. ES-0624/0030 RJ45 to 4 RJ11 extension cable
Connect power cord and power on the AbovEdge SS-
7010/MV-6432
Plug power cord into the AbovEdge SS-7030, the system will automatically start.
In rare cases that the system has already been shut down, and you need to start the
system, just press red power switch and quickly(less than one second) release it to start
the AbovEdge.
When the AbovEdge completes the power on process, usually less than 1 minute, the
status LED will show normal as below,
sys1~4:green light blink with certain time interval
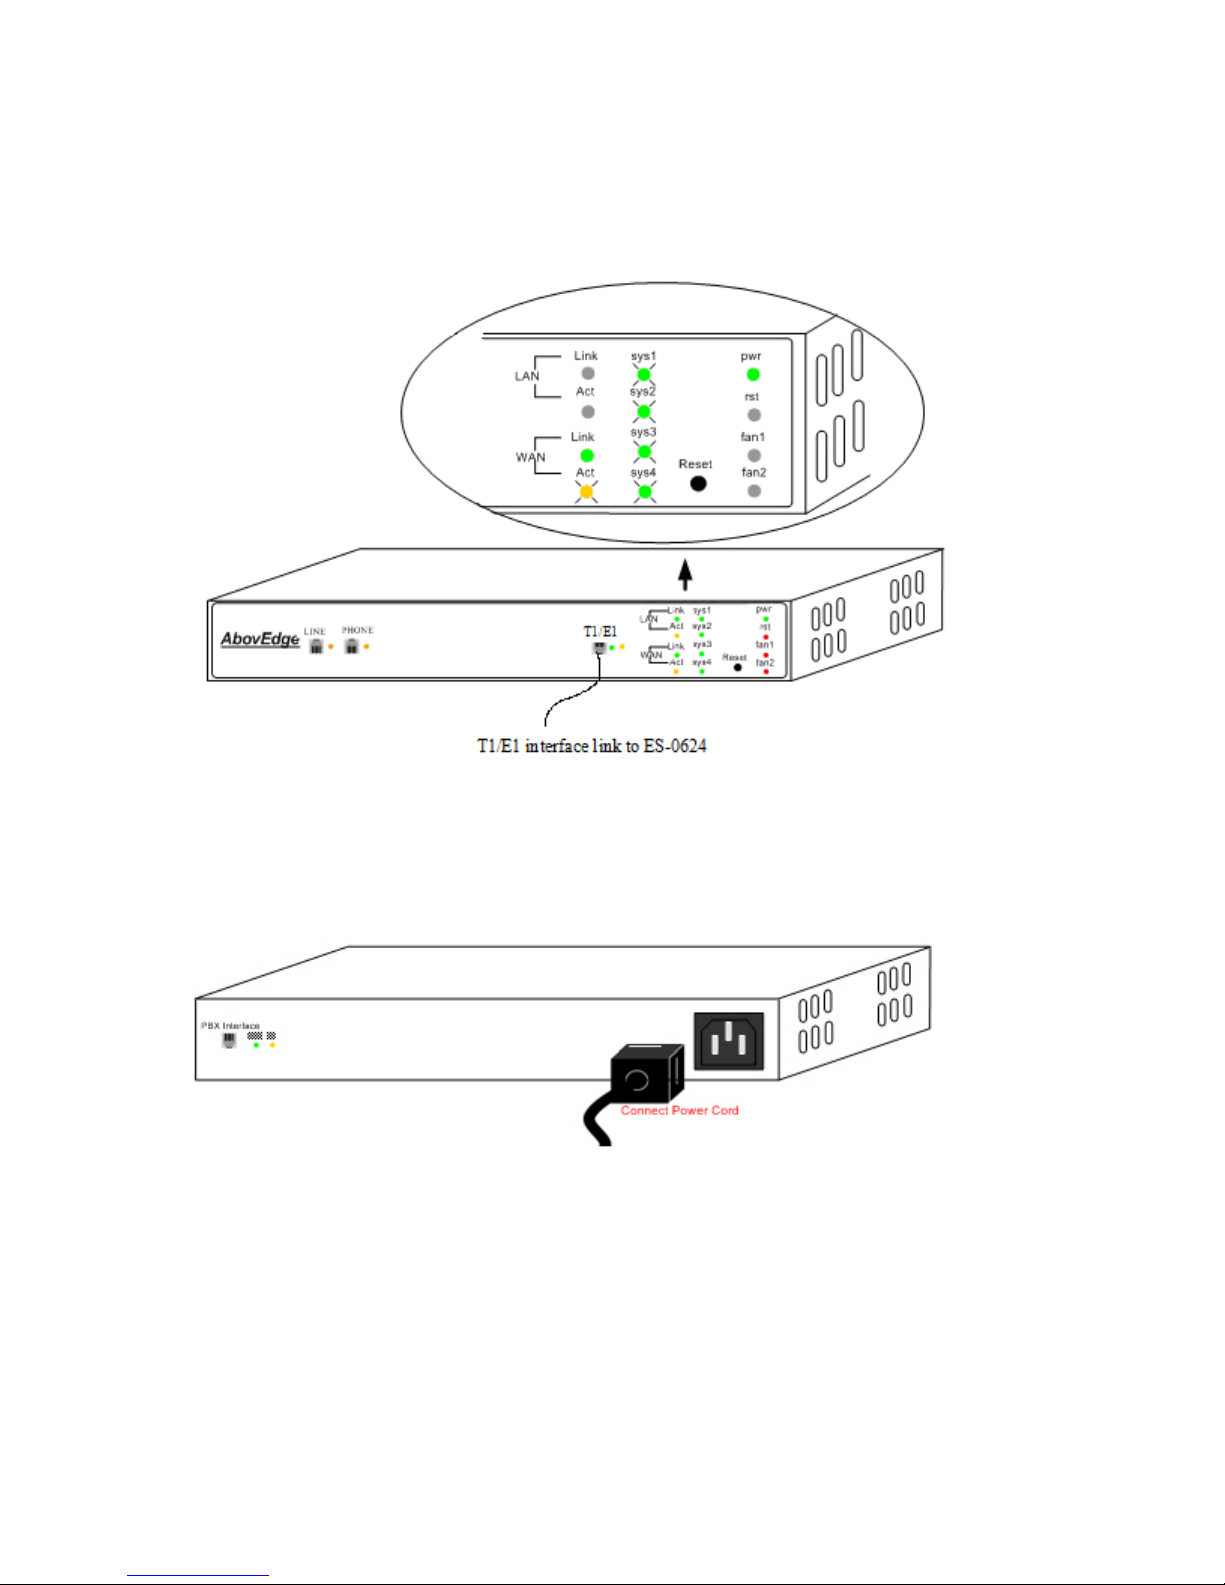
pwr、WAN Link:continuous green light
WAN Act:off at no traffic otherwise yellow light blink with certain time interval
Other LEDs are off in normal state.
Connect power cord and power on the Extension
Expansion ModuleES-0624/0030
When ES-0624 finish power on process, normal LED status as follows:
pwr、sync:continuous green light
sys1、sys2:green light blink with certain time interval
PHONE:continuous green light when off-hook, green light blink when ringing
the extension, and off otherwise.
LINE:off when Line is well-connected and available, continuous green light
when In a call, and blink green light when line is disconnected or ring the line.
Other LEDs are off in normal state.
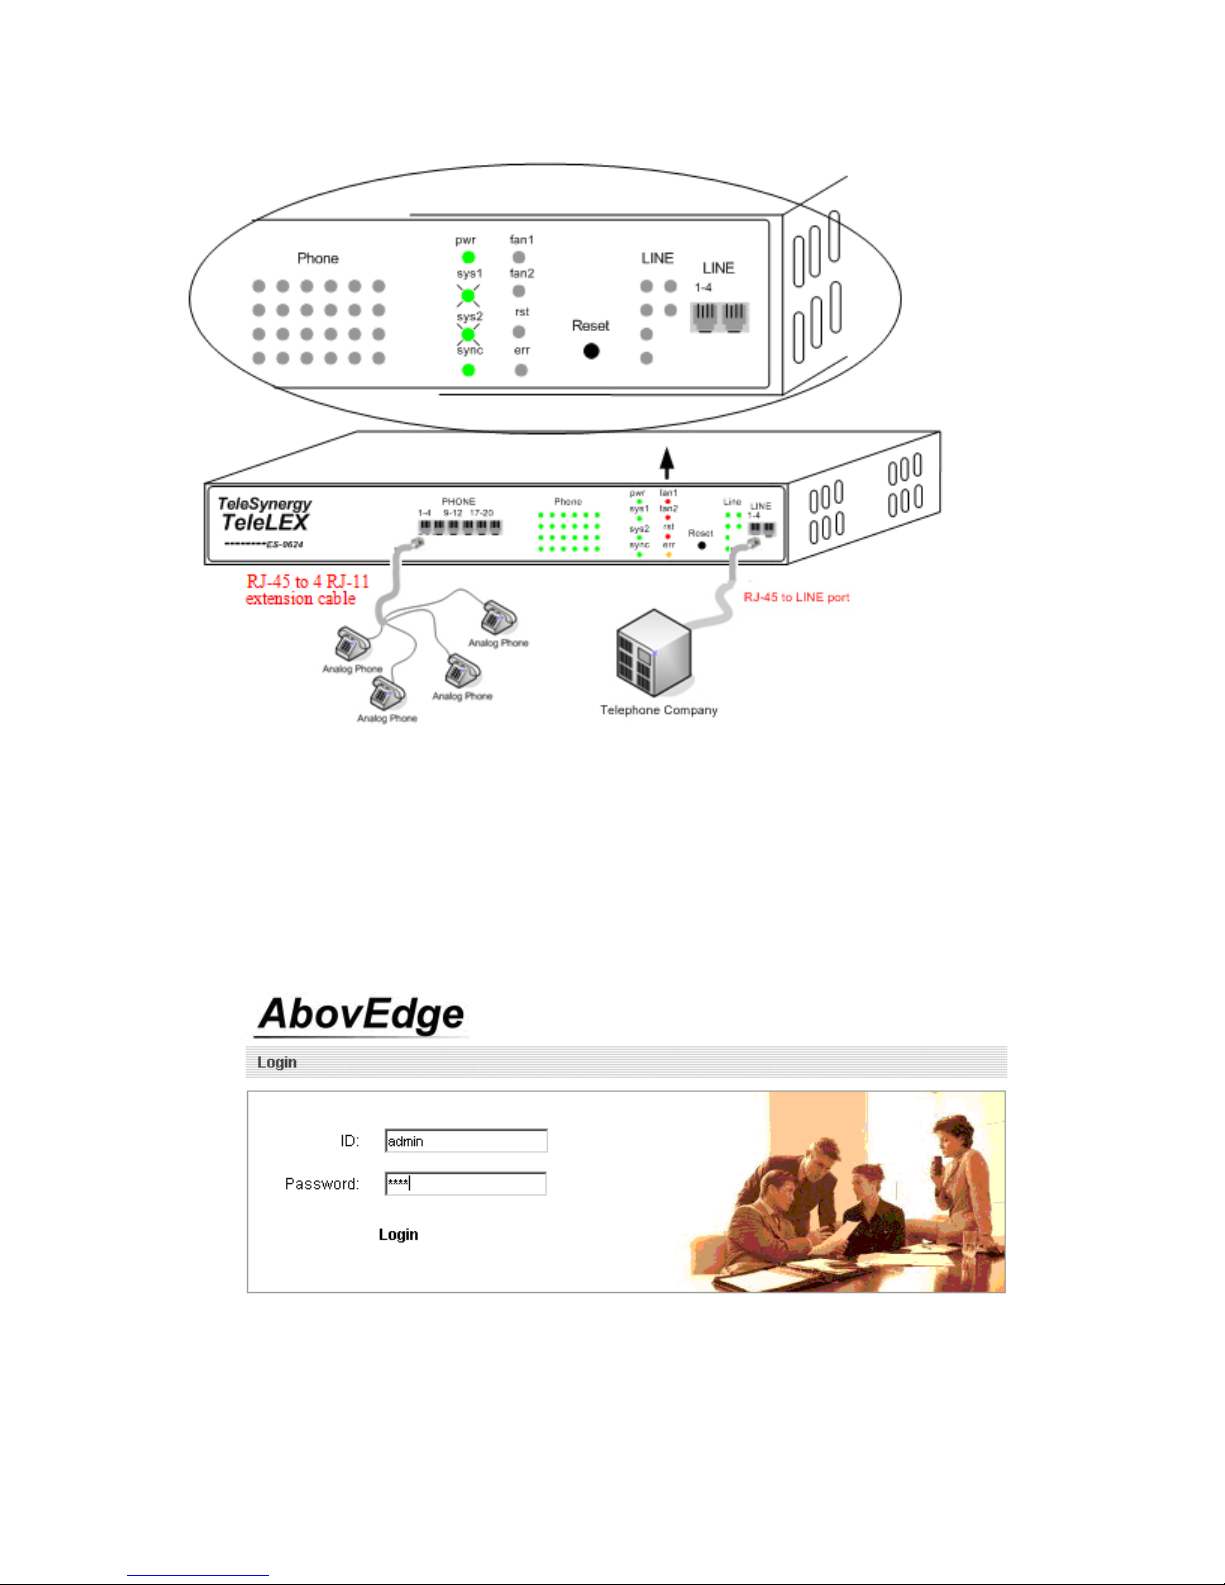
Log in the AbovEdge Administrator Interface through
Host PC
1. Open a web browser on Host PC. Visit http://192.168.1.5/admin. The default
administrator ID is admin and Password 5354.
2. If you need to change IP address of AbovEdge, go to the following setup and click
“OK” after the change. It will pop up message for rebooting device in order to make the
change take effect.
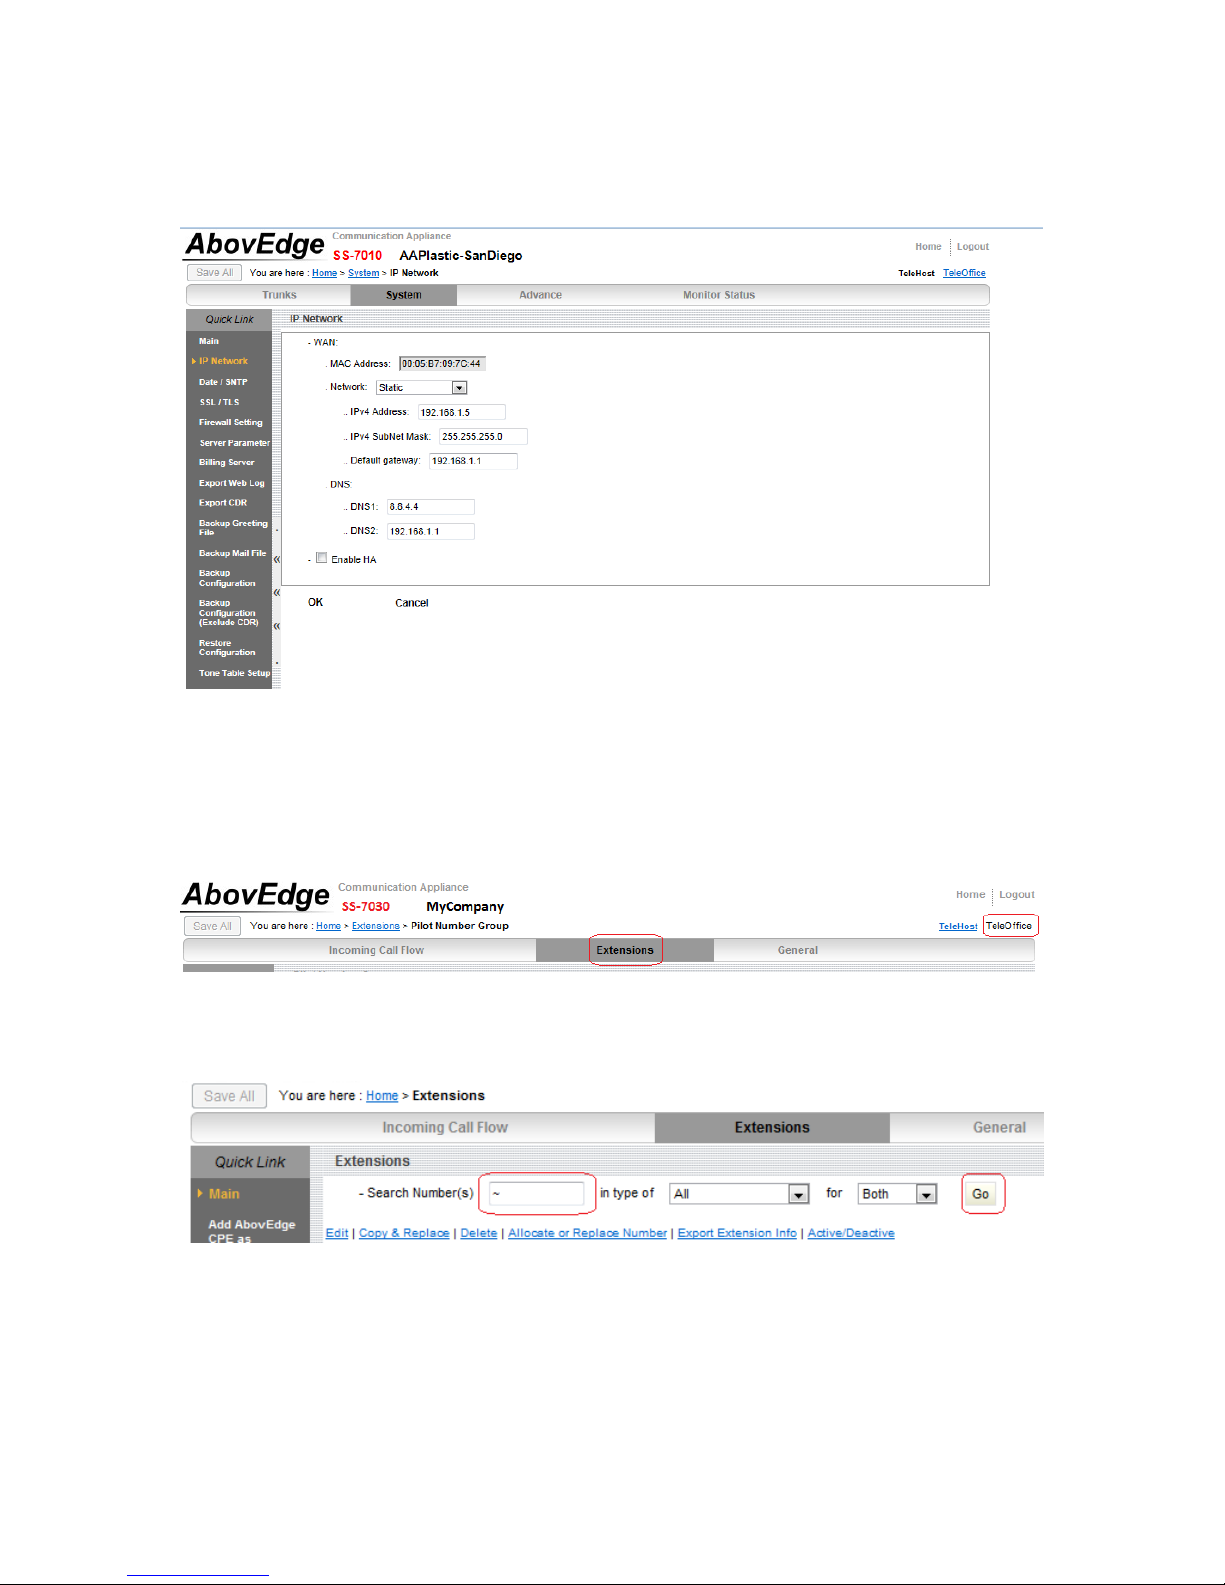
Please carefully check the IP address entered and take a screen shot so you have a
reference at hand in case you forget the IP address entered.
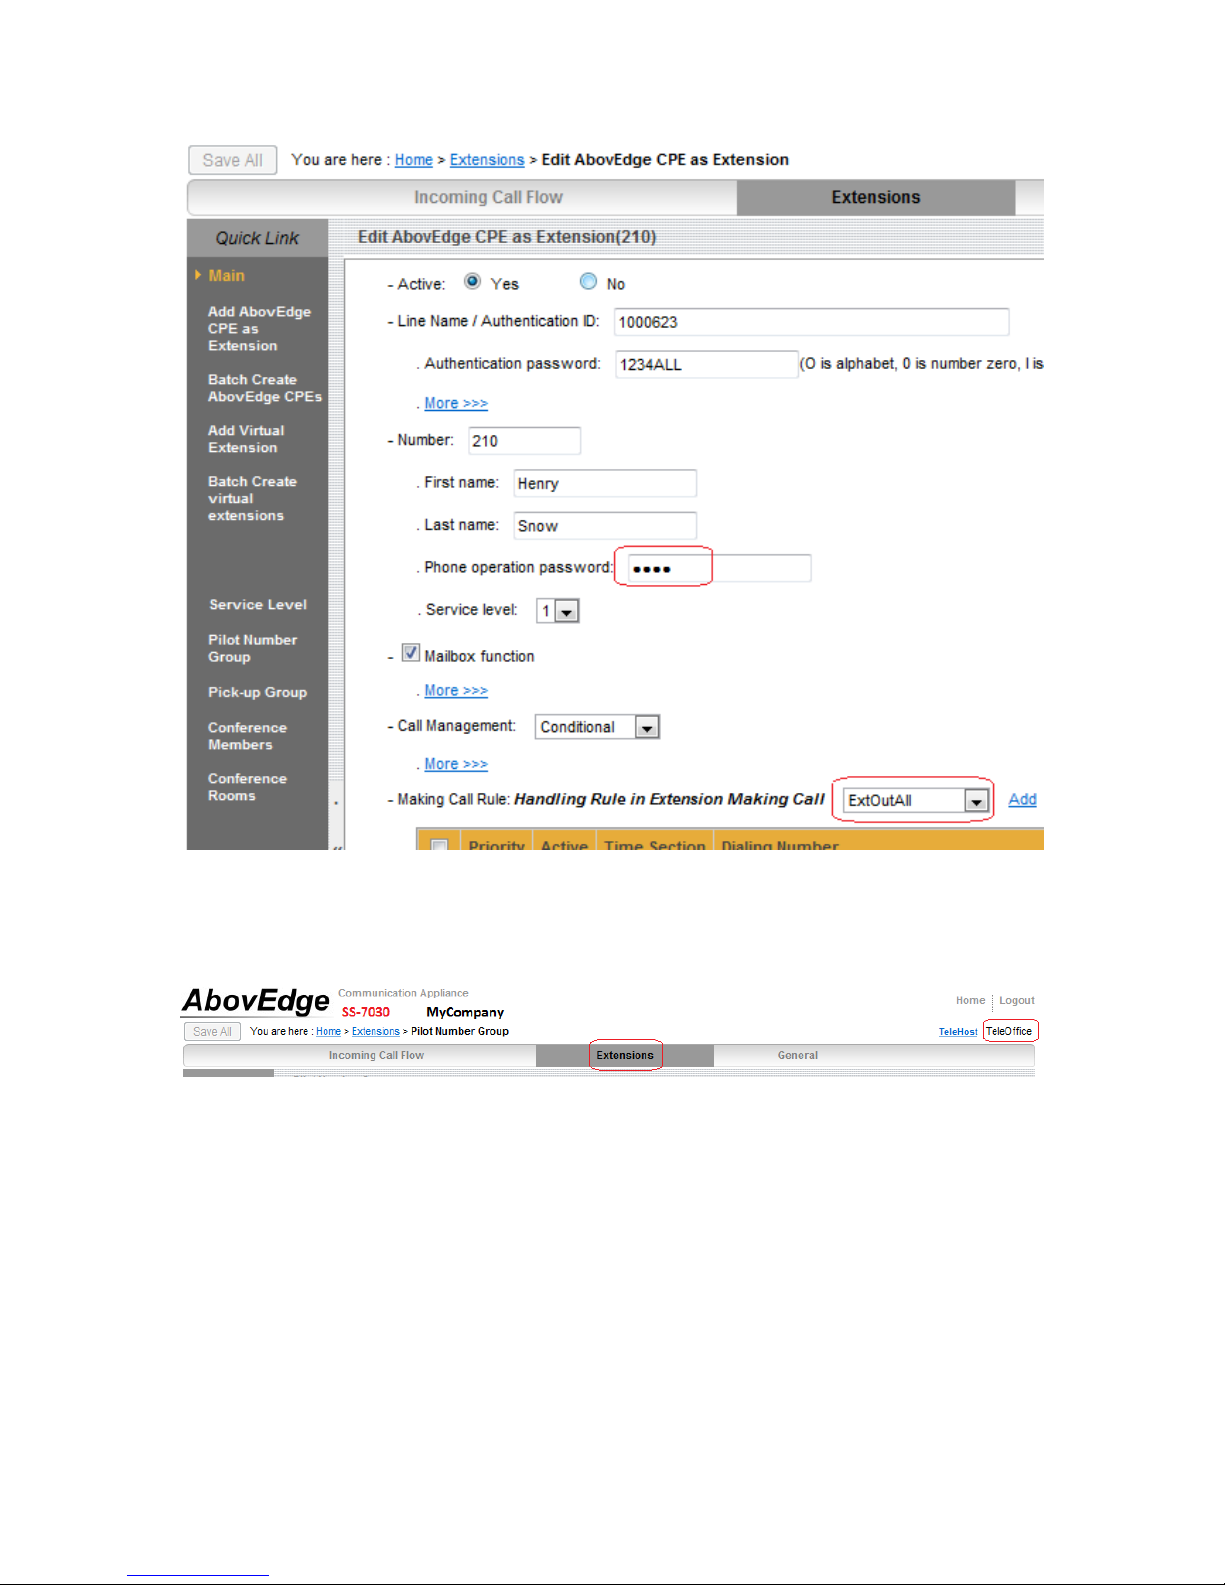
3. Currently the phone set’s operation password is set as 5354. For Handling Rule in
Extension Making Call, all extensions are set as “ExtOutAll”.
4. Change extension setup.
Step 1. Go to TeleOffice>Extensions
Step 2. At the top of “Extensions” page, enter the extension number in Search Number(s)
field and click Go button to list the record, or browse the “Extensions” page to locate the
extension record.
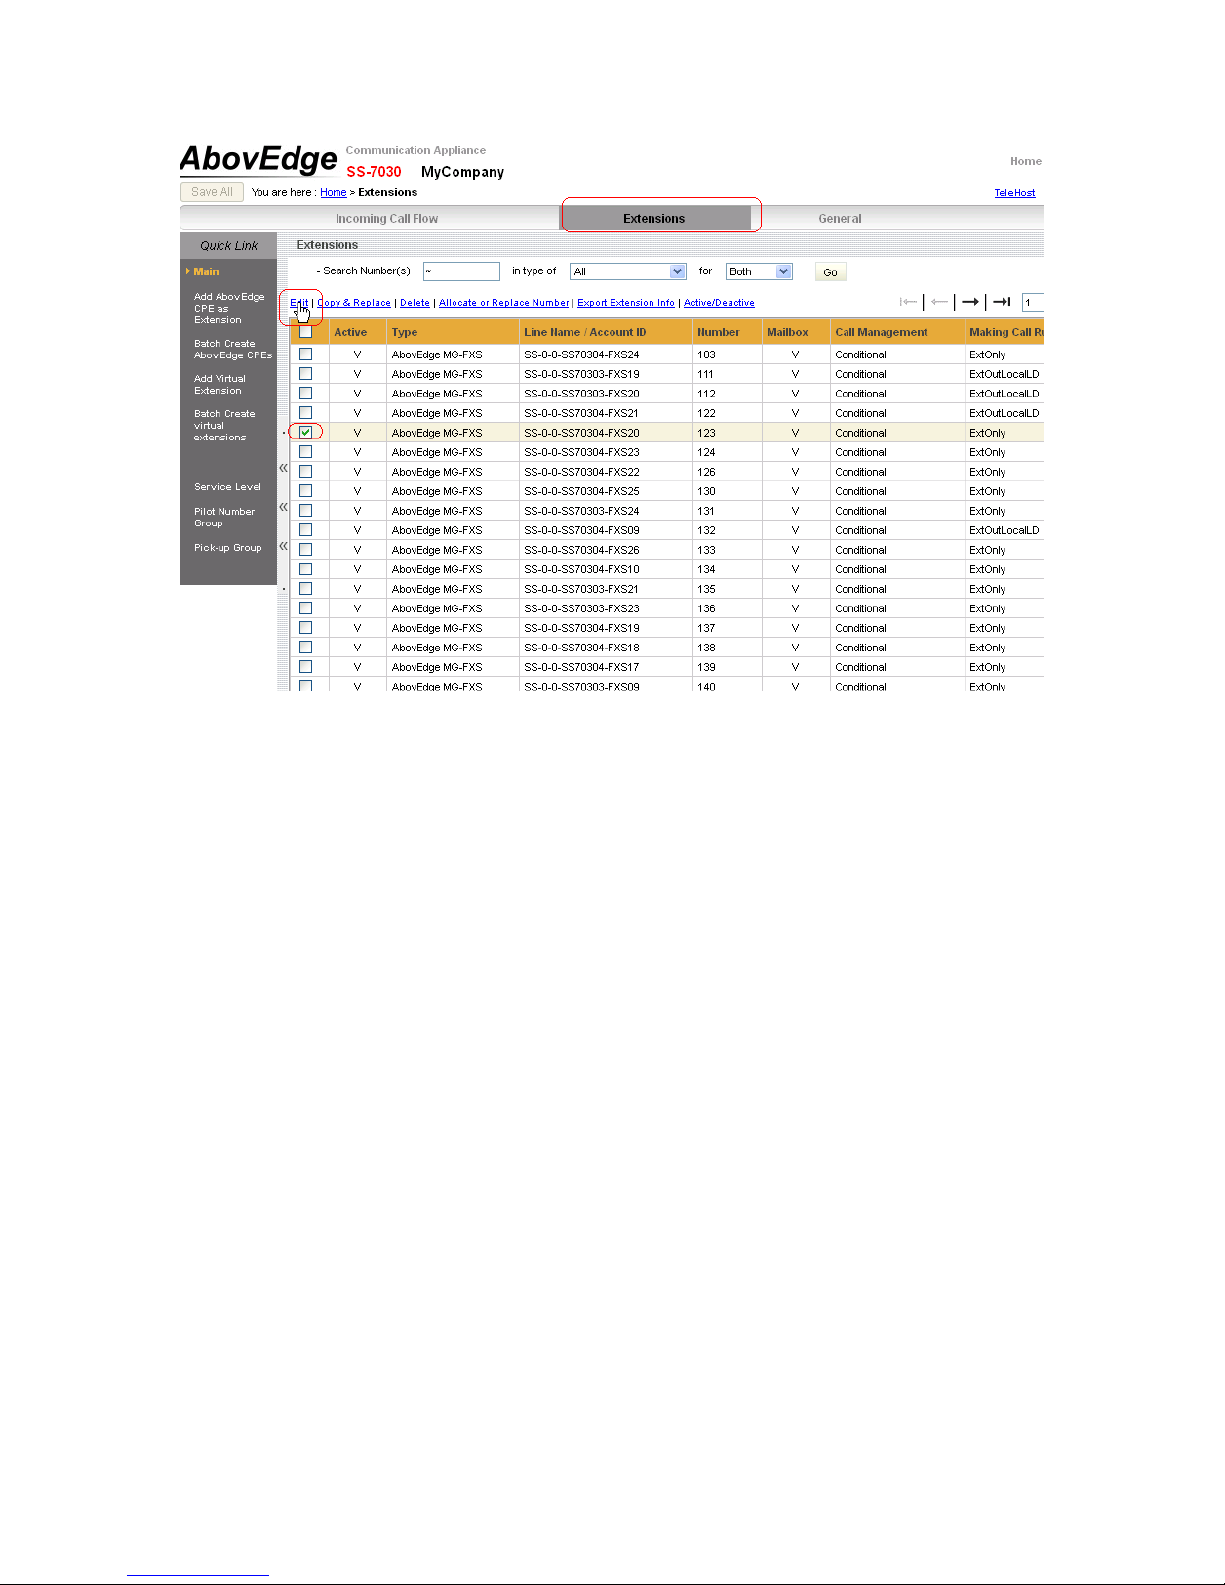
Step 3. Check the record and click Edit to make modifications as needed.
Note: Currently the phone set’s operation password is set as 5354. For Handling Rule in
Extension Making Call, all extensions are set as “ExtOutAll”.
5. Change the extension member of the pilot numbers or the ringing time.
Step 1. Go to TeleOffice>Extensions>Pilot Number Group
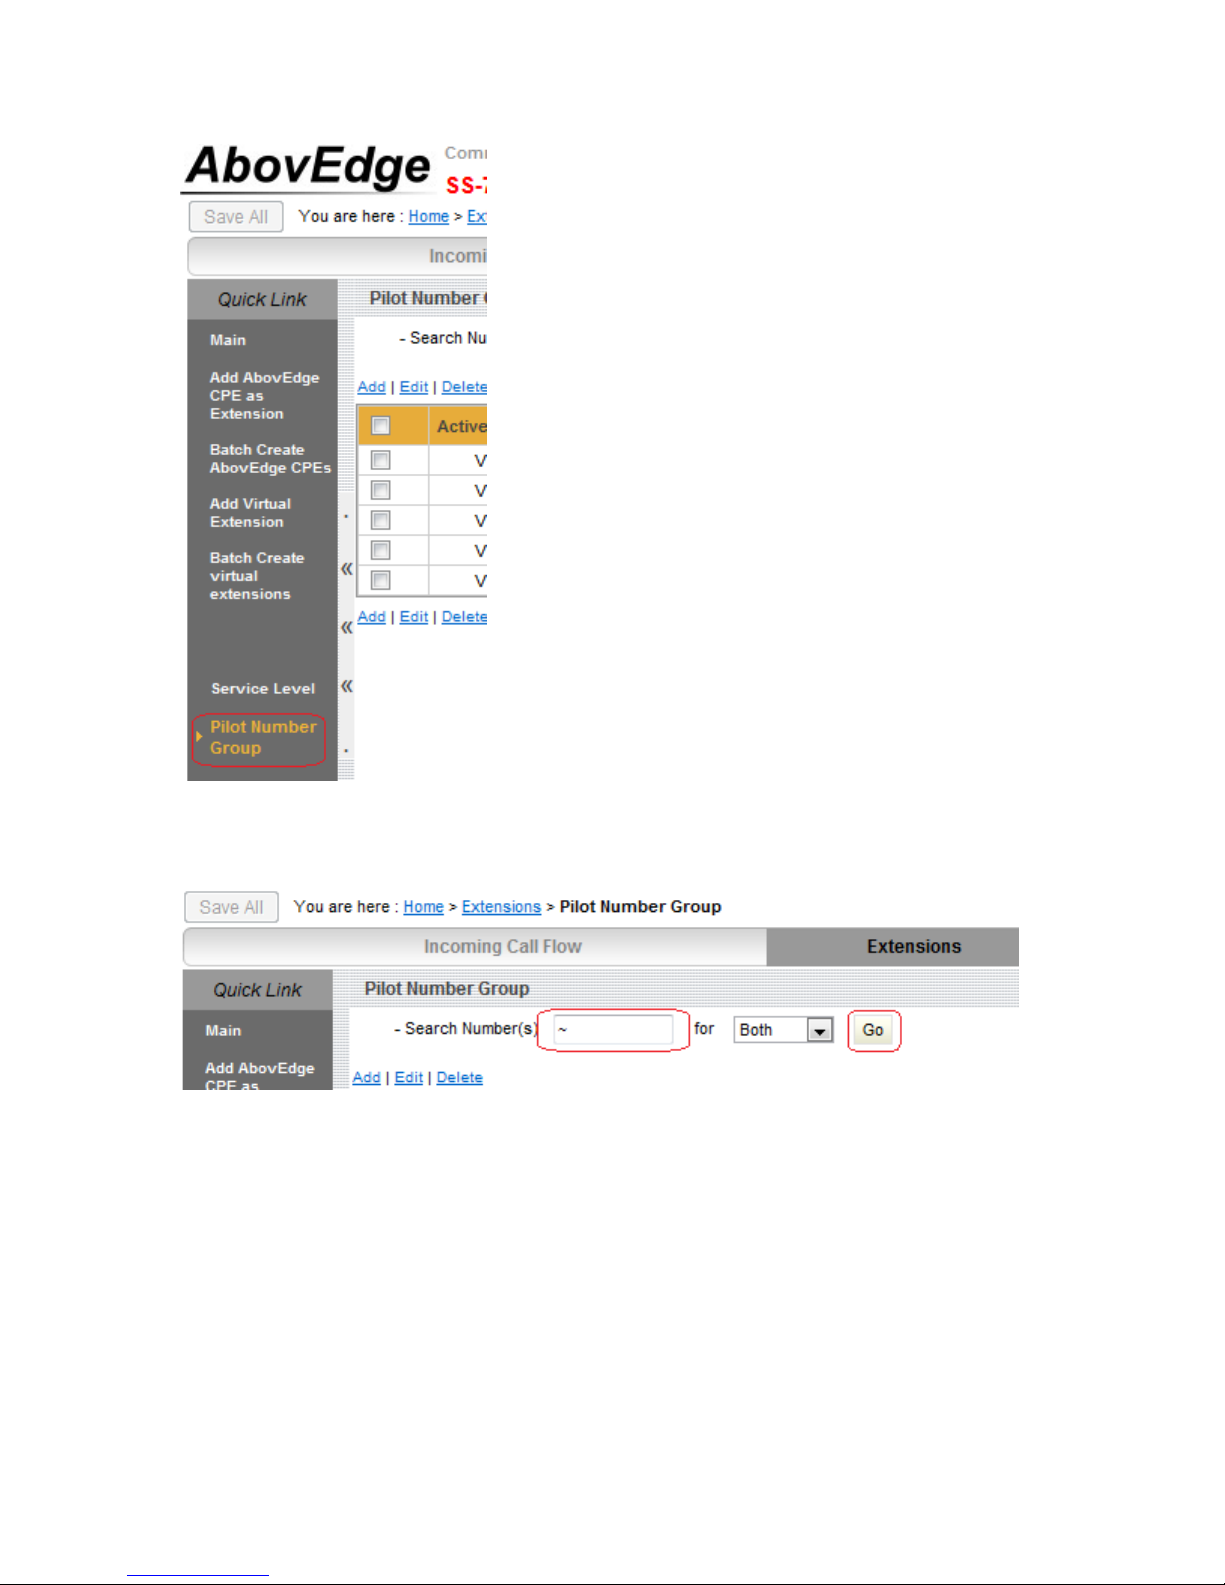
Step 2. At the top of “Pilot Number Group” page, enter the pilot number in Search
Number(s) field and click Go button.
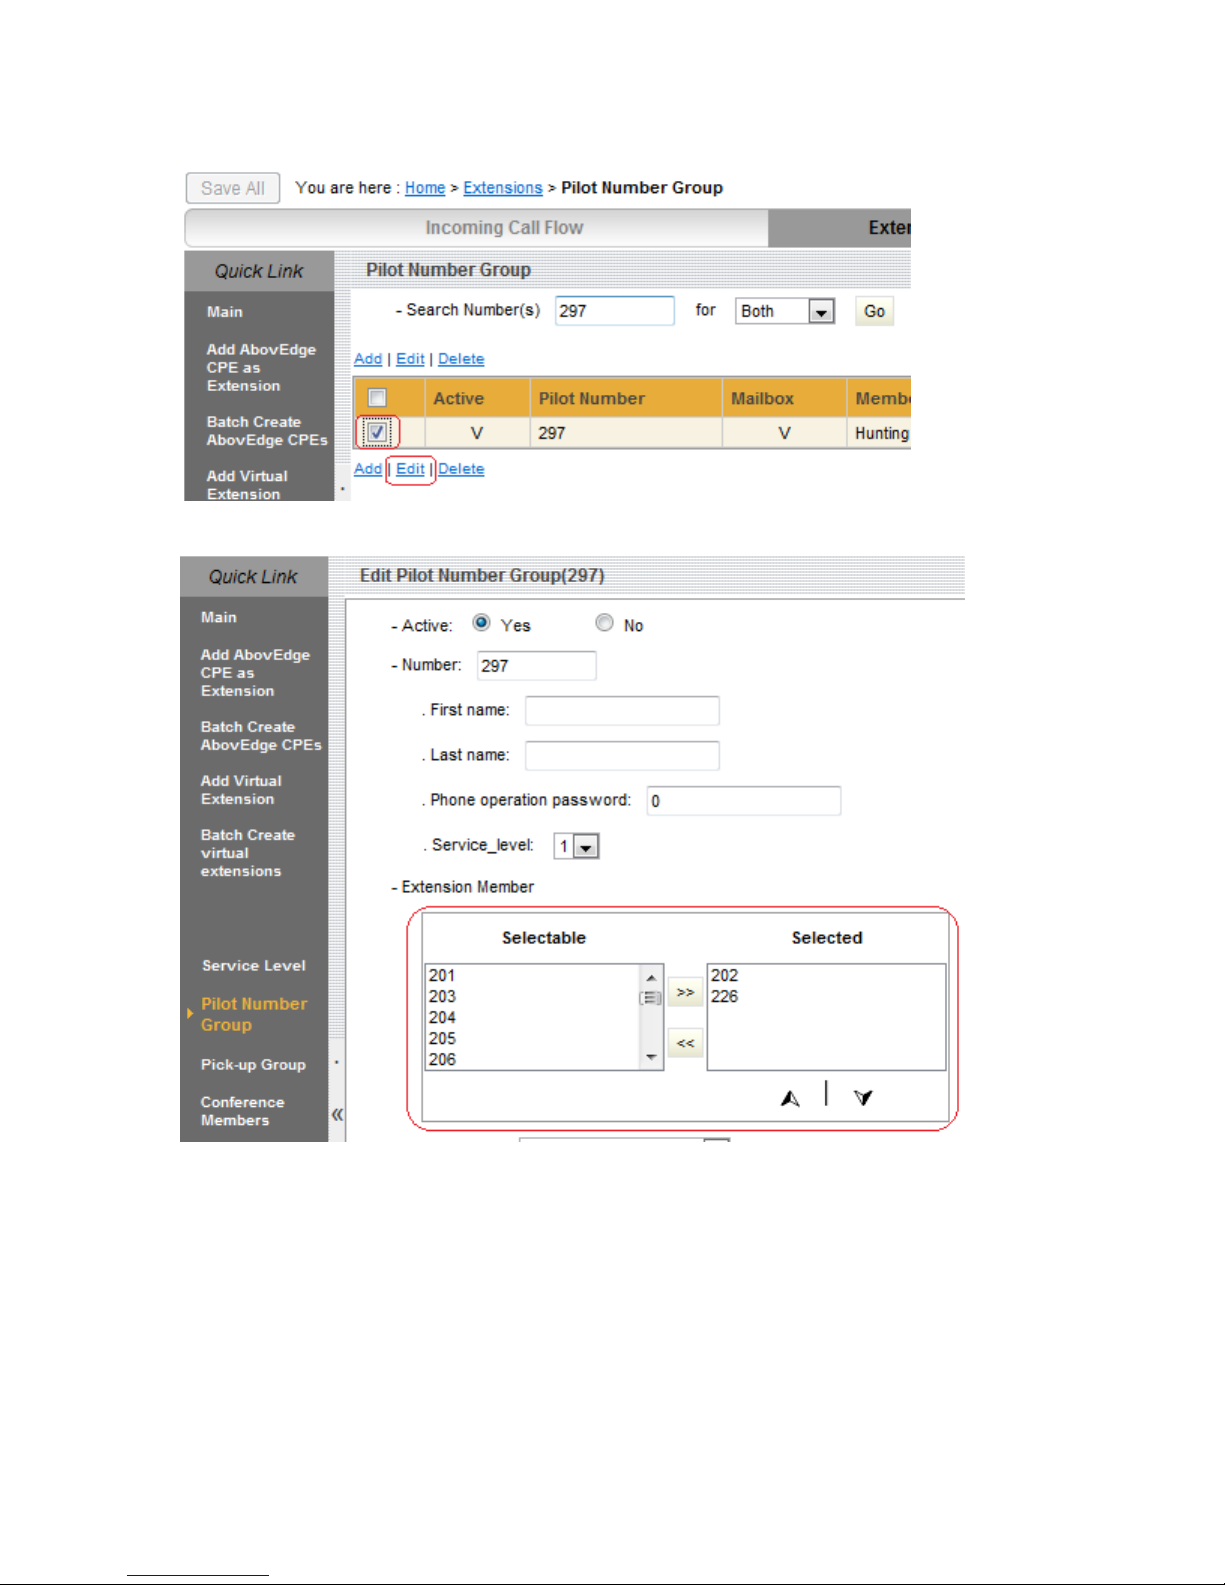
Step 3. The searched record will be listed. Check the record and click Edit.
Step 4. Make modifications, such as extension member or ringing time, and click Save.
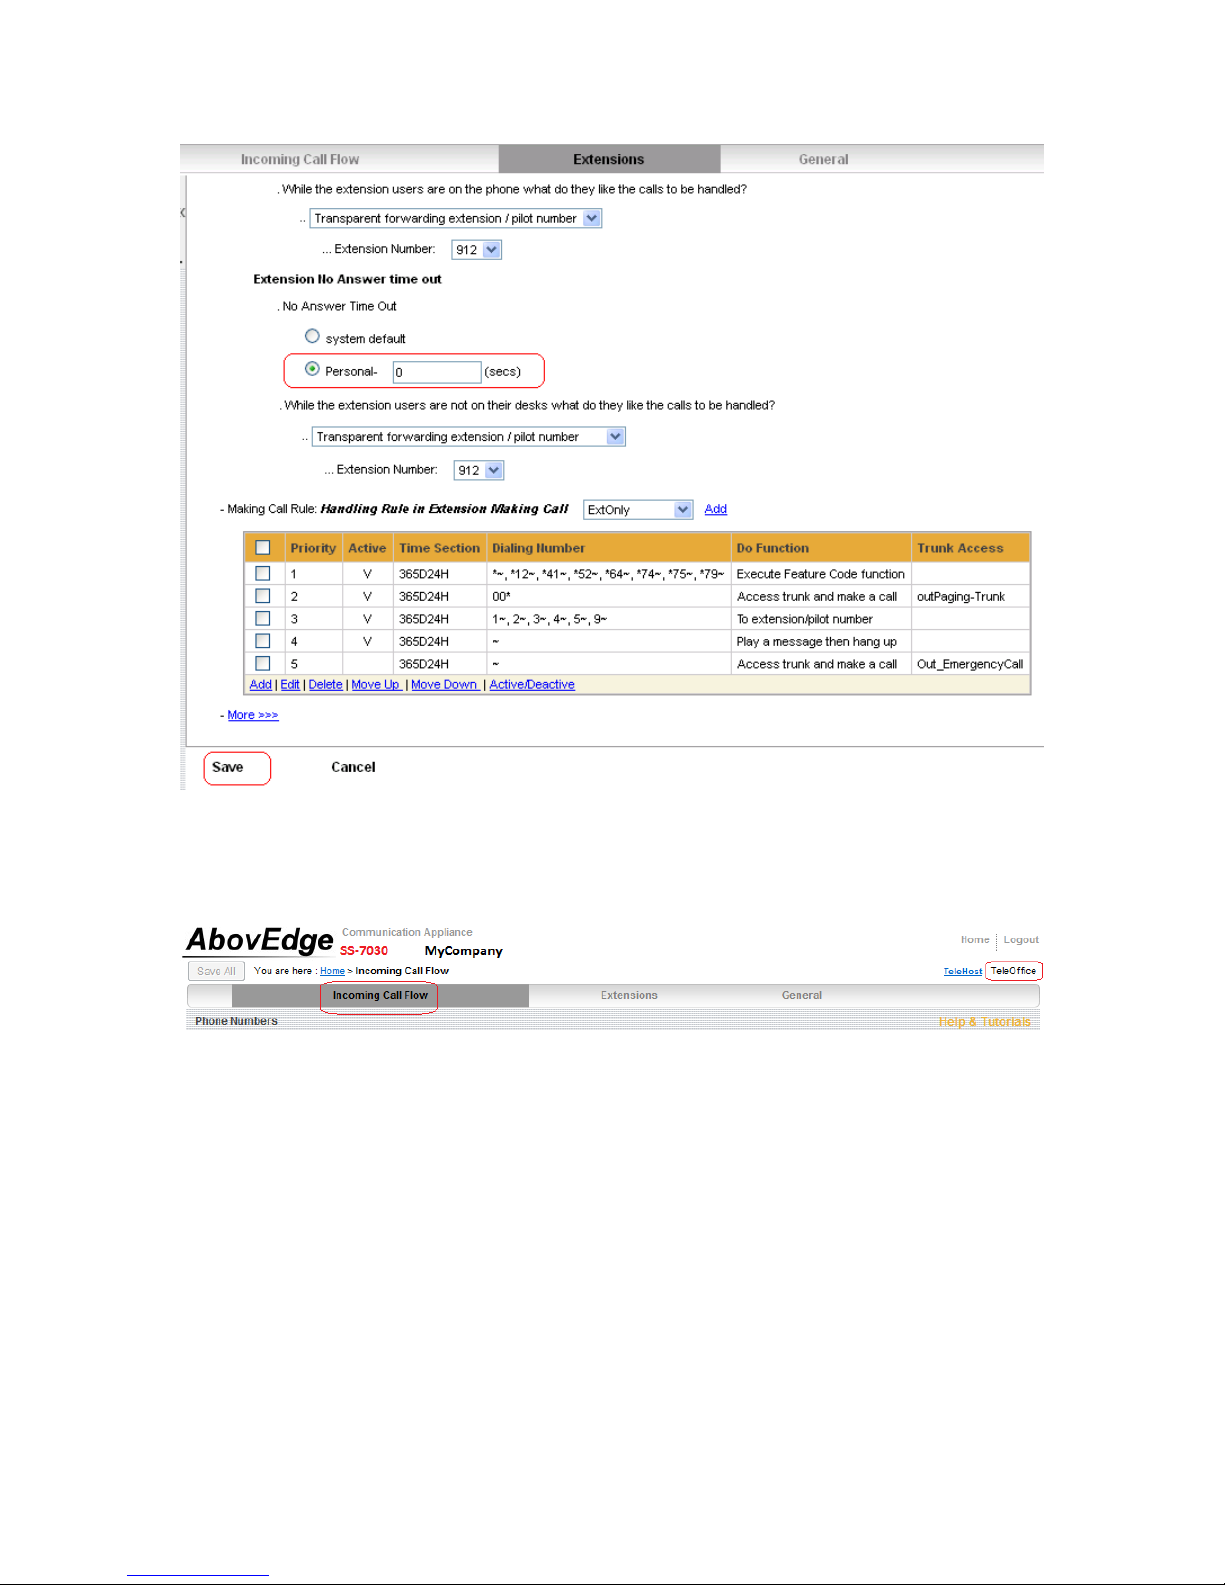
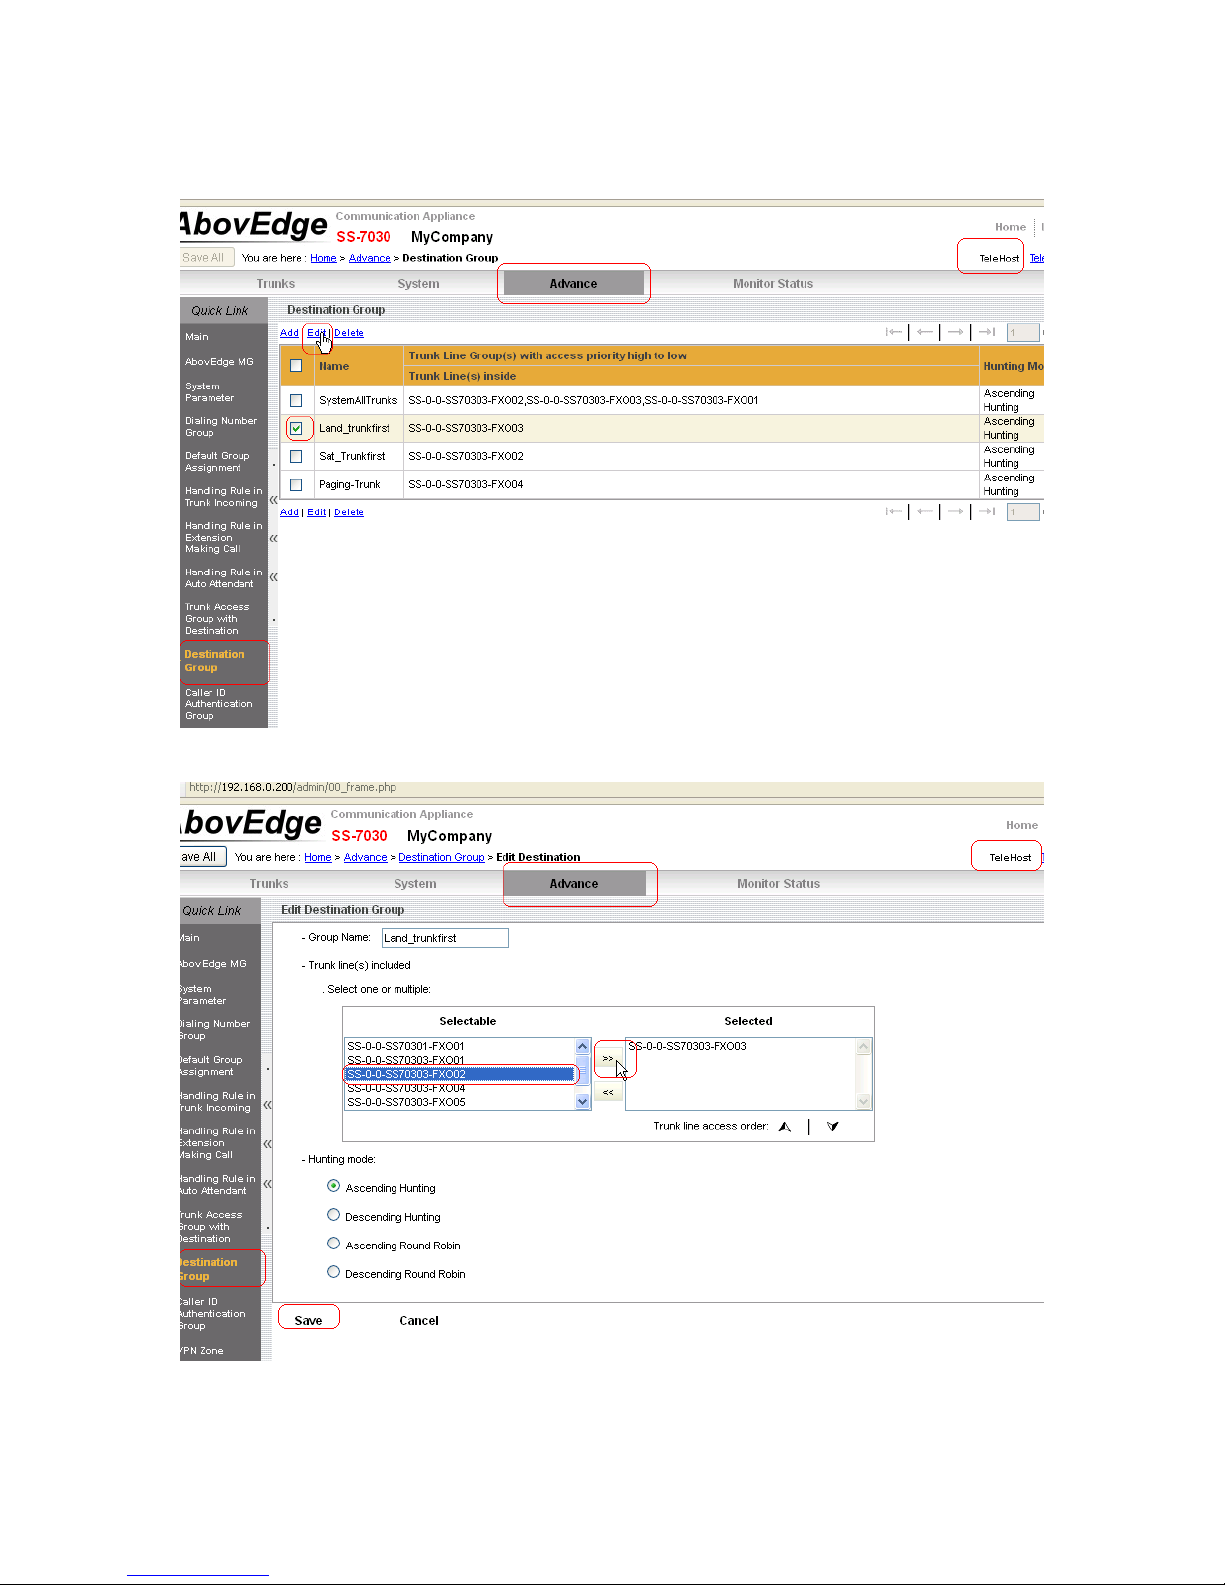
6. Change the operator of the trunk incoming.
Step 1. Go to TeleOffice>Incoming Call Flow
Step 2. Select the phone number on left panel.
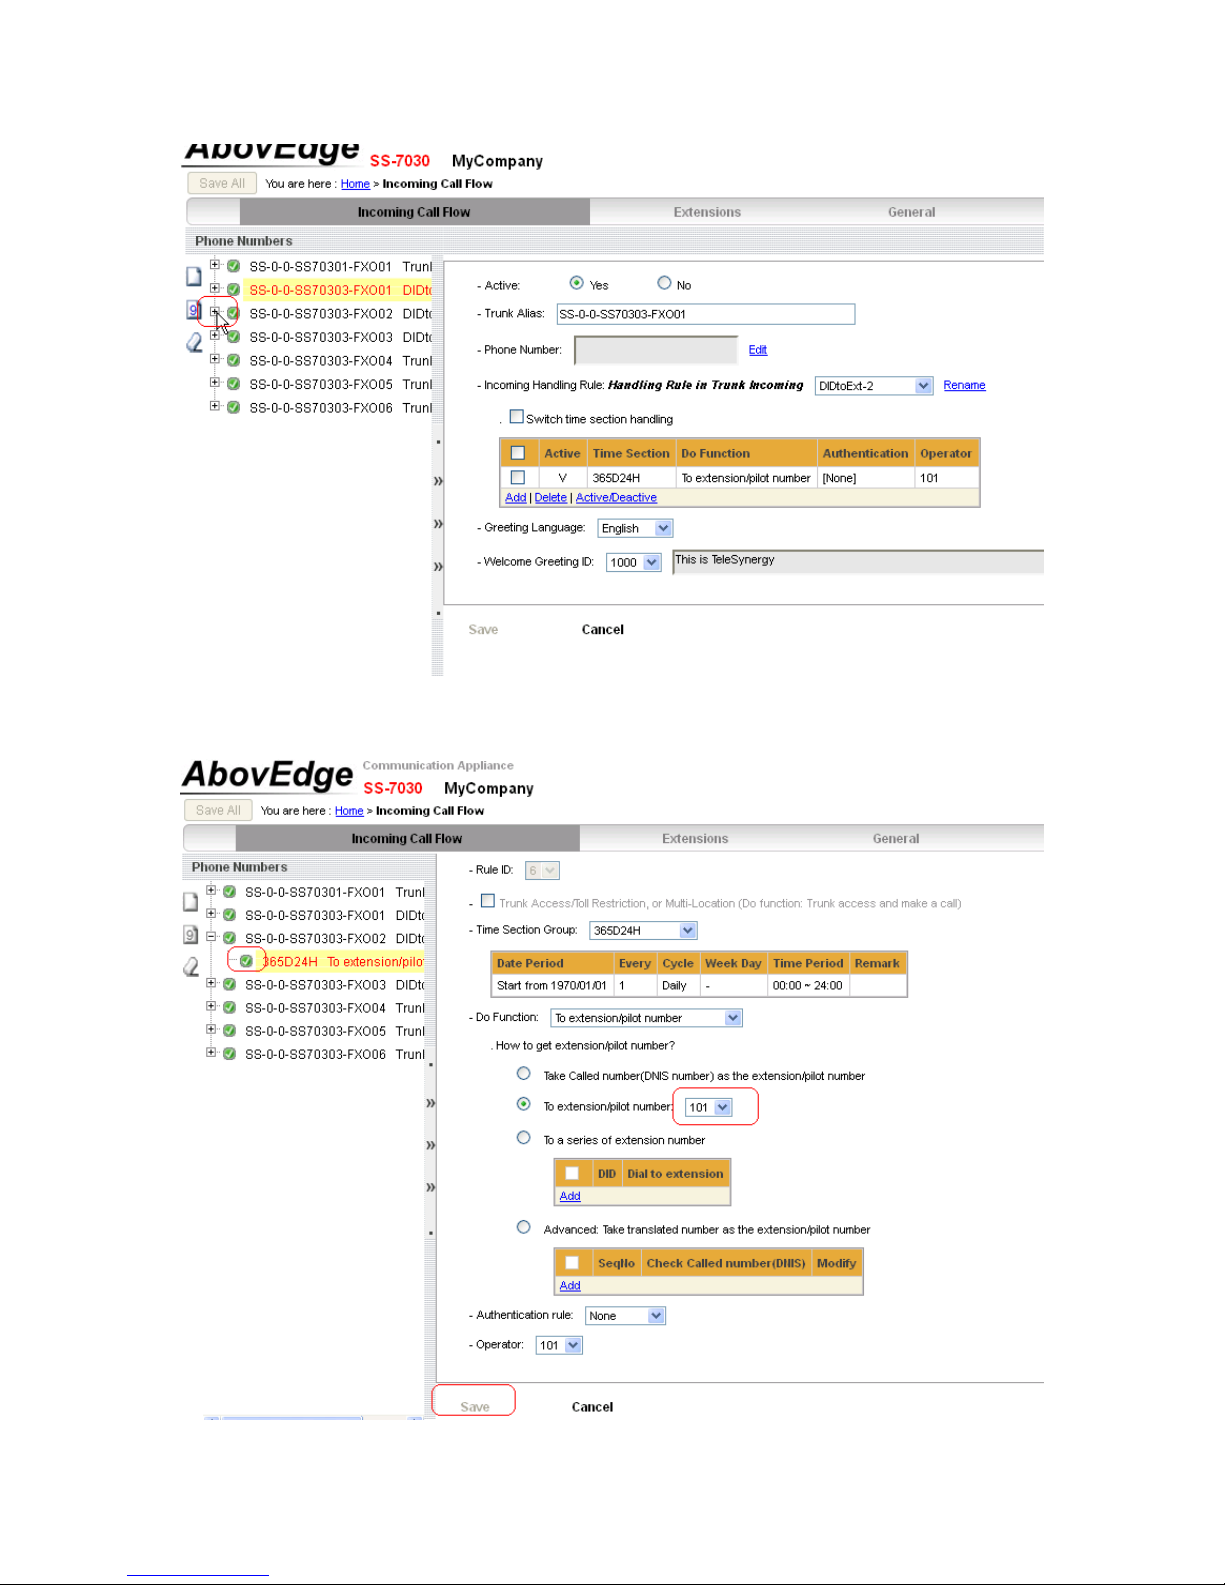
Step 3. Modify extension/pilot number on right panel and click Save.
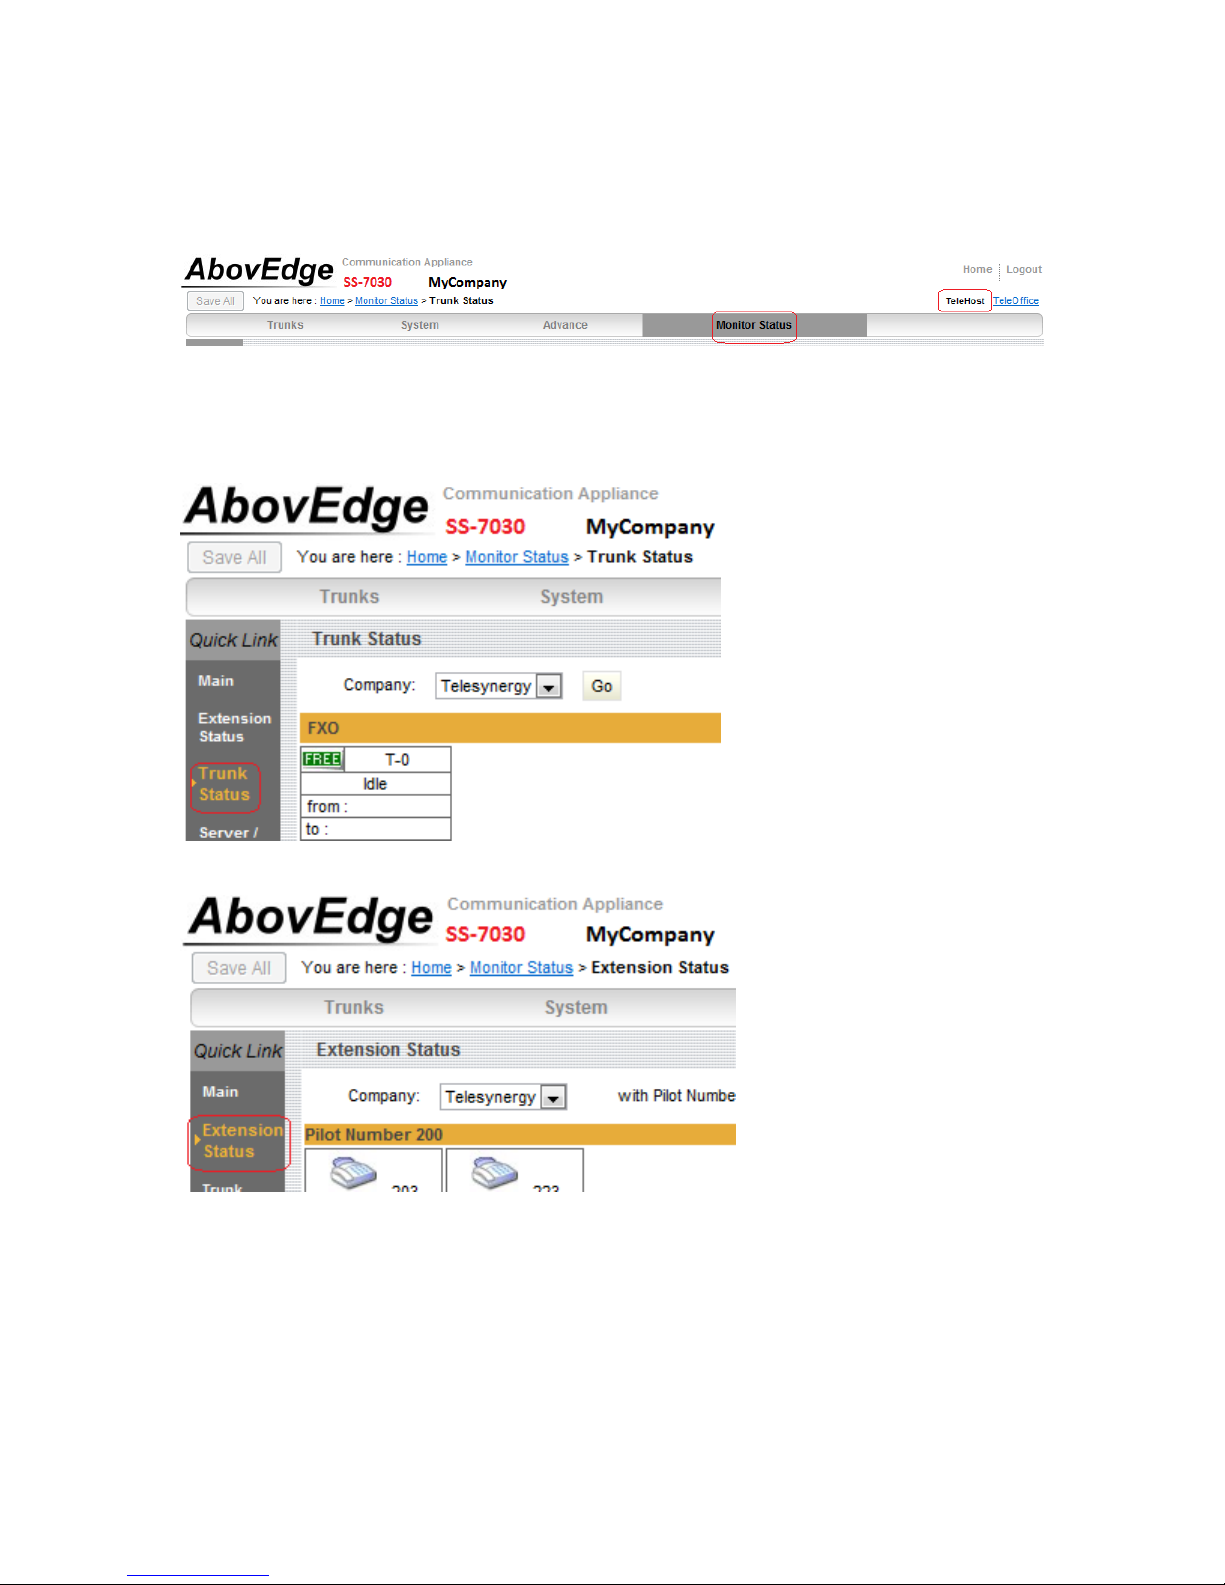
7. Monitor status: online monitor trunk status and extension status
Step 1. Go to TeleHost>Monitor Status
Step 2. Click Trunk Status on left panel to monitor trunk status, or click Extension Status
on left panel to monitor extension status.
8. If the trunk port that the Telephone phone line connected with is going to change, the
port that the outgoing call send out need to be changed as well.
This manual suits for next models
1
Table of contents
Popular PBX manuals by other brands


Panasonic
Panasonic KX-TD500 user manual

Auerswald
Auerswald COMmander Basic.2 Installation and commissioning instructions

CCL
CCL 832X Operating & programming manual

MCK
MCK EXTender 4000 Quick installation guide

MCK
MCK EXTender PBXgateway System administrator guide

Grandstream Networks
Grandstream Networks DP715 user guide