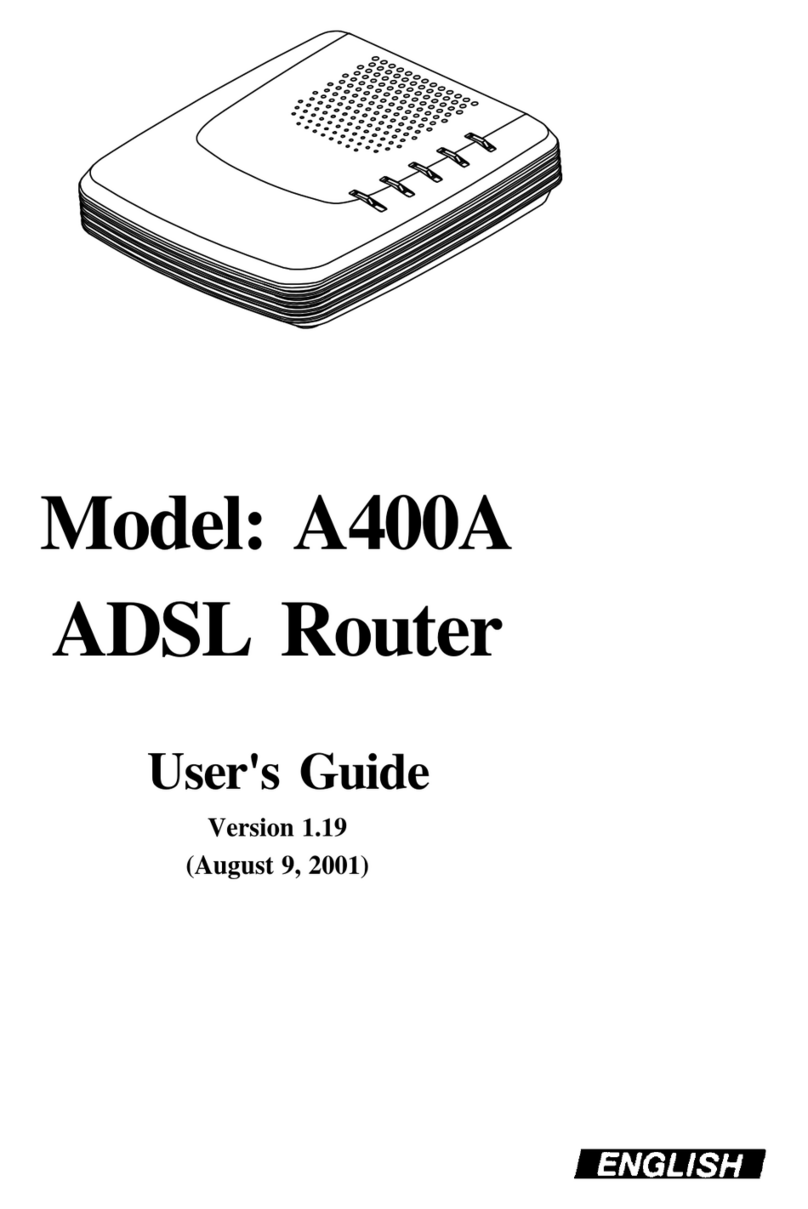
Telewins WIFI-TW510R User manual

2
Table of Contents
1. PRODUCT OVERVIEW...................................................................................................................................... 4
1.1 INTRODUCTION .............................................................................................................................................. 4
1.2APPEARANCE ................................................................................................................................................. 4
1.3 INDICATORS ................................................................................................................................................... 5
1.4 INTERFACES ................................................................................................................................................... 5
1.5APPLICATION.................................................................................................................................................. 5
2. INSTALLING THE ROUTER.............................................................................................................................. 7
2.1 INSTALLATION STEPS ..................................................................................................................................... 7
2.2 INSTALLATION ENVIRONMENT REQUIREMENTS ............................................................................................. 7
3. CONFIGURATION VIA WEB BROWSER.......................................................................................................... 8
3.1 LOGIN ............................................................................................................................................................ 8
3.2 SYSTEM STATUS ............................................................................................................................................. 9
3.2.1 Status................................................................................................................................................... 9
3.2.2 System Logs...................................................................................................................................... 10
3.3WAN SETTING............................................................................................................................................. 10
3.3.1 Basic Setting..................................................................................................................................... 10
1) Dynamic IP........................................................................................................................................................11
2) Static IP............................................................................................................................................................ 12
3) PPP over Ethernet .......................................................................................................................................... 13
4) 3G...................................................................................................................................................................... 13
3.3.2 MAC Clone......................................................................................................................................... 14
3.3.3 DDNS.................................................................................................................................................. 15
3.4 LAN SETTING.............................................................................................................................................. 16
3.4.1 Basic Setting..................................................................................................................................... 16
3.4.2 DHCP Setting.................................................................................................................................... 16
3.4.3 DHCP Table........................................................................................................................................ 17
3.5WLAN SETTING .......................................................................................................................................... 18
3.5.1 Basic Setting..................................................................................................................................... 18
3.5.2 Security............................................................................................................................................. 19
3.5.3 Advanced Setting............................................................................................................................. 20
3.6 SECURITY .................................................................................................................................................... 21
3.6.1 Firewall............................................................................................................................................. 21
3.6.2 URL Filter.......................................................................................................................................... 22
3.6.3 MAC Filter......................................................................................................................................... 23
3.6.4 ACL Setting....................................................................................................................................... 24
3.7 FORWARDING............................................................................................................................................... 25
3.7.1 NAT/NAPT......................................................................................................................................... 26
3.7.2 Port Forwarding............................................................................................................................... 26
3.7.3 DMZ.................................................................................................................................................... 27
3.8 ROUTING SETTING ....................................................................................................................................... 28
TeleWins(HK).,Co.LTD

3
3.8.1 Routing Table................................................................................................................................... 28
3.8.2 Static Routing .................................................................................................................................. 29
3.9 SYSTEM TOOLS ............................................................................................................................................ 29
3.9.1 System Time..................................................................................................................................... 29
3.9.2 Backup Setting................................................................................................................................. 30
3.9.3 Firmware Upgrade........................................................................................................................... 30
3.9.4 Reboot............................................................................................................................................... 31
3.9.5 Reset to Default.............................................................................................................................. 31
3.9.6 Password........................................................................................................................................... 32
4. TECHNICAL SPECIFICATIONS....................................................................................................................... 33
5. SERVICE AFTER SALE ................................................................................................................................... 34
TeleWins(HK).,Co.LTD

4
1. Product Overview
1.1 Introduction
Thank you for purchasing the 3G WiFi Router (WIF
3G/2G (EVDO / HSPA / TD-SCDMA / EDGE) USB modem. It also supports connection to an ADSL/cable
modem or Ethernet. It can reduce the cost for multiple Internet access via 3G or wired broadband.
You just need to connect the router to a USB modem or an ADSL/cable modem via the USB port, and
then each WiFi-enabled device (such as a notebook, desktop PC, PDA, game console, cell phone, MP3
player) can connect to the Internet when within the range of the router. The router can support 20 to
30 users.
It can also help you share your ADSL broadband connection quickly and easily.
1.2 Appearance
USB Modem Port
WiFi Antenna
LED Indicators (from up to down:
PWR, WIFI, WAN, and LAN)
Desktop Bracket
I-TW510R) of TeleWins(HK). Co., Ltd.
TeleWins(HK).,Co.LTD
The WIFI-TW510R lets you share your broadband Internet access quickly and easily with connection to a

5
WAN Port
Power Adaptor Socket
WIFI Antenna Connector
Reset Button
LAN Port
1.3 Indicators
LED Status Description
Red The power supply is normal.
PWR Power Indicator Off The router is turned off.
On The WIFI connection is established.
WIFI WIFI Connection
Indicator Off The WIFI connection is not established.
On The WAN connection is established via the WAN Port.
Flickering The router is transferring data via the WAN Port.
WAN WAN Connection
Indicator Off The WAN connection is not established.
On The LAN connection is established via the LAN Port.
Flickering The router is transferring data via the LAN Port.
LAN LAN Connection
Indicator Off The LAN connection is not established.
1.4 Interfaces
Interface Description
USB Modem Port To insert a compatible 3G/2G USB modem.
WIFI Antenna Connector To connect with the WIFI antenna included in the package.
LAN Port (RJ45) To connect with the PC, HUB or other Ethernet network devices via the
CAT-5 Ethernet cable included in the package.
WAN Port (RJ45) To connect with a cable/DSL modem or the Ethernet.
Power Adaptor Socket To connect with the AC/DC adaptor included in the package.
Reset Button To reset the router and restore it to factory default settings when the
button is pressed via the end of a paper clip or other small-pointed
object.
1.5 Application
•Coffee shops, lounge bars, hotels, restaurants;
TeleWins(HK).,Co.LTD
The WIFI-TW510R is suited for the places where 3G network or ADSL is available:

6
•Beaches, gardens, swimming pools...;
•Sports area and recreation centers, like bowling, billiards...;
•Homes, apartments, enterprises, small offices, SOHO in need of Internet sharing;
•Exhibition and convention sites;
•Mobile vehicles (trains, ships, buses, RVs, etc.)
TeleWins(HK).,Co.LTD

7
2. Installing the Router
2.1 Installation Steps
1) Locate the router as per the installation environment requirement specified in Section 2.2. If you
want to use the WiFi function, you’d better choose the place which has less obstruction between
the router and WiFi-enabled devices (e.g. your PC with wireless network card).
2) You can choose to let the router access the Internet either via 3G network or your existing
cable/DSL modem.
- Via 3G network: make sure that your 3G broadband service provided by your local
ISP/operator is available, then insert the 3G USB modem into the USB Modem Port when the
router is powered off.
- Via cable/DSL modem: connect your cable/DSL modem to the WAN Port of the router via an
Ethernet cable.
3) Adjust the antennas to upright direction.
4) Connect your PC to the LAN Port of the router via the Ethernet cable included in the package.
5) Connect the AC/DC adaptor to the Power Adaptor Socket and into a wall outlet. The router will
start to work automatically.
6) Power on your PC and/or your cable/DSL modem.
7) Configure the router via web browser on your PC as per Section 3.
2.2 Installation Environment Requirements
- The router shall not be located where it will be exposed to moisture or excessive heat.
- The effective WiFi signal range of router is 100 meters indoors and 300 meters outdoors.
- Make sure that the Ethernet cables and power cords are placed securely and do not create a
tripping hazard.
- The router can be placed horizontally on a table or vertically into the desktop socket.

8
3. Configuration via Web Browser
3.1 Login
1) Open the web browser (Microsoft IE 5.0 or later / Netscape Navigator 6.0 or later) on your PC that
is connected to the router. In the Address bar, type “192.168.1.1” (the default IP address of the
router) and then press “Enter”, the login window as shown in the figure below will appear to let
you input the user name and password.
2) Enter the default User name and Password (both are “admin”) and then click the OK button.
Then the configuration interface of the router will be displayed as below. You can click the left
menu, the corresponding help information will be displayed on the right.
TeleWins(HK).,Co.LTD

9
3.2 System Status
In the web configuration interface, click Staus in the left menu to check the current working status,
parameter settings and system logs of the router. There are 2 sub-menus: Status and Syslog.
3.2.1 Status
In the web configuration interface, click System Status -> Status in the left menu to check the
current status and settings of the router as shown in below figure. All information is read-only. The
description of each field is listed below.
TeleWins(HK).,Co.LTD

10
Fields Description
LAN Current settings and information of the LAN Port, including the MAC
Address, IP Address, and Subnet Mask.
Wireless Current settings and information of the WiFi connection, including the
Wireless Radio, SSID, Channel, Mode, MAC Address, and IP address.
WAN Current settings and information of the WAN Port, including the WAN
Type, IP Address, Subnet Mask, Default Gateway, Keep Online Time,
Signal Quality, Receive, Transmit, Primary DNS, and Secondary DNS.
System Time The total uptime of the router since its last boot-up or reset.
3.2.2 System Logs
In the web configuration interface, click System Status -> Syslog in the left menu to check the system
status and logs of the router as shown in below figure. All information is read-only. The description of
each field is listed below.
Fields Description
Memory Size The total size of router’s internal memory.
System Uptime The total uptime of the router since its last boot-up or reset.
Memory Used The used size of router’s internal memory.
Syslog The system logs of the router.
3.3 WAN Setting
In the web configuration interface, click WAN Setting in the left menu to configure the WAN (wide
area network) connection of the router (i.e. how the router access the Internet). There are 3
sub-menus: Basic Setting, MAC Clone and DDNS.
3.3.1 Basic Setting
In the web configuration interface, click WAN Setting -> Basic Setting in the left menu. Firstly, you
TeleWins(HK).,Co.LTD

11
shall choose the type of WAN connection: Static IP Address, Dynamic IP Address, PPP over Ethernet,
or 3G.
If you need the router to access the Internet via 3G network (you have inserted a 3G USB modem to
the router), please choose the option of 3G.
If you need the router to access the Internet via a cable/DSL modem (you have connected a cable/DSL
modem to the router), please make the right choice as per the following guideline:
- If no any login parameters (e.g. fixed IP address, login ID) are given by your ISP, please choose
Dynamic IP (the default choice);
- If a fixed IP address is given by your ISP, please choose Static IP;
- If a username and a password are given by your ISP, please choose PPP over Ethernet.
If you are not sure which connection type you use currently, please contact your ISP to obtain the
correct information.
1) Dynamic IP
If you choose Dynamic IP, the router will automatically get the IP parameters from your ISP. The
configuration interface will show as below. You shall enter the values as per the following description
and then click the Save Settings button.
TeleWins(HK).,Co.LTD

12
Fields Description
MTU Maximum Transmission Unit. The normal value for most Ethernet networks is
1500 bytes. For some ISPs you may need to enter a lower value. But this is rarely
required and shall not be done unless you are sure that it’s necessary for your
ISP connection.
Primary DNS and
Secondary DNS If your ISP gives 1 or 2 DNS addresses, enter them in the corresponding fields.
Otherwise, the DNS servers will be assigned dynamically by your ISP.
2) Static IP
If you choose Static IP, you shall have fixed IP parameters specified by your ISP. The configuration
interface will show as below. You shall enter the values as per the following description and then click
the Save Settings button.
Fields Description
WAN IP Address Enter the fixed IP address in dotted-decimal notation provided by your ISP.
WAN Subnet Mask Enter the subnet mask in dotted-decimal notation provided by your ISP.
Usually the value is 255.255.255.0.
WAN Gateway Enter the IP address of gateway in dotted-decimal notation provided by
your ISP.
WAN MTU Maximum Transmission Unit. The normal value for most Ethernet networks
is 1500 bytes. For some ISPs you may need to enter a lower value. But this
is rarely required and shall not be done unless you are sure that it’s
necessary for your ISP connection.
Primary DNS and Enter 1 or 2 DNS addresses in dotted-decimal notation provided by your
TeleWins(HK).,Co.LTD

13
Secondary DNS ISP.
3) PPP over Ethernet
If you choose PPP over Ethernet, you shall have the login username and password offered by your ISP.
The configuration interface will show as below. You shall enter the values as per the following
description and then click the Save Settings button.
Fields Description
PPPoE Username and
PPPoE Password Enter the user name and password provided by your ISP. These fields are
case-sensitive.
MTU Maximum Transmission Unit. The default value is 1492 bytes, which is
usually OK. For some ISPs you may need to enter a lower value. But this
shall not be done unless you are sure that it’s necessary for your ISP
connection.
PPPoE Service Name This shall not be entered unless you are sure that it’s necessary for your
ISP connection.
Primary DNS and
Secondary DNS If your ISP does not automatically send DNS address to the router during
the login, enter the IP addresses in dotted-decimal notation of the
primary and/or secondary (if available) DNS server of your ISP.
4) 3G
If you choose 3G, you shall have the APN offered by your 3G ISP. The configuration interface will show
as below. You shall enter the values as per the following description and then click the Save Settings
button.
TeleWins(HK).,Co.LTD

14
Fields Description
APN Access Point Name. The name used to identify a UMTS/GPRS service in the
global 3G/GSM network. Some 3G operators adopt “internet” as their
APN. Please consult your local 3G ISP to get the correct APN and enter it in
this field.
Pin Code A numeric value used to lock your SIM card. If required, please enter the
PIN code of your SIM card in this field. The code will be stored by the
router and you will not have to re-enter it unless you change the SIM card.
Dialed Number Enter the dial number provided by your ISP.
Username and
Password Enter the user name and password provided by your ISP. Both values are
corresponding to the APN previously entered.
Primary DNS and
Secondary DNS If your ISP does not automatically send DNS address to the router during
the login, enter the IP addresses in dotted-decimal notation of the
primary and/or secondary (if available) DNS server of your ISP.
3.3.2 MAC Clone
In the web configuration interface, click WAN Setting -> MAC Clone in the left menu. Some ISPs will
require you to register your MAC address. If the MAC address of your router is not the registered one,
you can clone the MAC address that is registered with your ISP to the router.
TeleWins(HK).,Co.LTD

15
Fields Description
Use the device’s MAC Address Choose this to maintain the MAC address of the router, if you
have registered the router’s MAC address or your ISP doesn’t
require registering MAC address.
Use this PC’s MAC Address Choose this to change the MAC address of the router to that of
the PC which is connecting to the router, if you have registered
the PC’s MAC address.
Use the following MAC Address Choose this and enter the MAC address that is provided by your
ISP.
3.3.3 DDNS
In the web configuration interface, click WAN Setting -> DDNS in the left menu. Via this function, you
can assign a fixed host and domain name to a dynamic Internet IP address. It is useful when you are
hosting your own website, FTP server, or other server behind the router. Before using this function,
you need to sign up for DDNS service providers (e.g. www.dyndns.org, www.TZO.com, or
www.3322.org ). The DDNS service provider will give you a password or key and then you can set up a
DDNS connection as per the following instructions.
1) Select a DDNS service provider in the field of DDNS Service.
2) Enter the User Name of your DDNS account.
3) Enter the Password of your DDNS account.
4) Enter the Host Name which is given by your DDNS service provider.
5) Click the Save Settings button to make your settings take effect.
6) You can check the DDNS connection status in the field of Status.
TeleWins(HK).,Co.LTD

16
3.4 LAN Setting
In the web configuration interface, click LAN Setting in the left menu to configure the LAN (local area
network) connection of the router (i.e. how the router share the Internet access). There are 3
sub-menus: Basic Setting, DHCP Setting and DHCP Table.
3.4.1 Basic Setting
In the web configuration interface, click LAN Setting -> Basic Setting in the left menu. You can
configure the IP parameters of the LAN Port. The configuration interface will show as below. You shall
enter the values as per the following description and then click the Save Settings button.
Fields Description
IP Address Specify the IP address of LAN Port of the router in dotted-decimal
notation. (The default setting is 192.168.1.1.)
Subnet Mask An address code that determines the size of the LAN. Usually specify it as
255.255.255.0.
3.4.2 DHCP Setting
In the web configuration interface, click LAN Setting -> DHCP Setting in the left menu to configure
TeleWins(HK).,Co.LTD

17
the DHCP parameters of your LAN. The router is set up by default as a DHCP (Dynamic Host
Configuration Protocol) server, which provides TCP/IP configuration to all the devices that are
connected the router on the LAN. The configuration interface will show as below. You shall enter the
values as per the following description and then click the Save Settings button.
Fields Description
DHCP Server By default, the DHCP Server is enabled. If you disable it, you shall have
another DHCP server in your LAN or manually configure the IP address for
each device in your LAN.
Start IP Address Specify the first IP address in your LAN. The default setting is 192.168.1.2.
End IP Address Specify the last IP address in your LAN. The default setting is
192.168.1.254.
Address Lease Time Specify the length of time (in minutes) that the device in your LAN can use
the current IP address it has been assigned to. The default setting is 120
minutes.
Default Domain Optional setting. Enter the domain name of your LAN.
Primary DNS and
Secondary DNS Optional setting. Enter the IP addresses in dotted-decimal notation of the
primary and/or secondary (if available) DNS server of your ISP.
3.4.3 DHCP Table
In the web configuration interface, click LAN Setting -> DHCP Table in the left menu to check the IP
parameters of each DHCP client (i.e. the devices in your LAN). The status interface will show as
below.
TeleWins(HK).,Co.LTD

18
Fields Description
IP Address The IP address that is assigned to the DHCP client.
Host The host name of the DHCP client.
MAC Address The MAC address of the DHCP client.
3.5 WLAN Setting
In the web configuration interface, click WLAN Setting in the left menu to configure the WiFi
connection of the router. There are 3 sub-menus: Basic Setting, Security and Advanced Setting.
3.5.1 Basic Setting
In the web configuration interface, click WLAN Setting -> Basic Setting in the left menu to configure
the WiFi parameters. The configuration interface will show as below. You shall enter the values as per
the following description and then click the Save Settings button.
Fields Description
Wireless Mode Select the desired WiFi mode among the following options:
- 802.11b: only WiFi-enabled devices that comply to 802.11b standard
can connect to the router;
- 802.11g: only WiFi-enabled devices that comply to 802.11g standard
can connect to the router;
- 802.11b/g: Both 802.11b and 802.11g devices can connect to the router
(the default choice).
Wireless SSID Specify the name of WiFi hotspot that can be recognized by your
TeleWins(HK).,Co.LTD

19
WiFi-enabled devices. The value can include up to 32 characters and is
case-sensitive.
Wireless Channel This field determines what channel (operating frequency) will be used by
the WiFi module of router. It is not necessary to change the value unless
you notice interference problems with another nearby WiFi access point.
Hide SSID If you check this, you can protect from others trying to use your WiFi
connection by hiding your SSID.
3.5.2 Security
In the web configuration interface, click WLAN Setting -> Security in the left menu to configure the
security parameters for your WiFi connection. The configuration interface will show as below. You
shall enter the values as per the following description and then click the Save Settings button.
Fields Description
Authentication Mode Choose your desired authentication mode: Open System, Shared, WEP
Auto, WPA-PSK, or WPA2-PSK.
If one of the first three options is chosen, you need to set the WEP
security; otherwise, the WPA-PSK security will be required to set.
WEP Security
Encryption You can enable or disable (i.e. “None” is selected) the WEP encryption.
It is strongly recommended that you enable it. Otherwise, the
WiFi-enabled devices will be able to connect the router without
encryption.
WEP Encryption Select the length of the WEP key (64-bit or 128-bit) for the encryption.
The higher the encryption bit, the more secure your network, however,
speed is sacrificed at higher bit levels.
TeleWins(HK).,Co.LTD

20
Default KEY ID Select which of the 4 keys below will be used for the encryption. The
key will be required when your WiFi-enabled device is connecting to the
router.
WEP KEY 1 ~ WEP KEY 4 After you specify the Default KEY ID, you shall choose the key format
(“HEX” or “ASCII”) and enter the key setting for the selected key ID.
- Key format: HEX format means you need to enter a code composed
of hexadecimal digits (i.e. 0~9, a~f, A~F); ASCII format can accept
any combination of keyboard characters.
- Key length: for 64-bit encryption, a 10-digit HEX key or 5-character
ASCII key is allowed; for 128-bit encryption, you can specify a
26-digit HEX key or 13-character ASCII key.
WPA-PSK Security
Encryption Type Choose the desired encryption type: TKIP or AES.
Passphrase Specify the WPA passphrase within 8 to 63 characters.
3.5.3 Advanced Setting
In the web configuration interface, click WLAN Setting -> Advanced Setting in the left menu to
configure the advanced settings for your WiFi connection. Please note that, in most cases the
advanced settings should remain at their default values. The configuration interface will show as
below. You shall enter the values as per the following description and then click the Save Settings
button.
Fields Description
Fragment Threshold This field specifies the maximum size for a packet before data is
fragmented into multiple packets.
This field shall remain at the default setting of 2346 (bytes). If you
experience a high packet error rate, you may slightly reduce this value.
But a too low value may result in poor network performance. Only minor
modifications are recommended.
RTS Threshold This field specifies the data packet size beyond which the low-level RF
protocol invokes RTS/CTS flow control.
This field shall remain at the default setting of 2347 (bytes). Should you
TeleWins(HK).,Co.LTD
Table of contents

