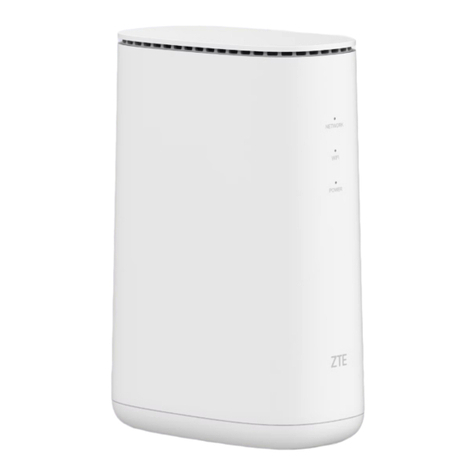
Telewins TW550R User manual

1
Super 3G Router
Instruction Manual
V1.0.0
USER MANUAL
TeleWins( HK).Co., Ltd.
Bldy1, Xiandaichenghuating, Chuangye Road
Nanshan District, Shenzhen 518054, P.R.China
Tel.: +86-755-86217635
Module name: Wifi-TW550R Wireless Router

2
Table of Contents
Chapter I Product Profile...............................................................................................................................3
1.1 Product Specifications ..........................................................................................................................3
1.2 Packing List ..........................................................................................................................................3
1.3 LED indicators and Interface Specifications.........................................................................................3
Chapter II Installation....................................................................................................................................4
2.1 Hardware Installation............................................................................................................................4
Step 1: Connect with the data card through the USB interface...........................................................5
Step 2: Connect to a PC......................................................................................................................5
Step 3: Connect to the power adapter .................................................................................................6
Step 4: Power On/Off..........................................................................................................................6
Chapter III How to Log into the Router.........................................................................................................6
3.1 How to correctly set up your computer network configurations...........................................................6
3.2 Configure 3G Router.............................................................................................................................9
Step 1、Open Web Management................................................................................................................9
Step 2、input User name and Password.....................................................................................................9
Chapter IV Quick Start Guide......................................................................................................................10
Step 1、Intelligent Guide ......................................................................................................................... 10
Step 2、Administrator Information Configuration...................................................................................10
Step 3、Configure the System Time ........................................................................................................ 11
Step 4、Configure 3G Mode.................................................................................................................12
Step 5、Configure LAN Information.......................................................................................................13
Step 6、Configure WLAN Information ...................................................................................................14
Chapter V System Status..............................................................................................................................16
5.1 Status (current work conditions of the router) ....................................................................................16
5.2 Statistical Information.........................................................................................................................17
Chapter VI Network Settings.......................................................................................................................18
6.1 WAN Settings......................................................................................................................................18
6.2 LAN Settings ......................................................................................................................................18
6.3 DHCP client list............................................................................................................................20
6.4 Advanced Routing Configurations......................................................................................................20
Chapter VII Wireless Network Configurations............................................................................................22
7.1 Basic Settings......................................................................................................................................22
7.2 Advanced Settings...............................................................................................................................24
7.3 Safety Settings ....................................................................................................................................27
7.4 WDS Configurations...........................................................................................................................28
7.5 WPS Configurations ...........................................................................................................................29
Chapter VIII Firewall...................................................................................................................................32
8. 1 MAC/IP/Port Filtering.......................................................................................................................32
8.2 Port Transmission (Virtual Host) ........................................................................................................33
8. 3 DMZ Settings.....................................................................................................................................34
8.4 System Safety Settings........................................................................................................................34
8.5 Content Filtering.................................................................................................................................35
Chapter IX System Management.................................................................................................................37
TeleWins(HK).,Co.LTD

3
9.1 Management........................................................................................................................................37
9.1.1 Domain Server ......................................................................................................................37
9.2 System Upgrade..................................................................................................................................38
9.3 Equipment Management.....................................................................................................................38
Chapter I Product Profile
1.1 Product Specifications
◆Supports PSTN Phone
◆Supports IEEE802.11b/g/n, speed rate up to 300Mbps.
◆NAT & NAPT with VPN pass-through Virtual Server.
◆Automatic receipt of IP address with DHCP Server.
◆Supports the high-speed gateway and multi-users.
◆Security through WEP, WPA and built-in firewall.
1.2 Packing List
3G Router x1 car charger(option)
Power Adapter x1 RJ45 cable
Quick Start Guide x1
1.3 LED indicators and Interface Specifications
TeleWins(HK).,Co.LTD

4
Chapter II Installation
2.1 Hardware Installation
Please make the correct connection as per the following steps before setting
up a router. Please place the router in the central part of the coverage area to
maximize its wireless performance.
TeleWins(HK).,Co.LTD

5
Step 1: Connect with the data card through the USB interface.
(Figure 2)
Step 2: Connect to a PC
If the indicator of the Ethernet interface connecting with a network cable is on, the
connection is successful. The Ethernet cable cannot be longer than 100 meters
(328 feet). To achieve better effect, use the shielded cable.
Whether the PC wireless connection is successful, please check your PC
connected through WLAN.
TeleWins(HK).,Co.LTD

6
(Figure 3)
Step 3: Connect to the power adapter
Use a power adapter that is compatible with the device; otherwise, the device may
be damaged.
(Figure 4)
Step 4: Power On/Off
Switch on will supply power to device
Switch off will cut the power
Chapter III How to Log into the Router
This chapter mainly introduces how to log onto the router set-up page. Please
set up your router by reference to the following steps after your router is
connected to the device with the cable (refer to Chapter II for the connection
steps).
3.1 How to correctly set up your computer network configurations
TeleWins(HK).,Co.LTD

7
Step1: On the desktop, right-click on “My Network Places”, select “Properties”.
(Figure 6)
Step2: In the following pop-up window, right-click on “Local Area Connection”
and select “Properties”. (Figure 7)
Step3: In the following window, select “Internet Protocol (TCP/IP)” option, then
click “Properties”. (Figure 8)
TeleWins(HK).,Co.LTD

8
Step4: In the following pop-up window, select “Obtain an IP address
automatically” and “Obtain DNS server address automatically”. Then click
“OK”. (Figure 9)
Step5: If you selected LAN connection. Please double check if the Gateway is
really connected to your computer, when “Local Connection” is showing
already connected. Then click “Start” menu and open “Run” program,
input “CMD” as figure 10.
【If you selected WIFI connection, Before step5, please click on
“Wireless Network Connection”icon in the lower right of desktop, check
the wireless network status and select your wireless network. Then connect
to it.】
TeleWins(HK).,Co.LTD

9
Step6: Input order “ping 192.168.1.1”and click “Enter”, it will get the
following result which is showing the above configuration is successful.
(Figure 11)
3.2 Configure 3G Router
Step 1、Open Web Management
Open Web browser, input 192.168.1.1 at Address bar, then press “Enter”.
Step 2、input User name and Password
the following pop-up window, both input “admin”at “User name”bar and
“Password”bar, then press “OK”. (Figure 13)
TeleWins(HK).,Co.LTD

10
Chapter IV Quick Start Guide
Step 1、Intelligent Guide
Click “Quick Setup Guide”as displayed on the major interface and make use of
the intelligent guide functions of the router. It enables the one-time configuration
of the router’s time, administrator information, internal and external network
ports.
Step 2、Administrator Information Configuration
Account: an account (user name) to log into the management interface. The
default system account is admin.
Password: a password to log on the management interface. The default system
password is admin.
TeleWins(HK).,Co.LTD

11
Click “Next”to Configure the System Time
Step 3、Configure the System Time
Current time: display the system time of the router.
Sync with host: make sure that the router’s time settings are consistent with those
of the PC.
NTP Server: set up an Internet-based time server. Every once in a while, the router
sets up its time and makes sure that its time is consistent with that of the server.
NTP synchronization(hours): intervals for the router to obtain data from the time
server.
Click “Next”to Configure 3G Mode
TeleWins(HK).,Co.LTD

12
Step 4、Configure 3G Mode
(图 10)
Run Type: under the “Keep Alive ”mode, the router will dial up automatically
and get connected to the Internet when 3G equipment is plugged in. Under the
“Manual”mode, the access internet through dial-up will not be launched until
the user clicks “Connection”on the status page. Under the“On-Demand”mode,
the system will be connected to the network automatically in case of WAN access
requests. If there are no network access requests within the specific period (idle
time), the system will disconnect to the network automatically. This connection
mode could effectively save network access fees for users that select to make
payment by the time actually consumed.
TeleWins(HK).,Co.LTD

13
PIN settings: If your 3G Internet access equipment has a PIN code, you shall
select “Use PIN”and fill in the PIN code in the following Input Box. Otherwise,
you shall select “Unused PIN”.
APN: If you select “Auto APN”, then information such as “APN
Information”, “Dial Number”, “User”and “Password”shall be filled by the router
automatically. If you select “Manual APN”, then you have to fill in such Internet
access information by yourself.
DNS type: If you select “Automatic DNS”, the router will use the DNS
obtained by 3G dial-up. If the “Manual DNS”is selected, the router will use the
DNS information entered by the user.
Click “Next”to Configure LAN Information
Step 5、Configure LAN Information
Click “Next”to Configure WLAN Information
TeleWins(HK).,Co.LTD

14
Intranet ports and DHCP settings
IP address: set up IP address for Intranet ports.
Subnet mask: set up masks for the Intranet.
MAC address: display the physical address of Intranet ports.
DHCP type: Select “Server”to open DHCP services and then the host in the
Intranet could obtain IP dynamically.
Start IP address-End IP address: IP obtained by the host in the Intranet via
DHCP mode are included in this range.
Default gateway: set up the gateway for the host in the Intranet.
DNS server: set up DNS server for the host in the Intranet.
Step 6、Configure WLAN Information
Radio On/Off: switch on or Off wireless networks. If Intranet clients do not select
TeleWins(HK).,Co.LTD

15
“Enable”, they could not get Wi-Fi connectivity to the Intranet of the router.
Network mode: select standards used by wireless networks. Options are 802.11b,
802.11g and 802.11n, or mix standards 802.11b/g,802.11b/g/n.
Network Name(SSID):Enter a name for your wireless local area network
(WLAN).
Security Mode:If “Disable” is selected, Intranet clients could have Wi-Fi
connection to the router’s Intranet without entering key information.
If “OPEN”, “SHARED” or “WEPAUTO” is selected, there is a need to set up the
key information. Wireless clients in the Intranet cannot gain access to the router’s
Intranet until correct key information is entered.
You can fill in four (ASCII or Hex, with a length of 10 to 26 characters) keys for
this router at the most. One of the four groups of pre-set keys can be selected as
the current effective key (default key).
TeleWins(HK).,Co.LTD

16
Chapter V System Status
5.1 Status (current work conditions of the router)
SDK Version: indicates the router’s current software versions and the release
date.
System Up Time: indicates the system operation time after the router is
loaded with a power supply. Such time will be cleared to zero after the power
supply is unloaded.
System Platform: indicated the router’s current model and hardware
versions.
Internet configurations:
Connected Type: the router’s online modes ,two buttons, namely
“Disconnect”and “Connect”will be displayed on the interface to disconnect and
TeleWins(HK).,Co.LTD

17
connect the 3G network.
Signal: signal intensity of the 3G network.
NetType: current 3G network that is connected (such as WCDMA, TD or
EVDO).
WAN IP address: current WAN IP address of the router. If the router’s
connection type is dynamic IP.
Subnet mask: Router’s WAN subnet mask.
Default gateway: Router’s WAN default gateway.
Domain server: Address of the DNS server that is currently used by the
router.
MAC address: MAC address of the router’s Extranet ports.
Local IP address: IP address of the router’s Intranet ports.
Local net mask: subnet mask of the router’s Intranet.
MAC address: Physical address of the router’s Intranet ports.
5.2 Statistical Information
(Data packets and bytes that are received and transmitted by each port and
the status of memory use)
TeleWins(HK).,Co.LTD

18
Chapter VI Network Settings
6.1 WAN Settings
Please refer to the Extranet configurations of the “Intelligent Guide”for the
online configurations.
MAC replication: If MAC address replication is initiated, the MAC address
of the Intranet’s Internet access data packet shall be changed to the MAC address
of the router while accessing the Internet via the router.
6.2 LAN Settings
IP address: set up IP addresses for Intranet ports.
Subnet mask: set up masks for the Intranet.
LAN 2 : Add an IP to the Intranet ports. This way, LAN clients could get
connected to the router through LAN.
TeleWins(HK).,Co.LTD

19
MAC address: indicated physical addresses of the Intranet ports.
DHCP type: Select “Server”to open DHCP services and then the host in the
Intranet could obtain IPs dynamically.
Start IP address-End IP address: IPs obtained by the host in the Intranet via
DHCP mode are included in this range.
Default gateway: set up the gateway for the host in the Intranet.
DNS server: set up DNS servers obtained by the host in the Intranet via
DHCP (If DNS Proxy is enabled, we recommend here to describe it as the IP of
the Intranet ports. This way, we needn’t reset this item when the router’s DNS
undergoes any changes).
Release time: effective period for the host in the Intranet to obtain IP
addresses.
Static designation: Hosts located in specific physical address obtain specific
IPs via DHCP.
Introduction of Relevant Intranet Programs
802.1d Spanning Tree:Support spanning tree protocols, avoid network
loopbacks in the LAN and address broadcast storm issues relating to the looped
Ethernet network.
TeleWins(HK).,Co.LTD

20
LLTD: Identify whether LLTD (Link-Layer Topology Discovery Responder)
protocol is supported. This network protocol could intelligently identify which
network equipment or computers are connected in the LAN network.
IGMP Proxy: Confirm whether the router supports the IGMP protocol. This
protocol operates between the host and the multicast router that is directed
connected to the host. It is a protocol for IP hosts to report the identity of multicast
group members.
UPNP: Identify whether UPNP protocols are supported.
RouterAdvertisement: Identify whether the router supports IPV6.
DNS Proxy: Transmit DNS requests of the Intranet. If this function is
enabled, you can configure DNS of the host in the Intranet to IPs of the router’s
Intranet ports. This way, hosts in the Intranet can diagnose web pages. There is no
need to reset the Intranet’s DNS after the Internet access method has been
changed.
6.3 DHCP client list
(Display information relevant to the hosts that are connected to the router’s
Intranet via DHCP)
DHCP client list enables you to check the status of online users such as MAC
address, IP address and lease periods of the IP address.
6.4 Advanced Routing Configurations
TeleWins(HK).,Co.LTD
Table of contents
Other Telewins Wireless Router manuals


