Telstra M450 User manual

Telstra M450
Digital Answering Machine
User Guide
If you have any problems with your answering
machine, firstly refer to the Troubleshooting
section of this User Guide or call our TecHelp
line on 1300 3 9 193.

1
© COPYRIGHT 2002 Telstra Corporation imited
This work is copyright. All rights reserved. Other than for purposes and subject to conditions prescribed under the Copyright Act,no
part of it may in any form or by any means (electronic, mechanical, photo copying, microcopying, scanning,recording or otherwise)
be reproduced,stored in a retrieval system or transmitted without prior permission from Telstra Corporation imited ABN 33 051 775
556 ™ Trade Mark of Telstra Corporation imited ® Registered Trade Mark of Telstra Corporation imited
In this guide
Introduction 2
Key features 3
Telstra M450 Answering Machine at a glance 4
Setting up the Telstra M450 7
all mounting your Telstra M450 8
Safety instructions 8
Using your Telstra M450 9
Answering machine controls 9
Troubleshooting 17
Maintenance 17
Product arranty & Customer Service 18
TecHelp is our commitment to providing superior service for our Corded
and Cordless Telephones, Answering Machines and accessories. We
support this by providing the following:
• Product Information ine 1300 369 193
• 12 Month Product Warranty

3
Key features
14 Minutes Recording Capacity
Offers the benefits of Digital Recording
Digital Message Counter
Displays the number of messages waiting
Day and Time Stamp
Each message is tagged with the Day and Time of the call
3 Separate mailboxes
Allows messages to be saved for specific people or groups
Remote Access
You can access your M450 from tone phones and replay messages or change the settings
of the unit.
Toll Saver
This means the M450 will answer your calls after 2 rings if messages have been left. If
there are no messages it will answer after 6 rings. During Remote Access this allows you
to hang up before the M450 answers , therefore saving you the cost of the call.
Call Screening
You can hear who’s calling you through the loudspeaker and decide whether to take the
call or let your M450 record a message.
2
Introduction
Your Telstra M450 is designed for ease of use and made to the high standards set by
Telstra.
Please read the instructions carefully before use and keep this user guide for future
reference.
Unpacking your Telstra M450
Check that your M450 is complete.If
anything is missing, please contact your
place of purchase immediately.
●Telstra M450 Digital Answering Machine
●Adaptor & Telephone ine Cord
●Easy Reference User Guide
●Mains Power Adaptor
●Wall Mounting Screws
If you experience any difficulties with your unit,
please call TecHelp on 1300 369 193.
Del
M450
1
?
2
?
??
12
Stop
Skip Skip
Memo
Ans On/Off
Play
Pause
Vol -
Vol +

5
Setting up the Telstra M450
1Plug the Line Cord into the Telephone wall socket, using the
adaptor if required.
Situate your M450 close enough to the phone and mains power sockets so that the cables
will reach. If you wish to wall mount your M450 please refer to the wall mounting
instructions on page 8.
Follow these steps to set up your Telstra M450.
Plan the location
4
Telstra M450 Answering Machine at a glance
Mailbox 1&2 buttons
To set up your M450 for
storing messages into
individual mailboxes for
seperate persons or groups.
>Skip & Skip < buttons
To skip forward or back
when hearing your
messages received.
Stop button
To cancel a deletion, if you
want to save a message.
Vol+ & Vol- buttons
To increase or decrease the
speaker volume.
Delete button
To delete messages
received.
Memo button
To record your outgoing
message into the M450.
Answer On/Off button
To turn on or off the M450.
Mic
For recording your
outgoing message.
Play/Pause button
To playback or pause
messages received by the
M450
Del
M450
1
?
2
?
??
12
Stop
Skip Skip
Memo
Ans On/Off
Play
Pause
Vol -
Vol +

7
4Plug the Mains Power Adaptor into the mains power wall
socket and switch on.
Your Telstra M450 is now
ready for use.
Important
Before using this telephone, please refer the safety instructions on page 8
If you experience any difficulties with your unit,
please call TecHelp on 1300 369 193.
6
2Plug your telephone into the socket marked Telephone on the
back of the M450.
3Plug your Mains Power Adaptor into the socket marked 9V DC
on the back of the M450.
ine
9V DC Telephone
7PQRS
ine
9V DC Telephone

9
Using your Telstra M450
Answering machine controls
Press the Ans On/Off button.
If the M450 is On the ED display will show the number of messages. If the
M450 is Off the ED display shows –.
Ans On/Off
To switch the M450 On and Off
Press Vol + to increase the volume and press Vol – to decrease the volume.
The volume level will be displayed momentarily on the ED display.
The unit will beep twice when it reaches its minimum or maximum setting.
Vol +
Vol -
To adjust the loudspeaker volume
To review the current set day and time, press the Stop button,the current
set day and time will be read back.
To change the day and time, press and hold the Stop button.The day will be
read back. To change the day, press the <Skip or Skip> button.Press the
Stop button to set the day, which will be read back.
Next the hour will be read back. To change the hour press the <Skip or
Skip> buttons.Press the Stop button to set the selected hour.
Next the minutes will read back. To change the minutes press the <Skip or
Skip> buttons.Press the Stop button to finalise the whole setting.
How to set the day and time
Stop
Stop
Skip Skip
8
all mounting your Telstra M450
Drill two holes 72mm vertically apart in the wall. eave a small gap between the screw
heads and the wall.
Place your M450 over the screw heads and slide down.
Note:
Take care so as not to drill into hidden power wires or water pipes.
Safety instructions
Use only the power adaptor supplied.
There is a slight chance that your answering machine could be
damaged by an electrical storm. We recommend that you unplug
your M450 from the mains and telephone sockets during storms.
The M450 and charging units produce a small amount of heat
during use. Therefore, we advise against placing these products on
antique, veneered or wooden surfaces as damage may occur.
Do not use your M450 in damp, humid conditions such as
bathrooms.
Do not expose the equipment to fire or water.

11
To use the three mailboxes you will need to change your OGM to instruct
callers on how to leave a message for a particular person. There are two
personal mailboxes and the main mailbox. An example of an OGM would
be:
“Thank you for calling,to leave a message for Peter please press 1 and to
leave a message for Jane please press 2, or simply leave a message after the
tone.”
To recover the messages left in the personal mailboxes press the desired
mailbox button.
You can also leave memo messages in the personal mailboxes. To leave a
message:
Press and hold the desired mailbox button.The M450 will prompt you to
leave a message.
How to use the 3 mailboxes
Press and hold the Ans On/Off button
Press the Skip> button
While the recorded OGM is being played back press the Delete button, the
recorded OGM will be deleted and replaced by the factory default message.
Ans On/Off
Skip
To reset your outgoing message (OGM)
1
?
2
?
10
Your M450 is ready to use with two pre recorded outgoing messages. Or
you may choose to record your own personal outgoing message.
Press and hold the Ans On/Off button for about 1second.
If you press the <Skip button you will select the following message:
“Hello,your call cannot e taken at the moment so please leave a message
after the tone.”
This message could be used for normal operation.
If you press the Skip> button you will select the following message:
“Hello,your call cannot e taken at the moment and you cannot leave a
message”
This message could be used when you do not want callers to be able to
leave a message.
If you wish to record your own OGM press and hold the <Skip button, then
record your OGM. When you have finished, release the <Skip button. The
maximum length of your OGM is 30 seconds.
Ans On/Off
Skip
Skip
Skip
Choosing your outgoing message (OGM)
Note
To exit at any time press the Stop button.
Note
To review your OGM message, press and
hold the Ans On/Off button.

13
You can use your M450 to record a memo which can be played back by
another person. A memo can be any length up to the maximum recording
time available.
Press and hold the memo button. Start speaking your memo when you
hear the beep.
To end the recording release the memo button. A beep confirms the
recording has stopped.
Memo
To Record a memo message
To playback memo’s press the Play button.Your messages will be played
back in the order in which they were received.
Press the < Skip button once to replay the current message or twice to go
back to the previous message.
Press the Skip > button to skip to the next message.
Play
Pause
Skip Skip
To Play back messages and memo’s
The message alert is an audible tone to alert you to waiting messages. To
turn this feature on or off press the < Skip button.
Skip
Message alert
12
After choosing your OGM your M450 is ready to receive messages. Your M450 will answer
calls after the selected number of rings. The factory default is 6 rings. To change the
number of rings, see section Setting the num er of rings before answer setting on page 14.
Callers can leave a message up to 2 minutes long.
The M450 will terminate the call under certain conditions:
If the caller paused for more than 6 seconds when leaving a message. If the memory
becomes full during recording.
Receiving messages
When a message has been received the number of messages that have been left will be
displayed on the ED display.
If a message has been left in Mailbox 1 or Mailbox 2 the Mailbox indicators will flash. The
indicators will show the number of messages left in each mailbox by flashing the same
number of times.
e.g. If a Mailbox indicator flashes in the following sequence there is one message
waiting. Flash, pause, flash, pause.
If a Mailbox indicator flashes with the following sequence there would be two messages
waiting. Flash, flash, pause, flash, flash, pause.
When the memory is full the letter Fwill be displayed on the ED display. When the
memory is full you will not be able to change the OGM or leave memo messages. The
OGM will change automatically to “Hello, your call cannot e taken at the moment and
you cannot leave a message.”.
Message indicators

15
To help keep your messages private, your M450 requires you to enter a 3-
digit security code before you can play back your messages.
The Pre Set code is 000
To Review your security code press the Delete key momentarily. Your
security code will be read back.
Setting Your security code
Press and hold the Delete key until you here the voice prompt.
Press the Skip> or <Skip back key to change the 1st digit.
Press and hold the Delete key until you hear the voice prompt.
Press the Skip> or <Skip key to change the 2nd digit.
Press and hold the Delete key until you hear the voice prompt.
Press the Skip> or <Skip key to change the 3rd digit.
Press the Delete key and your new security code will be read back.
Del
Del
Skip Skip
Del
Skip Skip
Del
Skip Skip
Del
To change your security code
14
While your message is playing back press the Delete button.
To delete all messages wait until all messages have finished being played
then press the Delete button within 8 seconds.
After you hear 1 beep all messages will be deleted.
If you wish to cancel the deletion you must press the Stop key within
8 seconds.
Del
Stop
To delete messages
You can let your M450 answer an incoming call and hear the callers voice through the
loudspeaker so you can decide whether or not to take the call in person.
With the M450 in the Answer ON state, let the unit answer the call. If you wish to take
the call pick up your handset and speak. The M450 will automatically stop recording and
reset to answer new calls.
Call screening
To review the current setting press the Skip > key momentarily. Your
setting will be displayed on the ED display.
To change the setting press and hold the Skip > key. The current setting
will be displayed then the other available options will be displayed.
Release the button when the desired setting is displayed. The new setting
will be displayed.
Skip
Skip
Setting the number of rings before answer

17
Troubleshooting
Maintenance
If you have problems using your M450 this section gives you the most common
solutions.
LED does not light up.
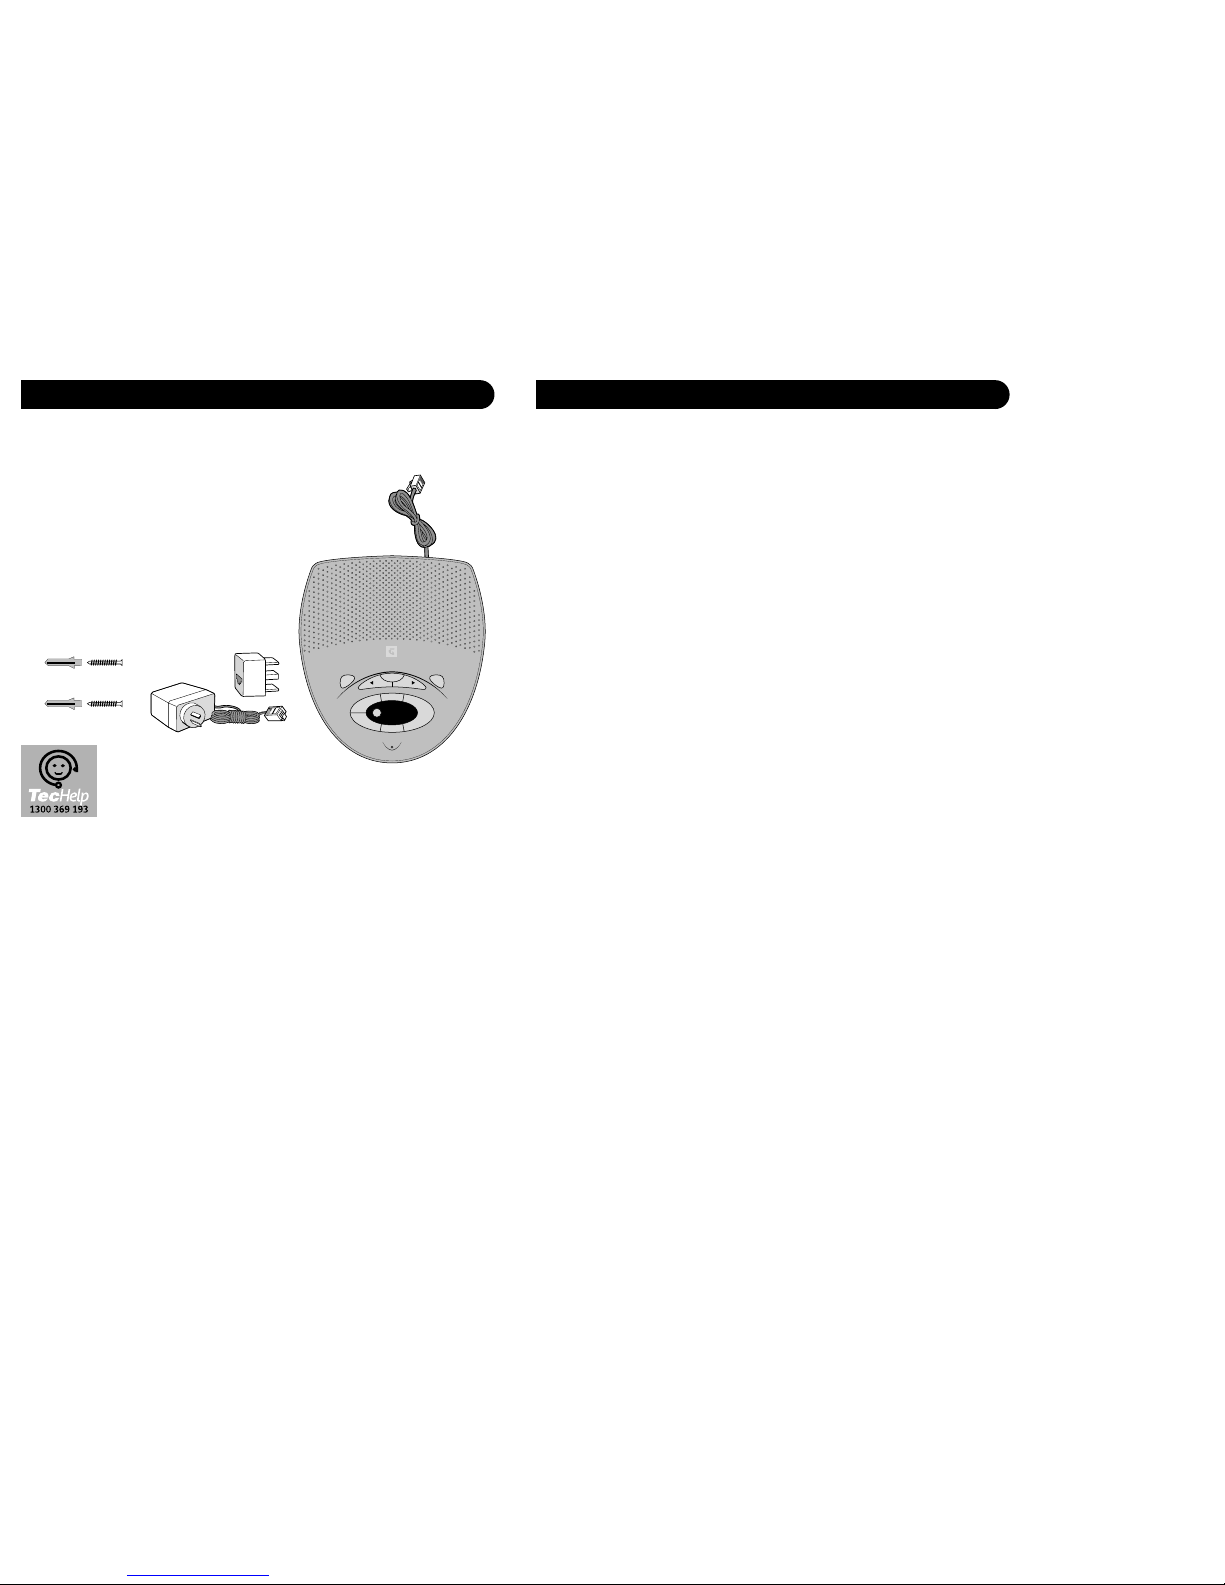
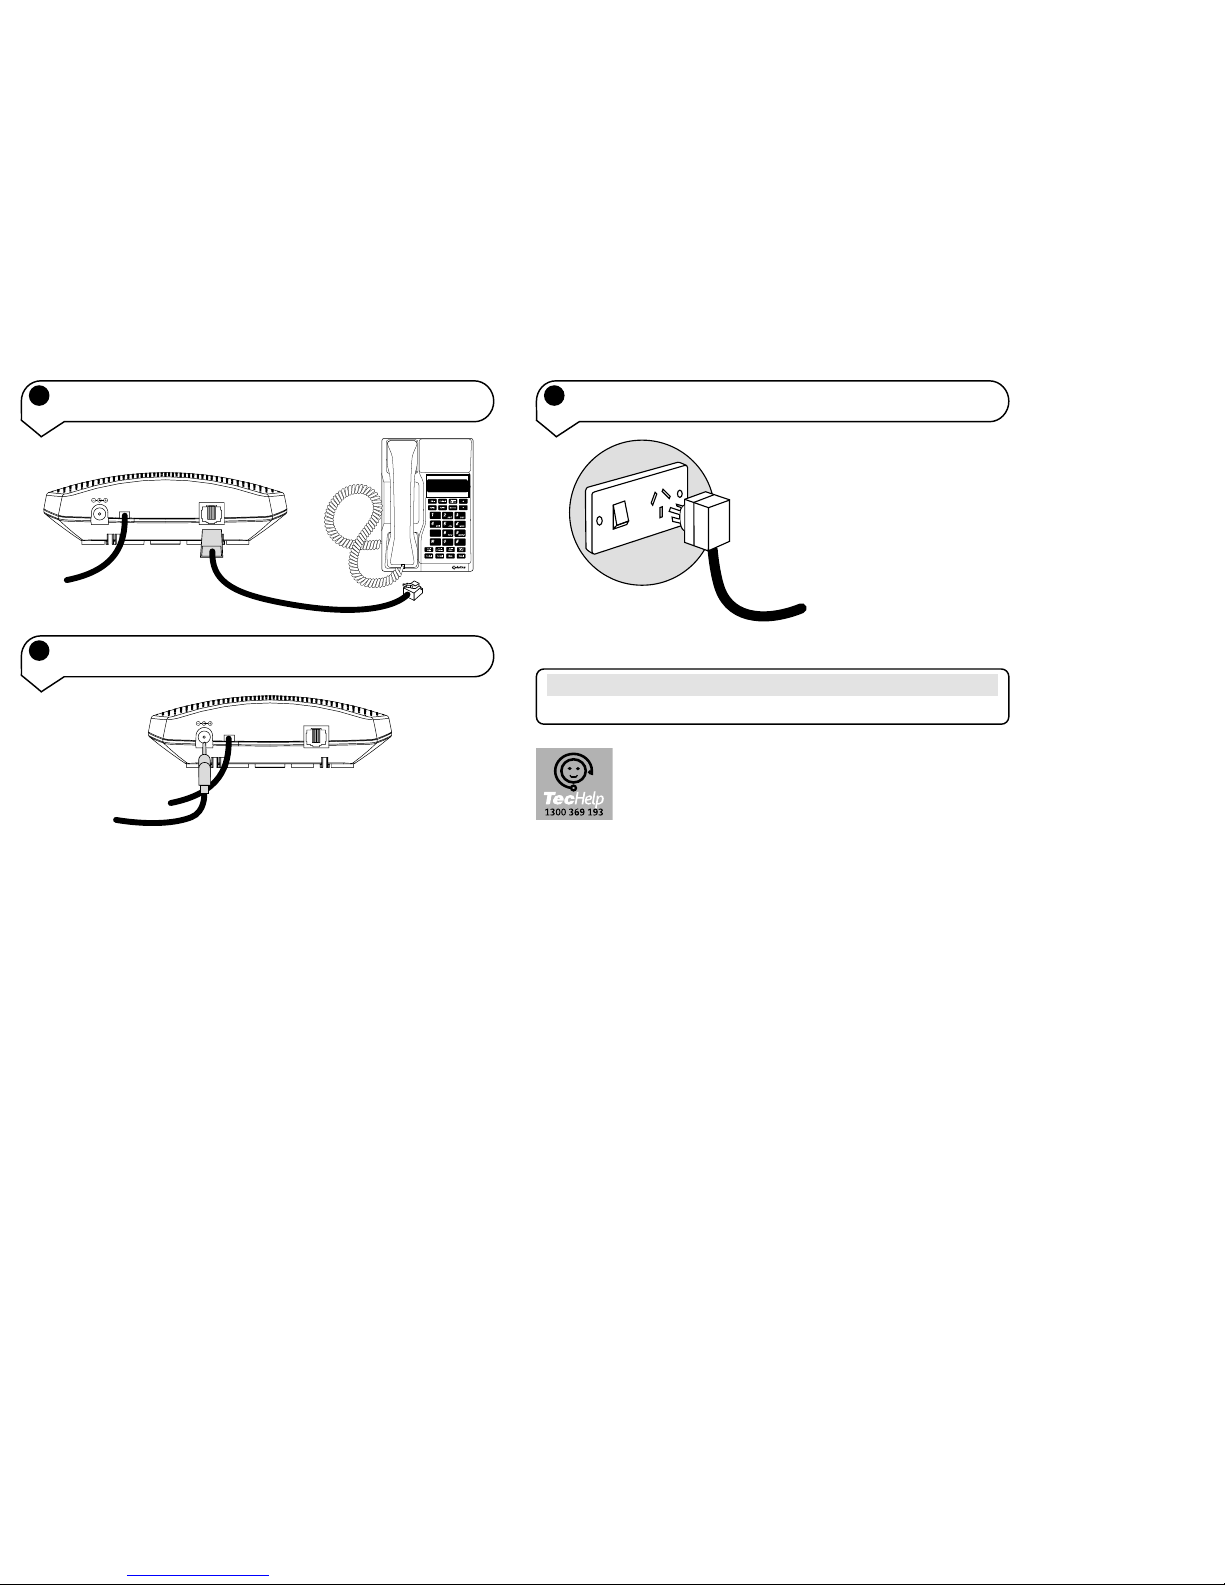
Check that your M450 is correctly connected to the mains socket and the power cable in
inserted correctly in the socket at the back of the machine.
Outgoing message is not clear.
Speak clearly, close enough (15 to 30 cm) to the microphone when recording your
message.
Incoming message does not record.
Check that your M450 is set to answer ON.
Check that you have recorded or set an outgoing message.
Check that the memory is not full.
You may have too many devices on your telephone line. Note the REN number on the
base of each telephone device connected to the line, the total of all should not exceed 3.
If you experience any difficulties with your unit, please call TecHelp on 1300 369 193.
Your M450 does not require routine maintenance.To clean the unit firstly disconnect it
from the line and power. Using a soft cloth, dampened only with water, wipe over the
unit.
Do not spray aerosol cleaners onto your M450.
16
Ring your M450 phone number.If your answering machine is turned on, it
will answer after the number of rings you have set (see page 14). Or if
turned off, your answering machine will answer after 14 rings.
After listening to your OGM press the *button on your phone.
You will then be prompted to enter your security code.
If you have no messages you will hear,“You have no new messages. To hear
main menu, press 1.”.
You can either press 1to hear the main menu or press the required digit to
access other functions (ie. press 0to turn on or off your M450).
If you have new messages you will hear, “You have (X) new messages” and
then the message/s will be played.
You can also enter the required digit to access other functions (ie. Press 4 to
skip back during message playback).
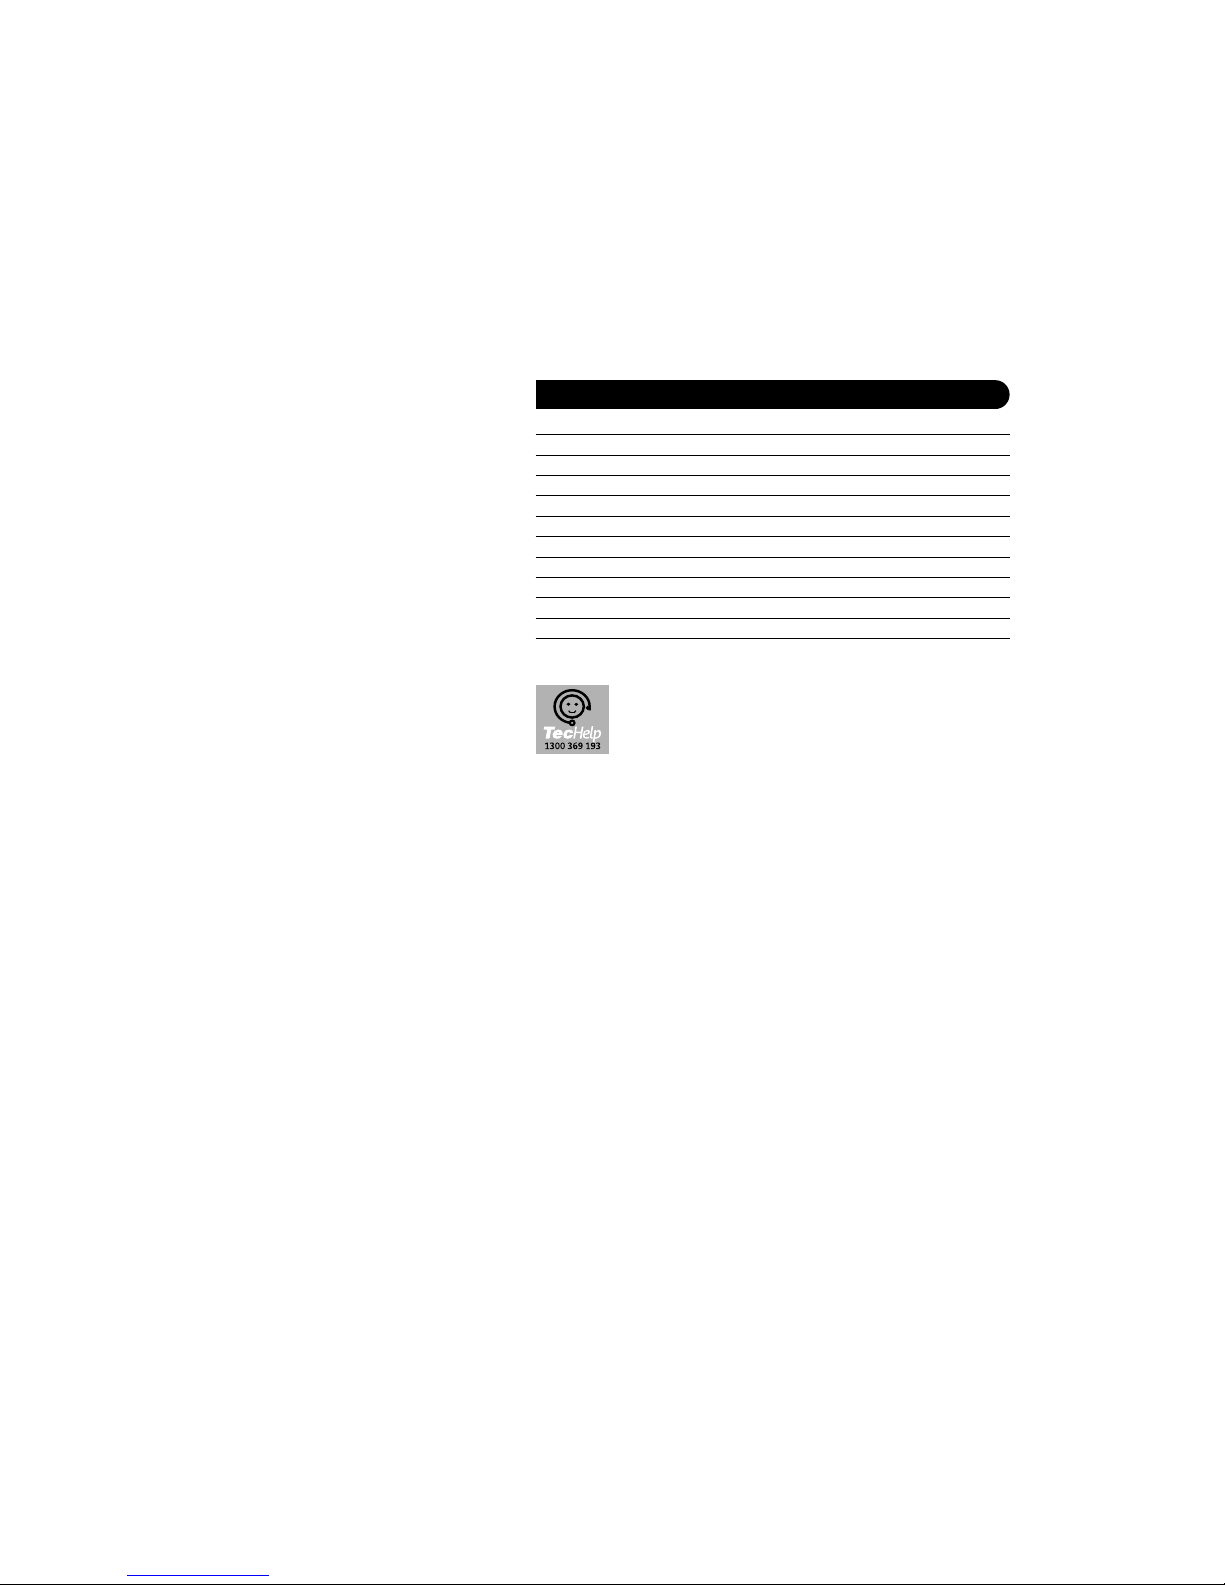
Accessing your M450 remotely from another tone phone
Keypad
Keypad
Menu for Remote Access Press
To hear main menu 1
To play all messages 2
To play new messages only 3
To Skip< during message 4
playback
To Delete a message during 5
playback
Menu for Remote Access Press
To Skip> during playback 6
To set answer ON or OFF 7
For Outgoing Message Menu 8
To set a new security code 9
To set Day and Time 0
For Mailbox Menu *

18
Product arranty
Telstra Guarantees your product for 12 months from
date of purchase against any defect in materials or
workmanship under conditions of normal use and
service and subject to proof of the date of purchase
being provided and subject to the conditions specified
below.
The benefits conferred by this warranty are in addition
to all other rights and remedies in respect of the
product that the consumer has under the Trade
Practices Act and similar State and Territory laws.
arranty Service Conditions
Subject to your statutory rights referred to above,
Telstra expressly limits its liability with respect to its
products to the person who purchases the Product
from the Telstra authorised retailer.
Subject to your statutory rights referred to above,
Telstra expressly limits its liability with respect to its
products to whichever is the lowest amount out of:
A. The cost of having the goods repaired
B. The cost of replacing the goods: or
C. The cost of obtaining equivalent goods.
Subject to your statutory rights referred to above, in
the event of the goods requiring service under
warranty,the owner is responsible for the cost of
transportation to the authorised service organisation.
Whilst in transit the goods are at the owner’s risk.
Subject to your statutory rights referred to above,
should the goods be found to be in sound working
order by the authorised service organisation the owner
may be charged a service fee.
Subject to your statutory rights referred to above, the
goods will not be eligible for service under this
warranty if:
A. Proof of date of purchase cannot be provided:
B. The goods are not branded Telstra:
C. The goods have been rented to another person;
D.The defect was caused by an accident, misuse,
abuse, improper installation or operation, lack of
reasonable care,unauthorised modification, loss of
parts, tampering or attempted repair by a person
not authorised by Telstra.
E. The product has been damaged by lightning or a
mains power surge.
Do you really need service?
Before calling for service under this warranty
have you :
Checked that all cables are securely connected as
detailed in the User Guide.
Referred to the User Guide to ensure that the features
are being used correctly.
If you are trying to access a network service such as
Call Waiting,confirmed with your network provider
that you have access to this feature.
If You Require arranty Service
To obtain service during the terms of this warranty:
Call the Product Information ine (1300 369 193) for
advice and assistance on the repair of your product, or
contact us by E-mail at: [email protected]
After consulting our operators,should it be deemed
necessary to have the product serviced, the operator
will inform you of your nearest authorised service
organisation and provide a Return Authority Number.
Please ensure that :
A. You provide proof of the date of purchase
B. That your product is suitably packaged (Preferably
in original packaging)
C. That you have included all components from the
original purchase:
D.That you provide details of the Return Authority
Number
IMPORTANT
Please retain this booklet with your sales receipt as
proof of the date of purchase.
Product arranty & Customer Service
Table of contents
Other Telstra Answering Machine manuals