manuals.online logo
Brands
  1. Home
  2. •
  3. Brands
  4. •
  5. Telvue
  6. •
  7. Server
  8. •
  9. Telvue AdCaster User manual

Telvue AdCaster User manual

Getting Started
TelVue AdCaster™ Digital Ad Servers
Turn the page for additional steps.
Screw in inner rail
to the server
QSG_AC_10_13_V1
1
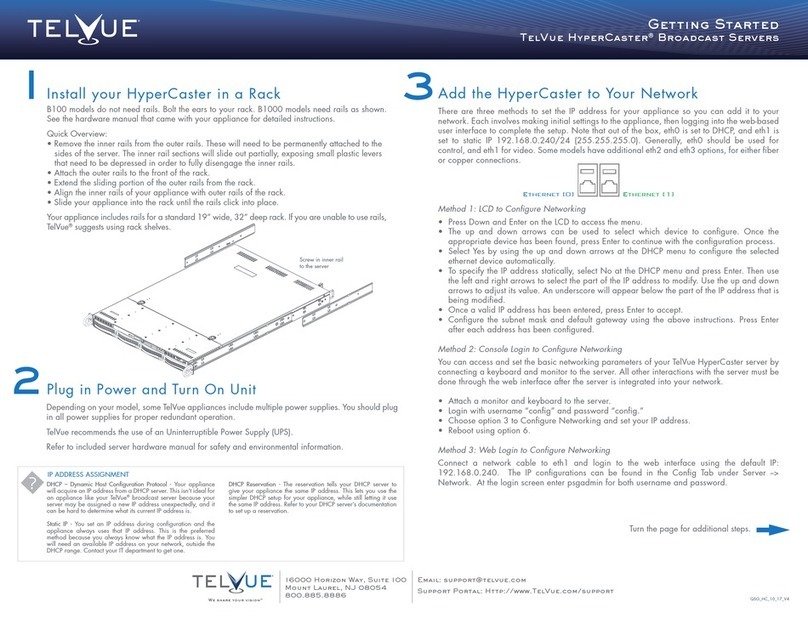
A100 models do not need rails. Bolt the ears to your rack. A1000 models need rails as shown.
See the hardware manual that came with your appliance for detailed instructions.
Quick Overview:
• Remove the inner rails from the outer rails. These will need to be permanently attached to the
sides of the server. The inner rail sections will slide out partially, exposing small plastic levers
that need to be depressed in order to fully disengage the inner rails.
• Attach the outer rails to the front of the rack.
• Extend the sliding portion of the outer rails from the rack.
• Align the inner rails of your appliance with outer rails of the rack.
• Slide your appliance into the rack until the rails click into place.
Your appliance includes rails for a standard 19” wide, 32” deep rack. If you are unable to use rails,
TelVue®suggests using rack shelves.
Install your AdCaster in a Rack 2
Depending on your model, some TelVue appliances include multiple power supplies. You should plug
in all power supplies for proper redundant operation.
TelVue recommends the use of an Uninterruptible Power Supply (UPS).
Refer to included server hardware manual for safety and environmental information.
Plug in Power and Turn On Unit
IP ADDRESS ASSIGNMENT
DHCP – Dynamic Host Configuration Protocol
Your appliance will acquire an IP address from a DHCP server. This isn’t ideal for an appliance like
your TelVue®Digital Ad Server because your server may be assigned a new IP address
unexpectedly, and it can be hard to determine what its current IP address is.
Static IP
You set an IP address during configuration and the appliance always uses that IP address. This is the
preferred method because you always know what the IP address is. You will need an available IP
address on your network, outside the DHCP range. Contact your IT department to get one.
DHCP Reservation
The reservation tells your DHCP server to give your appliance the same IP address. This lets you use
the simpler DHCP setup for your appliance, while still letting it use the same IP address. Refer to your
DHCP server’s documentation to set up a reservation.
16000 Horizon Way, Suite 500
Mount Laurel, NJ 08054
800.885.8886
Email: [email protected]
APIs: http://www.telvue.com/api
Support Portal: Http://www.TelVue.com/support
Training Videos: Http://www.TelVue.com/training
Powering IP Broadcast™
16000 Horizon Way, Suite 500
Mount Laurel, NJ 08054
800.885.8886
Email: [email protected]
APIs: http://www.telvue.com/api
Support Portal: Http://www.TelVue.com/support
Training Videos: Http://www.TelVue.com/training
Powering IP Broadcast™
Getting Started
TelVue AdCaster™ Digital Ad Servers
16000 Horizon Way, Suite 500
Mount Laurel, NJ 08054
800.885.8886
Email: [email protected]
APIs: http://www.telvue.com/api
Support Portal: Http://www.TelVue.com/support
Training Videos: Http://www.TelVue.com/training
Powering IP Broadcast™
4
QSG_AC_10_13_V1
TelVue recommends:
Google Chrome
Mozilla Firefox, 3.0 or higher
Internet Explorer 8.0 or higher
Apple Safari 3.0 or higher
• On a computer that is on the same network as your broadcast server, open a web
browser and navigate to http://[your_ip_address].
• At the login screen, enterpsgadmin for both theusername and password.
Login to the User Interface
What’s Next?
We have many resources available to help you further and get you up and running faster!
Solutions, documentation, literature, training videos and more are all at your fingertips.
Check them out!
http://www.telvue.com/support/
http://www.telvue.com/support/training/
If you would like to set up an appointment for training please contact the TelVue®
Support team at suppor[email protected].
3
There are three methods to set the IP address for your appliance so you can add it to your
network. Each involves making initial settings to the appliance, then logging into the web-based
user interface to complete the setup. Note that out of the box, eth0 is set to DHCP, and eth1 is
set to static IP 192.168.0.240/24 (255.255.255.0). Generally, eth0 should be used for
control, and eth1 for video. Some models have additional eth2 and eth3 options, for either fiber
or copper connections.
Method 1: LCD to Configure Networking
• Press Down and Enter on the LCD to access the menu.
• The up and down arrows can be used to select which device to configure. Once the
appropriate device has been found, press Enter to continue with the configuration process.
• Select Yes by using the up and down arrows at the DHCP menu to configure the selected
ethernet device automatically.
• To specify the IP address statically, select No at the DHCP menu and press Enter. Then use
the left and right arrows to select the part of the IP address to modify. Use the up and down
arrows to adjust its value. An underscore will appear below the part of the IP address that is
being modified.
• Once a valid IP address has been entered, press Enter to accept.
• Configure the subnet mask and default gateway using the above instructions. Press Enter
after each address has been configured.
Method 2: Console Login to Configure Networking
You can access and set the basic networking parameters of your TelVue AdCaster server by
connecting a keyboard and monitor to the server. All other interactions with the server must be
done through the web interface after the server is integrated into your network.
• Attach a monitor and keyboard to the server.
• Login with username “config” and password “config.”
• Choose option 3 to Configure Networking and set your IP address.
• Reboot using option 6.
Method 3: Web Login to Configure Networking
Connect a network cable to eth1 and login to the web interface using the default IP:
192.168.0.240. The IP configurations can be found in the Config Tab under Server -->
Network. At the login screen enter psgadmin for both username and password.
Add the AdCaster to Your Network
Ethernet [0] Ethernet [1]
Other Telvue Server manuals

Telvue HyperCaster User manual

Telvue

Telvue HyperCaster User manual

Telvue HyperCaster B100 User manual

Telvue

Telvue HyperCaster B100 User manual

Telvue HyperCaster User manual

Telvue

Telvue HyperCaster User manual

Popular Server manuals by other brands

IBM SCOD-3ZVQ5W Configuration and options guide

IBM

IBM SCOD-3ZVQ5W Configuration and options guide

Red Hat NETWORK SATELLITE 5.2 - CHANNEL MANAGEMENT reference guide

Red Hat

Red Hat NETWORK SATELLITE 5.2 - CHANNEL MANAGEMENT reference guide

VITRONIC SNE-1001-E user manual

VITRONIC

VITRONIC SNE-1001-E user manual

Meinberg LANTIME/SHS/BGT manual 

Meinberg

Meinberg LANTIME/SHS/BGT manual 

Moxa Technologies NPort 5200 Serie user manual

Moxa Technologies

Moxa Technologies NPort 5200 Serie user manual

Fujitsu Primergy RX300 S2 Start guide

Fujitsu

Fujitsu Primergy RX300 S2 Start guide

Dell Force10 MXL Blade reference guide

Dell

Dell Force10 MXL Blade reference guide

AMX MAX-HT12T datasheet

AMX

AMX MAX-HT12T datasheet

Tekelec T1000 Hardware manual

Tekelec

Tekelec T1000 Hardware manual

HP StorageWorks P4000 Series Release notes

HP

HP StorageWorks P4000 Series Release notes

Dell EMC PowerEdge T440 Simple operation manual

Dell

Dell EMC PowerEdge T440 Simple operation manual

Lenovo ThinkServer RD210 installation instructions

Lenovo

Lenovo ThinkServer RD210 installation instructions

Leightronix UltraNEXUS user manual

Leightronix

Leightronix UltraNEXUS user manual

DW Blackjack P-RACK quick start guide

DW

DW Blackjack P-RACK quick start guide

Asus TS300-E8-PS4 Configuration guide

Asus

Asus TS300-E8-PS4 Configuration guide

HP ProLiant DL160 Gen8 user guide

HP

HP ProLiant DL160 Gen8 user guide

H3C UniServer R4300 G5 Installation, quick start

H3C

H3C UniServer R4300 G5 Installation, quick start

Siemens RUGGEDCOM RS416P installation guide

Siemens

Siemens RUGGEDCOM RS416P installation guide

manuals.online logo
manuals.online logoBrands
  • About & Mission
  • Contact us
  • Privacy Policy
  • Terms and Conditions

Copyright 2025 Manuals.Online. All Rights Reserved.