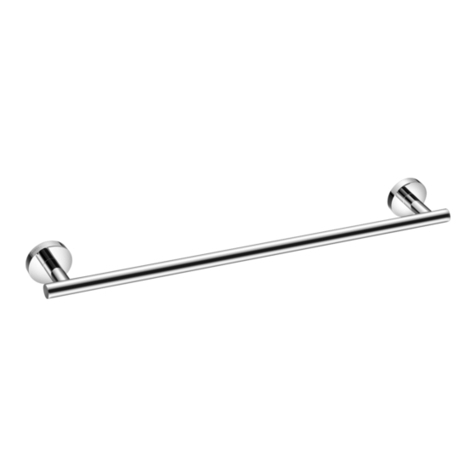
TEMPLE & WEBSTER build TBR44PS User manual

Heated Towel Rail
Installation
Instructions
Please read these instructions carefully before installation.
Hardwire Installation should be carried out by a qualified electrician

Check you’ve got everything:
You will also need:
•Cross Head Screwdriver
•Pencil
•Spirit Level
•Tape Measure
•Drill Bits (6mm & 15mm)
•Cordless Drill
•Electrical Supply
Machine Screw
x 2
Grub Screw
x 10 (in legs)
Mounting Bracket
x 3
White Concealed Wiring
Sleeve
Allen Key
x 1
Concealed Wired Leg x 2
Wall Plug x 4
Countersunk
Screw x 4
Exposed Wired Leg x 1
Exposed
Wiring
Mounting
Bracket x 1
Non –Wired Leg x 2
Please note these parts are
not to scale

Concealed Wiring Installation
Collect the parts you need
Ensure that you have all the correct parts needed for concealed wiring
installation of this towel rail. Any additional parts that are for exposed wiring will
not be required.
Fix the legs to the rail
First, decide which side you want to connect the electrical supply to and then
allocate the appropriate legs to each of the three remaining mounting points.
Remove the mounting brackets from inside the legs by releasing the grub
screws with the allen key provided. Attach the two non-wired legs to the rail
using the machine screws and a cross head screw driver. Attach the third leg to
the non-wired point at the bottom of the rail using two grub screws.
Plan and Measure Your Installation
Measure and mark out the four wall bracket positions making sure they are
level. The easiest way to mark this is to put some masking tape or similar at
the location of the four mounting positions and then hold the rail against the
wall and once it is straight and level mark the four leg footprints on the tape.
We recommend that the rail is installed onto a flat uniform wall at least 600mm
from the floor, with a 300mm clearance from permanent fixtures. Where
possible the Heated Towel Rail should be screwed into studs or if fixing to
hollow walls suitable anchors should be used to ensure rail is secure.

Install the Wall Brackets
Drill a 6mm hole in the centre of each of the four marked mounting positions
and insert the wall plugs provided into the three non-wired legs. Now fix the
three wall brackets in place using the countersunk screws and a cross head
screwdriver. In the fourth position, use the pilot hole to drill a larger hole (15mm)
for the concealed wiring sleeve & electrical cable.
Connect Electrical Cable & Wall Bracket
Remove the 3 pin plug from the end of the lead. Connect the lead to the rail at
your chosen position by unscrewing the screw cap (See Diagram 2a.), inserting
the lead into the connection point ensuring that the pins match up correctly using
the arrows marked (See Diagram 2b.) and tighten the screw cap (See Diagram
2c.). Slide the concealed wiring leg over the electrical cable (See Diagram 2d.)
and fix in place using the grub screws provided (See Diagram 2e.).
Connect to Main Supply
Ensure the mains power supply is switched off before carrying out any electrical
work. Slide the concealed wiring sleeve over the exposed end of the electrical
cable and insert into the hole in the wall. This will be tight fit so the sleeve will
need to be hit in with a hammer. Connect the lead to the mains supply in
accordance with current electrical regulations.
Fix Rail to the Wall
Fit the rail to the mounting brackets installed on the wall. Tighten using the grub
screws and the allen key provided. Your installation is now complete.

Exposed Wiring Installation
Collect the parts you need
Ensure that you have all the correct parts needed for exposed wiring installation
of this towel rail. Any additional parts that are for concealed wiring will not be
required.
Fix the legs to the rail
First, decide which side you want to connect the electrical supply to and then
allocate the appropriate legs to each of the three non-wired remaining mounting
points. Remove the mounting brackets from inside the legs by releasing the
grub screws with the allen key provided. Attach the two non-wired legs to the
rail using the machine screws and a cross head screw driver. Attach the third
leg to the non-wired point at the bottom of the rail using the grub screws
provided.
Plan and Measure Your Installation
Measure and mark out the four wall bracket positions making sure they are
level. The easiest way to mark this is to put some masking tape or similar at
the location of the four mounting positions and then hold the rail against the
wall and once it is straight and level mark the four leg footprints on the tape.
We recommend that the rail is installed onto a flat uniform wall at least 600mm from the
floor, with a 300mm clearance from permanent fixtures. Where possible the Heated
Towel Rail should be screwed into studs or if fixing to hollow walls suitable anchors
should be used to ensure rail is secure

Install the Wall Brackets
Drill a 6mm hole in the centre of each of the four marked mounting positions
and insert the wall plugs provided. Now fix the three wall brackets in place using
the countersunk screws and a cross head screwdriver. In the fourth position
attach the exposed wiring mounting bracket using a countersunk screw.
Connect Electrical Cable & Wall Bracket
Slide the exposed wired leg over the end of the lead and connect the lead to
the rail at your chosen position by unscrewing the screw cap (See Diagram 2a.),
inserting the lead into the connection point ensuring that the pins match up
correctly using the arrows marked (See Diagram 2b.) and tighten the screw cap
(See Diagram 2c.). Slide the exposed wired leg towards the rail (See Diagram
2d.) and fix in place using the grub screws provided (See Diagram 2e.).
Fix rail to the Wall
Fit the rail to the mounting brackets installed on the wall. You may need
assistance to hold the rail in place. Tighten using the grub screws and the allen
key provided.
Power Up
Plug the lead into your power point to complete your installation.

Safety Information
Heated Towel Rails should be installed by a qualified electrician and in
accordance with current local regulations. We recommend that the rail is
installed onto a flat uniform wall at with a 300mm clearance from permanent
fixtures. Where possible the Heated Towel Rail should be screwed into studs or
if fixing to hollow walls suitable anchors should be used to ensure rail is secure.
Warning: In order to avoid a hazard for very young children, this appliance
should be installed so that the lowest heated rail is at least 600mm above the
floor.
Please read and understand this installation guide in full before commencing
installation.
•Observe and adhere to electrical guidelines and IP ratings when placing
your rail in wet areas
•Ensure any timers or switches used are installed in correct zones
according to the IP rating of the timer/switch
•Ensure that your rail is protected by a suitably rated RCD circuit
•Do not use the towel rail to hold towels or other articles that have been
in contact with oil, petroleum based products or dry cleaning fluids
•This appliance is not intended for use by persons (including children)
with reduced physical, sensory or mental capabilities, or lack of
experience and knowledge, unless they have been given supervision
or instruction concerning use of the appliance by a person responsible
for their safety.
•Children should be supervised to ensure that they do not play with the
appliance.
•Do not immerse your rail in any liquid
•If the supply cord is damaged, it must be replaced by the
manufacturer, its service agent or similarly qualified persons in order
to avoid a hazard

Care Information
The finish of your Heated Towel Rail is hard-wearing and easy to maintain.
However, any harsh scrubbing, scratching or acid-based cleaning products will
damage the surface of your towel rail. Cleaning with a soft cloth and a non-
abrasive cleaning agent will give the best results.
Warranty Information
This rail is covered with a 5 year replacement warranty for polished finishes
and 2 year warranty for coloured finishes.
Our goods come with guarantees that cannot be excluded under the
Australian Consumer Law. You are entitled to a replacement or refund for a
major failure and compensation for any other reasonably foreseeable loss or
damage. You are also entitled to have the goods repaired or replaced if the
goods fail to be of acceptable quality and the failure does not amount to a
major failure.
For full warranty terms and conditions please refer to the warranty section on
our website: www.thebuild.com.au or www.templeandwebster.com.au.
Contact Information
Call us on 1300 461 911 or visit us at the below:
www.templeandwebster.com.au
www.thebuild.com.au
Code
Size
Finish
Wattage
Profile
TBR44PS
600x800
Polished
105W
Round
TBR44BR
600x800
Brushed
105W
Round
TBR44BK
600x800
Black
110W
Round
TBR44BB
600x800
Brushed Brass
105W
Round
TBS44PS
600x800
Polished
105W
Square
TBS44BK
600x800
Black
110W
Square
Warranty Information
Warranty Registration
This manual suits for next models
5
Table of contents
Popular Bathroom Fixture manuals by other brands
noken
noken Arquitect 100123476 Installation and Maintenance

Speakman
Speakman CPT-24400 instructions

Triton
Triton Aspirante 8.5kW Installation and operating instructions

Aurlane
Aurlane CAB 206 manual

UBERHAUS DESIGN
UBERHAUS DESIGN 98495003 Operator's manual

Stern
Stern ARTIS H Installation and maintenance guide

Nadoli
Nadoli DW1-3736 instruction manual

Fantini Rubinetti
Fantini Rubinetti CUPOLINO HAMMAM 9100W098 instructions

Bossini
Bossini Arch L00865 INSTALLATION AND CARE INSTRUCTIONS

aquabrass
aquabrass MB2 installation guide

WOLSELEY
WOLSELEY SARACEN Installation and maintenance guide

Dornbracht
Dornbracht 13 800 720-FF installation instructions