Teradek CTRL.3 User manual

CTRL.3
Quick Start Guide

TABLE OF CONTENTS
Physical Properties .............................. 2
Power and Connect ............................. 3
Pair Controller and Receiver ............... 3
Camera Run/Stop ................................ 3
Controller Menu Operation.................. 4
Lens Mapping ....................................... 5
Lens Data Overlay ................................ 7
FIZ Limits .............................................. 8

I
K
A
C
G
I
D
2
PHYSICAL PROPERTIES
F
E
H
B
J
MOTR.XMDR.X
COMPATIBLE DEVICES
To take advantage of the features and functionality
that CTRL.3 has to oer, you will need to pair the
controller with a compatible Teradek RT receiver
and congure up to three Teradek RT motors.
A: Wired-mode input
B: REC/PWR button
C: Force joystick
D: Status LED
E: A/B thumbwheels
F: OLED Menu screen
G: Menu buttons
H: Limit buttons
I: Slider
J: Mini-USB
K: Lens ring
L: Knob
L

Connect the motor(s) to the receiver using a 4-pin connector. If connecting two or more motors, use
a 4-pin to 4-pin connector to daisy-chain them together. The motor(s) will then begin calibrating.
2
3
Attach the motor(s) to the rods/lens.
Connect power to the receiver’s PWR port (N).
1
Insert an LP-E6 battery in the controller, then press the REC/PWR (B) button to turn on the controller.
4
Press the MENU button on the controller, then navigate to WIRELESS>FIND RECV to scan for active
receivers and automatically pair. The LED on the controller will turn green once paired.
Wireless Pairing
Connect a 5-pin connector from the controller’s wired-mode input (H) to the IN-1 input on the receiver.
The controller and receiver will remain paired even after disconnecting the 5-pin connector. The LEDs
on the controller and receiver will turn blue once paired.
Wired Pairing
3
PAIR CONTROLLER AND RECEIVER
POWER AND CONNECT
If the controller has not been paired to a receiver, you can use one of the following methods to pair
both devices:

Press the REC button on the controller (C) to start/stop recording on the camera.
2
NOTE: If using a RED camera, the camera serial communication setting must be set to RCP
(Redlink Command Protocol) for the unit to operate.
Connect a camera cable from the CAM/Control port on the receiver to the camera, then navigate
to MENU>CAMERA on the CTRL.3 to indicate which camera you have connected.
1
CAMERA RUN/STOP
4
Press the MENU button, then use the ▲, ▼ and SET button to navigate through the dierent
menu options.
• POWER OFF - Power OFF the controller
• LENS - Congure lens mapping function
• MOTORS - Congure attached motor(s)
• INPUTS - Congure controller’s knobs/slider
• WIRELESS - Congure wireless settings
• CAMERA - Select the make of the camera
• LIMIT - Congure knob’s range
• SCREEN - Change display settings
• BUTTONS - Assign functions to the buttons
• RX CONFIG - Congure auxiliary controllers,
such as a thumbwheel or zoom rocker
• ADV - Contains device info menu, licenses,
and advanced functions for debugging
CONTROLLER MENU OPERATION

• OFF - Unit is powered o
• YELLOW - No wireless connection
• RED - Camera is recording
• ORANGE - PC/Bootloader mode
• WHITE - Checking RF module status
• GREEN - Wireless is synched
• BLUE - Wired-mode connection
Controller Status LED
The controller status LED indicates when the system is ON and provides the system’s current status
during operation.
5
The LENSMAP menu lets you create your own lens map(s) according to lens manufacturer and lens
type. Once a lens map has been created, you can SELECT it for use with the controller, EDIT the lens
map’s name and/or parameters, modify the lens map’s BEHAVIOR, or DELETE the map. Use the
following steps to create a lens map.
LENS MAPPING
Select whether the lens is a prime or zoom lens. If it’s a prime lens, enter the lens’ xed focal length
(e.g. 35mm, 85mm). For zoom lenses, enter the focal length range (e.g. 24-70mm, 70-200mm).
2
3
Select the lens brand, then create a name to identify the lens map.
Enter the CTRL.3 menu, then navigate to LENS>LENSMAP>CREATE.
1

6
Press the MENU button, then select TABLE DONE. You will then be prompted to create an iris or
focus distance table, depending on the type of lens. Select YES.
6
7
Using the Up and Down buttons on the controller, enter the corresponding mark, then select OK.
Repeat for all marks until they have all been mapped to the controller.
Move the controller knob so that the motor adjusts the lens ring to the smallest mark.
5
Repeat steps 5 through 7 for each motor you want to map
8
10 Navigate to LENS>LENSRING>SELECT and select the corresponding lens ring size.
Attach a lens ring to the controller’s knob.
9
For prime lenses you will be prompted to create an Iris table. For zoom lenses, you will be
prompted to create a focal length table, then an iris table after. Make sure a motor is attached to the
corresponding ring, and both the motor and controller are set to the same class (Focus, Iris, Zoom).
4
7
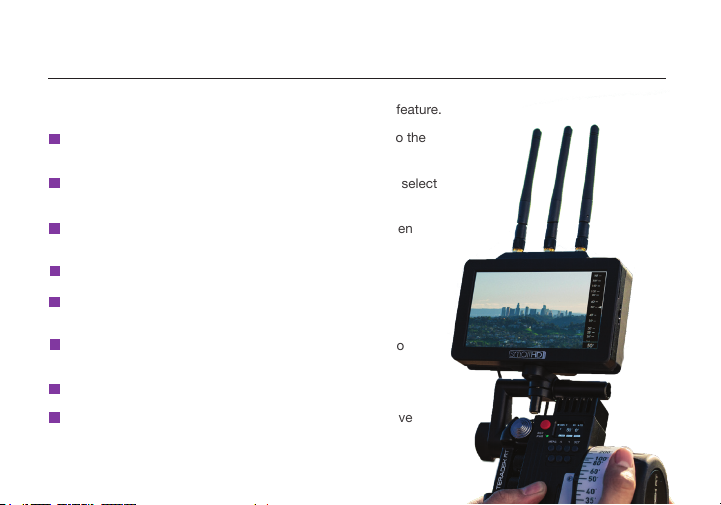
LENS DATA OVERLAY
SmallHD monitors include a Lens Data Overlay feature that displays your CTRL.3 lens map on the
monitor. Below are steps to enable the Lens Data Overlay feature.
Press the MENU button to return to the main menu, then
navigate to ADV>SMALLHD.
2
3
From the controller, navigate to LENS>LENSMAP and select
one of the congured lens maps.
Update your CTRL.3 controller and SmallHD monitor to the
latest rmware.
1
Select TERADEK RT.
6
7
Tap the screen on the SmallHD monitor and navigate to
ADD NEW TOOL>ADD ONS.
Connect a cable from the controller’s wired mode
connector to the monitor’s USB port.
5
The Lens Map Overlay will appear on the right and move
according to controller’s knob movements.
8
Select YES to activate SmallHD Comms.
4

CTRL.3 limit buttons allow you to set a limit range for either the Focus, Iris, or Zoom controls. Setting
limits restricts the motor from adjusting the lens past a set limit.
FIZ LIMITS
While continuing to hold down the limit button, move the input to the other end of the limit you
want to set, then release. The limit range is now set.
2
3
Press and hold down the limit button for the corresponding axis (H).
Move the input to the high or low end of the limit you want to set.
1
To completely lock the motor, press and release the limit button without moving the
corresponding input.
5
To remove the limit range, press the limit button.
4
8

Teradek regularly releases new rmware versions to improve performance, add new features,
or to x vulnerabilities. Visit https://www.teradek.com to update your device with the latest
rmware.
SUPPORT: http://support.teradek.com → Contains tips, information and all the latest rmware
& software updates.
6pm PST)
NEED MORE HELP?
Other manuals for CTRL.3
1
Table of contents
Other Teradek Camera Accessories manuals


Popular Camera Accessories manuals by other brands

Viltrox
Viltrox EF-NEX Mount instructions

Calumet
Calumet 7100 Series CK7114 operating instructions

Ropox
Ropox 4Single Series User manual and installation instructions

Cambo
Cambo Wide DS Digital Series Main operating instructions

Samsung
Samsung SHG-120 Specification sheet

Ryobi
Ryobi BPL-1820 Owner's operating manual


