manuals.online logo
Brands
  1. Home
  2. •
  3. Brands
  4. •
  5. Nikon
  6. •
  7. Camera Accessories
  8. •
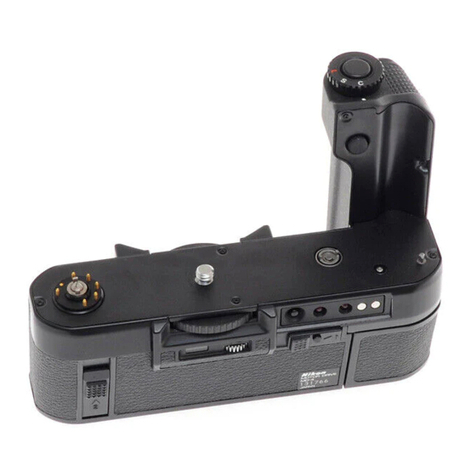
  9. Nikon ND40N Parts list manual

Nikon ND40N Parts list manual

Other Nikon Camera Accessories manuals

Nikon MC-EU1 User manual

Nikon

Nikon MC-EU1 User manual

Nikon WM-E80 User manual

Nikon

Nikon WM-E80 User manual

Nikon MC-EU1 User manual

Nikon

Nikon MC-EU1 User manual

Nikon MD-15 User manual

Nikon

Nikon MD-15 User manual

Nikon WP-CP2 User manual

Nikon

Nikon WP-CP2 User manual

Nikon SB-400 User manual

Nikon

Nikon SB-400 User manual

Nikon EN-EL11 User manual

Nikon

Nikon EN-EL11 User manual

Nikon AF-S NIKKOR 24mm f/1.8G ED User manual

Nikon

Nikon AF-S NIKKOR 24mm f/1.8G ED User manual

Nikon SB-26 - Speedlight User manual

Nikon

Nikon SB-26 - Speedlight User manual

Nikon EN-EL4 User manual

Nikon

Nikon EN-EL4 User manual

Nikon SB-300 User manual

Nikon

Nikon SB-300 User manual

Nikon AF Nikkor User manual

Nikon

Nikon AF Nikkor User manual

Nikon AF-S NIKKOR 24mm f/1.8G ED User manual

Nikon

Nikon AF-S NIKKOR 24mm f/1.8G ED User manual

Nikon EN-EL7E User manual

Nikon

Nikon EN-EL7E User manual

Nikon AF-S DX NIKKOR 18-105mm f/3.5-5.6 ED VR User manual

Nikon

Nikon AF-S DX NIKKOR 18-105mm f/3.5-5.6 ED VR User manual

Nikon HL-CP10 User manual

Nikon

Nikon HL-CP10 User manual

Nikon SB-29 User manual

Nikon

Nikon SB-29 User manual

Nikon WT-6 User manual

Nikon

Nikon WT-6 User manual

Nikon AF Nikkor 85mm f/1.4D IF User manual

Nikon

Nikon AF Nikkor 85mm f/1.4D IF User manual

Nikon 24mm F/1.4G ED AF-S Nikkor User manual

Nikon

Nikon 24mm F/1.4G ED AF-S Nikkor User manual

Nikon AF-S NIKKOR 600mm f/4E FL ED VR User manual

Nikon

Nikon AF-S NIKKOR 600mm f/4E FL ED VR User manual

Nikon EN-EL3a User manual

Nikon

Nikon EN-EL3a User manual

Nikon UT-1 User manual

Nikon

Nikon UT-1 User manual

Nikon SB-400 User manual

Nikon

Nikon SB-400 User manual

Popular Camera Accessories manuals by other brands

CamRanger CamRanger user manual

CamRanger

CamRanger CamRanger user manual

Custom Brackets HDV CAGE KIT Instructions for use

Custom Brackets

Custom Brackets HDV CAGE KIT Instructions for use

Aegis ABL052010P user manual

Aegis

Aegis ABL052010P user manual

Saft SRA Series Installation and operating instructions

Saft

Saft SRA Series Installation and operating instructions

Kodak TIB5200 technical information

Kodak

Kodak TIB5200 technical information

Videotec HEG instruction manual

Videotec

Videotec HEG instruction manual

Ikelite 6171.11 manual

Ikelite

Ikelite 6171.11 manual

Pentax Auto Bellows Slide Copier K user manual

Pentax

Pentax Auto Bellows Slide Copier K user manual

dji RONIN 4D quick start guide

dji

dji RONIN 4D quick start guide

SLIK ABLE 300DX user manual

SLIK

SLIK ABLE 300DX user manual

Rebelcell 36V70 user manual

Rebelcell

Rebelcell 36V70 user manual

Trojan GC2 48V quick start guide

Trojan

Trojan GC2 48V quick start guide

Calumet 7100 Series CK7114 operating instructions

Calumet

Calumet 7100 Series CK7114 operating instructions

Ropox 4Single Series User manual and installation instructions

Ropox

Ropox 4Single Series User manual and installation instructions

Cambo Wide DS Digital Series Main operating instructions

Cambo

Cambo Wide DS Digital Series Main operating instructions

Samsung SHG-120 Specification sheet

Samsung

Samsung SHG-120 Specification sheet

Ryobi BPL-1820 Owner's operating manual

Ryobi

Ryobi BPL-1820 Owner's operating manual

TBB power Energy Hub EH128L user manual

TBB power

TBB power Energy Hub EH128L user manual

manuals.online logo
manuals.online logoBrands
  • About & Mission
  • Contact us
  • Privacy Policy
  • Terms and Conditions

Copyright 2025 Manuals.Online. All Rights Reserved.

Battery
Grip
ForNIKON
D60/D40/D40X
f[| ND40N-Battery
GripInstruction
ForUsage
@@
@
r\-/v
llI- v
I \:G
Diagram
E
Thank you for purchase of ND40N standard battery grip for use with Nikon D40/D40)VD60 Single-lens reflex digital camera The ND40N grip
takes one or two EN-EL9 batteries or six M batteries,especially sultable for shooting in a large quantity or low temperatufes environment
It also includes a vertical-grip shuttetrrelease button to enable shooting in the same fashion as a horizontal grip
A PartsName
'1. Battery chamber release latch
2. Battery chamber
3. Attach/detach knob
4. Attachmentscrew
5. Grip electrical pole
6, Electrical contact
7. Tripod socket
A InstallingBattery
8. Vertical-grip
switch
9. Vertical-grip
shutterbutton
10, Camerabafterychambercoverstoragearea
1'1,Controllock
12, Vertical
grip
shutter
parts
13. AAbatterymagazine
'14, EN-ELgbatterymagazine
Use
theEN-ELg
BatteryPacks
1. Pressdownthebatterymagazine
lockknobandopenthebattery
compartment@ver,andthen
pull
outtheEN-ELgbatterymagazineor
theAAbatterymagazine(Diagram
AandDiagramB)
2. InstalltwoEN-EL9batterypacksasshownbytheindicatorsonEN-EL9batterymagazine(BesurethatthecontactorofEN-EL9battery
isupturned),andtheninsert
themtothebatterymagazine
alongthecontactof
position
Besurethat
thecontactorofEN-ELgbatteryisat
the
gap
ofthemagazineInserttheEN-ELg
batterymagazineintothebattery
grip
andclosethebatterycompartmentcoverandbesure
thatthecoverislocked
wellbeforeusing
(Diagram
CandDiagramD)Lithiumbaftery
packs
are
installed
Note:Thebattery
grip
can
alsouseonlyoneEN-ELgbattery
. lfonlyoneEN-EL9batteryisuseditmaybeinsertedineither
the
right
orlettsides
. lf twobatterypacksae inselted,powissupplied si@ltareouslyiy both-batteA/
packs- _
. Twobattery
packs
withdifferentcharginglevels
canbeinsertedandusedwithout
any
problems
Use
AABatteries
1. InsertsixNl-MH(AA)batteriesintoAA
batterymagazinewiththedirection
shown[+][-]ontheinsideBatterymagazine
(Diagram
E)
2, InstalltheAAbatterymagazine
intothebatterychambecthenciose
thebatterychambercoverandbesurebatterycoverisonthelocked
position(Diagram
F)
. WhenAAbatteriesareused,fewerimagescanbeshotTherefofe,usageofAAsizebatteriesisrecommendedonlyforemergencies
. lfusingthrowawayAAsizebatteries,thecameramaynotfunctionwhenusedintemperaturesbelow20Corforcertainbatterybrandsand
storageconditionsAlso,insert
six
new
batteriesthatarethesamebrandDonot
useoldandnewbatteriestogethel
Installing Battery Grip
'1, BesufethatthecameraisonOFF,slidethecamera'schamber@verin45Cdndmoveitup,andthenremovethebatteriesfromthe
camera chamber Please keep the battery chamber cover up to avoid batteries falling off (Diagram G)
2, Camera' s battery chamber cover can be stored in battery grip' s camera battery chamber cover storage area as illustrated (Diagram H)
3, Insertthebatterygripelectricalcontactstocamera'sbatterychamberandaligntheattachmentscrewwiththecamera'stripodsocket,
then turn the attach/detach knob to tighten securely (Diagram l)if there is a space left ,please fe-attach the battery grip
4. Thewholeinstallprocessfinished,Turnonthecamera,andmakesurethatthecamera'sLCDdispiaysthefigures
5, To dispatch the battery grjp,reverse the above steps
A SetandusetheVertical-grip
shutter
'1. TurntheVertical-grip
switchto "ON" Press: " E" buttontwotimestoenterMenuSetthecameratoShootingmodebypressing
multi-
selectorandthepress "OK" button
(Diagram
J)Setmulti-selectorbuttonto "! " ,and
press
theVertical-grip
switch
(DiagramK)
TheVertical-grip
system
pops
upautomaticallyTheVertical-gripisavailableforwork
2. TheVertical-gripalsoworks
in "! 25" stat6eress " E' buttontlvotimes
toenterMenuSetthecameratoShootingmodeby
pressing
multi-selectorandthepress
"OK" button,setmulti-selectofbuttonto
"E25" andpresstheVertical-gripswithTheVertical-gripsystem
pops
upautomaticallyThen
press
theVertical-grip
shutterbutton,2secondstime-lapse
and
then
theshutterwillstartThis
isespecially
suitableforshootingsceneandstilllifewithtripod
. ThisVertical-gripisa procedure
After
pressing
anddisentangling
the
Vertical-grip
shutterbutton,camerafocusingandshootautomatically.
Whenshootinginhorizontal
position,camera
shouldnotin " E " or "E25" state
. Whensho-dlingln hiiizomaTpos-t'o,push
the-Vetrtical-gripsystembacktoprevent
damegeaeeidentally.Thereis-ecraakinefwher-puslrinE-
back(DiagramL)
A Using
the Battery
GriP
The common control function:
. Tum the vertical-grip operation ON/OFF switch to ON(Diagram '11)
The buttons and dials on the battery grip function in the same way as those on me camera
. When shooting in the horizontal-grip position,it ls recommended that you turn the vertical-grip operation oN/OFF switch to OFF so that
you do not accidentally use the buttons or dials on the battery grip
A Caution
1, The Battery Grip is notwaterproof
2, Never attempt to disassembte or repair the product by youreelf Any malfunction or accident resulting from such actlon is not @vered by
the warranty
3. Make sure that the camera is on OFF when attach the battery grip'
4, Batteries must be in accordance with the directions as shown[+]Flon the inside battery magazine when inserting
5. When replacing batteries,be sure to replace all batteries with new batteries of the same brand and never mix old and new batteries
simultaneously,failure-to observe this precaution @uld result in shorten the battery life or bad connection
6, When the €mera is not to be used for an extended pefiod,remove the batteries from the battery grip
Donotshort-circuit
the battery
gripwith batteries
installed
Donotcarryorstorethebatterygripwithbatteriesinstalledtogetherwithmetallicobjects,lfthebatterygrip'selectricalcontactstouchwlth
theconductiveobjects(likemetallicplate,keysetc')shortwillbecausedinthe "+r'poleofbatterygrip
Using
thecamera
in lowtemperatures
Batteries
weaken
inlow
temperatures,which
may
because
malfunctions,To
avoid
this,itis
recommended
to
carry
freshbatteries
Alternating
batteries
regularly
with
keepthem
warmanci
helpensure
smooth
operation
storing
the@mera
in
awarm
pleo6whileitlsnutnfiK€tflg€B'cF-'
recommended By low-temperature the number of the film shooting decrease and batteries weakened can recover when returned to normal
temperature l-lowever,avoid drastic changes in lemperature,because this may cause unstable voltage
A Battery
state
Checkthe batteries capacity provide on the camera' s LCD panel
Battery
Life
Shooting
condition
Temperature Normal
Temperature
20'c Low
Temperature
0c
TwoEN-EL9
baftery
NOflash
use Appro
4000 Appro
2200
TwoEN-ELg
battery
50% flash
use Appro
2200 Appro
1600
MNl-MH 2300MLiH
battery
Noflash
use Appro
4000 Appro800
AA
Nl-MH
2300MAJH
battery
50%
flashuse Appro-2200 Appro
400
The entire data are based on the standard test of the manufacture we apologize if there are any mistakes or misprints in the instruction
Design and specifi€tion are subject to change without notice