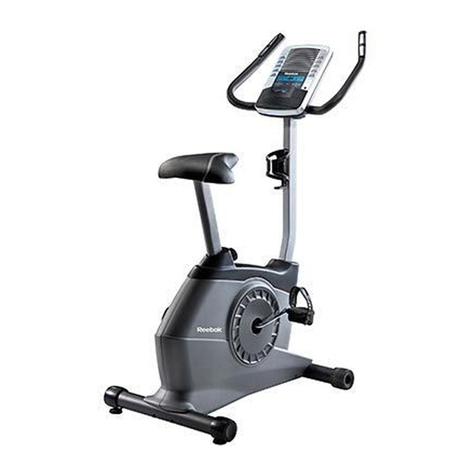
Terracoda Exercise cycle User manual

Ownerʼs manual
Assembly and operation
TERRACODA BIKE

INTRODUCTION
Congratulation on purchasing the Terracoda Bike.
This unique exercise cycle will provide you with a
cardiovascular workout simulating riding a real bicy-
cle. The upper frame with seat, crank, flywheel and
handlebar is tiltable from side to side, this tilt move-
ment is controllable through turning the handlebar
and balance of your body. The pedals provided on
this training bike, developed by Flexiped AS and
exclusively distributed by Terracoda, a have a unique
feature in the optional tiltable motion which is trans-
verse the direction of foot motion. These features
provide for proprioceptive exercise options.
The effects of using the Terracoda Flexipedal is
documented in a medical report by Per Høiness,
(corresponding author at Orthopaedic Surgical De-
partment, Ullevaal University Hospital) published
in Scandinavian Journal of Medicine& Science in
Sports in 2003 (13:266-271).
The Terracoda Bike is designed for indoor use only. This
manual should be studied carefully before any operation.
Take notice of all safety instructions provided. Before
beginning any fitness program, you should have a
complete physical examination by your doctor.
TABLE OF CONTENTS
Introduction ................................................................................................................................................. 2
Safety and precautions ................................................................................................................................ 3
Important safety information ...................................................................................................................... 3
Unpacking and assembly ............................................................................................................................ 4
Assembly part list ....................................................................................................................................... 4
Assembly step 1–4 ...................................................................................................................................... 5
Leveling and transport ................................................................................................................................ 6
Operation ..................................................................................................................................................... 6
Pedals .......................................................................................................................................................... 7
The effect of proprioseptive training .......................................................................................................... 8
Use .............................................................................................................................................................. 8
Maintenance instructions ............................................................................................................................. 9
Service ......................................................................................................................................................... 9
Part list ........................................................................................................................................................ 10
Limited warranty ......................................................................................................................................... 11
The Specifications and descriptions in this manual were
accurate at the time of printing. Improvement is a constant
goal at Terracoda; therefore we reserve the right to make
changes in specifications at any time without notice and
without incurring obligation.
The information in this manual is given in good faith.
However any person who uses this information in any way,
does so entirely at his or her own risk. Neither Terracoda, nor
its representatives can accept responsibility for any damage or
injury incurred as a result of information presented here except
under the terms of warranty of Terracoda products.
2

SAFETY AND PRECAUTIONS
Read all instructions in this manual before using the
Terracoda Bike. These instructions are written to
ensure your safety and to protect the unit.
> It is the responsibility of the owner to ensure that
all users of the Terracoda Bike are adequately
informed of all precautions.
> Assemble and operate the Terracoda Bike on a
solid, level surface. A mat beneath it would help
to protect the floor or carpet. Keep the Terracoda
Bike indoors, away from moisture and dust.
> Check the Terracoda Bike before each use. Do not
use the Terracoda Bike if it is not completely
assembled or if it is damaged in any way. Inspect
and tighten all parts regularly. Replace any worn
parts immediately.
> Inspect the Crank Arms and Pedals daily for any
signs of stress fatigue, and check Brake Pads for
its wear periodically. The safety level of the
equipment can be maintained only if it is
examined regularly for damage and wear.
> Never allow children on or near the Terracoda
Bike. Keep hands away from revolving parts.
Keep pets and animals away from the equipment
at all times.
> The Terracoda Bike should not be used by persons
weighing more than 120 kg.
> Wear proper exercise clothing and shoes for your
workout, no loose clothing. Tie long hair back.
It is recommended that athletic support clothing
be worn for both men and women. Athletic shoes
should always be worn while exercising.
DO NOT USE with bare feet, wearing sandals,
or wearing only socks or stockings.
> Use care when getting on or off the Terracoda
Bike. Be aware of the tilting pedals! Keep your
body and head facing forwards. Never attempt to
turn around on the Terracoda Bike.
> Do not use accessory attachments that are not
recommended by the manufacturer. Such
attachments might cause injuries.
> Do not overexert yourself or work to exhaustion.
> Stop your workout immediately if you feel any
pain or abnormal symptoms, and consult your
doctor.
Terracoda AS assumes no responsibility for personal
injury or property damage sustained by or through
the use of this product.
IMPORTANT SAFETY INFORMATION / WARNING
Before starting any exercise program, it is recom-
mended that you consult your physician, especially
for persons with pre-existing health problems.
Before using the new equipment, please review this
manual to learn about the features, functions, and
safety operations. Should you experience any irreg-
ular physical conditions such as dizziness, severe
muscle or joint pain, pain in your chest or should
any other symptoms appear: STOP EXERCISING
and consult with your physician immediately.
Fig. 1
3

UNPACKING AND ASSEMBLY
The Terracoda Bike is tested and inspected before
shipment. The Terracoda Bike requires assembly as
it is packed for effective shipment. Figure 2 shows
an exploded view of the parts not assembled on
the Terracoda Bike.
All parts should be unpacked and spread on the
floor and identified with reference to figure 2 and
the following assembly part list. It is important to
read through the entire procedure before assembling
the Terracoda Bike.
ASSEMBLY PART LIST
No. Description Quantity
3 Front stabilisator,,,,,,,,,,,,,,,,,,,,,,,,,,,,,,,,,,,,,, 1
6 Seat bar,,,,,,,,,,,,,,,,,,,,,,,,,,,,,,,,,,,,,,,,,,,,,,,,,,,, 1
7 Washer ,,,,,,,,,,,,,,,,,,,,,,,,,,,,,,,,,,,,,,,,,,,,,,,,,,,,, 2
8 Lock handle,,,,,,,,,,,,,,,,,,,,,,,,,,,,,,,,,,,,,,,,,,,,, 2
9 Seat,,,,,,,,,,,,,,,,,,,,,,,,,,,,,,,,,,,,,,,,,,,,,,,,,,,,,,,,,, 1
11 Adjustment handle,,,,,,,,,,,,,,,,,,,,,,,,,,,,,,,,,,, 2
No. Description Quantity
12 Handlebar ,,,,,,,,,,,,,,,,,,,,,,,,,,,,,,,,,,,,,,,,,,,,,,,, 1
13 Handlebar post,,,,,,,,,,,,,,,,,,,,,,,,,,,,,,,,,,,,,,,,, 1
23 Pedals (L/R),,,,,,,,,,,,,,,,,,,,,,,,,,,,,,,,,,,,,,,,,,,,, 2
56 Bolts ,,,,,,,,,,,,,,,,,,,,,,,,,,,,,,,,,,,,,,,,,,,,,,,,,,,,,,,, 2
57 Nuts ,,,,,,,,,,,,,,,,,,,,,,,,,,,,,,,,,,,,,,,,,,,,,,,,,,,,,,,,, 2
58 Bolts ,,,,,,,,,,,,,,,,,,,,,,,,,,,,,,,,,,,,,,,,,,,,,,,,,,,,,,,, 2
Fig. 2. Terracoda Bike with indication of the various
parts. Above: Tools included in the box.
4

UNPACKING AND ASSEMBLY (continued)
Step 1
See fig. 3. Secure the Front Stabilizer 3 to Main Frame
using Bolts 56 and Dome Nuts 57, and bolts 58. Make
sure to fasten the bolts and nuts securely with the wrench
provided.
Step 2
See fig. 4. Slide the Handlebar Post 13 into the Main
Frame 1 and tighten the Adjustable Knob 11 to secure
onto the Main Frame. Attach Handlebar 12 and secure
with washer 7 and tighten with Adjustment Handle 8.
Step 3
See fig. 5. Slide the Seat Post 5 into the Main Frame 1
and tighten with the Adjustable knob 11 to secure. Attach
Seat Bar 6 on to Seat Post 5 and secure with washer 7
and tighten with Adjustment Handle 8. Fix Seat 9 onto
Seat Bar 6 using a wrench.
Fig. 4
Fig. 3
Fig. 5
5

UNPACKING AND ASSEMBLY (continued)
Step 4
See fig. 6. Firmly screw each Left and Right Pedal 23L, 23R
into the left and right Crank Arm using a wrench to secure
tightening. The left pedal L is mounted turning the pedal
axle in a counter-clockwise direction, the right pedal R is
mounted turning the pedal axle in a clockwise direction.
Note: Make sure the pedals are wrench tightened to elimi-
nate any gaps between the pedal and the crank, which
could result in broken pedals or damaged cranks.
Inspect the pedals before each use to ensure the
connection is tight to avoid any safety hazards.
LEVELING AND TRANSPORT
See fig. 7. After completing the installation, if the floor/
equipment is not even, turn the adjustable bolts 54 under-
neath the front and the rear stabilizers to the desired height
and then tighten with the butterfly locknuts 55. (See also
exploded view on page 10).
The Terracoda Bike has a lock knob 15 which locks upper
frame with lower frame during transport. To unlock, turn
knob 15 anti-clockwise as shown in fig. 8. Always lock
upper frame to lower frame during transport.
OPERATION
See fig. 7. You have now assembled the Terracoda
Bike from Terracoda. This unique training and ex-
ercise cycle will provide you with a cardiovascular
workout simulating riding a real bicycle! The upper
frame with seat, crank, flywheel and handlebar is tilt-
able from side to side, this tilt movement is control-
lable through turning of the handlebar. The function
provides for proprioseptive training as explained on
page 8. The level of controlling the tilt is limited ad-
justable turning knob 15 located in front of the bike.
A bar 46 is located between the springs 45. Turning
knob 15 Clockwise will adjust the of control to a
“soft” level, turning knob anti clockwise bringing
bar 46 and springs 45 towards flywheel, will harden
the level of control. See fig. 7 or exploded view p. 10
for numeral references.
RESISTANCE ADJUSTMENT
The tension knob 22 located on the handlebar con-
trols the pedaling resistance. To increase resistance,
turn the tension knob clockwise. To decrease, turn
counter clockwise.
Fig. 6
Fig. 7
6
Fig. 8
Locked position for transport (left)
Open poistion for use (right)
(You may remove the knob, but
remember to keep it in a safe place
for later use!

PEDALS
The pedals provided are another product from
Terracoda. The pedals exclusively provided by
Flexiped have the unique option of being tiltable
transverse the direction of foot motion. This feature
provides a proprioseptive training option. As seen
on figures 9 and 10 the pedals have two different
sides onto which you may place your foot, herein
after called foot support. Fig. 10 shows a pedal with
a firm foot support, as a normal pedal. Fig. 9 shows
the side of the foot support which is tiltable (top).
The user may choose, by rotating the pedal, which
side to use.
When using the tiltable foot support, your foot
should be placed on middle portion of the support,
the ball of the foot placed over the pedal axle, as
indicated on fig. 11.
Fig. 9. Tiltable side of pedal (top)
Fig. 10. Firm or normal side of pedal
Fig. 11. Place the ball of the foot as indicated
for maximum training when you use the tilt
option of the Terracoda Flexipedal
7
SEAT ADJUSTMENT
Properly adjust the seat to ensure maximum exercise
efficiency, comfort, and to reduce the risk of injury.
The appropriate seat position on the training bike is
found by placing one pedal in the downward posi-
tion, with that leg slightly bent at the knee. To adjust
the Seat Height simply turn the adjustable knob 11
loose, then pull the knob to move the seat either
up or down to the desired height (six different seat
height positions).
To adjust the Seat Position turn the adjustable
knob 8 loose, then pull the knob to move the seat
either front or backwards to the right position.
HANDLEBAR ADJUSTMENT
Four different handlebar heights for adjustment are
available. Refer to the seat height adjustment for the
handlebar height
OPERATION (continued)
The Terracoda Flexipedal is developed for use on
ordinary bicycles as well as on spinning machines.
Please see last page or www.terracoda.com for
further details about the Terracoda Flexipedal
and the Terracoda Flexiped Clipless.

USE
The Terracoda Bike will provide you with a cardio-
vascular workout simulating riding a real bicycle. The
handlebar can be turned in order to control the tilt action
of the Terracoda Bike. As the frame tilts to one or the
other side the user can straighten the frame by turning
the handlebar towards the direction of tilt. See fig 12.
During use you will have to work balancing the
upper frame by shifting upper body and turning the
handlebar, as well as pedaling on the tilting pedals.
We hope you will enjoy the features of the
Terracoda Bike and benefit from the physical chal-
lenges this product will give you. Good health!
Fig. 12
8
THE EFFECTS OF PROPRIOSEPTIVE TRAINING
When using the Terracoda Bike you should try to
maintain a balanced stance, limiting the tilt of the
frame and of the foot support tilt. This will encour-
age not only work in all muscles in activity when
biking but also many muscles which are normally
not in use. The overall balance system will also be
challenged and stimulated and will improve your
reflexes.
The effects of using the pedal from Flexiped is
documented in a medical report by Per Høiness,
(corresponding author at Orthopaedic Surgical De-
partment, Ullevaal University Hospital) published
in Scandinavian Journal of Medicine& Science in
Sports in 2003 (13:266-271).
The report was made from studying and testing of
subjects at the Orthopaedic Surgical Department,
Ullevaal University Hospital, N-0407 Oslo, Sunnaas
Rehabilitation Hospital, Bjørnemyrveien, N-1450
Nesodden, and the Norwegian Olympic Senter,
Sognsveien 220, Box 4014 Ullevaal Stadion, N-0806

MAINTENANCE INSTRUCTIONS
DAILY MAINTENANCE
> Examine all components and parts that could have
loosened or worn during usage (pedals, crank
arms, brake assembly, crank bolts, tilt springs, pop
pins, seat, bolts and nuts) and secure or replace
each as needed.
> Release the tension completely to allow air to
flow through and to prevent hardening of the
brake pads.
> Wipe down the entire bike including the underside
with a damp cloth to remove perspiration. Also,
for sanitary purposes, wipe down the seat and
handlebars with a mild soap solution.
> Remove the handlebar post, seat bar and seat post
from the frame and wipe clean.
> Inspect and replace any worn or damaged pedals.
To test the spindle, hold the pedal firmly and
move the pedal up, down, back and forwards for
any signs of movement or clicking.
WEEKLY MAINTENANCE
> Examine all seat and handlebar adjustments for
smooth operation. Lubricate with silicone spray
if needed.
> Release the tension completely to remove the
brake pads. Sand any brake pads hardening with
a light sand paper and apply 3-N-ONE®oil
onto the pads. Replace any unusable brake pads.
> Test the belt by mounting the bike and standing
with the pedals parallel to the floor and rock back
and forth to feel any play between the pedals and
the flywheel. The pedals and the flywheel should
move as one. Cycle for a 1/2 turn and feel for play
again. If the belt is too loose, tighten immedi-
ately.
BELT ADJUSTMENT
To adjust the Belt, loosen the Dome Nuts (2H) on
each side of the Flywheel and rotate each Nut (2J)
by half a turn either clockwise to tighten or coun-
ter-clockwise to loosen. Be sure to re-secure both
Dome Nuts (2H) on each side after adjusting. If Belt
is still too tight or too loose, repeat the above steps.
Only adjust Nuts (2J) by half a turn each time. (See
exploded view p. 10 for details)
9
The Terracoda Bike is tested before shipment and
should perform without faults under normal usage
following recommended maintenance. Do not at-
tempt to service the Terracoda Bike yourself, except
for maintenance tasks described in this manual.
However, if you have problems with the Terracoda
Bike, call your authorized Terracoda dealer.
For further information about product and service,
contact your authorized Terracoda dealer. Informa-
tion is also found at www.terracoda.com.
SERVICE

PART LIST
No. Description Quantity No. Description Quantity
1 Main Frame.....................................................................1 26 Nut M17*PH1.0 ................................................................ 2
2 Flywheel Ø450*30kgs .................................................... 1 27 Screw M4*15L.................................................................. 1
2A Bearing #6005................................................................ 1 28 Brake Cable Holder........................................................... 2
2B Axle, Ø20*169L..............................................................1 29 Bolt Ø17*195L.................................................................. 1
2C Belt wheel .......................................................................1 30 Washer Ø40 ....................................................................... 3
2D Bearing #6301................................................................2 31 Bearing #6003 .................................................................. 6
2E Spacer.............................................................................. 1 32 Caliper Brake .................................................................... 1
2F Washer, Ø10*Ø20*3T..................................................... 4 33 Brake Pad .......................................................................... 2
2G Belt adjusting screw M6*30L.........................................2 34 Bolt M8*20L..................................................................... 2
2H Dome nut 3/8”*26*15.....................................................2 35 Connector ..........................................................................1
2I Adjustable Screw Bracket...............................................2 36 Screw M8*30L.................................................................. 2
2J Nut M6 ............................................................................ 2 37 Screw M4*70L.................................................................. 1
2K Bearing Housing .............................................................1 38 Screw M4*15L.................................................................. 5
2L Bolt M8*30L...................................................................4 39 Screw M4*55L.................................................................. 1
2M One-way Clutch .............................................................. 1 39A Screw M4*65L.................................................................. 1
2N Bearing #6805................................................................ 1 40 Brake Cable....................................................................... 2
2P Bolt M6*10L...................................................................2 40A Emergency Cable .............................................................. 1
Fig. 13. Exploded drawing
10

LIMITED WARRANTY
> The Terracoda Bike (Product) is warranted to be
free of all defects in material and workmanship.
> This warranty covers the original purchaser or
any person receiving the product as a gift from the
original purchaser.
> Terracoda warrants the product for one year after
the date of purchase, and/or according to local
national marketing laws.
> If product is found faulty any replacements part
or component will be shipped to you without
charge, providing the repairs are authorized by
Terracoda first and are performed by a Terracoda
trained or authorized service provider, or, at our
option we will replace the product.
> Any failure or damages caused by unauthorized
service, misuse, accident, negligence, improper
assembly or fittings, alterations, modifications
without our written authorization or by failure
on your part to use, and maintain as set out in
your Owners Manual, is not covered by this
warranty.
> Always retain proof of purchase, such as your bill
of sale, store, operate, and maintain the Product as
specified in your Owners Manual. Notify your
dealer of any defect within 10 days of discovery
of the defect.
> It is very important that you read the Owners
manual before operating the product. Remember
to do the periodic maintenance requirements
specified in the Owners Manual to assure proper
operation.
> Terracoda is not responsible or liable for indirect,
special or consequential damages arising out of
or in connection with the use or performance of
the product or damages with respect to any
economic loss, loss of property, loss of revenues
or profits, loss of enjoyment or use, costs of
removal, installation or other consequential
damages of whatsoever nature.
If your country do not allow limitations on how long
an implied warranty lasts, or if your country do not
allow exclusion or limitation of incidental or con-
sequential damages, the above limitations may not
apply to you.
3 Front Stabilizer 50*100*2T*700L.................................. 1 41 Inner Chain Cover ............................................................. 1
4 Swinging Frame .............................................................. 1 42 Outer Chain Cover ............................................................1
5 Seat Post..........................................................................1 42A Front Chain Cover............................................................. 1
6 Seat Bar ........................................................................... 1 43 Belt .................................................................................... 1
7 Washer Ø10*Ø28*6T....................................................2 44 Belt Wheel......................................................................... 1
8 Adjusting Handle ............................................................ 2 45 Rubber Spring Ø23.5, 70 ................................................ 2
9 Seat.................................................................................. 1 46 Rubber Adjusting Inner Post 30*70 ................................. 1
10 Seat Post Sleeve 40*80/30*70 ........................................ 3 47 Bolt M8*15L..................................................................... 2
11 Pop-pin............................................................................2 48 Washer Ø8*Ø16*1.5T....................................................... 2
12 Handlebar........................................................................1 49 Rubber Stopper M8........................................................... 2
13 Handlebar Post ................................................................ 1 50 Bearing #51203 ................................................................ 2
14 Rubber Adjusting Post 40*80*2T*115L......................... 1 51 Bolt Ø17*130L.................................................................. 1
15 Knob................................................................................2 52 Stabilizer End Cap............................................................. 4
16 Bottle...............................................................................1 53 Rubber Moving Wheel Ø76.............................................. 2
16A Bottle Holder................................................................... 1 53A Screw M8*40L.................................................................. 2
16B Screw M5*15L ............................................................... 2 53B Washer Ø8.5*Ø15*1.5T.................................................. 2
17 Rubber Adjusting Screw .................................................1 53C Nylon Nut M8 ................................................................... 2
18 Nut M16*8T.................................................................... 4 54 Adjustable Foot M8........................................................... 4
19 Washer Ø17.3*Ø27*2T................................................. 2 55 Butterfly Nut...................................................................... 4
20 Bolt Ø17*156L................................................................1 56 Bolt M10*120L................................................................. 2
21 Emergency brake.............................................................1 57 Dome Nut M10 .................................................................2
22 Tension knob ...................................................................1 58 Bolt M8*15L..................................................................... 2
23R Right Pedal FX-001 ........................................................1 59 Bolt M10*15L................................................................... 5
23L Left Pedal FX-001........................................................... 1 60 Axle................................................................................... 1
24R Right Crank.....................................................................1 61 Tape Roller #30203 .......................................................... 2
24L Left Crank .......................................................................1 62 Spacer for B.B................................................................... 1
25 PVC End Cap..................................................................1 63 End Cap............................................................................. 3
11

The Terracoda Bike is patented and patent pending.
Manufactured under license by Fran Wheel Enterprise Co., LTD.
Made in Taiwan.
Terracoda and Flexiped are a trademarks of Terracoda AS.
All rights reserved.
Terracoda AS products are all patented or patent pending.
Unauthorized use of Terracoda AS designs and proprietary rights
will be legally pursued.
Terracoda AS, Øvre Vollgate 6, N-0158 Oslo, Norway
www.terracoda.com
OTHER PRODUCTS FROM TERRACODA
Right: Terracoda Norwalker – climber and walker in one,
with tiltable platforms which provide the same beneficial results as the
Terracoda Flexipedal.
Below: Terracoda Bench. This unique training bench has an
optional sideways tilt of +/– 15°.
www.terracoda.com
Far left: Terracoda Pedal Clipless
Left: Terracoda Pedal Classic
(provided with the Terracoda Bike. See p 7 for details).
Brødr. Fossum AS, Oslo 08–2007
This manual suits for next models
1
Table of contents


