HIT FITNESS G12 User manual

Retain this owner’s manual for future reference
Read and follow all instructions in this owner’s manual
1

Thank you
Thanks for purchasing this product. The product will help you exercise your muscles in the
correct way and to improve your fitness – and all this in a familiar environment.
Precautions
WARNING:This spin bike has been designed and constructed to provide maximum safety.
Nevertheless,certain precautions should be taken when using exercise equipment.Read the
whole manual before assembling and using the spin bike.The following safety precautions
should also be observed:
It is the responsibility of the owner to ensure that all users of the spin bike are adequately
informed of all precautions. Use the spin bike only as described in this manual.
Keep children and pets away from spin bike at all times.DO NOT leave them unsupervised
in the room where this spin bike is kept.
Inspect and assemble all parts regularly. Replace and worm parts immediately.
Place the spin bike on a level surface, with at least 1.0 m of clearance on each side of spin
bike. To protect the floor or carpet from damage, place a mat under the spin bike.
Keep the spin bike indoors, away from moisture and dust. Maintain the using place
ventilation. DO NOT use it in the airless place.
Don’t put any sharp things around the spin bike.
Wear appropriate clothes while exercising; do not wear loose clothes that could become
caught on the spin bike. Always wear athletic shoes for foot protection while exercising.
Do not use this product if more than 150 kg of weights. Please choose our other series of Spin
bike.
Keep your pedaling speed in a controlled way.
If you find your spin bike works abnormal, do not use it immediately.
No more then one person should operate the spin bike at one time.
If you feel pain or dizziness while exercising,stop exercising immediatiely and ask for a
doctor.
This product cannot be used as a medical device.
2

Safety notice
When you are remedial or have below symptoms, after discussing with your doctor, then could
use this spin bike.
1. Waist paining now and leg, waist, neck hurt before, legs, waist, neck and hand numbly
please do not use.
2. Have anamorphic arthritis, rheumatic and gout.
3. Have osteoporosis and other abnormality.
4. Have perfunctory system obstacle (heart disease, blood obstacle, hypertension ).
5. Have breath obstacle.
6. Using the manpower pulse adjust machine or insert into the body machine.
7. Have sarcomata.
8. Have thrombus or other symptoms.
9. Have diabetes or be caused by diabetes feeling obstacle.
10. Have skin trauma.
11. Hyperpyrexia caused by sick(38 or over 38 ).
12. Abnormal back bone or back bone bending.
13. Pregnant or catamenia.
14. Feel physical abnormality, need convalesce.
15. Body condition is not very well.
16. The aim is to healing.
17. Except the upper symptoms, feel other physical abnormality.
----Maybe cause the accident or the poor body condition.
Before beginning any exercise program, consult your physician. This is especially
important for persons over age 35 or persons with pre-existing health problems. To
reduce the risk of serious injury, read all important precautions and instructions in this
manual and all warnings on your spin bike before using your spin bike.
3
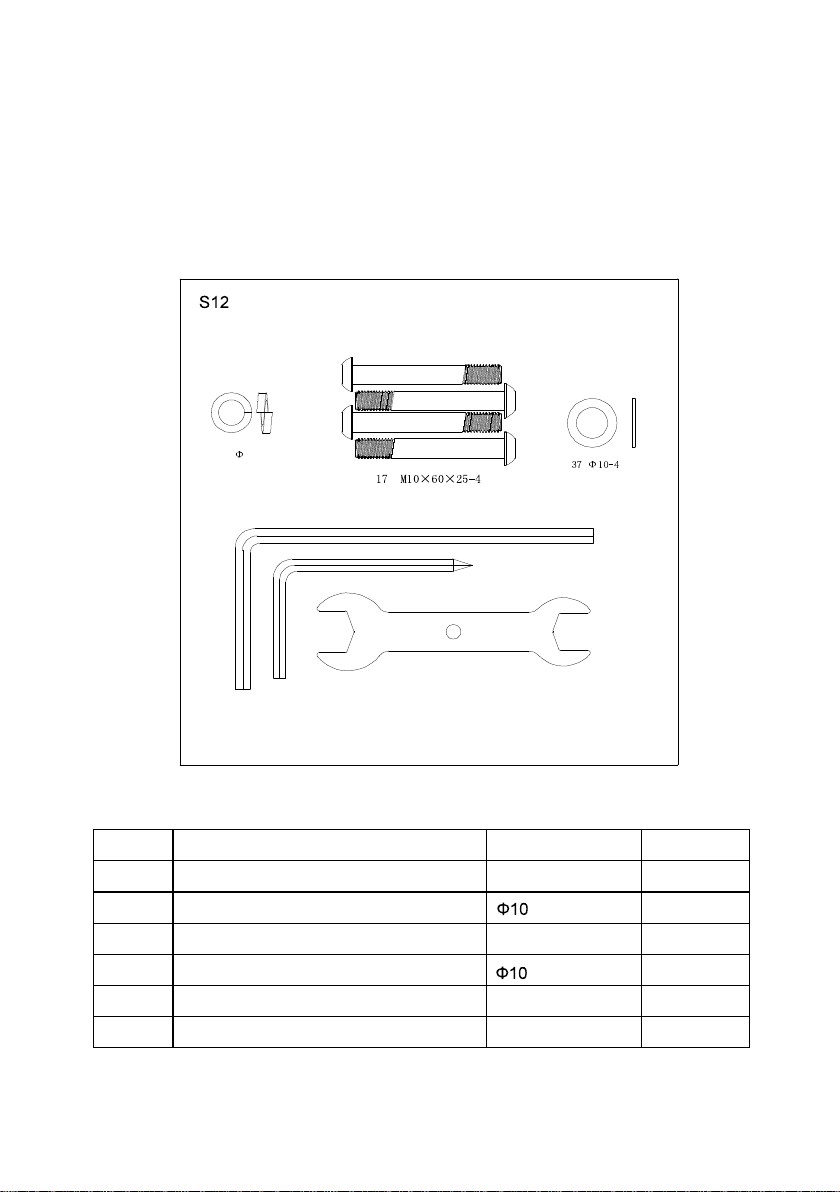
NO. NAME SPECIFICATION QUANTITY
17 Allen C.K.S. half thread screw M10×60×25 4
37 Flat washer 4
Open end wrench t4.0×32×110 1
38 Spring washer 4
L-shaped spanner 6×66×140 1
L-shaped spanner 5×35×85S 1
Pre-assembly Notes
Open the boxes:
Make sure to inventory all the parts that are included in the box. Check the hardware chart of a
full count of the number of parts included for proper assembly . If any of the parts are missing,
contact with the dealer.
38 10-4
4
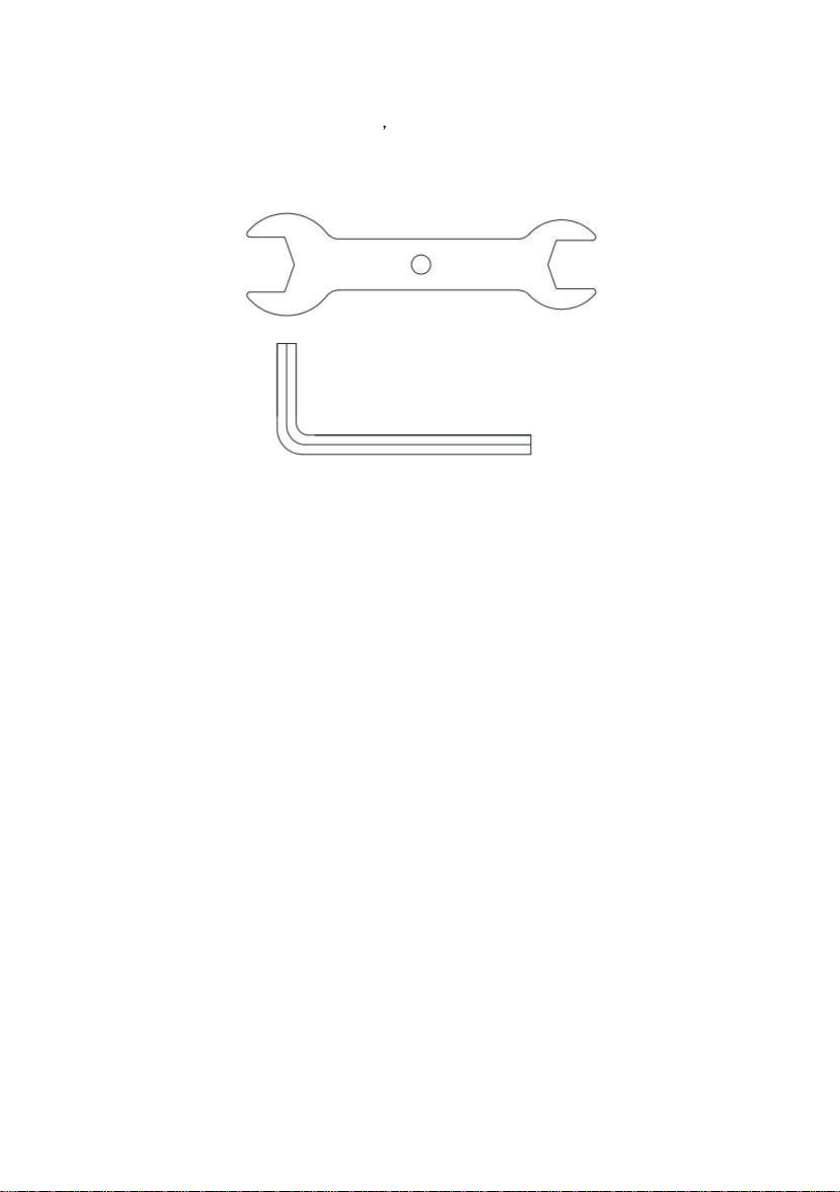
Gather your tools
Before starting the assembly of your unit gather the necessary tools.Having all of the
equipment at hand will save time and make the assembly quick and hassle-free.
Clear your work area
Make sure that you have cleared away a large enough space to properly assemble the
unit.Make sure the space is free from anything that may cause injury during assembly.After
the unit is fully assembled,make sure there is a comfortable amount of free area around the
unit for unobstructed operation.
5

Product instruction
Technical information
*WE RESERVE THE RIGHT TO AMEND THE PRODUCT WITHOUT PRIOR NOTICE.
TYPE S12
DIMENSION Unfold
1400×546×1135mm
Speed ratio 210:50
Flywheel
Handlebar adjustment Up/down; Front/back
Saddle adjustment
Up/down;Front/back
console
Adjusting knob
Saddle
Main body
Fly wheel
Rear stabilizer
Wheel
Front stabilizer
Pedal
Handle bar
6

Step 1: Attach the front stabilizer(2) to the main frame(1) with flat washer(37) , spring
washer(38) and Allen C.K.S. half thread screw(17).
Step 2: Attach the rear stabilizer(3) to the main frame(1) with flat washer(37) , spring
washer(38) and Allen C.K.S. half thread screw(17).
ASSEMBLY INSTRUCTIONS
37
38
2
38
37
37
38
2
3
7

Step 3: Loosen L zinc alloy handlebar (50). Insert handlebar adjustment(5) into main frame(1).
Then lock L zinc alloy handlebar (50).
Step 4: Attach Console (76) to the Handlebar set(4) with Philips pan head full thead screw
(25).
3
5
8

Step 5: Attach handlebar(4) to the handlebar adjustment(5) with rotary knob washer(49) and L
zinc alloy handle(50).
Step 6: Attach saddle(74) to the seat tube(6) with rotary knob washer(49) and L zinc alloy
handle(50).
5
49
45
6
49
74
6
9

Step 7: Attach left pedal(70) and right pedal(71) to the main frame(1), then lock them tightly.
Workout tips:
1,User need to put the feet completely inside the pedal,and to adjust the resistance of magnet
control according to user.
2,Since the machine with double flywheels and it will have huge moment of inertia, when the
user stop before high speed, the user should minimize the resistance and lower the speed, to
avoid hurt the user’s leg by the moment of inertia of left and right pedal
3,The machine should be put on flat floor and have enough space for workout.
7
10

Half-drawing for assembly
37
38
38
37
2
3
37
38
49
74
4
49
5
25
11

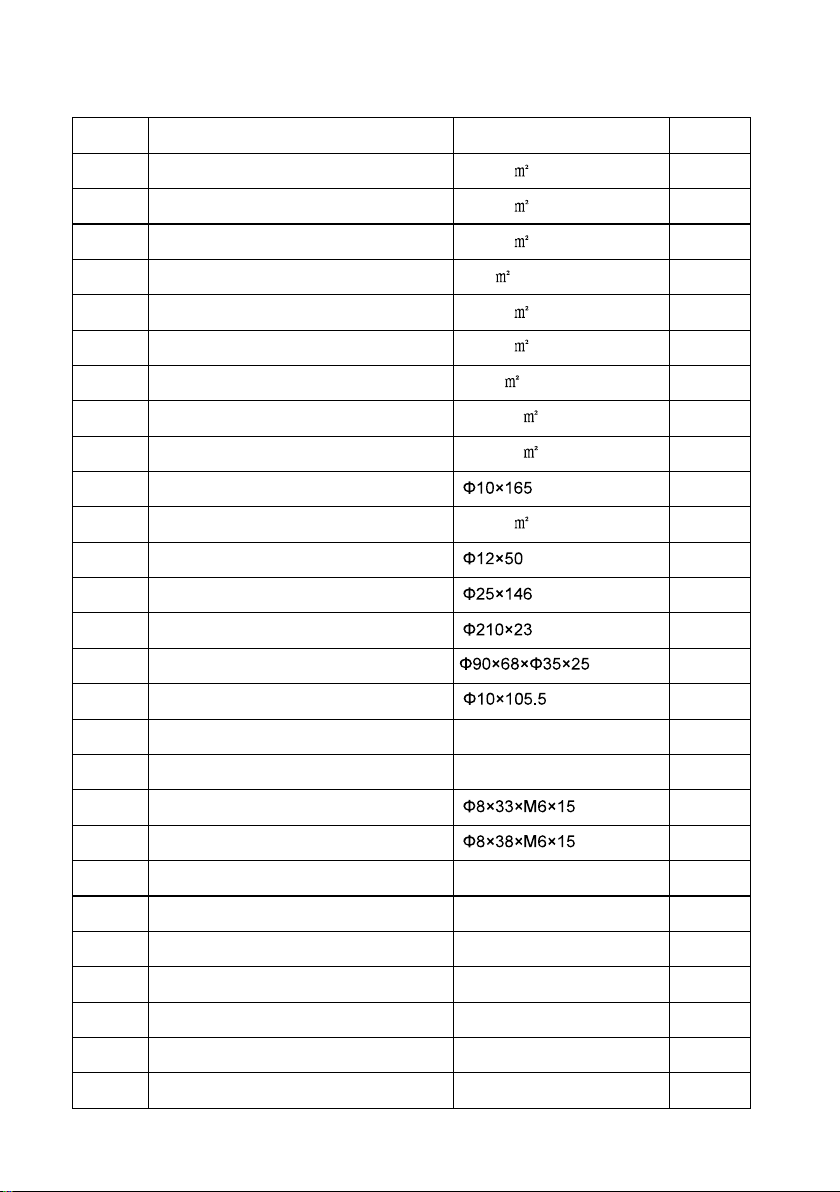
NO. NAME DESCRIPTION QTY
1 Main frame 0.817 1
2 Front stabilizer 0.145 1
3 Rear stabilizer 0.129 1
4 Handlebar set 0.5 1
5 Handlebar adjustment 0.113 1
17 Allen C.K.S. half thread screw M10*60*25 4
25 Philip pan head full thread screw M5*15 1
38 Flat washer 4
39 Spring washer 4
49 Rotary knob t4.0×40×40 2
50 L zinc alloy handle Hex 16×M10×30 4
70 Pedal(L) JD-307/110×100×30 1
71 Pedal(R) JD-307/110×100×30 1
74 saddle 262×146 1
Part list
12
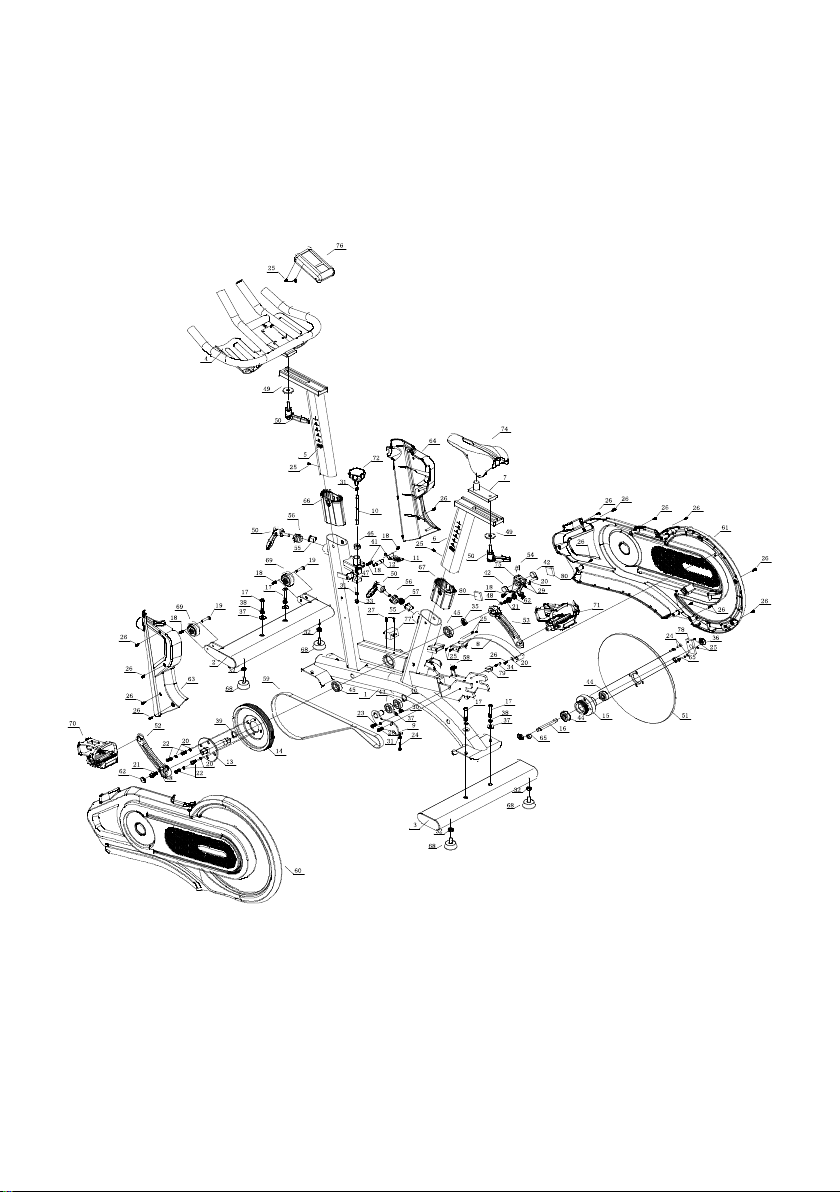
Drawing for assembly
13
NO. NAME DESCRIPTION QTY
1 Main frame 0.817 1
2 Front stabilizer 0.145 1
3 Rear stabilizer 0.129 1
4 Handlebar set 0.5 1
5 Handlebar adjustment 0.113 1
6 Seat tube 0.113 1
7 Saddle adjustment 0.02 1
8 Outer cover stator 0.0235 1
9 Tensioning wheel adjustment 0.0176 1
10 Brake round bar 1
11 Brake adjustment 0.006 1
12 Magnetic control fixed axis 1
13 Crank axis 1
14 Belt pulley 1
15 Flywheel fixed shaft 1
16 Flywheel axis 1
17 Allen C.K.S. half thread screw M10×60×25 4
18 Allen C.K.S. full thread screw M6×15 5
19 Allen C.K.S. hollow screw 2
20 Allen C.K.S. hollow screw 1
21 Hex flange nut 5/16-18UNC-1 2
22 Allen C.K.S. full thread screw M10×20 4
23 Allen C.K.S. half thread screw M10×25×15 1
24 Allen C.K.S. full thread screw M8×30 5
25 Philips pan head full thread screw M5×15 12
26 Philips C.K.S. Self-tapping screw ST4×16 15
27 Philips C.K.S. Self-tapping screw ST4×25 2
Part list
14
28 Allen C.K.S. full thread screw M8×15 1
29 Allen socket full head screw M5×5 2
30 Hex locking nut M10 1
31 Hex nut M8 3
32 Hex nut M10 4
33 High cap nut M8 1
34 Allen C.K.S. half thread screw M8×40×20 1
35 Hex nut M24×P1.5 1
36 Hex flange nut M10 2
37 Flat washer 5
38 Spring washer 8
39 Circlip for shaft 1
40 Circlip for shaft 1
41 Circlip for shaft 2
42 Round magnet 25×25×10 2
43 Deep groove ball bearing 6004ZZ 2
44 Deep groove ball bearing 6000-2RS 2
45 Deep groove ball bearing 6005ZZ 2
46 Brake block nut M22×P1.5×10 1
47 Brake adjustment 28×28×20 1
48 Flat washer 8612-07 2
49 Knob gasket 8606-40 2
50 L zinc alloy handle Hex 16×M10×30 4
51 Flywheel (S12-14) 1
52 Crank (L) t13×42×170 1
53 Crank (R) t13×42×170 1
54 Brake rubber block t6.0×15×35 1
55 Limited block(8605-30) 2
56 Fast pin lock nut M30×P1.5×8 2
15

57 Locking spring 1
58 Brake torsion spring 1
59 Motor belt 540PJ7 1
60 Outer cover (L) 1071.6×511.5×74.1 1
61 Outer cover (R) 1071.6×511.5×74.1 1
62 Crank decoration cover 2
63 Upright tube decorative cover (L) 506.3×224×54 1
64 Upright tube decorative cover (R) 506.3×224×54 1
65 Space sleeve T2.0×16×16 2
66 Supporing tube bushingt PT50×100/PT40×80 1
67 Seat tube bushing PT50×100/PT40×80 1
68 Foot pad 4
69 wheels 2
70 Pedal (L) JD-307/110×100×30 1
71 Pedal (R) JD-307/110×100×30 1
72 Brake rotary /BLC125 1
73 Brake line S12/L=1050 1
74 Saddle A-2015/262×146 1
75 Magnetic control frame 130×52×40 1
76 console ST7214wireless receive 1
77 RF module 1
78 Flywheel axis fixed chip t2.0×30×60 1
79 Cover support chip t3.0×25×82 1
80 Magnet mounting chip t4.0×32×34 2
16

Operating Manual
■KDY FUNCTIONS:
MODE:
1) During non-exercise, into SET mode, switch each setting item.
2) Pressing and hold 3 seconds reset the value to zero.
SET:
1) djust upwards during setting, TIME、DIST NCE、C LORIES.
2) If any time, distance or calories is set, at exercise state, this item is displayed as a countdown.
When the countdown reaches 0, the exercise will automatically stop with a "DI DI"
sound
prompt.
RESET : In the SET mode, pressing the RESET key to reset the value to zero.
■SLEEP MODE:
The system turns on when the key is depressed or system sensed a signal input from
the
sensor.
The system turns off automatically when the sensor has no signal input or no key are
pressed
for approximately 4 minutes.
■FUNCTIONS:
SPEED: The current speed with starting exercise.
DISTA CE: The current distance with starting exercise.
TIME: The working times with starting exercise.
CALOREIS: The calorie burned with starting exercise.
PULSE: The current heart rate during exercise.
■BATTERY INSTALLATION & REPLACEMENT
SPECIFICA
TION
TIME
-99M:59S
SPEED 0.0~99.9M
DIST 0.00~999 M
CALORIES 0.0~999Kcal
PULSE 40~240 BPM
BATTYERY SIZE-AAA *2
Operating temperature 0~40 (32℉-104℉)
Storage temperature -10~60 ((14℉-140℉)
17

General fitness
Start your exercise program slowly, i.e. one exercise unit every 2 days. Increase your
exercise session week by week. Begin with short periods per exercise and then increase
these continually. Start slowly with the exercise sessions and don’t set yourself impossible
targets. In addition to these exercises, do other forms of exercise such as jogging,
swimming, dancing and/or cycling.
Always warm up thoroughly before exercising. To do so, carry out at least five minutes of
stretching or gymnastic exercises to avoid muscle strains and injuries.
Check your pulse regularly. If you do not have a pulse measuring instrument, ask your GP
how you can measure your heart rate effectively. Determine your personal exercise
frequency range to achieve optimal training success. Take into account both your age and
your level of fitness. The table on page 16 will give you a reference point for determining
the optimal exercise pulse.
Make sure you breathe regularly and calmly when exercising.
Take care to drink enough while exercising. This ensures that the liquid requirement of
your body is satisfied. Consider that the recommended drinking amount of 2-3 liters per
day is strongly increased through physical strain. The fluid you drink should be at room
temperature.
When exercising on the device always wear light and comfortable clothing as well as
sports shoes. Do not wear any loose clothing that could tear or become caught in the
device whilst exercising.
Exercises for your personal work-out
Warm-up / stretching exercises
A successful exercise session begins with warming up exercises and ends with exercises
for cooling down and relaxing. These warming up exercises prepare your body for the
subsequent demands made upon it. The cooling down / relaxation period after the
exercise session ensures that you do not experience any muscular problems. In the
following you will find stretching exercise instructions for warming up and cooling down.
Please pay attention to the following points
18

NECK EXERCISES
ARM STRETCHING EXERCISES
19

6
20
Table of contents
Other HIT FITNESS Exercise Bike manuals


Popular Exercise Bike manuals by other brands


Sunny Health & Fitness
Sunny Health & Fitness SF-B121021 user manual

Monark
Monark 827E instruction manual

Stamina
Stamina 1310 owner's manual

American Fitness
American Fitness SPR-BK1072A owner's manual
 Service manual")
Cateye
Cateye CS-1000 (CYCLO SIMULATOR) Service manual

BH FITNESS
BH FITNESS H9158H Instructions for assembly and use