Tevion Film Strip Scanner User manual

Helpline no.: UK/N. Ireland: 08 458 684 540 Rep. of Ireland: 076 60 600 29
Web Support: www.unisupport.net P50615 1
Film Strip Scanner
User Manual
After Sales Support
Now you have purchased a TEVION Film
Strip Scanner you can rest assured in the
knowledge that as well as your 3 year
parts and labour warranty you have the
added peace of mind of dedicated help
lines and web support:

Helpline no.: UK/N. Ireland: 08 458 684 540 Rep. of Ireland: 076 60 600 29
Web Support: www.unisupport.net P50615 2
Helpline number:
UK/Northern Ireland: 08 458 684 540
Republic of Ireland: 076 60 600 29
www support:
www.unisupport.net

Helpline no.: UK/N. Ireland: 08 458 684 540 Rep. of Ireland: 076 60 600 29
Web Support: www.unisupport.net P50615 3
TABLE OF CONTENTS
IMPORTANT NOTICE.........................................................................4
PRECATIONS.....................................................................................5
DISPOSAL (WEEE).............................................................................6
BEFORE YOU START ........................................................................7
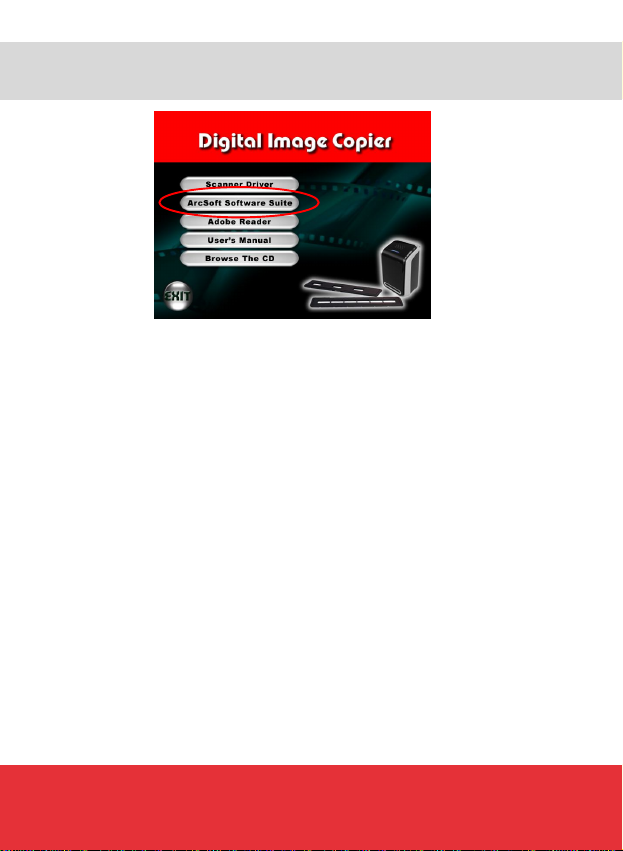
Driver and software installation.......................................................7
Driver installation............................................................................7
Windows XP...................................................................................7
Windows Vista................................................................................7
SOFTWARE INSTALLATION..............................................................8
CALIBRATING THE FILM STRIP SCANNER ......................................9
STANDARD SETTING ......................................................................10
HOW TO LOAD NEGATIVES / SLIDES INTO THE TRAY .................11
INDIVIDUAL SELECTION OF PICTURE SEQUENCE.......................13
USING THE FILM STRIP SCANNER.................................................14
To scan pictures...........................................................................15
To transfer/save pictures..............................................................15
EDITING THE PICTURES.................................................................16
Enhance.......................................................................................16
Colour..........................................................................................17
Red-Eye.......................................................................................17
Crop.............................................................................................18
Straighten.....................................................................................18
BLUR BACKGROUND ......................................................................19
Healing brush...............................................................................19
Clone...........................................................................................20
Lighten/Darken.............................................................................20
Smudge .......................................................................................20
Sharpen.......................................................................................20
Blur..............................................................................................21
Paint Brush ..................................................................................21
Line..............................................................................................21
Eraser..........................................................................................21
Clipboard .....................................................................................21
SAVING YOUR EDITED PHOTOS....................................................22
TECHNICAL SPECIFICATIONS........................................................23
System requirements....................................................................23
FAQ..................................................................................................24
Problem .......................................................................................24
Reason ........................................................................................24
Solution........................................................................................24
Warranty Card...................................................................................27
Fault Report Card..............................................................................29

Helpline no.: UK/N. Ireland: 08 458 684 540 Rep. of Ireland: 076 60 600 29
Web Support: www.unisupport.net P50615 4
IMPORTANT NOTICE
Always use only the standard settings of the program when
installing the software and calibrating/using the film strip scanner.
Otherwise you may risk improper reproduction and reduced quality
of your negatives/slides on your computer.

Helpline no.: UK/N. Ireland: 08 458 684 540 Rep. of Ireland: 076 60 600 29
Web Support: www.unisupport.net P50615 5
PRECATIONS
High-voltage internal
components create the risk
of electric shock when
exposed. Only authorized
service providers should
perform maintenance and
repairs.
Never operate the scanner
inside an aircraft or
anywhere else where
operation of such devices is
restricted. Improper use
creates the risk of serious
accident.
If you notice smoke or a
strange odor coming from
the scanner, turn the power
off immediately. Take the
scanner to the nearest
authorized service centre
for repair. Never attempt to
repair the scanner on your
own.
Use only the recommended
power sources. Use of
power sources not
expressly recommended for
the scanner may lead to
overheating, distortion of
the equipment, fire,
electrical shock or other
hazards.
Do not try to open the case
of the scanner or attempt to
modify the scanner in any
way.
The scanner may become
slightly warm during use.
This does not indicate
malfunction.
Keep the scanner and its
accessories out of the
reach of children and
animals to prevent
accidents or damage to the
scanner.
Keep the scanner away
from water and other
liquids. Do not use the
scanner with wet hands.
Never use the scanner in
the rain or snow. Moisture
creates the danger of fire
and electric shock.
If the exterior of the
scanner needs cleaning,
wipe it with a soft, dry cloth.

Helpline no.: UK/N. Ireland: 08 458 684 540 Rep. of Ireland: 076 60 600 29
Web Support: www.unisupport.net P50615 6
DISPOSAL (WEEE)
Electrical and electronic equipment (EEE) contains materials, parts
and substances, which can be dangerous to the environment and
harmful to human health if waste of electrical and electronic
equipment (WEEE) is not disposed of correctly.
Equipment, which is marked with the WEEE logo (as shown
above), should not be thrown away with your household waste.
Contact your local authority waste disposal department, as they will
be able to provide details of the recycling options available in your
area.

Helpline no.: UK/N. Ireland: 08 458 684 540 Rep. of Ireland: 076 60 600 29
Web Support: www.unisupport.net P50615 7
BEFORE YOU START
Driver and software installation
To use the scanner you must install the scanner driver and the
ArcSoft Photo Impression 6 software.
Note:
If another version of Photo Impression 6 is already installed on
your computer you have to un-install it before installing this new
software.
The scanner should NOT be connected to your computer at this
stage.
Driver installation
1. Turn on the computer.
2. Insert the installation CD
into the CD-ROM drive.
3. Select “Scanner Driver-
32 bit” by clicking it once.
4. Follow the on-screen
instructions to install the
driver:
Windows XP
• Click “Next”
• Click “Install”
• Click “Finish”
Windows Vista
• Click “Next”
• Click “Install”
• Click “Finish”
• Select “Locate and install driver software (recommended)”

Helpline no.: UK/N. Ireland: 08 458 684 540 Rep. of Ireland: 076 60 600 29
Web Support: www.unisupport.net P50615 8
SOFTWARE INSTALLATION
1. Select “ArcSoft Software Suite”.
2. Follow the on-screen instructions.
3. The installed software will automatically create a
PhotoImpression 6 shortcut on your desktop.
4. Insert the film strip scanner cable in the USB 2.0 *) port on
your PC and let remain there.
When the film strip scanner is powered the LED on top of it will
light blue.
5. Restart the computer.
*) If the scanner cannot be seen in the list of your installed
hardware you should connect it to a USB port on the back of your
PC (improved power supply).

Helpline no.: UK/N. Ireland: 08 458 684 540 Rep. of Ireland: 076 60 600 29
Web Support: www.unisupport.net P50615 9
CALIBRATING THE FILM STRIP SCANNER
Before using the film strip scanner the first time it should be
calibrated.
Note:
NO trays should be inserted in the scanner slide at this stage.
1. Click the Photo Impression 6 shortcut on the desktop.
2. Click “Get Photos”.
3. Select “Acquire from Scanner”.
4. Click "Calibrate" in the lower left corner of the display.

Helpline no.: UK/N. Ireland: 08 458 684 540 Rep. of Ireland: 076 60 600 29
Web Support: www.unisupport.net P50615 10
STANDARD SETTING
1. Verify that the selected device is OVT Scanner.
2. Select format and quality.
3. Confirm or change the location of where to save your pictures.
4. Select film type.
5. Select colour dept.
6. Select dpi.
7. Click "Acquire".
You are now ready to use the film strip scanner. See next page for
how to load the negatives / slides trays.

Helpline no.: UK/N. Ireland: 08 458 684 540 Rep. of Ireland: 076 60 600 29
Web Support: www.unisupport.net P50615 11
HOW TO LOAD NEGATIVES / SLIDES INTO THE TRAY
Negatives Slides
Open the tray.
Place negatives/ slides (white frame side up) into the tray as
shown.
Close the tray and make sure that it closes properly.
Note: To produce a clear picture clean the tray slot and the glass
surface on a regular basis using a clean, dry, non-alcohol cotton
swab. Make sure that your film negatives/ mounted slides and
cover trays are clean before inserting into the scanner as well.
Dust or dirt from the negatives and cover trays will affect the quality
of your scanned pictures.

Helpline no.: UK/N. Ireland: 08 458 684 540 Rep. of Ireland: 076 60 600 29
Web Support: www.unisupport.net P50615 12
HOW TO LOAD NEGATIVES / SLIDES INTO THE TRAY
Insert the negative film / slide tray properly into the slot as shown.
(Insert through front entrance)

Helpline no.: UK/N. Ireland: 08 458 684 540 Rep. of Ireland: 076 60 600 29
Web Support: www.unisupport.net P50615 13
INDIVIDUAL SELECTION OF PICTURE SEQUENCE
You can adjust the location of the individual picture by moving the
film tray; the film tray can be moved in both directions.
(Insert through rear entrance)

Helpline no.: UK/N. Ireland: 08 458 684 540 Rep. of Ireland: 076 60 600 29
Web Support: www.unisupport.net P50615 14
USING THE FILM STRIP SCANNER
General information: Hold your mouse over the icons in Arcsoft
software to get functionality information.
1. Click the Photo
Impression 6 shortcut
on the desktop.
2. Insert the tray in the
scanner slot as shown
on previous page.
3. Click “Get Photos”.
4. Select “Acquire from Scanner”.
5. Make corrections of the standard settings, if any.
6. Click "Acquire".
The pictures from the scanner will be seen in the preview area at
the top of the window.
The maximum number of pictures in the preview area is 12. If there
are more than 12 pictures scanned, picture no. 13 will overwrite
picture no 1.
A selected picture will be indicated by a green frame around it.
- To select more pictures in
sequence, press the Shift
key.
- To select one specific
picture, press the CTRL
key.

Helpline no.: UK/N. Ireland: 08 458 684 540 Rep. of Ireland: 076 60 600 29
Web Support: www.unisupport.net P50615 15
USING THE FILM STRIP SCANNER
To scan pictures
- click “Snapshot” or
- press the COPY button on top of
the scanner.
Note:
To ensure the best picture quality, please allow about 5 seconds
between snapshots and transfers for white balance enhancement.
To transfer/save pictures
- Click the “Transfer” icon to transfer and save selected pictures to
your computer.
Unless you are an experienced user we strongly recommend you
no to use the options under the "Format" icon, but use only the
standard settings of the program.
Click “Exit” to exit the program.

Helpline no.: UK/N. Ireland: 08 458 684 540 Rep. of Ireland: 076 60 600 29
Web Support: www.unisupport.net P50615 16
EDITING THE PICTURES
1. Click the Photo Impression
6 shortcut on the desktop.
2. Select the photo you want
to edit.
3. Click "Edit".
4. Select "Photo Editing Tools".
The Photo Editing Tools module includes a complete set of photo
enhancement, editing and retouching tools grouped under the 3
tabs Adjust, Retouch and Clipboard.
The window area can be stretched to provide a large size view of
the active photo. Click the "Maximize" icon in the top right corner of
the module’s tool bar to maximize the window to fill the computer
screen.
Adjust offers you five distinct sets of tools:
Enhance
The enhance feature has two options:
- Auto Enhance
Click the “Auto Enhance” icon to improve the overall quality of your
pictures with a single click.
- Manual enhancement
1. Move the sliders to adjust the level of brightness, contrast,
saturation, colour (hue), and sharpen. If you would like to
adjust colour or brightness, press the “Colour/Brightness
Adjustment” button by pressing the plus or minus button before
you click “snap shot” - or press the copy button.

Helpline no.: UK/N. Ireland: 08 458 684 540 Rep. of Ireland: 076 60 600 29
Web Support: www.unisupport.net P50615 17
EDITING THE PICTURES
2. Use the zoom slider in the top right corner to get a closer look
at how the adjustment affects the photo.
3. Click “Apply” if you like the result. Click “Cancel” if you do not.
Colour
This feature is designed to fix digital photos that have unnatural
colour or appear too dark. It’s also great for fixing scanned
versions of old prints that have faded or whose colours have
changed after many years.
How to fix the colour of a photo:
1. Drag the colour balance sliders to make the photo colour
appear more natural.
- Add red or yellow to make the photo warmer.
- Add blue or green to make the photo cooler.
2. Drag the Lighter/Darker slider to the left to reveal details
hidden in a dark photo or to the right to make a faded photo
look new again.
3. Click “Apply” if you like the result. Click “Cancel” if you do not.
Red-Eye
This feature makes it easy for you to fix a red-eye – a common
problem in flash photography.
You have two options to fix red-eyes:
- Auto Fix
Simply click the “Fix Red-Eye” icon to automatically fix all red-eyes.
If not all of the red eyes are fixed, use the “Manual Fix” method.

Helpline no.: UK/N. Ireland: 08 458 684 540 Rep. of Ireland: 076 60 600 29
Web Support: www.unisupport.net P50615 18
EDITING THE PICTURES
- Manual Fix
1. Use the zoom slider on the toolbar to zoom in on the photo.
2. Drag the small white box inside the zoom navigator to move
over a red eye.
3. Place your cursor directly over the red eye and click.
4. Repeat the process until all the red eyes are fixed.
5. Click “Undo” if you make a mistake or don’t like the result.
Crop
This feature enables you to trim photos for dramatic effect or cut off
the distracting parts of a picture.
How to use the crop function:
1. Select the crop orientation (portrait or landscape).
2. Select a fixed proportion for the crop rectangle (4:6, 5:7, 8:10)
or select “Custom” if you want to use a different proportion.
3. Resize the crop rectangle by clicking and dragging the red
lines.
4. Move the crop rectangle into position by clicking and dragging
inside the red box.
5. Click “Crop”. The area inside the rectangle will be kept; the
area outside will be trimmed away.
6. Click “Undo” just above the image area if you make a mistake
or don’t like the result.
Straighten
This feature enables you to fix photos that appear to be tilted.
How to use the straighten function:
1. Move the slider (or click the rotate icons) until the photo
appears straight.
2. Use the superimposed grid lines for vertical and horizontal
reference.
3. Click “Apply” if you like the result. Click “Cancel” if you do not.

Helpline no.: UK/N. Ireland: 08 458 684 540 Rep. of Ireland: 076 60 600 29
Web Support: www.unisupport.net P50615 19
BLUR BACKGROUND
This feature can be used in a subtle way – to tone down un-
important background details, or for dramatic effect - by making the
main subject of a photo “pop out” of the picture.
How to use the blur background function:
1. With your cursor, trace a line around the person or object you
want to "pop out". When you release the mouse button, the
area outside the traced line will become slightly blurred.
2. Drag the first slider to make the transition between the blurred
and non-blurred area sharp or smooth.
3. Drag the second slider to increase or decrease the amount of
blur.
4. Click “Apply” if you like the result. Click “Cancel” if you do not.
Retouch offers you 9 distinct sets of improvement tools.
Healing brush
The healing brush is good at fixing dust, scratches and removing
skin blemishes.
How to use the healing brush e.g. to fix a skin blemish:
1. Define a source point for the healing brush by holding the shift
key and clicking on an area of the skin that in colour and
texture is close to the area you want to heal.
2. Use the zoom slider in the top right corner to zoom in on the
blemish.
3. Adjust the size of the healing brush to only slightly larger than
the blemish.
4. Paint over the blemish. The area will be concealed.
5. Click “Undo” just above the image area if you make a mistake
or don’t like the result.

Helpline no.: UK/N. Ireland: 08 458 684 540 Rep. of Ireland: 076 60 600 29
Web Support: www.unisupport.net P50615 20
BLUR BACKGROUND
Clone
The clone tool is good at removing unwanted elements from a
photo. You can also use it for fun e.g. to move a nose from one
person to another.
How to use the clone tool e.g. to remove a telephone pole from the
background of a photo:
1. Define a source point for the clone tool by holding the shift key
and clicking on an area of the sky that you want to use to paint
over the telephone pole.
2. Adjust the brush size so the cursor (circle) is only slightly larger
than the widest part of the telephone pole.
3. Click and hold your mouse button and carefully paint over the
telephone pole.
Note: Do not release the mouse button until the job is
complete.
4. Click “Undo” if you make a mistake or don’t like the result.
Lighten/Darken
The Light/Darken tool is good at adjusting specific areas of a
photo.
Use the sliders below to adjust brush size and darkness.
Smudge
Simulates the smearing of wet paint.
Use the sliders below to change the brush size and sharpness.
Sharpen
Sharpens blurry areas.
Use the sliders below to change the brush size and transparency.
Table of contents
Other Tevion Scanner manuals
Popular Scanner manuals by other brands

Photoneo
Photoneo PhoXi 3D Scanner XS quick start guide

Autel
Autel MaxiDASMaxiCheck DS808 manual

Kodak
Kodak I620 - Document Scanner user guide

Kodak
Kodak 2400 DV Plus user guide

COMPANION
COMPANION Wireless Universal KeepnTrack Scanner V6555 quick start guide

Digital Check
Digital Check SmartSource SSM1-ELITE55-IJ Installation and operation guide