Step 2..........Make sure that the burner control valve knobs is turned off. Twist in a
clockwise direction
Step 3..........Make sure regulator assembly rubber seal is clean and undamaged
and in its proper centered position.
Step 4..........Attach the propane cylinder onto the regulator assembly (hand tighten
only). Insert tube into the inlet housing on the right side of the stove. In-
sert the tube fully into the inlet and turn the collar clockwise to tighten.
(When installed correctly the propane cylinder and regulator and tube
assembly will slant slightly toward you. The propane cylinder does not
rest flat on the surface).
Step 5..........Please check all connections for leaks using soapy water. Bubbles will
form if there is a leak present.
Step 6..........When you are sure there are no leaks, you may proceed to setup/
lighting your stove.
D Y U SMELL GAS? IF YES, THERE IS A LEAK.
IS THE C NNECTI N AREA EXTREMELY C LD?
IF S , THERE IS A LEAK
D N T USE ST VE IF IT IS LEAKING.
WHEN Y U ARE SURE THERE ARE N LEAKS,
Y U MAY PR CEED T SETUP/LIGHTING Y UR ST VE.
SETUP/LIGHTING Y UR ST VE
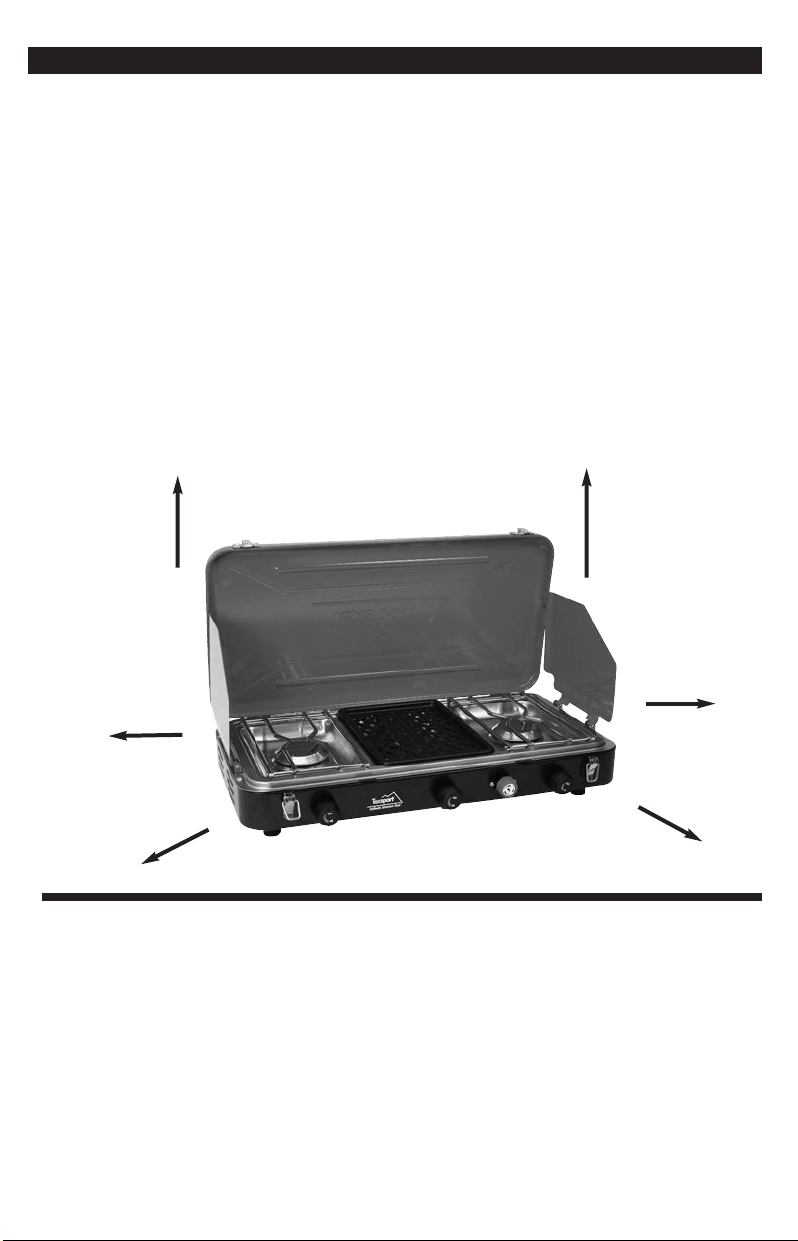
Step 1..........Open case cover assembly and position two side windshields by insert-
ing notched supports into the cover.
Step 2..........Turn the burner control valve knob counter clockwise to a low or
medium setting. Gas will begin to flow and now press the ignition but-
ton repeatedly until burner lights.
Step 3..........If stove fails to light, turn off the valve. Allow any gas to dissipate and
check for a fuel blockage while following all the safety instructions
listed.
Step 4..........Repeat above instructions for lighting grill.
USING Y UR ST VE
Step 1..........After burner has ignited, adjust to desired heat level.
Step 2..........While ignited DO NOT touch the cooking area. Only the control knob
should be touched during operation.
Step 3..........Stove surface is very hot and should not be handled or moved, except
after being shut down.
Step 4..........Allow stove to cool for 15 minutes before moving or storage.
3
Gracias por comprar un producto auténtico de Texsport. Esperamos que disfrute su nuevo aparato
de propano y que le proporcione servicio por muchos años. Le invitamos a leer y entender cada
paso de las instrucciones de armado y de operación segura antes de usar este aparato de
propano.
SOLO PARA USO AL AIRE LIBRE
INF RMACIÓN GENERAL DE SEGURIDAD
• NUNCA usar en un rea cerrada.
• NO usar la estufa mientras duerme.
• Siempre usar la estufa en posición bien derecha.
• NO exponer el cilindro de propano al calor excesivo.
• Siempre inspeccionar la estufa, el cilindro de propano y las conexiones para encontrar
daños, restos o suciedad antes de conectar la estufa al cilindro de propano.
• NO USAR COMO CALENTADOR DE ESPACIOS.
• Siempre conectar/desconectar el cilindro de propano al aire libre lejos de cualquier fuente
de fuego o luces de pilotos y solo cuando la estufa esté fría.
• Al almacenar o transportar la estufa, siempre desconectar el cilindro de propano y guardar
en una ubicación fría y bien ventilada en posición erguida.
• Asegurarse que la conexión al cilindro de propano esté bien asegurada (apretada a mano
solamente) antes de cada uso.
• Nunca operar la estufa cerca de líquidos o vapores inflamables. Mantener todos los materi-
ales inflamables o combustibles lejos de la zona segura tal como se indica en la parte
trasera de este manual.
• Terminar la operación y cerrar la v lvula si:
– la temperatura ambiente desciende a menos de -10˚ F.
– ya no hay combustible en el cilindro de propano
– la combustión se vuelve inestable
– no se puede encender r pida y f cilmente
– hay flamazos repetidos
• Si se bloquea la flama del quemador, no intentar desbloquear con un objeto de metal. Lla-
mar a Servicios al Cliente de Texsport al 1-800-231-1402 8 a.m. – 5p.m. CST de lunes a
viernes.
• Nunca dejar la estufa desatendida cuando esté caliente o en uso.
• MANTENER LEJOS DEL ALCANCE DE LOS NIÑOS.
2S
C NEXIÓN A LA FUENTE DE C MBUSTIBLE
ENSAMBLAR AL AIRE LIBRE
Paso 1 ......Usar solamente el cilindro desechable de propano de 16.4 oz/465 g
aprobado por el Departamento de Transporte de los Estados Unidos
DOT-NRC 232/290 M1110.
Paso 2 ......Asegurarse que el mango de la v lvula de control del quemador esté en
posición apagada. Girar en dirección de las manecillas del reloj
Paso 3 ......Asegurarse que el sello de hule del ensamblaje regulador esté limpio y
sin daño y que esté en la posición centrada adecuada.
14228 Instructions 12-13_Layout 1 3/17/14 2:10 PM Page 3