Thames & Kosmos TKx400i DUAL-LED User manual
TKx400iDUAL-LED
MICROSCOPE
TKx400iDUAL-LED
MICROSCOPE
Instructions
for using the
microscope and
the accessories
included in
the kit
Franckh-Kosmos Verlags-GmbH & Co. KG, Pfizerstr. 5-7, 70184 Stuttgart, Germany | +49 (0) 711 2191-0 | www.kosmos.de
Thames & Kosmos, 301 Friendship St., Providence, RI, 02903, USA | 1-800-587-2872 | www.thamesandkosmos.com
Thames & Kosmos UK Ltd, Goudhurst, Kent, TN17 2QZ, United Kingdom | 01580 212000 | www.thamesandkosmos.co.uk
EXPERIMENT MANUAL
Quickstart Guide:
Descriptions of
the permanent
slide preparations
and tips for initial
investigations

Safety for Experiments with Batteries
Three AA batteries (1.5-volt, type AA/LR6), which could not be included in the kit due to their limited shelf life, are required for use. •
Non-rechargeable batteries are not to be recharged. They could explode! • To replace the 1-5-volt batteries: Remove all batteries from
the battery compartment. Then insert new batteries. Always close battery compartments with the lid. • Batteries are to be inserted
with the correct polarity. • Different types of batteries or new and used batteries are not to be mixed. • Do not mix old and new
batteries. • Do not mix alkaline, standard (carbon-zinc), or rechargeable (nickel-cadmium) batteries. • Exhausted batteries are to be
removed from the toy. • Rechargeable batteries are only to be charged under adult supervision. • Rechargeable batteries are to be
removed from the toy before being charged. • The supply terminals are not to be short-circuited. A short circuit can cause the wires to
overheat and the batteries to explode. • Be sure not to bring batteries into contact with coins, keys, or other metal objects. • Do not
throw batteries into the fire! • Avoid deforming the batteries. • Dispose of used batteries in accordance with environmental
provisions, not in the household trash.
Notes on Disposal of Electrical and Electronic Components
The electronic components of this product are recyclable. For the sake of the environment, do not throw them
into the household trash at the end of their lifespan. They must be delivered to a collection location for electronic
waste, as indicated by the symbol shown here. Please contact your local authorities for the appropriate disposal
location.
WARNING! This kit contains functional sharp edges or points. Do not injure
yourself! Caution is required when handling the sharp dissecting needle,
when cutting objects with the cutting tool or other blades, and when
handling the fragile cover slips made of glass.
Never look directly at the sun either with the naked eye or through the
eyepiece. There is a risk of blinding! Never leave the eyepiece unattended in
the sun — it could cause a fire!
WARNING! Not suitable for children under 3 years. Choking hazard — small
parts may be swallowed or inhaled.
First check the list of parts to be sure all the correct parts are present in the
kit.
Keep the packaging and instructions as they contain important information.
Rules for Safe Experimentation
→ Carefully prepare your work area for the experiments. Make
sure you have enough room and get everything ready that you
might need.
→ Perform the experiments calmly and carefully in accordance
with the instructions.
→ Read the instructions before use, follow them, and keep them
on hand for reference.
→ Do not use any equipment or materials other than those
included in the kit or specifically mentioned in the instructions.
Do not use any power supply other than what is indicated.
→ Do not eat, drink, or smoke in the experiment area.
→ If foodstuffs (such as fruit or vegetables) are used in the
experiments, the part to be used should be separated from
the rest before beginning the experiment. Material used
in experiments should not later be consumed, and should
be disposed of in the household trash after completing the
experiment.
→ Some suggested objects of study may contain contents
that are mildly toxic (such as ivy, tulip, etc.). It is therefore
absolutely necessary to keep these away from your mouth
and mucous membranes and to wash your hands after the
experiments.
→ Keep small children and animals away while experimenting.
→ Store the experiment kit out of the reach of small children.
Dear Parents,
With this experiment kit, your
child can discover the world of
smallest things, the microcosm.
Please be prepared to offer
help and advice to your child
when it may be required. A
helping adult hand will be
particularly important when it
comes to preparing thin
sections using the cutting
device or a razor blade. You
should also go through the
steps in the instruction manual
together with your child when
performing the initial
microscope setup. Please also
check to make sure that the
batteries are inserted correctly
into the device. With a little
practice, your child will soon be
having fun studying objects
and performing experiments
independently.
We wish you and your child a
lot of fun with the experiments!
Safety Information
2
CONTENTS
3
Your New Microscope
Page
How your microscope is
constructed and what the
parts are called
A First Look
Pages and
How to focus a
microscope
The Permanent Mounts
Pages 8 and
Wool,
frog’s blood,
and onion skin
The Equipment
Pages and
How to use the
accessories in the
experiment kit
Check It Out
Page 10
Lenses
Macroscopic Examination
with Reflected Light
Page 11
Check It Out
Page
Measurements under the
Microscope

What’s inside your experiment kit:
EQUIPMENT
4
You will also need:
Three AA batteries
(1.5 Volt/LR6). In
addition, you will
need a variety of
natural and household
materials for some
of the preparations.
See the explanations
accompanying the
individual experiments.
Checklist: Find – Inspect – Check off
N0. Description Quantity Order no.
1 Microscope 1 717 161
2 Eyepiece 1 718 090
3 Box 1 717 834
4 with specimen slides 10
5 and permanent mounts
Wool 1 718 086
Onion skin, 1 718 087
Frog’s blood 1 718 088
6 Box with cover slips
and sheet of labels 1 705 228
7 Tweezers 1 705 321
8 Dissecting needle 1 705 233
9 Pipette 1 717 169
10 Magnifying glass 1 717 170
11 Sample container 3 717 172
12 Graduated cylinder 1 717 175
13 Cutting tool (microtome) 1 717 177
14 Chambered sample box 1 717 178
6
8
GOOD TO KNOW!
If you are missing any parts,
please contact Thames &
Kosmos customer service.
US: techsupport@thamesandkosmos.com
UK: techsupport@thamesandkosmos.co.uk

Eyepiece: This
is where you look
into your microscope.
The eyepiece has a
ten-fold (10x)
magnification and
comes separately
in the box. Illumination
unit for reflected
light: This allows you to
illuminate your objects of
study from above when they
can’t be lit with light shining
through from below. The
specimen should not be too
thick or large. This kind of
illumination is only usable
at low magnification
levels.
The base: You
will find the battery
compartment on the
bottom. Be sure to
remove the eyepiece
before turning the
microscope upside
down.
Use the light
adjustment knob to
switch on the LED and
adjust its brightness. One
side of the base controls the
light transmitted from
below, while the other
controls the reflected
light (from above).
Focus knob:
A knob for
adjusting the
sharpness of the
image.
Stage: This is
where you clamp
the slide holding
your specimen,
keeping it firmly in
place.
Use the
revolving
nosepiece to select
objectives with
different
magnifications.
Objectives:
There are three
different levels of
magnification. Always
start with the shortest
one (lowest
magnification).
Filter wheel:
This rotating disk
contains various
colored filters and
diaphragm openings
for adjusting the
light intensity.
The illumination
unit for transmitted
light: This allows you to
illuminate your specimens
when they are mounted on
slides, such as your permanent
mounts and other slide-mounted
specimens you create yourself.
The light shines through the
specimen from below.
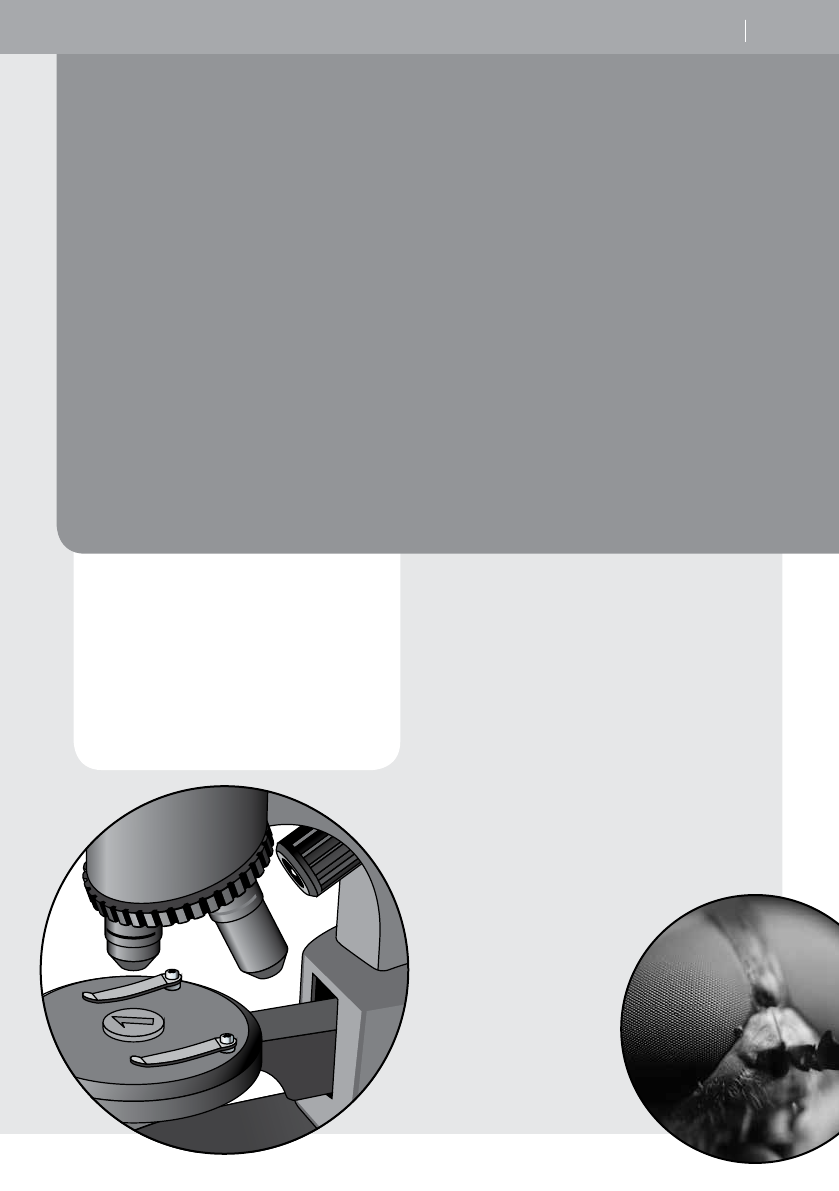
Your New
Microscope
Here is an overview explaining
the components of your
new microscope, what they
are called, and how they are
used. On the following pages,
you will learn step by step
how to set up and use your
microscope.
How your microscope is constructed and what the parts are called 5
6
A First Look
Here’s what you have to do
to study an object under the
microscope.
YOU WILL NEED
Microscope with batteries
Wool permanent mount
(slide)
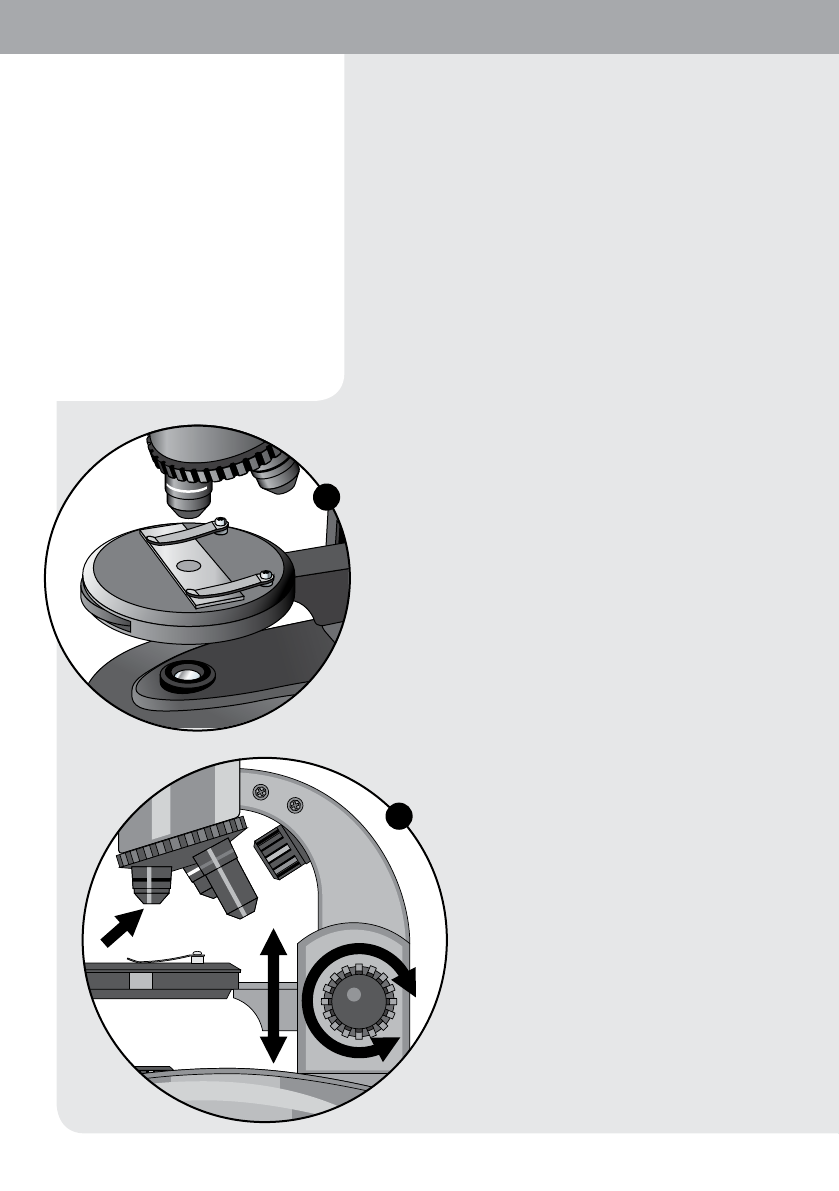
HERE’S HOW
1. Push the slide under the clamps on
the stage. Turn on the illumination
unit for transmitted light at a
medium brightness setting by
turning the light adjustment knob.
The light should shine directly
through the hole in the stage and
through the center of the specimen
on the slide.
Adjust the filter wheel so that the
light shines through the diaphragm
opening with the largest hole.
2. Turn the revolving nosepiece until it
clicks into place in the position
showing the lowest magnification
(4x).
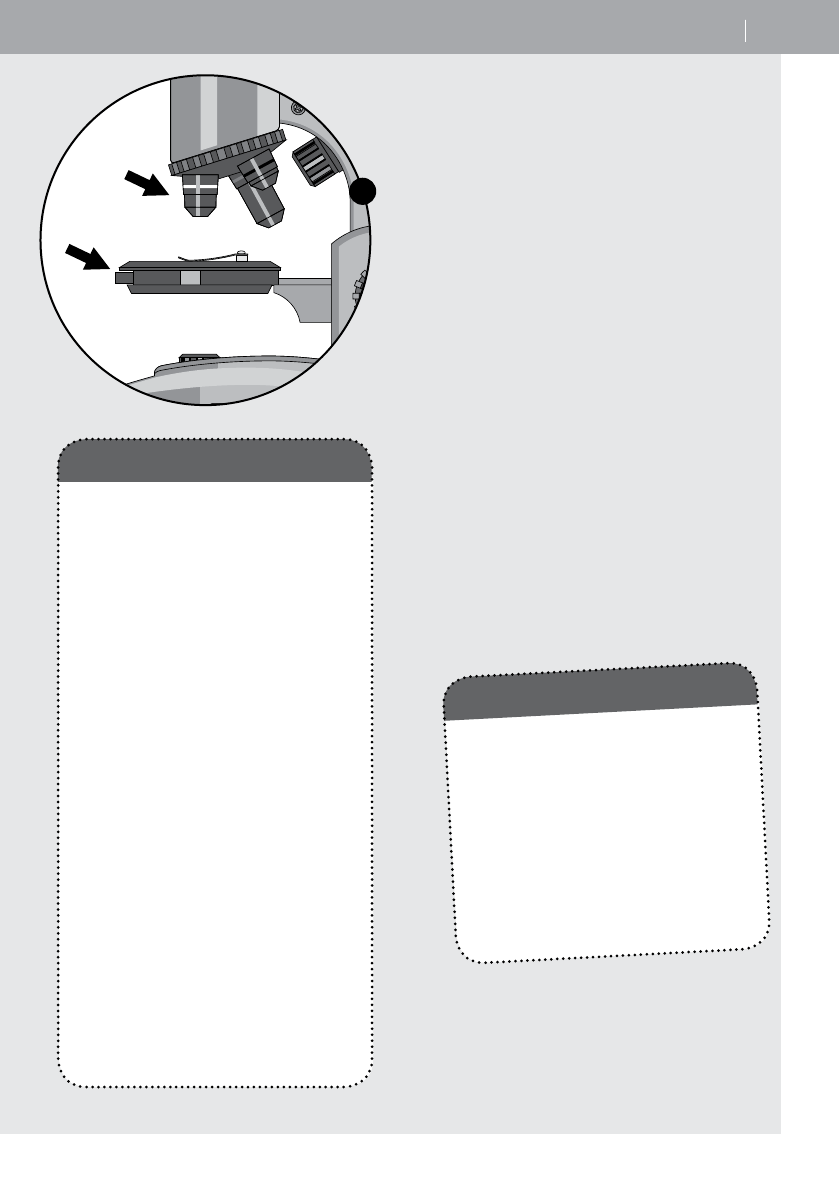
Now rotate the focus knob until the
objective is as close as possible to
the slide.
If you then look through the
eyepiece while slowly moving the
focus knob upward, a greatly-
enlarged image of the wool fibers
will suddenly appear as if from
nowhere.
Now study the fibers under 40-fold
magnification (10x [eyepiece] times
4x [objective]).
With the lowest degree of
magnification, you can get an
overview of the object by slowly
moving the slide with your fingers.
It’s a little tricky at first, but you will
soon get the hang of it.
How to adjust a microscope 7
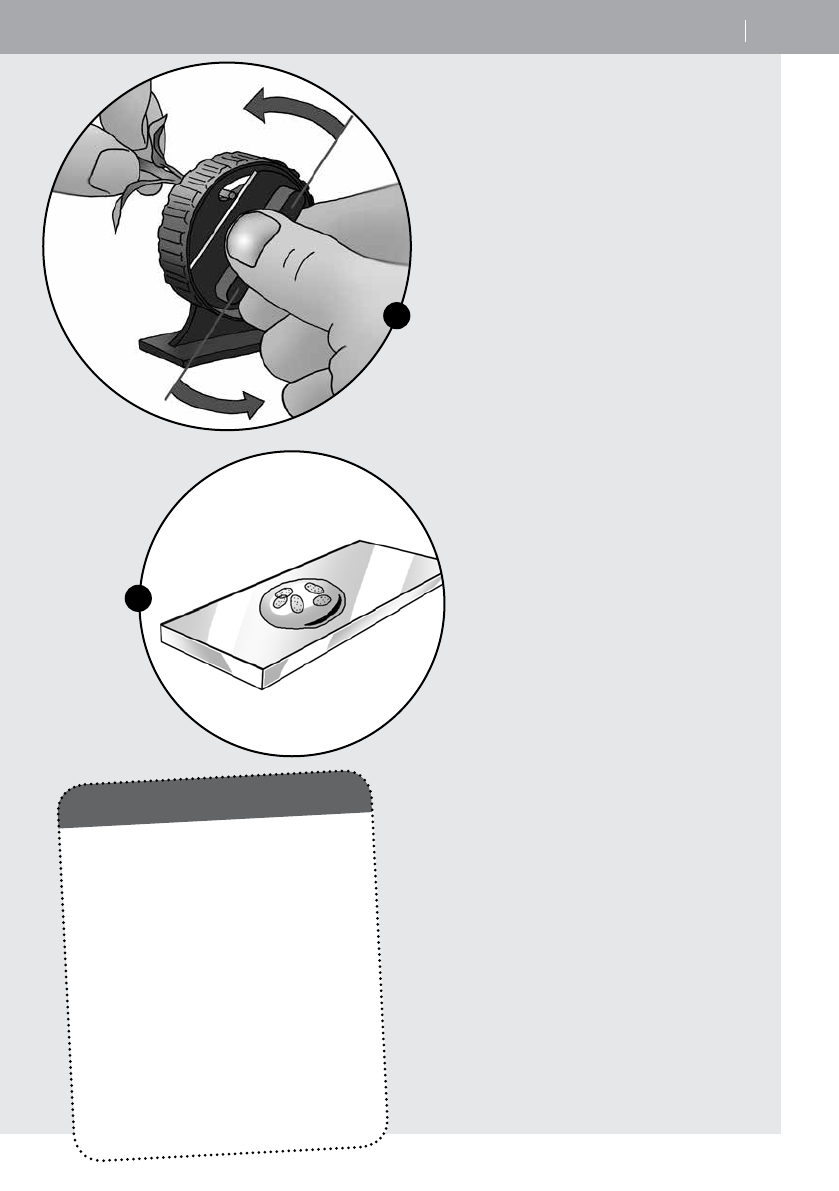
3. Some structures will be easier to
recognize if you use a color filter
or a different diaphragm opening.
Simply turn the filter wheel and see
how the image changes.
You will get a greater magnification
if you turn the revolving nosepiece
in a counterclockwise direction
until it clicks into place again in a
setting showing the next-higher
magnification (10x, or 100-fold in
total).
If you look through the eyepiece
now, you will quickly realize that
you have to re-focus. Just turn the
adjustment knob a little bit, though.
That’s normal, and you will have to
do it again when you switch to the
highest magnification (40x, or 400-
fold in total).
The objective with the greatest
magnification is so long that it will
hit the slide if the focus knob is
turned all the way down. You
should definitely avoid that,
because it will smudge the
objective lens or maybe even
scratch it, and then you won’t be
able to see anything at all.
Do you see nothing but blackness
when you look through the
eyepiece? In that case, the light is
probably not on, or its light is not
bright enough. It might be due to
old or weak batteries. Or is it
possible that the revolving
nosepiece didn’t click properly
into place?
Is it bright enough when you look
through the eyepiece, but you
can’t get a sharp image? The
pictures on the following pages
will show you what you should be
seeing. If it isn’t working, it might
be because the specimen is not
positioned directly under the
objective. Nudge it a bit while
looking through the eyepiece.
A common beginner’s mistake is
moving the focus knob too
quickly. If you do that, you might
not even notice when a sharp
image briefly appears. Try it again!
TIP!
HELP?!

8
The Permanent
Mounts
In your microscope kit, in addition
to this manual, you will find a book
titled “Microscopy” by Annerose
Bommer. It describes all sorts of
things that you can study under
your microscope and explains how
you can prepare your own
microscope specimens. To help you
get started right away, your kit
contains three slides containing
specimens that have already been
prepared for you. These are called
prepared mounts or permanent
mounts. Read below to find out
what you will be able to discover in
them.
YOU WILL NEED
Microscope with batteries
Wool permanent mount
HERE’S HOW
1. Place the permanent mount under
the microscope and adjust the focus
as described on pages 6 and 7. Use
the transmitted light unit on the
base of the microscope and begin
with the lowest magnification
power.
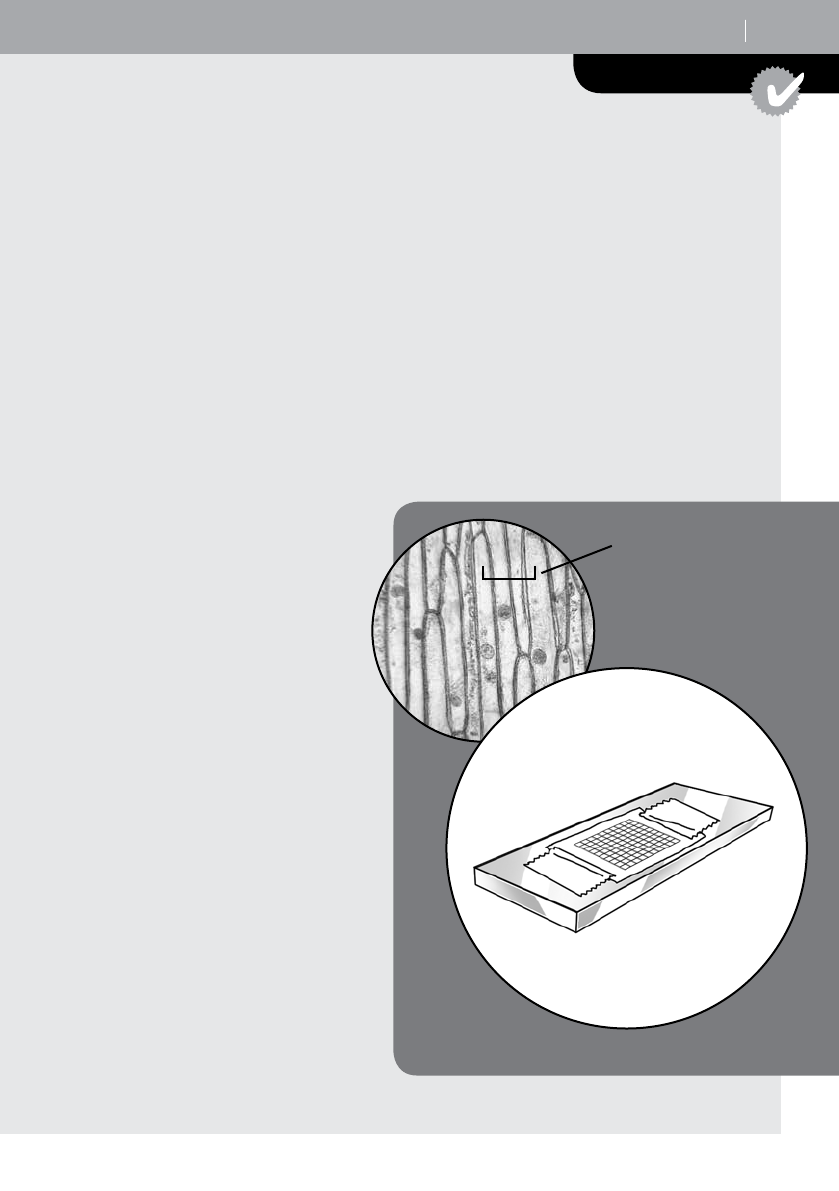
2. Now, as you observe the wool fibers,
you will notice that they are
colored. After all, wool is made from
the hairs of sheep, which can be
white or black. In your permanent
mount, the fibers have been dyed to
give them better contrast and help
you see more details. You will find
thick and thin hairs in the specimen.
The larger ones have a thick wall
and are hollow in the center.
Sometimes, you may also be able to
see scales on the wall.

All the things you can discover with the permanent mount 9
HERE’S HOW
1. Place the permanent mount under the
microscope and adjust the focus as
described on pages 6 and 7. Use the
transmitted light unit on the base and
begin with the lowest magnification
power.
2. In this permanent mount, a drop of
blood was spread so thinly on the slide
that you can recognize the individual
red blood cells (also called red blood
corpuscles). In the permanent mount,
they look like circles or ovals with a
wide border. Living red blood cells
have the shape of a hard candy drop,
round and flat with a thicker edge
region — or a little like a donut
without the hole. Depending on how
the individual cells are arranged in the
permanent mount, you will see them
from above or at a slant from the side,
which accounts for the various shapes
you will see in the specimen. Red
blood corpuscles are responsible for
oxygen transport in the blood.
HERE’S HOW
1. Place the permanent mount under the
microscope and adjust the focus as
described on pages 6 and 7. Use the
transmitted light unit on the base and
begin with the lowest magnification
power.
2. The onion skin is so thin that it
consists of just one or two layers of
cells. All plant cells have a wall made
of cellulose, which builds a stable
framework between the cells. You can
recognize this quite easily in the
permanent mount, with the individual
cells appearing more or less hexagonal
(six-sided). In your permanent mount,
the cells were dyed so that the cell
walls appear darker and you can see
them more easily. In some cells, you
will also be able to see round shapes.
Those are the cell nuclei, where the
chromosomes containing genetic
material (DNA) are located.
YOU WILL NEED
Microscope with batteries
Frog’s blood permanent mount
YOU WILL NEED
Microscope with batteries
Onion skin permanent mount

Eyepiece lens
Eye
Light source
Actual plane
of intermediate image
Intermediate
lens
Objective lens
Slide
Stage
Diaphragm disk
Apparent
image plane
0.0025 mm in reality
1 cm under the
microscope
Drops of water and curved pieces of glass
have something in common: They magnify
objects when you look through them. Curved
pieces of glass are also known as lenses. Since
the 19th century, when Ernst Abbe began
improving the magnification power of lenses,
not just by trial and error, but also through
mathematical calculations, microscopes have
become better and better.
But what exactly does “better” mean?
Basically, it means getting a clearer and larger
image through more skillfully shaped lenses
and through the combination of various
lenses. In your microscope, you will always
be seeing the image through two lenses. One
lens is located in the eyepiece, the other in
the objective.
Each objective has a different lens, with
each lens magnifying the slide specimen
more strongly than the last. You can see
the magnification written on the revolving
nosepiece. Under the microscope’s highest
magnification, objects will appear 400 times
larger. That means that two cells that seem
to be 1 centimeter apart from each other
under the microscope will actually be just 25
thousandths of a millimeter apart.
CHECK IT OUT
10
Lenses
YOU WILL NEED
Microscope with batteries
Magnifying glass
Flat objects to study such
as a leaf, flower, stone, coin,
paper money, or stamp
The “Macro” Function of your Microscope
Up to now, you have familiarized yourself with the “normal” use of a microscope.
Normally, you will study specimens on a glass slide that are so thin (or sliced so thinly)
that light can shine through them from below. This also works for viewing
microorganisms swimming in a drop of water, for example. This kind of microscopy is
known as bright-field microscopy.
But you might sometimes want to study an object that is not small or thin enough to
fit on a slide or for the light to shine through it — a leaf, a flower, a dead insect, or
maybe a coin or a stamp. In such a case, you will only need a relatively low degree of
magnification and light should shine on the object from above. This type of viewing of
objects at magnifications of 40 times or less is sometimes called macroscopy, which is
the viewing of objects that are visible with the naked eye, as opposed to microscopy,
which is the viewing of objects that are too small to see with the naked eye.
There are special macroscopes for studying things like this, usually with 20-fold or
40-fold magnification and often with two eyepieces for binocular viewing, providing a
three-dimensional image. Your microscope can do that too, though, in a simpler
manner (at least for smaller and rather flat objects). For “macro” viewing, use the
reflected light function of your microscope.
HERE’S HOW
1. Start by studying your object under
the magnifying glass. Which areas
seem interesting enough to warrant
investigation under greater
magnification?
2. Turn your revolving nosepiece to
the lowest level of magnification
(red ring). The other objectives are
not usable for “macro” viewing.
Place your object of study on the
stage and turn on the reflected light
illumination unit.
3. Adjust the focus
as you look
through the
eyepiece. Nudge
the object to find
the most
interesting areas
on its surface.
Macroscopic examination with reflected light 11
12
The Equipment
This section presents the items
that you will find in your
experiment kit and explains
how to use them. These items
constitute the basic
equipment for all your
microscopic investigations.
Because they are used for the
preparation of specimen
slides, they are also called
“specimen slide equipment.”
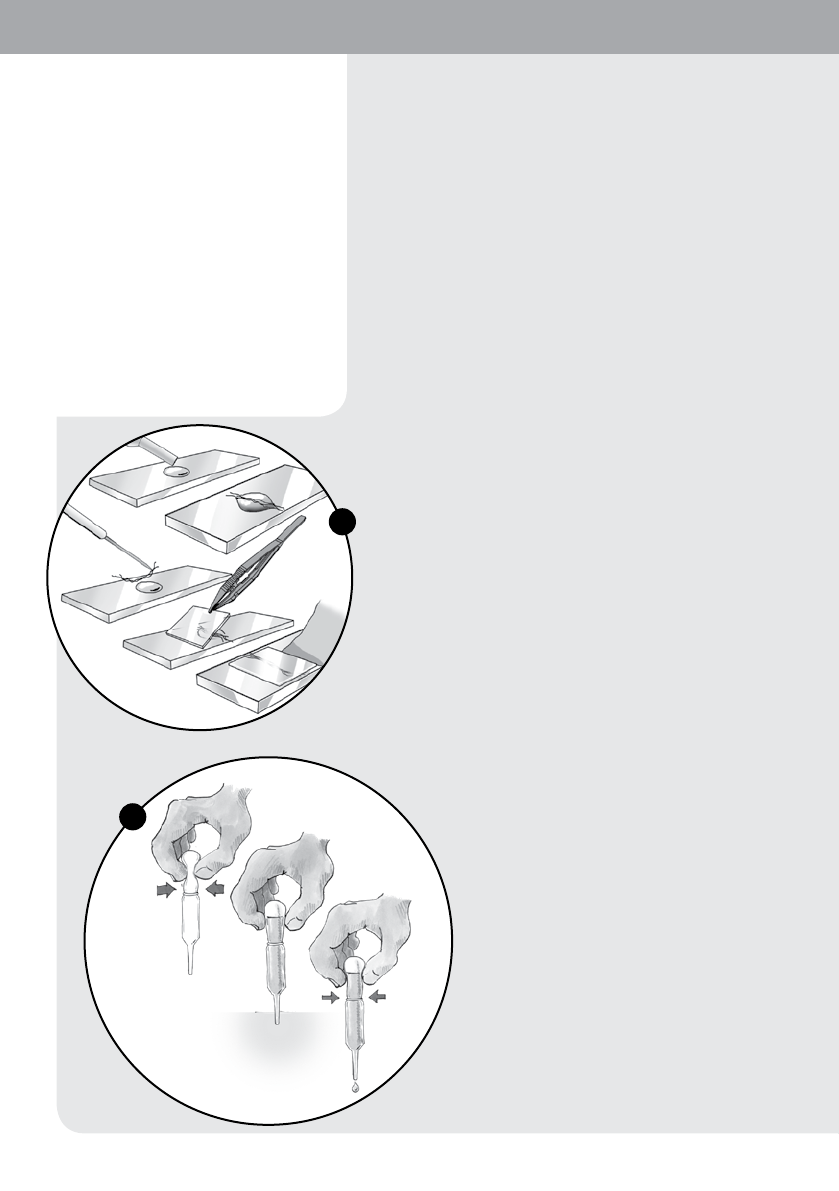
1. Without slides and cover slips, of
course, you can’t do much
microscopic investigation. The slide
serves as a foundation for all
objects that you want to study
under the microscope. The objects
(with very few exceptions) should
always be placed in a drop of water
and covered with a cover slip. The
illustration shows you how to do it.
You will find examples of easy-to-
prepare beginner’s specimen slides
starting on page 12 in the
microscopy book.
2. For these initial specimens, you will
also be using three additional
specimen slide tools: the pipette,
the tweezers, and the dissecting
needle.
The pipette is the standard tool for
suctioning up a small quantity of
liquid and transferring it to the slide
or into another container.
The tweezers and dissecting needle
will help you grab very small
objects, or position them or pull
them apart on the slide. Be careful
with the dissecting needle — it’s
really sharp! You can also use the
tweezers to place the cover slip
over the specimen. Just be careful,
because cover slips break easily.
How to use the accessories in the experiment kit 13
3. Your microscope makes it possible
to see large images of tiny things.
There are lots of objects that can be
placed directly in a drop of water on
the slide, covered with a cover slip,
and then viewed under the
microscope: strands of hair,
material fibers, insect wings,
strands of algae, and so on. To
prepare a specimen like the
permanent mount included in the
kit, though, you will first have to get
a little practice with one of the most
important manual skills of
microscopy: the preparation of thin
sections.
For viewing sections of an object
under the microscope, they have to
be thin enough for the light to shine
through them. That means that we
are talking about sections that are
only about half a millimeter in
thickness — or even thinner! The
cutting tool included in the kit will
help you prepare thin sections like
that.
4. Get your slide ready and use the
pipette to place a drop of water in
the center of it. Now, for the cutting
step, the most important thing you
will need is patience! Not every slice
will work. Some will be too thick,
others uneven, others maybe too
thin. Start by cutting several
sections and place them in the drop
of water on the prepared slide.
Depending on the size of the
sections, you will usually be able to
fit more than one in a single water
drop. The more sections you
prepare, the better the chance that
one will be usable.
You will find a razor blade inside
the cutting tool. It will gradually
become less sharp over time,
which will make it harder and
harder to produce thin sections.
You can replace the blade by
loosening the screw and opening
it, and exchanging a new, sharper
blade for the old one. You should
definitely have an adult help you
replace the blade. Razor blades are
extremely sharp!
TIP!
14 How to use the accessories in the experiment kit
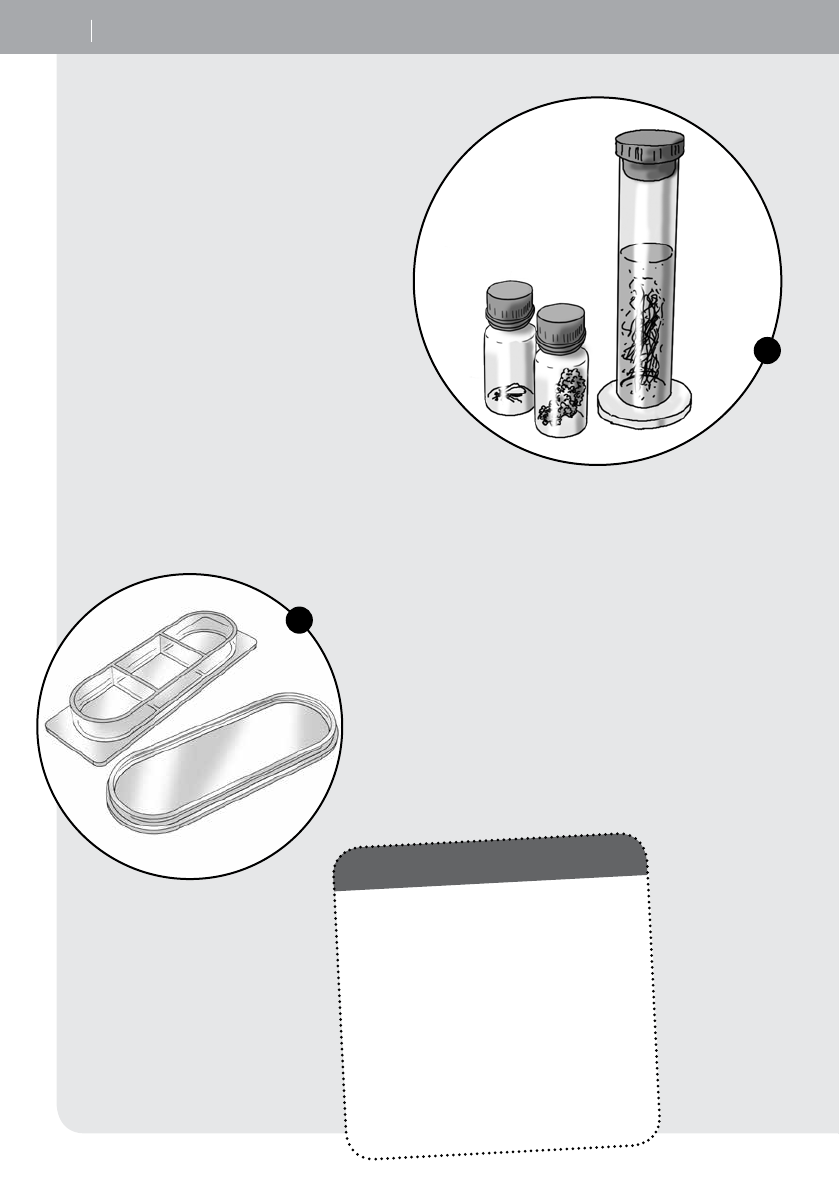
6. Some water samples will be literally
swimming with interesting things to study.
For some of the larger creatures, you won’t
even need the microscope to view them. Use
the sample container with the
magnification lid to perform an initial
sorting of your finds. Larger objects can be
directly viewed under the magnifying lens
in the lid.
Pages 14 through 19 and 40 to 42 in the
colored microscopy book will give you lots
of ideas for projects using the accessories in
your microscope kit.
5. In principle, you can take your
microscope with you wherever you
go. But to protect its sensitive
optics and mechanics, it is best to
use it on a table inside. The most
interesting objects to investigate,
though, will usually be found
outside in nature.
The colored microscopy book
describes lots of objects of study
that you can find on trees, in ponds,
or in meadows. Your microscope kit
contains some very handy sample
containers for collecting water
samples from a rain barrel, insect
wings, or other interesting objects
from outside and transporting them
safely to your microscope.
One final tip for taking care of your
microscope: Always keep your
microscope clean and free of dust.
Only use a dry, very soft cloth to
clean the lenses. Clean all items of
equipment as soon as you have
completed your microscopy
project. The better you heed this
advice, the longer you will be able
to enjoy sharp, clear images from
the micro-world.
TIP!
The classic method for “saving”
awesome observations under the
microscope is to draw what you
see. You will find examples of good
drawings in the colored microscopy
book. In addition to an identifying
description, a scientific drawing
will always have a scale. The scale
will help you reconstruct later on
how large the studied object
actually was. But how can you
measure sizes under the
microscope?
To see how, you will need: a slide,
graph paper with one-millimeter
squares, a permanent felt-tip
marker (the thinner the better), a
small piece of clear plastic film (a
transparency sheet or a piece of
clear plastic packaging, for
example), a ruler, and transparent
tape.
Place the piece of plastic film on
the graph paper. Use the pen to
draw the one-millimeter grid on the
plastic film. Use the ruler to help
you keep the lines straight.
Now tape the plastic film with the
one-millimeter grid to the center of
the slide.
Now, when you prepare a
microscope specimen on this slide,
you can easily estimate its size. The
thin lines on the one-millimeter
graph paper are only one millimeter
apart.
CHECK IT OUT
Measurements under the Microscope
Measurements
under the
Microscope
15
. mm

1st edition 2016
© 2016 Franckh-Kosmos Verlags-GmbH & Co. KG, Stuttgart
This work, including all its parts, is copyright protected. Any use outside the specific limits of the copyright law without the consent
of the publisher is prohibited and punishable by law. This applies specifically to reproductions, translations, microfilming, and
storage and processing in electronic systems and networks. We do not guarantee that all material in this work is free from copyright
or other protection.
Project management: Dr. Mark Bachofer,
Text: Jan Haller, Mark Bachofer
Product development: Constanze Schäfer, Armin Vetter, Björn Stolpmann
Design and Layout: werthdesign, Horb auf Basis eines Grundlayouts vom Atelier Bea Klenk, Berlin
Illustrations: Friedrich Werth, Horb
Photos: ExQuisine ©fotolia.com, page 3 bottom left, 8 top; Mark Bachofer, Stuttgart, page 3 top left + bottom right, 8 bottom, 9, 10;
15; Michael Flaig, prostudios, Stuttgart, page 2
Packaging design: fine tuning, Michaela Kienle, Dürmentingen-Hailtingen using a photorealistic digital illustration by Andreas
Resch, St. Ulrich am Waasen, Österreich
1st English Edition © 2017 Thames & Kosmos, LLC, Providence, RI, U.S.A.
® Thames & Kosmos is a registered trademark of Thames & Kosmos, LLC.
Editing: Camille Duhamel and Ted McGuire; Additional Graphics and Layout: Dan Freitas
Distributed in North America by Thames & Kosmos, LLC. Providence, RI 02903
Phone: 800-587-2872; Web: www.thamesandkosmos.com
Distributed in United Kingdom by Thames & Kosmos UK, LP. Goudhurst, Kent TN17 2QZ
Phone: 01580 212000; Web: www.thamesandkosmos.co.uk
We reserve the right to make technical changes. Printed in Germany / Imprimé en Allemagne
635602- 02- 030317
Table of contents
Other Thames & Kosmos Microscope manuals


 user manual")


