manuals.online logo
Brands
  1. Home
  2. •
  3. Brands
  4. •
  5. BestScope
  6. •
  7. Microscope
  8. •
  9. BestScope BS-2040FB(LED) User manual

BestScope BS-2040FB(LED) User manual

BestScope
BestScope
BestScope
BestScope International
International
International
International Limited
Limited
Limited
Limited
LED
LED
LED
LED F
F
F
F luorescent
luorescent
luorescent
luorescent Biological
Biological
Biological
Biological
Microscope
Microscope
Microscope
Microscope
BS-2040
BS-2040
BS-2040
BS-2040 F
F
F
F B
B
B
B (LED)
(LED)
(LED)
(LED) /
/
/
/ F
F
F
F T
T
T
T (LED)
(LED)
(LED)
(LED)
User
User
User
User Manual
Manual
Manual
Manual
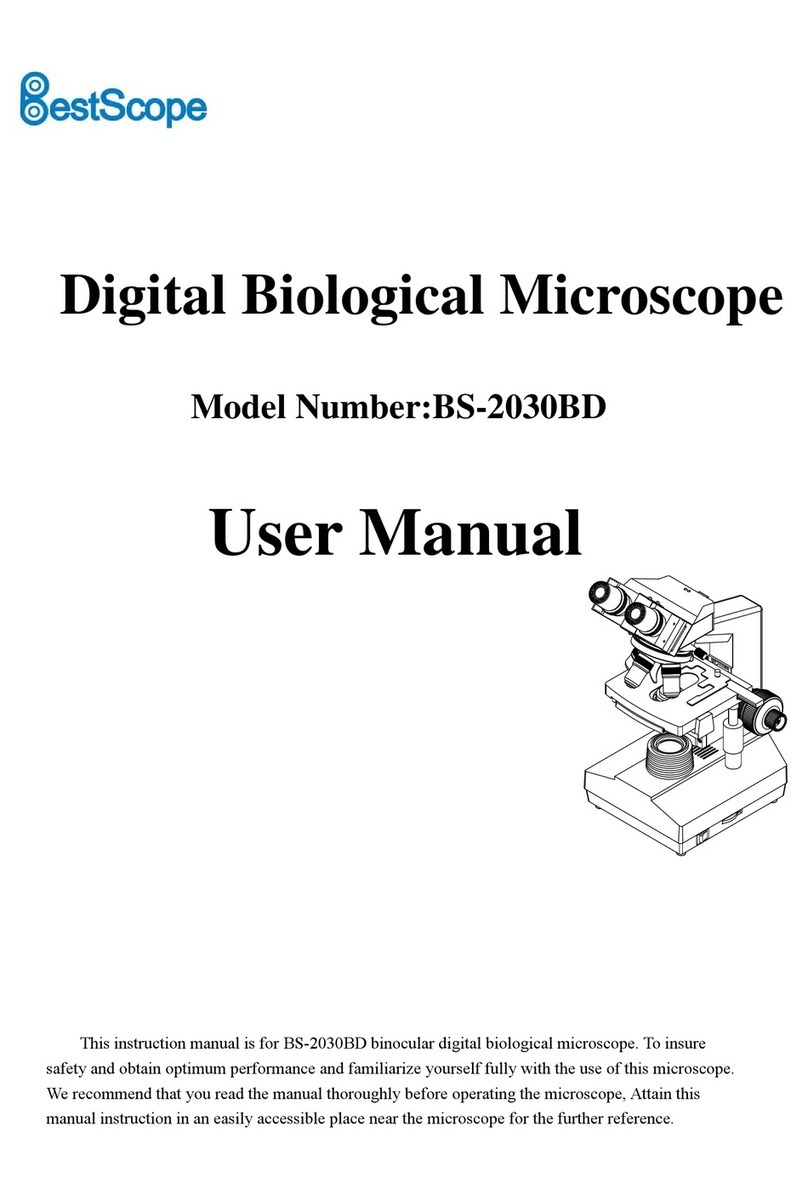
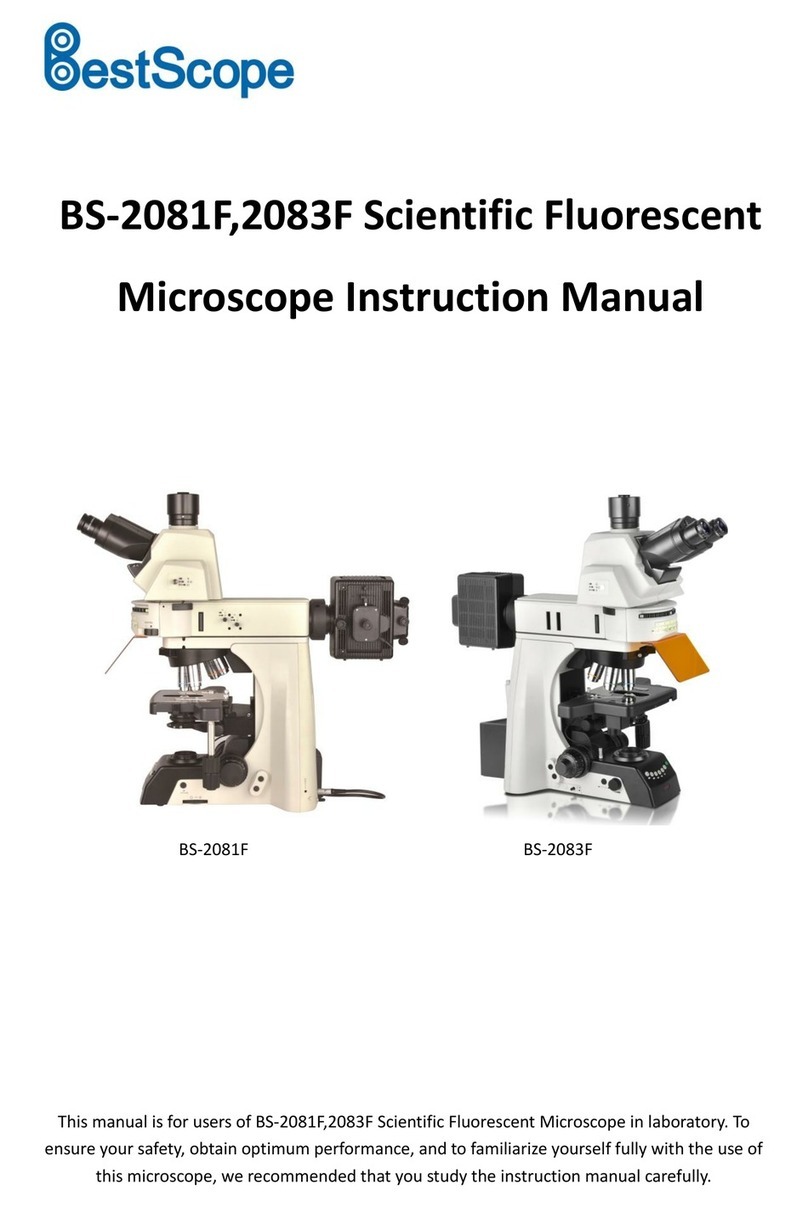
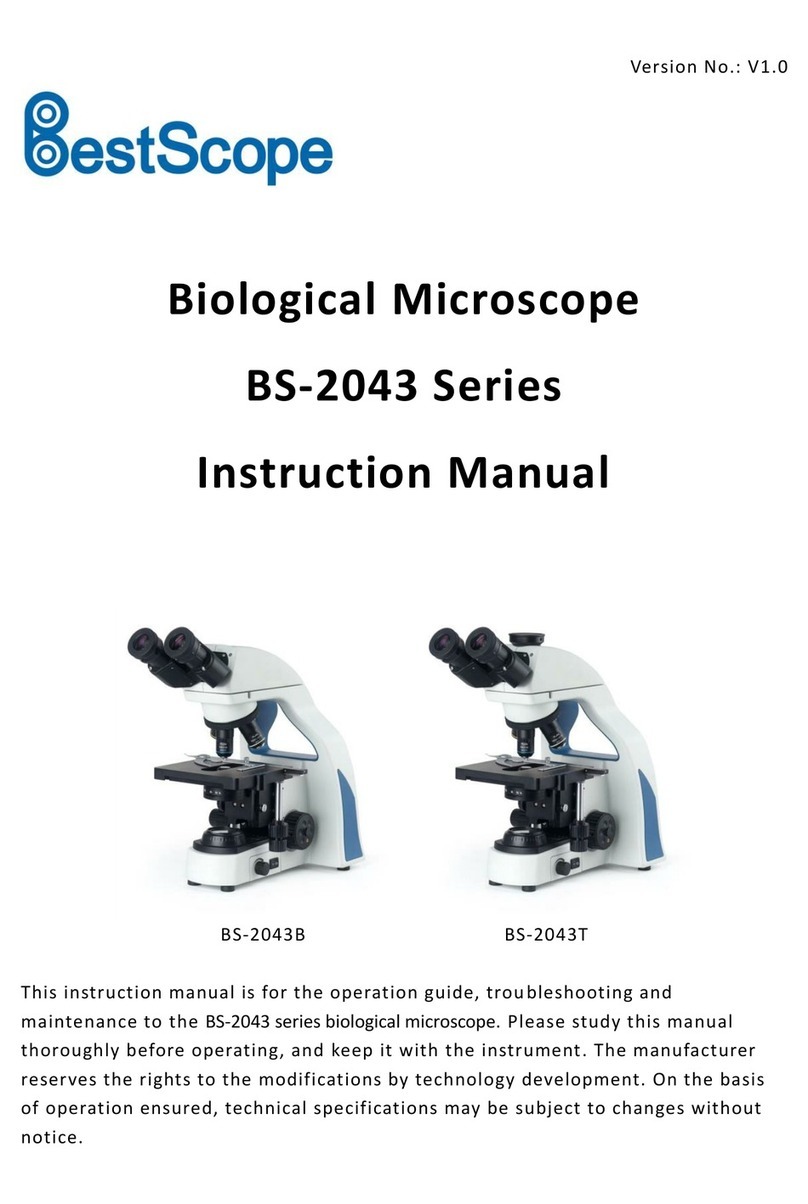
This manual is for LED fluorescent biological microscope Model BS-2040 F B (LED) / F T (LED) .
To ensure the safety, obtain optimum performance and to familiarize yourself fully with the use of
this microscope, it is strongly recommended that you study this manual thoroughly before operating
the microscope.
BestScope
BestScope
BestScope
BestScope International
International
International
International Limited
Limited
Limited
Limited
1
Content
Content
Content
Content
User Notice ...................................................................................................... 1
1. Safety Note ............................................................................................ 1
2. Maintenance and Care ........................................................................... 2
LED Fluorescent Part ....................................................................................... 2
1. Components Name ................................................................................. 2
2. Installation ............................................................................................. 3
3. Adjustment and Operation ..................................................................... 4
4. Configuration and Specifications .......................................................... 6
Microscope Part ............................................................................................... 7
1. Components Name ................................................................................. 7
2. Assembly ................................................................................................ 8
3. Adjustment and operation .................................................................... 13
4.Technical Specifications .................................................................... 18
5.Outfit .................................................................................................. 19
6.Troubleshooting Guide ...................................................................... 20
BestScope
BestScope
BestScope
BestScope International
International
International
International Limited
Limited
Limited
Limited
2
User
User
User
User Notice
Notice
Notice
Notice
1.
1.
1.
1. Safety
Safety
Safety
Safety Note
Note
Note
Note
1. Open the box carefully to avoid the accessories, like lens, dropping to ground or being damaged.
2. Do keep the instrument out of direct sunlight, high temperature or humidity, dusty and easy
shaking environment. Make sure the stage is flat, horizontal and firm enough.
3. When moving the microscope, carefully carry it with the handle and the base.
4. When running, the lamp house and nearby parts will be very hot. Please ensure there is enough
cooling room for them.
5. Make sure the instrument is earthed, to avoid lighting strike.
6. For safety, be sure the main switch is in “ O ” (off) state and cut off the power supply before
replacing the bulb or the fuse. If you replace the bulb during use or right after use, allow the lamp
bulb and the lamp house to cool completely before touching.
(Designated
(Designated
(Designated
(Designated bulb
bulb
bulb
bulb :6V/20W
6V/20W
6V/20W
6V/20W Halogen
Halogen
Halogen
Halogen Lamp)
Lamp)
Lamp)
Lamp)
7. Check the input voltage: be sure the input voltage which is signed in the back of the microscope is
consistent with the power supply voltage, or it will bring a serious damage to the instrument.
8. Always use the power cord provided by Novel.
2.
2.
2.
2. Maintenance
Maintenance
Maintenance
Maintenance and
and
and
and Care
Care
Care
Care
1. All the lenses have been adjusted properly; do not dismount them by yourself please.
2. The nosepiece and coarse and fine focusing parts are so delicate that it is forbidden to
disassemble them carelessly by yourself.
3. Keep the instrument clean, and do not pollute the optical element when wiping away the dust on
the instrument.
4. The contaminations on the prism, like fingerprints and oil smudges, could be gently wiped with
a piece of soft cloth or tissue paper, gauze which has been immersed in pure alcohol or ether.
(Note
(Note
(Note
(Note that
that
that
that the
the
the
the alcohol
alcohol
alcohol
alcohol and
and
and
and ether
ether
ether
ether are
are
are
are highly
highly
highly
highly flammable,
flammable,
flammable,
flammable, do
do
do
do keep
keep
keep
keep them
them
them
them away
away
away
away from
from
from
from the
the
the
the fire
fire
fire
fire or
or
or
or
potential
potential
potential
potential sources
sources
sources
sources of
of
of
of electrical
electrical
electrical
electrical sparks,
sparks,
sparks,
sparks, and
and
and
and use
use
use
use them
them
them
them in
in
in
in a
a
a
a drafty
drafty
drafty
drafty room
room
room
room as
as
as
as possible
possible
possible
possible as
as
as
as you
you
you
you
can.)
can.)
can.)
can.)
5. Do not attempt to use organic solvents to clean the microscope components other than the glass
components. To clean them, use a lint-free, soft cloth slightly moistened with a diluted neutral
detergent.
6. When using, if the microscope is splashed by liquid, cut off the power at once, and wipe away
the splash.
7. Do not disassemble any parts of the microscope, as this will affect the function or reduce the
performance of the microscope.
8. Place the instrument in a cool, dry position. When not using the microscope, keep it covered
with a dust cover. Make sure the lamp socket is cool before covering the microscope.
BestScope
BestScope
BestScope
BestScope International
International
International
International Limited
Limited
Limited
Limited
3
LED
LED
LED
LED Fluorescent
Fluorescent
Fluorescent
Fluorescent Part
Part
Part
Part
T h is f luorescent attachment is designed for infinite optical system.
1.
1.
1.
1. Components
Components
Components
Components Name
Name
Name
Name
FL-LED fluorescent attachment: (Fig.1)
①B rightness adjustment knob
②Condenser focusing knob
③M ain body of fluorescent attachment
④F ilter subassembly
⑤Fastening bolt
⑥F luorescent objective
⑦L ight barrier control lever
⑧P ower adapter
E lectrical parameters :
E xternal electric supply :110V-240V 50/60 Hz
I nput
V
oltage :DC7.5V 1000mA
F luorescent illuminator :LED 3W ( B lue)
Fig.2
①
③
②
⑥
⑧
④
⑦
⑤
BestScope
BestScope
BestScope
BestScope International
International
International
International Limited
Limited
Limited
Limited
4
2.
2.
2.
2. Installation
Installation
Installation
Installation
F
F
F
F or
or
or
or installation
installation
installation
installation instruction,
instruction,
instruction,
instruction, take
take
take
take BS-2040FB(LED)
BS-2040FB(LED)
BS-2040FB(LED)
BS-2040FB(LED) fluorescent
fluorescent
fluorescent
fluorescent biological
biological
biological
biological microscope
microscope
microscope
microscope for
for
for
for example:
example:
example:
example:
●BS-2040FB(LED) LED F luorescent M icroscope=biological microscope BS-2040B+FL-LED
attachment
F
F
F
F luorescent
luorescent
luorescent
luorescent M
M
M
M icroscope
icroscope
icroscope
icroscope Assembly
Assembly
Assembly
Assembly
:
1) L oosen the clamping screw ①on biological microscope BS-2040B and remove the binocular
viewing head from the body of microscope by revolving it counterclockwise by 90 °.
2) I nsert the main body of fluorescent attachment into the upper part of the microscope
BS-2040B ,adjust the orientation and tighten the clamping screw ①.
3) I nsert the binocular viewing head into the main body of the fluorescent attachment , adjust its
orientation and tight the clamping screw ②to fix the head.
4) R eplace the original biological objective with special fluorescent objectives ④.
Fig. 3
NOTE:
NOTE:
NOTE:
NOTE:
1.
1.
1.
1. B
B
B
B oth
oth
oth
oth top
top
top
top and
and
and
and bottom
bottom
bottom
bottom illumination
illumination
illumination
illumination system
system
system
system can
can
can
can be
be
be
be used
used
used
used for
for
for
for fluorescent
fluorescent
fluorescent
fluorescent
microscope.
microscope.
microscope.
microscope. B
B
B
B ut
ut
ut
ut for
for
for
for this
this
this
this fluorescent
fluorescent
fluorescent
fluorescent attachment
attachment
attachment
attachment ,
,
,
, only
only
only
only top
top
top
top illuminator
illuminator
illuminator
illuminator can
can
can
can be
be
be
be
used
used
used
used while
while
while
while bottom
bottom
bottom
bottom illuminator
illuminator
illuminator
illuminator is
is
is
is closed.
closed.
closed.
closed. The
The
The
The filter
filter
filter
filter subassembly
subassembly
subassembly
subassembly is
is
is
is set
set
set
set at
at
at
at the
the
the
the
middle
middle
middle
middle position
position
position
position (B
(B
(B
(B excitation
excitation
excitation
excitation state);
state);
state);
state); F
F
F
F or
or
or
or normal
normal
normal
normal biological
biological
biological
biological observation,
observation,
observation,
observation, use
use
use
use
bottom
bottom
bottom
bottom illuminator
illuminator
illuminator
illuminator while
while
while
while top
top
top
top illumination
illumination
illumination
illumination is
is
is
is closed.
closed.
closed.
closed. The
The
The
The filter
filter
filter
filter subassembly
subassembly
subassembly
subassembly is
is
is
is
set
set
set
set at
at
at
at empty
empty
empty
empty position.
position.
position.
position.
2.
2.
2.
2. It
It
It
It is
is
is
is necessary
necessary
necessary
necessary to
to
to
to adjust
adjust
adjust
adjust biological
biological
biological
biological microscope
microscope
microscope
microscope system
system
system
system firstly
firstly
firstly
firstly before
before
before
before
fluorescent
fluorescent
fluorescent
fluorescent attachment
attachment
attachment
attachment is
is
is
is used.
used.
used.
used.
BestScope
BestScope
BestScope
BestScope International
International
International
International Limited
Limited
Limited
Limited
5
3.
3.
3.
3. A
A
A
A djustment
djustment
djustment
djustment and
and
and
and O
O
O
O peration
peration
peration
peration
3.1
3.1
3.1
3.1 F
F
F
F luorescent
luorescent
luorescent
luorescent O
O
O
O peration
peration
peration
peration S
S
S
S ystem
ystem
ystem
ystem
3.2
3.2
3.2
3.2 F
F
F
F luorescent
luorescent
luorescent
luorescent M
M
M
M icroscope
icroscope
icroscope
icroscope O
O
O
O peration
peration
peration
peration (Fig.4,
(Fig.4,
(Fig.4,
(Fig.4, Fig.5)
Fig.5)
Fig.5)
Fig.5)
1. S et the filter subassembly ①at the middle position to engage B excitation filter into the light path.
2. C onnect the power supply onto the microscope, turn on the main switch and adjust brightness adjustment
knob ④to a proper intensity.
3. A djust the condenser focusing knob ③to make the field of view full.
4. P lace the specimen on the stage for observation and operation.
5. D uring observation, use the light barrier lever ②to obscure the light path so that the main switch is not
open and closed frequently.
●T he standard FL-LED fluorescent attachment are equipped with b -excitation filter (in the m iddle
position). If you need other types of filters , please purchase separately.
Fig.4
Condenser focusing knob ③
M ain switch and brightness adjustment knob ④
Light barrier control lever
F ilter subassembly ①
Fig.5
B- stop filter
B-excitation filter
BestScope
BestScope
BestScope
BestScope International
International
International
International Limited
Limited
Limited
Limited
6
3.3
3.3
3.3
3.3 P
P
P
P recautions
recautions
recautions
recautions for
for
for
for O
O
O
O peration
peration
peration
peration
1. Check that the power voltage and frequency is consistent with the product requirements.
2. E nsure that the plug is inserted fully and well connected.
3. I f only for transmitted light observation (bio logical microscop y ), pull out the filter subassembly or
push inward it to engage the empty position into the optical path.
4. W hen Using the oil immersion objective (100x), be sure to use specified immersion oil for
f luorescent observation .
5. If you interrupt observation within a short time, use the light barrier to block light .
4.
4.
4.
4. Configuration
Configuration
Configuration
Configuration and
and
and
and Specification
Specification
Specification
Specification s
s
s
s
Components N ame S pecifications O utfit
Fluorescence main body ●
I nfinite plan fluorescence
objective
4 × , 10 × , 40 × , 100 × ○
F ilter subassembly B excitation ●
Filter subassembly G excitation ○
I lluminator
3W LED L amp (465-475nm blue) ●(with B excitation)
3W LED L amp (520-530nm green) ○(with G excitation)
A dapter DC7.5V 1000mA ●
NOTE : “●” S tandard outfit ; “○” O ptional
BestScope
BestScope
BestScope
BestScope International
International
International
International Limited
Limited
Limited
Limited
7
Microscope
Microscope
Microscope
Microscope Part
Part
Part
Part
1.
1.
1.
1. Components
Components
Components
Components Name
Name
Name
Name
Eyepiece
Binocular viewing head
Nosepiece
Objective
Main body
BestScope
BestScope
BestScope
BestScope International
International
International
International Limited
Limited
Limited
Limited
8
①
②
2
2
2
2 .
.
.
. Assembly
Assembly
Assembly
Assembly
2-1
2-1
2-1
2-1 Assembly
Assembly
Assembly
Assembly Diagram
Diagram
Diagram
Diagram
The following figure shows the installation sequence of the components. The number in the figure
shows the assembly steps.
�
�
�
�Before
Before
Before
Before installing,
installing,
installing,
installing, be
be
be
be sure
sure
sure
sure every
every
every
every components
components
components
components is
is
is
is clean,
clean,
clean,
clean, do
do
do
do not
not
not
not score
score
score
score any
any
any
any parts
parts
parts
parts or
or
or
or glass
glass
glass
glass surface.
surface.
surface.
surface.
�
�
�
�Keep
Keep
Keep
Keep well
well
well
well with
with
with
with hexagon
hexagon
hexagon
hexagon wrench
wrench
wrench
wrench provided.
provided.
provided.
provided. When
When
When
When changing
changing
changing
changing the
the
the
the components,
components,
components,
components, you
you
you
you will
will
will
will need
need
need
need it
it
it
it
again.
again.
again.
again.
Main body
Objective
Binocular
viewing head10X Eyepiece
④
③
Power cord
BestScope
BestScope
BestScope
BestScope International
International
International
International Limited
Limited
Limited
Limited
9
2.2
2.2
2.2
2.2 Assembly
Assembly
Assembly
Assembly Procedure
Procedure
Procedure
Procedure
Fig.1
Fig.3
Fig.2
2.2.1
2.2.1
2.2.1
2.2.1 Installing
Installing
Installing
Installing binocular
binocular
binocular
binocular viewing
viewing
viewing
viewing head
head
head
head
(
Fig.1-2
Fig.1-2
Fig.1-2
Fig.1-2
)
Insert the binocular viewing head into the
microscope head and turn it to a proper position,
then screw down the bolt to fix it.
2.2.2
2.2.2
2.2.2
2.2.2 Installing
Installing
Installing
Installing the
the
the
the eyepiece
eyepiece
eyepiece
eyepiece
(
Fig3-4
Fig3-4
Fig3-4
Fig3-4
)
Insert the eyepiece into the eyepiece tube
until they are against each other, as shown
in Fig.4.
Fig.4
BestScope
BestScope
BestScope
BestScope International
International
International
International Limited
Limited
Limited
Limited
10
Fig.6
Fig.5
Fig.7
2.2.3
2.2.3
2.2.3
2.2.3 Installing
Installing
Installing
Installing the
the
the
the objective
objective
objective
objective
(
Fig.5-6
Fig.5-6
Fig.5-6
Fig.5-6
)
1. Adjusting the coarse focus knob until the
support device of the mechanical stage
reaches its low limit position.
2. Screw the lowest magnification objective
into the nosepiece from the left or the right
side, then revolve the nosepiece clockwise
and mount other objectives by the sequence
of low to high magnification
�Installing objective this way will make the
change of magnification to be easier during
using.
�
�
�
�Clean
Clean
Clean
Clean the
the
the
the objective
objective
objective
objective regularly,
regularly,
regularly,
regularly, for
for
for
for lens
lens
lens
lens is
is
is
is
susceptible
susceptible
susceptible
susceptible to
to
to
to dust.
dust.
dust.
dust.
�
�
�
�When
When
When
When operating,
operating,
operating,
operating, use
use
use
use 10
10
10
10 ×magnification
magnification
magnification
magnification
objective
objective
objective
objective to
to
to
to search
search
search
search and
and
and
and focus
focus
focus
focus specimen
specimen
specimen
specimen
firstly,
firstly,
firstly,
firstly, then
then
then
then replace
replace
replace
replace with
with
with
with higher
higher
higher
higher
magnification
magnification
magnification
magnification objective
objective
objective
objective if
if
if
if necessary.
necessary.
necessary.
necessary.
�
�
�
�When
When
When
When replacing
replacing
replacing
replacing the
the
the
the objective,
objective,
objective,
objective, slowly
slowly
slowly
slowly
turn
turn
turn
turn the
the
the
the nosepiece
nosepiece
nosepiece
nosepiece until
until
until
until you
you
you
you hear
hear
hear
hear
“
“
“
“ clicked
clicked
clicked
clicked ”
”
”
” ,
,
,
, that
that
that
that means
means
means
means the
the
the
the objective
objective
objective
objective is
is
is
is in
in
in
in
place.
place.
place.
place.
.2.4
.2.4
.2.4
.2.4 Mounting
Mounting
Mounting
Mounting the
the
the
the filters
filters
filters
filters
(
Fig.7
Fig.7
Fig.7
Fig.7
)
1.
1.
1.
1. Place the required filter in front of the
condenser..
★the
the
the
the filter
filter
filter
filter of
of
of
of the
the
the
the standard
standard
standard
standard outfit
outfit
outfit
outfit is
is
is
is green
green
green
green
and
and
and
and baby
baby
baby
baby blue.
blue.
blue.
blue.
BestScope
BestScope
BestScope
BestScope International
International
International
International Limited
Limited
Limited
Limited
11
2.2.5
2.2.5
2.2.5
2.2.5 Connecting
Connecting
Connecting
Connecting the
the
the
the Power
Power
Power
Power Cord
Cord
Cord
Cord
(Fig.8-10
Fig.8-10
Fig.8-10
Fig.8-10 )
★The
The
The
The cable
cable
cable
cable and
and
and
and cords
cords
cords
cords are
are
are
are vulnerable
vulnerable
vulnerable
vulnerable
when
when
when
when bent
bent
bent
bent or
or
or
or twisted,
twisted,
twisted,
twisted, never
never
never
never subject
subject
subject
subject the
the
the
the
power
power
power
power cord
cord
cord
cord to
to
to
to excessive
excessive
excessive
excessive force.
force.
force.
force.
1. Set the main switch ①to “ O ” (off) state
before connecting the power cord.
2. Insert the plugs ②into the power jack ③of
the microscope safely.
3. Plug the power cord ④into the power
supply receptacle ⑤. Make sure the
connection is well.
★Do
Do
Do
Do use
use
use
use the
the
the
the supplied
supplied
supplied
supplied power
power
power
power cord
cord
cord
cord all
all
all
all the
the
the
the
time.
time.
time.
time. If
If
If
If lost
lost
lost
lost or
or
or
or damaged,
damaged,
damaged,
damaged, select
select
select
select the
the
the
the same
same
same
same
standard
standard
standard
standard cord,
cord,
cord,
cord, please.
please.
please.
please.
★A
A
A
A wide
wide
wide
wide range
range
range
range of
of
of
of voltage
voltage
voltage
voltage ,like
,like
,like
,like 100V
100V
100V
100V ~
240V ,
240V ,
240V ,
240V , is
is
is
is acceptable
acceptable
acceptable
acceptable for
for
for
for this
this
this
this microscope.
microscope.
microscope.
microscope.
2.2.6
2.2.6
2.2.6
2.2.6 Replacing
Replacing
Replacing
Replacing the
the
the
the fuse
fuse
fuse
fuse
(
Fig.8-10
Fig.8-10
Fig.8-10
Fig.8-10
)
Do remember to set the main switch ①to
the state “ O ” (OFF) and unplug the power cord
before replacing the fuse. Rotate the fuse ⑥out
of the holder ⑦with the “ -- ” type screwdriver,
replace with a new fuse, then rotate it back to
the holder again.
Fig.8
Fig.9
Fig.10
BestScope
BestScope
BestScope
BestScope International
International
International
International Limited
Limited
Limited
Limited
12
Fig.11
Fig.12
2.2.7
2.2.7
2.2.7
2.2.7 Installing
Installing
Installing
Installing and
and
and
and Replacing
Replacing
Replacing
Replacing the
the
the
the bulb
bulb
bulb
bulb
(
Fig.11-13
Fig.11-13
Fig.11-13
Fig.11-13
)
�Please use the specified halogen Lamp
6V20W.
1. Pull out the condenser holder as shown in
Fig.11.
2. Hold the bulb ①after you wrap it with
gauze or other protection materials, and
then insert its pin ②deeply into the jack
in the lamp holder.
3. During microscope using or soon after it is
turned off, the bulb, the lamp house and
nearby parts will be very hot and will
cause serious burns. Please turn the main
switch to “ O ” (off) and disconnect the
power plug, and make sure the bulb, the
lamp room and periphery are all cool.
Then, you can do your replacing.
�
�
�
�Insert
Insert
Insert
Insert the
the
the
the bulb
bulb
bulb
bulb gently.
gently.
gently.
gently. Squeezing
Squeezing
Squeezing
Squeezing too
too
too
too hard
hard
hard
hard
will
will
will
will damage
damage
damage
damage the
the
the
the bulb.
bulb.
bulb.
bulb.
�
�
�
�
To
To
To
To
prevent
prevent
prevent
prevent reduced
reduced
reduced
reduced bulb
bulb
bulb
bulb life
life
life
life or
or
or
or cracking,
cracking,
cracking,
cracking,
do
do
do
do not
not
not
not touch
touch
touch
touch the
the
the
the bulb
bulb
bulb
bulb with
with
with
with bare
bare
bare
bare hands.
hands.
hands.
hands. If
If
If
If
fingerprints
fingerprints
fingerprints
fingerprints are
are
are
are accidentally
accidentally
accidentally
accidentally left
left
left
left on
on
on
on the
the
the
the
bulb,
bulb,
bulb,
bulb, wipe
wipe
wipe
wipe the
the
the
the bulb
bulb
bulb
bulb with
with
with
with a
a
a
a soft
soft
soft
soft cloth.
cloth.
cloth.
cloth.
4. Place the condenser holder back and press
fit.
Fig.13
BestScope
BestScope
BestScope
BestScope International
International
International
International Limited
Limited
Limited
Limited
13
3.
3.
3.
3. Adjustment
Adjustment
Adjustment
Adjustment and
and
and
and operation
operation
operation
operation
3.1
3.1
3.1
3.1 Adjustment
Adjustment
Adjustment
Adjustment set
set
set
set diagram
diagram
diagram
diagram
(
Fig.14-15
Fig.14-15
Fig.14-15
Fig.14-15
)
Right Fine Focus Knob
Right Coarse Focus Knob
Tension Adjustment Collar
Main Switch
Portrait Adjustment Knob
Lateral Adjustment Knob
Brightness Adjustment Knob
Fig.14
BestScope
BestScope
BestScope
BestScope International
International
International
International Limited
Limited
Limited
Limited
14
Left Coarse Focus Knob
Interpupillar Distance Indicator
Fig.15
Clocking Set
Condenser Focusing Knob
Left Fine Focus Knob
Aperture Iris Diaphragm Collar
Indicator
BestScope
BestScope
BestScope
BestScope International
International
International
International Limited
Limited
Limited
Limited
15
3.2
3.2
3.2
3.2 Adjustment
Adjustment
Adjustment
Adjustment and
and
and
and Operation
Operation
Operation
Operation
3.2.1
3.2.1
3.2.1
3.2.1 Brightness
Brightness
Brightness
Brightness Adjustment
Adjustment
Adjustment
Adjustment
(
Fig.16
Fig.16
Fig.16
Fig.16
)
1. Connect the power cord and set the main switch
to “ -” state (ON).
2. Turning the brightness adjustment knob
clockwise, the voltage raise, and the brightness
strengthen; whereas turning at the contra
direction, the voltage decline, and the brightness
weaken.
2.T �
�
�
�Using the microscope with low voltage in the
voltage range can prolong the service life of the
bulb.
3.3.2
3.3.2
3.3.2
3.3.2 Placing
Placing
Placing
Placing the
the
the
the Specimen
Specimen
Specimen
Specimen (Fig.17
Fig.17
Fig.17
Fig.17 )
1. Place the specimen ①in the center of the
mechanical stage and use the stage clips to clamp it.
2. Turn the portrait and lateral adjustment
knob ②of the mechanical ruler, move the specimen
to the required position.
�
�
�
�Be
Be
Be
Be careful
careful
careful
careful when
when
when
when changing
changing
changing
changing the
the
the
the objective.
objective.
objective.
objective. If
If
If
If you
you
you
you
finish
finish
finish
finish the
the
the
the observation
observation
observation
observation with
with
with
with the
the
the
the short
short
short
short working
working
working
working
distance
distance
distance
distance objective,
objective,
objective,
objective, and
and
and
and want
want
want
want to
to
to
to change
change
change
change another
another
another
another one,
one,
one,
one,
be
be
be
be careful
careful
careful
careful of
of
of
of not
not
not
not letting
letting
letting
letting the
the
the
the objective
objective
objective
objective touch
touch
touch
touch the
the
the
the
specimen.
specimen.
specimen.
specimen.
3.3.3
3.3.3
3.3.3
3.3.3 Focusing
Focusing
Focusing
Focusing the
the
the
the Specimen
Specimen
Specimen
Specimen (Fig.18
Fig.18
Fig.18
Fig.18 )
1. F ocus the specimen with 10X objective. To avoid
the objective touching the specimen during
focusing, you should raise the mechanical stage to
let the specimen close to the objective at first, then
slowly separate them to bring the specimen to
focus.
Fig.16
Fig.18
Fig.17
BestScope
BestScope
BestScope
BestScope International
International
International
International Limited
Limited
Limited
Limited
16
Turn the coarse focus knob ①conversely to
lower the specimen and search images in the
10 × ocular simultaneously, and then use the fine
knob ②to focus. After that, you can replace with
other magnification objectives safely, and focus
without the risk of damaging the specimen.
�
�
�
�
To
To
To
To
make
make
make
make the
the
the
the observation
observation
observation
observation more
more
more
more convenient,
convenient,
convenient,
convenient, you
you
you
you
can
can
can
can use
use
use
use the
the
the
the locking
locking
locking
locking set
set
set
set ③to
to
to
to fix
fix
fix
fix the
the
the
the stage
stage
stage
stage in
in
in
in a
a
a
a
vertical
vertical
vertical
vertical direction.
direction.
direction.
direction.
3.3.4
3.3.4
3.3.4
3.3.4 Condenser
Condenser
Condenser
Condenser Adjustment
Adjustment
Adjustment
Adjustment (Fig.20
Fig.20
Fig.20
Fig.20 )
Turn the condenser focus knob to move the
condenser up and down. Raise the condenser when
using the high magnification objective, and descend it
when using the low magnification one.
�
�
�
�The
The
The
The condenser
condenser
condenser
condenser and
and
and
and the
the
the
the objective
objective
objective
objective are
are
are
are coaxial.
coaxial.
coaxial.
coaxial. It
It
It
It
has
has
has
has been
been
been
been adjusted
adjusted
adjusted
adjusted before
before
before
before leaving
leaving
leaving
leaving factory,
factory,
factory,
factory, so
so
so
so the
the
the
the
user
user
user
user needn
needn
needn
needn ’
’
’
’ t
t
t
t to
to
to
to adjust
adjust
adjust
adjust them
them
them
them by
by
by
by self
self
self
self
�
�
�
�The
The
The
The highest
highest
highest
highest position
position
position
position of
of
of
of the
the
the
the condenser
condenser
condenser
condenser has
has
has
has been
been
been
been
adjusted
adjusted
adjusted
adjusted too.
too.
too.
too. It
It
It
It also
also
also
also needn
needn
needn
needn ’
’
’
’ t
t
t
t any
any
any
any user
user
user
user
’
’
’
’
s
s
s
s
operation
operation
operation
operation .
3.3.5
3.3.5
3.3.5
3.3.5 Aperture
Aperture
Aperture
Aperture Iris
Iris
Iris
Iris Diaphragm
Diaphragm
Diaphragm
Diaphragm Adjustment
Adjustment
Adjustment
Adjustment
(
Fig.20
Fig.20
Fig.20
Fig.20
)
Turn the aperture iris diaphragm collar ①to
adjust the aperture iris diaphragm.
�
�
�
�The
The
The
The aperture
aperture
aperture
aperture iris
iris
iris
iris diaphragm
diaphragm
diaphragm
diaphragm is
is
is
is designed
designed
designed
designed for
for
for
for
the
the
the
the adjustment
adjustment
adjustment
adjustment of
of
of
of the
the
the
the numerical
numerical
numerical
numerical aperture
aperture
aperture
aperture ,not
not
not
not for
for
for
for
the
the
the
the brightness.
brightness.
brightness.
brightness.
Generally,
Generally,
Generally,
Generally, setting
setting
setting
setting the
the
the
the aperture
aperture
aperture
aperture iris
iris
iris
iris diaphragm
diaphragm
diaphragm
diaphragm
to
to
to
to 70-
70-
70-
70- 80%
80%
80%
80% of
of
of
of the
the
the
the N.A.
N.A.
N.A.
N.A. of
of
of
of the
the
the
the objective
objective
objective
objective in
in
in
in use
use
use
use will
will
will
will
provide
provide
provide
provide an
an
an
an image
image
image
image with
with
with
with good
good
good
good contrast.
contrast.
contrast.
contrast. If
If
If
If you
you
you
you want
want
want
want
to
to
to
to observe
observe
observe
observe the
the
the
the image
image
image
image of
of
of
of the
the
the
the aperture
aperture
aperture
aperture iris
iris
iris
iris
diaphragm,
diaphragm,
diaphragm,
diaphragm, remove
remove
remove
remove one
one
one
one eyepiece
eyepiece
eyepiece
eyepiece and
and
and
and look
look
look
look through
through
through
through
the
the
the
the tube.
tube.
tube.
tube.
You
You
You
You
will
will
will
will see
see
see
see a
a
a
a dark
dark
dark
dark circle
circle
circle
circle encroaching
encroaching
encroaching
encroaching on
on
on
on
the
the
the
the bottom
bottom
bottom
bottom of
of
of
of the
the
the
the tube.
tube.
tube.
tube.
Fig.19
Fig.20
BestScope
BestScope
BestScope
BestScope International
International
International
International Limited
Limited
Limited
Limited
17
3.3.6
3.3.6
3.3.6
3.3.6 Adjusting
Adjusting
Adjusting
Adjusting the
the
the
the Interpupillary
Interpupillary
Interpupillary
Interpupillary Distance
Distance
Distance
Distance
(
Fig.21
Fig.21
Fig.21
Fig.21
)
The interpupillary distance range:
55mm ~75mm 。
While looking through the eyepieces, move both
eyepieces until the left and right fields of view
coincide completely.
3.3.7
3.3.7
3.3.7
3.3.7 Adjusting
Adjusting
Adjusting
Adjusting the
the
the
the Diopter
Diopter
Diopter
Diopter
(
Fig.22
Fig.22
Fig.22
Fig.22
)
1. Turn the eyepiece ①to adjust the diopter while
looking through it.
★
The
The
The
The diopter
diopter
diopter
diopter range
range
range
range of
of
of
of the
the
the
the eyepiece
eyepiece
eyepiece
eyepiece is
is
is
is ±
±
±
± 5
5
5
5
diopter.The
diopter.The
diopter.The
diopter.The number
number
number
number aligned
aligned
aligned
aligned to
to
to
to the
the
the
the line
line
line
line on
on
on
on the
the
the
the
viewing
viewing
viewing
viewing head
head
head
head is
is
is
is the
the
the
the diopter
diopter
diopter
diopter in
in
in
in use.
use.
use.
use.
3.3.8
3.3.8
3.3.8
3.3.8 Adjusting
Adjusting
Adjusting
Adjusting the
the
the
the tension
tension
tension
tension adjustment
adjustment
adjustment
adjustment
collar
collar
collar
collar (Fig.23
Fig.23
Fig.23
Fig.23 )
Turn the tension adjustment collar ①with your
fingers .When the collar is turned in the
direction of the arrow, tension of the coarse
adjustment knob ②increases. Turning the collar
in the opposite direction decreases the tension.
If the nosepiece descends on its own or if the
specimen gets out of focus quickly even when it
is brought into focus using the fine adjustment
knob ③, it means the tension of the coarse
adjustment knob is too low. Turn the collar in
the direction of the arrow to increase the tension
Fig.22
Fig.21
Fig.23
BestScope
BestScope
BestScope
BestScope International
International
International
International Limited
Limited
Limited
Limited
18
4
4
4
4.Technical
Technical
Technical
Technical Specifications
Specifications
Specifications
Specifications
(
(
(
( 1)
1)
1)
1) .
.
.
. Main
Main
Main
Main Specifications
Specifications
Specifications
Specifications
Optical System Infinite optical system
Viewing Head Siedentopf Binocular Head, 30 ° Inclined,Interpupilary Distance 48-75 mm
Eyepiece Wide Field Eyepiece WF 10X/18
Nosepiece Quadruple Nosepiece
Objective Infinitive Semi-plan Objectives 4 × , 10 × , 40 × , 100 ×
Focusing Coaxial Coarse and Fine Adjustment, Moving Range20mm,Fine Division 0.002mm
Condenser Abbe Condenser , NA=1.25
Stage Double Layers Mechanical Stage 140mm × 140mm ,Moving Range 75 × 50mm
Illumination 6V20W Halogen Lamp
(
(
(
( 2)
2)
2)
2) .
.
.
. Eyepiece
Eyepiece
Eyepiece
Eyepiece and
and
and
and objectives
objectives
objectives
objectives
1. objective
Magnification Numerical Aperture Focal Length (mm )Working Length (mm )Objective
4 × 0.10 45.3 17 dry
10 × 0.25 17.96 6 dry
40 × 0.65 4.5 0.37 dry
100 × 1.25 1.81 0.13 oil
2. Eyepiece
Eyepiece Magnification Focal Length (mm )Field of View (mm )
Wide field plan eyepiece 10 × 25 φ 22
BestScope
BestScope
BestScope
BestScope International
International
International
International Limited
Limited
Limited
Limited
19
5
5
5
5.Outfit
Outfit
Outfit
Outfit
Main Body
Main Standard 〇
Double Layers Mechanical Stage 〇
Condenser Holder 〇
Viewing Head Siedentopf Binocular Head 〇
Condenser Abbe Condenser, NA=1.25 〇
Nosepiece Quadruple 〇
Illumination
6V20W Halogen Lamp 〇
Spare Bulb 〇
Eyepiece 10 × Wide Field Plan Eyepiece 〇
Objective
Infinite Semi-Plan Objective 4 × 〇
Infinite Semi-Plan Objective 10 × 〇
Infinite Semi-Plan Objective 40 × 〇
Infinite Semi-Plan Objective 100 × (Oil ) 〇
Condenser
Bright Field Condenser with Adjustable Iris
Diaphragm
〇
Filter Baby Blue, Green 〇

This manual suits for next models

1

Other BestScope Microscope manuals

BestScope BS-2092 User manual

BestScope

BestScope BS-2092 User manual

BestScope BS-5092 Series User manual

BestScope

BestScope BS-5092 Series User manual

BestScope BS-2040BD User manual

BestScope

BestScope BS-2040BD User manual

BestScope BS-3060A User manual

BestScope

BestScope BS-3060A User manual

BestScope BS-2052BDBD User manual

BestScope

BestScope BS-2052BDBD User manual

BestScope BS-3012 Series User manual

BestScope

BestScope BS-3012 Series User manual

BestScope BS-2080MH4 User manual

BestScope

BestScope BS-2080MH4 User manual

BestScope BS-2030MH10 User manual

BestScope

BestScope BS-2030MH10 User manual

BestScope BS-3030 Series User manual

BestScope

BestScope BS-3030 Series User manual

BestScope BS-6000A User manual

BestScope

BestScope BS-6000A User manual

BestScope BS-3080 Series User manual

BestScope

BestScope BS-3080 Series User manual

BestScope BS-6045 User manual

BestScope

BestScope BS-6045 User manual

BestScope BS-8030B User manual

BestScope

BestScope BS-8030B User manual

BestScope BS-2041FB(LED) User manual

BestScope

BestScope BS-2041FB(LED) User manual

BestScope BS-2080MH6 User manual

BestScope

BestScope BS-2080MH6 User manual

BestScope BS-3010A User manual

BestScope

BestScope BS-3010A User manual

BestScope BS-2046 User manual

BestScope

BestScope BS-2046 User manual

BestScope BS-2025M User manual

BestScope

BestScope BS-2025M User manual

BestScope BS-2081 User manual

BestScope

BestScope BS-2081 User manual

BestScope BS-2030MH4B User manual

BestScope

BestScope BS-2030MH4B User manual

BestScope BS-3035 Series User manual

BestScope

BestScope BS-3035 Series User manual

BestScope BS-2030B User manual

BestScope

BestScope BS-2030B User manual

BestScope BS-2080F(LED) User manual

BestScope

BestScope BS-2080F(LED) User manual

BestScope BS-2052 Series User manual

BestScope

BestScope BS-2052 Series User manual

Popular Microscope manuals by other brands

Motic PA43 Operation manual

Motic

Motic PA43 Operation manual

Leica WILD M695 Service manual

Leica

Leica WILD M695 Service manual

Olympus MX63 instructions

Olympus

Olympus MX63 instructions

Optika Italy B-510 Series instruction manual

Optika Italy

Optika Italy B-510 Series instruction manual

Optika B-50 Operation manual

Optika

Optika B-50 Operation manual

Olympus bx40 instructions

Olympus

Olympus bx40 instructions

Niigata seiki XTS-SP2 instruction manual

Niigata seiki

Niigata seiki XTS-SP2 instruction manual

OPTO-EDU A34.5017 user manual

OPTO-EDU

OPTO-EDU A34.5017 user manual

AmScope ZM-2 Series user manual

AmScope

AmScope ZM-2 Series user manual

Nikon LABOPHOT-2 instructions

Nikon

Nikon LABOPHOT-2 instructions

BMS C2 operation instruction

BMS

BMS C2 operation instruction

Kelima UM018G user manual

Kelima

Kelima UM018G user manual

Steinberg Systems SBS-MK-1 user manual

Steinberg Systems

Steinberg Systems SBS-MK-1 user manual

Motic S-10 Series instruction manual

Motic

Motic S-10 Series instruction manual

STEINDORFF S-3000 Series instruction manual

STEINDORFF

STEINDORFF S-3000 Series instruction manual

Ken A Vision Video Flex® except 2000 series manual 

Ken A Vision

Ken A Vision Video Flex® except 2000 series manual 

VWR Visiscope 800 Series instruction manual

VWR

VWR Visiscope 800 Series instruction manual

Nikon Eclipse E400 instructions

Nikon

Nikon Eclipse E400 instructions

manuals.online logo
manuals.online logoBrands
  • About & Mission
  • Contact us
  • Privacy Policy
  • Terms and Conditions

Copyright 2025 Manuals.Online. All Rights Reserved.