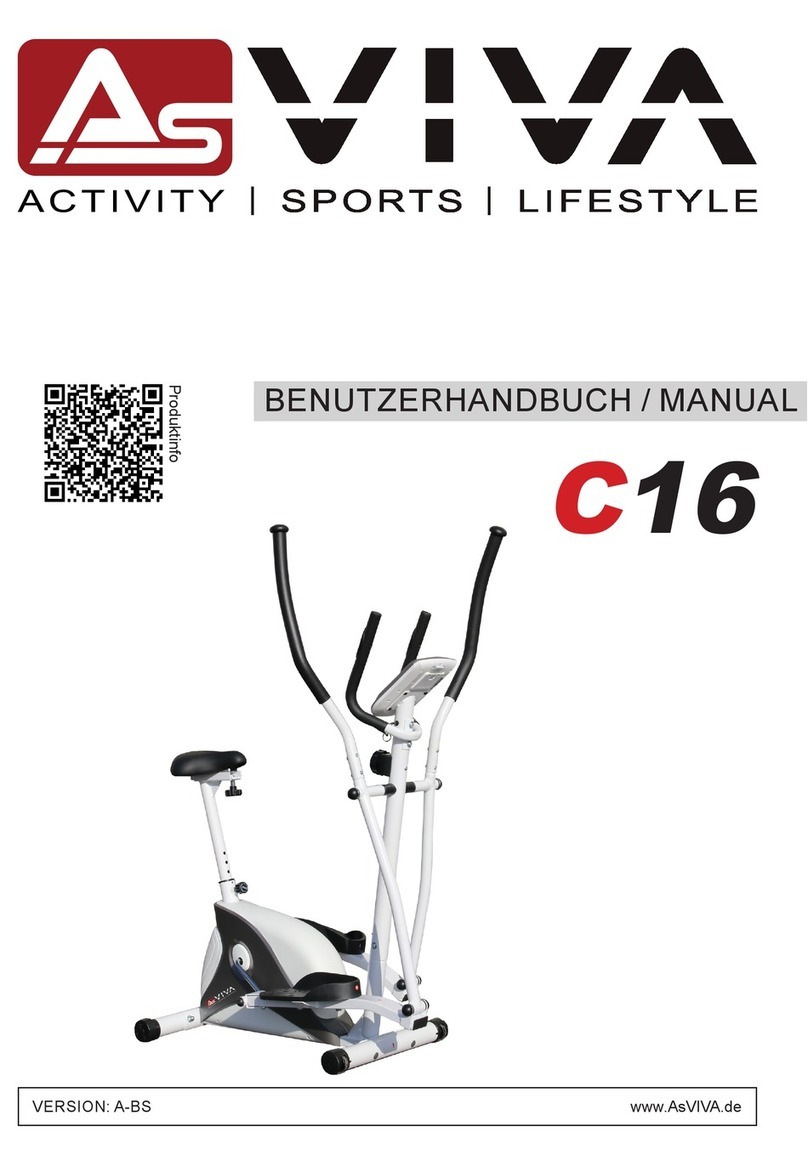
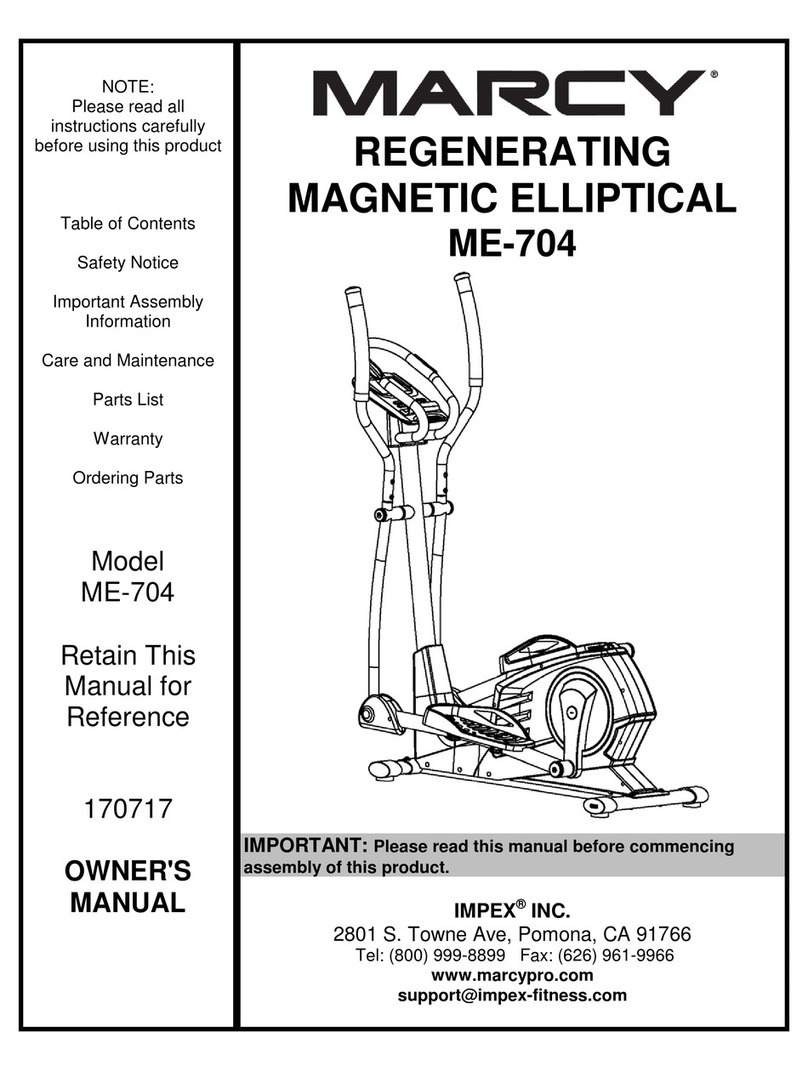
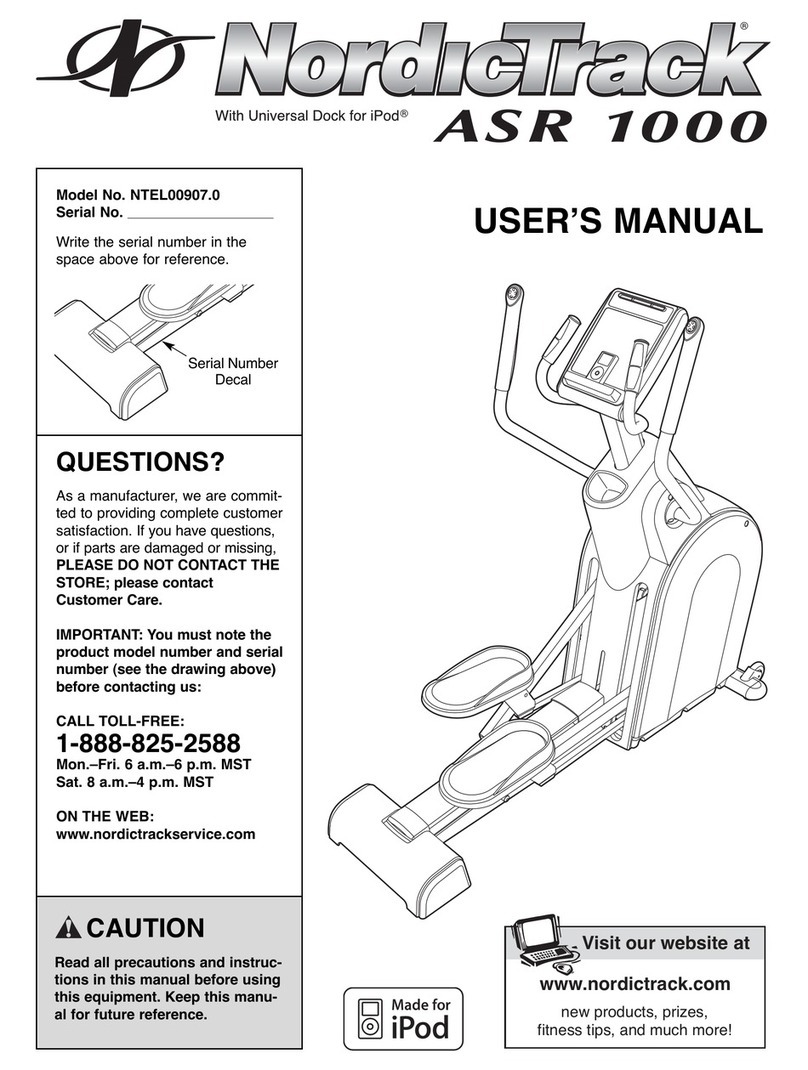
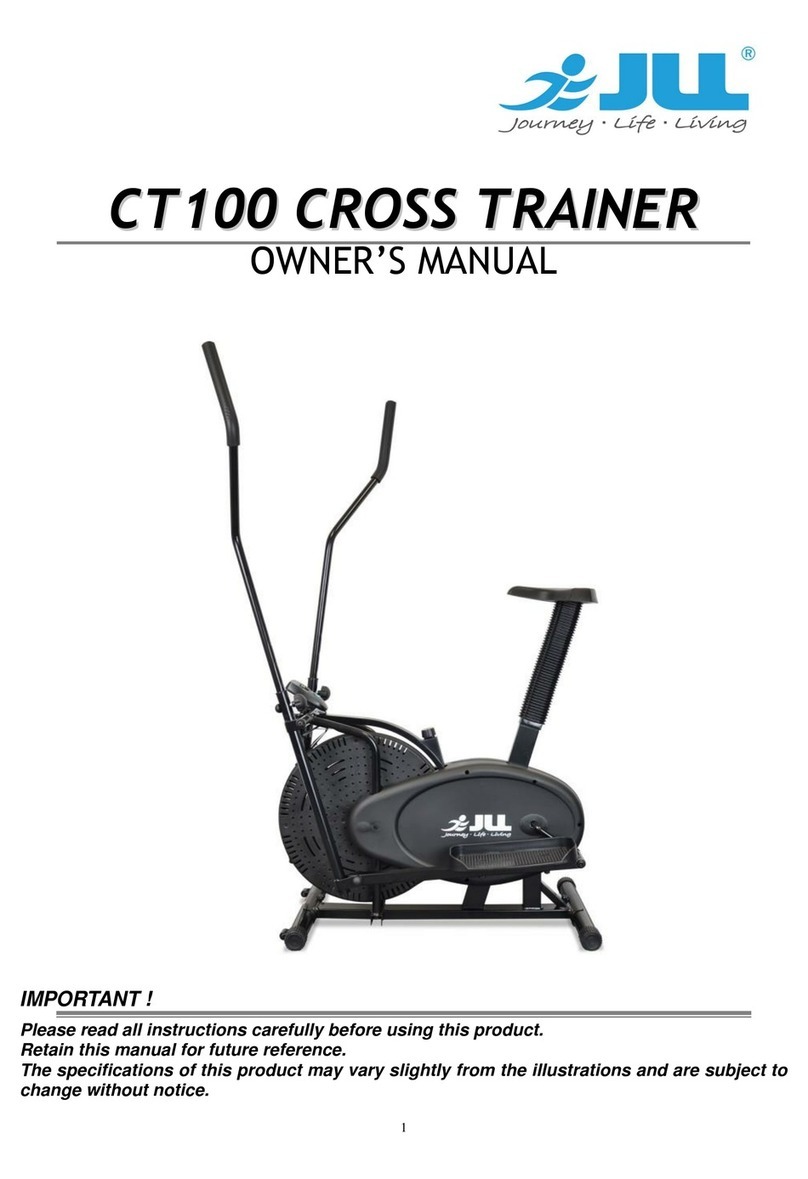
Thane Fitness OrbiTrek PRo User manual

Owner’s Manual
Manuel Du Propriétaire
Manual Del Propietario
This Product is Brought to You by
Ce produit vous est offert par
Este producto llega a sus manos por
www.thanefitness.com
Making Fitness Fun!®
(07/01)

Owner’s Manual
Manuel Du Propriétaire
Manual Del Propietario
Thane International, Inc.
C/O. Universal Distribution
Services (UDS)
4910 Longley Lane, Suite 101
Reno, NV. 89502, U.S.A.
Tel: (888) 367-6205
http://www.thanefitness.com
IMPORTANT!
Please read all instructions carefully before using this product,
and view assembly instructions at the end of the workout
video. Retain this manual for future reference.
IMPORTANT!
Veuillez lire toutes les directives attentivement avant
d’utiliser ce produit et visionnez les instructions
d’assemblage à la fin de la vidéo d’entraînement.
Conservez ce manuel à des fins de référence.
¡IMPORTANTE!
Sírvase leer detenidamente todas las instrucciones antes
de emplear este producto, y observe las instrucciones de
instalación que se encuentran al final del video con la rutina
de ejercicios. Conserve este manual para consultas futuras.
Safety Notice..........................2
Assembly & Usage ............3-10
Exploded View......................11
Parts List..............................12
Nutritional Guide ............13-17
Avis de sécurité ....................18
Assemblage et utilisation..19-27
Vue détaillée ........................28
Liste des pièces ....................29
Guide nutritionnel............30-35
Aviso sobre seguridad ..........36
Ensamblaje y uso ............37-44
Vista esquemática ................45
Lista de piezas......................46
Guía nutricional ..............47-52

Owner’s Manual
2
IMPORTANT SAFETY NOTICE
1. THE MAXIMUM WEIGHT CAPACITY OF THE ORBITREK PRO IS 275 LBS. Persons whose
body weight exceeds this limit should NOT use this machine.
2. Keep children and pets away from the OrbiTrek Pro at all times. DO NOT leave
unattended children in the same room with the machine
3. If the user experiences dizziness, nausea, chest pain, or any other abnormal symptoms,
STOP the workout at once. CONSULT A PHYSICIAN IMMEDIATELY.
4. Position the OrbiTrek Pro on a clear, level surface. Place mat under the unit to help keep
the machine stable and to protect flooring.
5. Always wear appropriate workout clothing when exercising. Running or aerobic shoes are
also required.
6. Use the OrbiTrek Pro only for its intended use as described in this manual. DO NOT use
any other accessories not recommended by the manufacturer.
7. DO NOT place any sharp objects around the OrbiTrek Pro.
8. Handicapped or disabled persons should not use the OrbiTrek Pro without the presence
of a qualified health professional or physician.
9. Before exercising, always do stretching first.
10. NEVER operate the OrbiTrek Pro if it is not functioning properly.
11. Tighten all bolts on a regular basis.
12. Do not use OrbiTrek Pro without turbo fan covers.
WARNING: BEFORE BEGINNING THIS OR ANY EXERCISE PROGRAM, CONSULT YOUR
PHYSICIAN FIRST. THIS IS ESPECIALLY IMPORTANT FOR INDIVIDUALS OVER THE AGE OF
35 OR PERSONS WITH PRE-EXISTING HEALTH PROBLEMS. READ ALL INSTRUCTIONS BEFORE
USING. THANE FITNESS ASSUMES NO RESPONSIBILITY FOR PERSONAL INJURY
OR PROPERTY DAMAGE SUSTAINED BY OR THROUGH THE USE OF THIS PRODUCT.
SAVE THESE INSTRUCTIONS

Owner’s Manual
3
I. BEFORE you begin
1. Locate a comfortable work site. Assemble your OrbiTrek Pro in an open space with adequate
ventilation and lighting. Because the OrbiTrek Pro is portable, to some extent, you need not
assemble it exactly where it is to be used. For your convenience, however, you should avoid
hauling the machine across excessive distances, through narrow passage ways or over staircases
once its assembly is complete.
2. It’s a good idea to flatten out the shipping carton, and use it as a work surface when you
assemble the OrbiTrek Pro. Keep a few paper towels handy since some of the components
are lightly pre-greased.
3. Find your tools. OrbiTrek Pro includes all the tools needed for assembly, however, you may find
that using the following tools will make your assembly of the OrbiTrek Pro easier and quicker.
• Scissors or utility knife.
•Ruler with both metric and English measurements.
•Standard ratchet with 14 mm, 17 mm, 18mm, and 19 mm sockets.
4. Assembly Video. The enclosed workout video includes complete assembly instructions which are
located after the workout portion of the video. Load the video into your VCR and simply assemble
your OrbiTrek Pro following the visual instructions provided. You can always refer to the written
instructions if you need to.
ASSEMBLY & USAGE
#41 3/8” x 60
Carriage Bolt (4X) #43 3/8” Acorn Nut (4X) #65 M10
Lock Nut (2X) #42 3/8” Arc
Washer (4X)
#64 3/8” M10
Washer (2X) #25 M x38
Knob Bolt (2x)
#14 Connection Shaft (1X) #26 D Clip
Washer (2X) #27 3/8” Spring
Washer (2X) #28 3/8” x 20
Screw (2X)
Allen Wrench 6# (2X)
Allen Wrench
8# (1X)
#30 M8x50 Bolt (2X) #29 M8 Lock Nut (2X)
#36 M8 Lock Nut (4X) #34 M8x50 Hex
Head Bolt (4X) #33 Big Washer (8X)
#35 1/2” Pedal Hinge Bolt (2X) (L, R) #67 1/2” Spring
Washer (2X) #66 1/2” Lock Nut (2X) (L, R)
Wrench 1 (1X) Wrench 2 (1X)

Owner’s Manual
4
II. Attaching front and rear stabilizers
Turn the OrbiTrek Pro on its back so that the main frame is upside down. Locate the front and rear
stabilizers which are clearly marked FRONT and REAR with blue stickers. Attach the front and rear
stabilizers (2F & 2R) to the main frame using:
•4 - 3/8” x 60 carriage bolts (41)
•4 - 3/8” arch washers (42) and
•4 - 3/8” acorn nuts (43).
Place the Front Stabilizer with the dimpled square holes facing up toward you. Take two of the carriage
bolts (41), and pass them down through the dimpled holes and through the stabilizer support located on
the unit. Slip the two arc washers (42) over the threaded portion of the carriage bolts. Attach and firmly
tighten down the acorn nuts (43).
Follow the same procedure for attaching the Rear Stabilizer.
Once both stabilizers are firmly attached, turn the unit over to its upright position.
Notice that the front stabilizer (2F) has rolling front end caps (22) for moving your OrbiTrek Pro.
2R
2F 41
42
43
1
41
42
43
22
Fig.1
FRONT
REAR

Owner’s Manual
5
III. Attaching the turbo fan
Turbo Fan
Place Turbo Fan (#13) onto the Turbo Axle (#20) with the blade’s flat side toward the center of the
machine. The Turbo Fan should “lock into position”. You will feel each blade fit snugly when they have
seated properly. Place the m10 washers (#64) and m10 lock nuts (#65) into place on each Turbo Axle
and hand tighten. Using both 17mm sockets provided, tighten both lock nuts down firmly.
Note: The blades can become damaged if, while you are exerting pressure on the lock nuts, your hand
slips off and hits them. Tighten until firm only.
Turbo Fan Covers
Each Turbo Fan Cover (#62) has a small lip on the top and a larger lip on the bottom. Hold the cover
vertically and align the lip with the key on the upper and bottom chain covers and insert into track.
Turn the cover counter clockwise into position with the OrbiTrek Pro logo and vents on the top.
If you have any trouble getting the Turbo Fan Cover to fit into the key, try tilting the cover slightly
so that the upper key and lip fit first and then do the bottom.
Fig.2
65 64
51 62
13
20
10
64
65
Chain Cover

Owner’s Manual
6
IV. Attaching the coupler bars
Install the right and left coupler bars (#5R & 5L) to the main frame (#1) using the connection shaft
(#14). Set the coupler bars aside for a moment. Take off, only from one end of the connection shaft,
the 3/8” x 20 side screw (#28), 3/8” spring washer (#27), and D clip washer (#26). Be aware that the clip
washer is designed to only go on one way. Watch how it comes off and take note of how it fits back on.
Slide the connection shaft (#14) through the short connection tube from left to right. Slide the
connection shaft through the tube in the left coupler bar (#5L). Replace the D clip washer (#26), the
3/8” spring washer (#27) and the 3/8” x 20 side screw (#28) on the left side and hand tighten. Next,
repeat the same steps on the right side. Take two small Allen wrenches and insert one in the center
of each side screw. Only tighten one side at a time and let the opposite Allen Wrench hold the other
bolt in place. Once that side is tight, tighten the other side.
Fig.3
1
5R
SHORT CONNECTION TUBE
14
5L
26
27
28
ALLEN
WRENCH
ALLEN
WRENCH

Owner’s Manual
7
V. Attaching the foot pedals
Foot Pedal
Attach the right and left Foot Pedal (#55R & 55L) onto respective pedal tubing (#4R & 4L). Note that
the foot and pedal tubings are marked with R&L stickers signifying Right and Left. There are bolts (#34)
lock nuts (#36) and washers (#33) on each pedal tubing that the foot pedals will slip into. Don’t unscrew
those bolts completely, just loosen them so you can slide the foot pedals into position between pedal
tubing and washers. Tighten the bolts securely using flat wrench and socket.
Note: The foot pedals are positioned properly when the rounded ridge is to the front and in along the
side closest to the main body of the OrbiTrek Pro. If you have installed them opposite of what they
should be, you will not be able to attach the pedal tubings to the crankshaft (#38).
Pedal Tubings
Now it’s time to attach the front of the right and left pedal tubing (#4R & 4L) to coupler bars (#5R &
5L). Locate the two sets of bolts: M8 x 50 bolt (#30) and M8 lock nut (#29). Be sure the bolt-head is on
the outside of the machine and the threads of the bolt face inward. Thread the bolt through the holes
in the coupler bars and pedal tubing. Tighten both sides down firmly with the lock nuts, using the
tools provided.
Note: Bushings may fall out in moving Pedal Tubings. Be sure to replace them before attaching to
coupler bar.
Fig.4
4L
55L 30 29 5L
5R
4R
55R
38
33 36
33
36
31
31
33
34

Owner’s Manual
8
VI. Attaching pedal tubing to the crankshaft
Note: Pedal hinge bolts and lock nuts are marked (R) for right and (L) for left.
Attach the right and left pedal tubing (#4R & 4L) to the crankshaft (#38) using right and left 1/2” pedal
hinge bolt (#35R & 35L) the 1/2” spring washer (#67) and 1/2” lock nut (#66R & 66L). Be sure to keep
the hinge bolt straight as it goes through the pedal tubing to meet the crankshaft. If the hinge bolt is
connected to the crankshaft at an angle, it will not be fully fastened by the spring nut and damage to
both the hinge bolt and crankshaft may occur. Align the right pedal tube (#4R) underneath the foot
pedal (#55R) to the right-side crank and thread the pedal hinge bolt by hand until you can no longer
turn it. Then take an Allen Wrench and continue threading the bolt clockwise until it is flush with the
pedal tube. Place the washer on (#67) and then the lock nut (#66R) onto the inside of the bolt. Tighten
down the lock nut with the preformed wrench.
Note: The right pedal hinge bolt (#35R) tightens the lock nut clockwise and left pedal hinge bolt (#35L)
tightens the lock nut counter clockwise.
Fig.5
35L
66L
67
4L
66R 35R AB
4R
38

Owner’s Manual
9
IMPORTANT!
The hinge bolt (35R & 35L) must fully penetrate
the nylon ring inside the spring nut (66R & 66L).
This will ensure the stability and durability of
your OrbiTrek Pro.
In order to install the hinge bolt properly, keep it
perfectly straight as the bolt goes through the
pedal tubing and the crankshaft. If the hinge bolt
is connected to the crankshaft at an angle, damage
to both the hinge bolt and the crankshaft may occur.
VII. Attaching the handlebars
Handlebars
You can easily switch your handle bars
(#3R & 3L) between the dual action mode
and the fixed mode during your work out.
Dual Action Mode: To allow the handlebars to
move along with the pedals, insert them into the
coupler bar. The handle bars are identified with
R & L stickers indicating Right and Left. Select
a height that is comfortable and lock it in place
with knob bolt (#25).
Fixed Mode:
To keep the handlebars stationary, attach them
to the tubing on the main frame between the
coupler bars. As with the dual-action mode, set
both handlebars at the same, comfortable height
and secure them with the same knob bolts.
CORRECT
INCORRECT
INCORRECT
35L
Counter Clockwise 35R
Clockwise
A nylon ring can be seen at the rim inside
the spring nut. The hinge bolt must fully
penetrate this nylon ring.
Fig.6
3L
5L
3R
25
5R
FIXED
MODE

Owner’s Manual
10
VIII. Tension adjustment
The assembly of your OrbiTrek Pro is now complete. As you try it for the first
time, you should adjust the tension to a desirable level before you begin a full
workout. To increase tension turn the tension knob to the right and to decrease
tension turn the tension knob to the left.
IX. Reversable movement
Remember, your OrbiTrek Pro has REVERSIBLE movement!
Forward pedaling emphasizes your quadriceps muscles (front thighs),
while backward pedaling emphasizes your hamstrings (back thighs).
Take advantage of this fact to make your workout less fatiguing,
and more fun.
X. Electronic monitor
With the press of a button, you can set the electronic monitor of your OrbiTrek Pro to display
the following information:
• SCAN – press the “MODE” button until “SCAN” appears. The monitor will rotate through all
4 functions: speed, distance, timer and calories every 30 seconds
• SPEED – press the “MODE” button until “SPD” appears. The monitor
will display how fast you are running.
• DISTANCE – press the “MODE” button until “DST” appears to find
out how far you would have run with your two feet on the ground.
• TIME – press the “MODE” button until “TMR” appears to find
out how long you have been exercising.
• CALORIE – press the “MODE” button until “CAL” appears to
accumulate the calorie consumption.
• RESET – by pressing the “RESET” button for more than 1
second the monitor will reset all functional values to zero.
The SCAN mode lets your monitor automatically alternate the four read-
outs in short intervals, so you don’t have to stop and press a button to check different information.
The monitor comes with a AA battery and turns itself off when not in use to conserve energy.
How to replace battery
1. Push in and hold small tab, on back of unit, with thumb and lift.
2. Remove battery
3. Replace with one Size AA or UM-3 battery.
4. Make sure battery is positioned correctly. The end marked with –
must be in contact with the spring.
5. If the display becomes illegible or only partial segments appear, please
take out the battery, wait 15 seconds, and reinstall
6. Battery life is approximately one year under normal usage.
7. Removal of battery will reset all functional values to zero.
Tension
Control Knob

Owner’s Manual
11
EXPLODED VIEW & PARTS LIST
A complete list of parts shown here can be found on the next page.
Most parts are pre-assembled. This diagram is not intended as an instruction for assembling the
OrbiTrek Pro but simply as a reference in case certain parts need service or replacement.
Thane Fitness reserves the right to alter the details of the OrbiTrek Pro as depicted in this owner’s
manual without prior notice.

Owner’s Manual
12
PART NO. DESCRIPTION SPECIFICATION QUANTITY
1 MAIN FRAME 1
2F FRONT STABILIZER 1
2R REAR STABILIZER 1
3L LEFT HANDLEBAR 1
3R RIGHT HANDLEBAR 1
4L LEFT PEDAL TUBING 1
4R RIGHT PEDAL TUBING 1
5L LEFT COUPLER BAR 1
5R RIGHT COUPLE BAR 1
6 PLASTIC WHEEL BRACKET 1
7 WASHER 15/16” 1
8 ELECTRONIC MONITOR 1
9 SCREW ST4.8x45 4
10 UPPER CHAIN COVER 1
11 TENSION ADJUSTMENT KNOB 1
12 SCREW ST4.8x15 4
13 TURBO FAN 2
14 CONNECTION SHAFT 1
15 SMALL BELT WHEEL 1
16 STOP WASHER 1
17 LOCK NUT M6 2
18 SMALL SPRING 1
19 ROUND END CAP FOR HANDLEBAR 25.4x2 2
20 TURBO AXLE FOR FRICTION WHEEL 1
21 POSITION PLATE 5x14 1
22 ROLLING END CAP 2
23 FRICTION WHEEL 1
24 PLASTIC BUSHING SET 1
25 KNOB BOLT M8x38 2
26 D CLIP WASHER 2
27 SPRING WASHER 3/8” 2
28 SCREW 3/8”x20 2
29 LOCK NUT M8 2
30 BOLT M8x50 2
31 BUSHING 4
32 ROUND PLASTIC BUSHING 2
33 BIG WASHER 8
34 HEX HEAD BOLT M8x50 4
35L LEFT PEDAL HINGE BOLT 1/2” 1
35R RIGHT PEDAL HINGE BOLT 1/2” 1
36 LOCK NUT M8 4
37 CHAIN 1
38 CHAIN WHEEL AND CRANK 1
39 12 ANGLES END CAP 2
40 FOAM GRIPS 2
41 CARRIAGE BOLT 3/8”x60 4
42 ARC WASHER 3/8” 4
43 ACORN NUT 3/8” 4
44 SCREW ST2.9x20 2
45 BALL COLLAR BRACE 2
46 BALL COLLAR BEARING 2
47 BALL COLLAR 7/8” 1
48 WASHER 7/8” 1
49 HEX HEAD NUT 7/8” 1
50 FRICTION BELT 1
51 BOTTOM CHAIN COVER 1
52 BALL COLLAR 15/16” 1
53 SQUARE END CAP 2
54 SCREW ST3.0x8 2
55L LEFT FOOT PEDAL 1
55R RIGHT FOOT PEDAL 1
56 SCREW ST4.8x12 2
57 3VX BELT 1
58 PLASTIC WHEEL 1
59 BIG BELT WHEEL 1
60 AXLE FOR BIG BELT WHEEL 1
61 BUSHING 10
62 FAN BLADE COVER 2
63 SMALL CHAIN WHEEL 1
64 WASHER M10 7
65 LOCK NUT M10 7
66L LEFT LOCK NUT 1/2” 1
66R RIGHT LOCK NUT 1/2” 1
67 SPRING WASHER 1/2” 2
68 POSITION PLATE 4x12 1
69 POSITION PLATE 4x8 1
70 ROUND NUT M27x1.5 1
71 SENSOR 1
72 STOP PLATE 1
73 PROTECTION ROLL 1
74 NUT M8 2
75 ADJUSTABLE BOARD FOR CHAIN 1
76 BUSHING 2
77 BUSHING SLEEVE 1
78 BUSHING 2
79 WASHER M6 1
80 HEX HEAD BOLT M6x25 1
81 ADJUSTABLE BOARD FOR BELT WHEEL 1

Nutritional Guide
13
Any medical or health-related information contained in this book is not
intended as a substitute for consulting your physician. Any attempt to diagnose or
treat any illness or medical condition should come under the supervision of a
qualified physician familiar with your personal medical history.
The information contained in this Weight Loss System is intended for use by
normally healthy individuals as part of a general program of improvement of
body appearance.
CHECK WITH YOUR PHYSICIAN BEFORE STARTING ON THIS OR ANY
PROGRAM OF PHYSICAL CHANGE.
Nutritional
Guide

Nutritional Guide
14
DO
S
1) ALWAYS BALANCE WHAT YOU EAT -- so that your intake of complex carbohydrates approximately matches your intake of
protein. You may do this by simply eyeballing the foods you are eating. Example: if you have a dish full of pasta in front of you
(high carbs) then you need to balance it with what you approximate to be an equal amount (by volume or better, by weight) of
high protein food.
COMPLEX CARBOHYDRATES: PROTEIN
• Brown rice • Boneless skinless turkey breast
• Yams • White meat chicken
• Grits • Egg whites
• White potatoes • Pork tenderloin
• Sweet potatoes • Canned tuna packed in water
• Oatmeal • Nonfat dairy products
• Oat bran • Shrimp
• Corn • Eye of round steak
• Whole grain breads • Cod
• Whole grain pastas • Flounder
• Shredded wheat • Haddock
• Cream of rice cereal • Scrod
• Black-eyed peas • Halibut
• Lima beans • Sirloin
• Black beans • Canned white meat chicken in water
• White beans • Fat free turkey or chicken breast deli slices
• Pinto beans
2) DRINK PLENTY OF WATER! Try to drink eight 8 ounce glasses of water each day, or more. It is usually best to use bottled
spring or distilled water, since the water in most areas today is heavily treated with chlorine and other unhealthful chemicals.
3) Eat plenty of fibrous vegetables and leafy greens, they are the BEST possible foods to eat! And remember not to ruin
things for yourself by adding oily salad dressings!
There are several vegetables that actually use up more energy getting digested than they bring to your body. The digestion of any
food requires anexpenditureof energy by the body.Once the food is digested,it releases its own stored energy in the form of calories, which
are then either used (“burned”) or stored, mostly as fat. Sometimes, the number of calories in a food is lower than the number of calories
it takes to chew and digest it. The act of eating, for example, celery or cucumber, can be a weight losing proposition all by itself — without
exercise or anything! Now isn’t that interesting...?
Vegetables whose digestion can use more calories than they contain include:
DON’Ts
1) Avoid going on repeated diets, each of which usually sets you up to regain everything you lose, and then some, just as soon
as you “go off” your diet. Instead, follow the simple guidelines below.
2) Don’t add any fat or oil to anything you eat... ever! This is by far the most important rule to remember, and it cannot be
overemphasized. The words “added fats and oils” have a very specific and special meaning here, referring to all those
unnatural fats and oils that humans manufacture, process, and add to the food they eat. There are no such things as added
fats and oils in nature. They just don’t exist. NATURE makes corn... HUMANS make corn oil, margarine and deep-fried food.
NATURE creates soybeans and peanuts... HUMANS manufacture soy oil, mayonnaise, and peanut oil.
FOOD & HOW TO CONTROL IT
• Alfalfa sprouts
• Beet greens
•Broccoli - (a close call)
•Cabbage
• Cauliflower - (a close call)
•Celery
•Chard, Swiss
•Chives
•Cucumber
• Eggplant - (a close call)
•Endive
•Garlic
•Lettuce
•Mushrooms
• Peppers -(a close call)
•Radishes
• Seaweeds of all kinds
•Spinach
• Tomato - (a close call)
• Turnip greens
• Water chestnuts
• Watercress

Nutritional Guide
15
It is very importantto avoid ALLadded fats and oils, not justbecause they’llmake you fat, butbecausethey’llalso makeyousick,
linked as they are to such disorders as breast and colon cancers, heart disease, and other serious illnesses.
Eliminating added fats and oils means avoiding:
•Margarine,
•Mayonnaise,
• Olive Oil,
•Butter,
• Oily salad dressings,
• Chips of all kinds (unless they’re baked),
• Fried foods,
•French fries,
•Cream cheese,
• Ice cream,
•Lard,
• and any other manufactured fat or oil.
Note that ifyou don’tlike saladswithout dressing — try lemon juice and seasoning salt. It’s delicious! Or... try any of the oil-free
salad dressings now widely available. You’ll be surprised to taste how much they have improved
All the above-listed items are horrible for you. But the hydrogenated products such as margarine, mayonnaise, and all heated
fats and oils are the worst, as they are high in trans fats, substances that form when fat or oil is heated or heavily processed. Trans fats
are directly implicated in the onset and/or exacerbation of obesity, cardiovascular disease and cancer. Avoid these “foods” at all costs.
3) Avoid processed foods high in sugar and white flour. Check your labels and do not eat anything that has too much of these
items in the ingredient list, as they too contribute to obesity and ill health.
FOOD PREPARATION
This subject could fill a book all by itself. The essential point to rememberis, onceagain, to avoid added fats andoils! Do not fry with
oil. Use non-stick pans and fry with water or non-fat chickenbroth. A little experimentation and you’llsee how easy this is. Also remember
that any menu that contains oil, butter or margarine can easily be made as well, or nearly as well, without those ingredients. You must
experiment to apply this concept to every one of your favorite recipes, but the reward for doing so is very high. It will mean better and bet-
ter health as well as greater and greater success.
FOOD TIMING
The best way to arrange your food day is to spread out your daily intake into several meals, as opposed to eating, say, one large meal
per day. Studies have shown that when two comparable groups of people eat the same number of calories but on different schedules, the
group that eats one large meal per day gains weight and feels worse, while the group that spreads its calories out during the day feels bet-
ter and gains no weight.
Other studies indicate that when food is eaten late in the day, closer to bedtime, weight is gained as compared to no weight gain
when the same food is eaten earlier in the day.
The typical large dinner with which most people are familiar is problematic because the natural daily rhythms of the body are such
that evening is when it is preparing for rest, not a large meal. More importantly, food eaten late in the day is much more likely to be con-
verted to stored body fat. So eat alight mealfor dinner — a pieceof grilled chicken, brown rice, and vegetable- just watch theportionsize.
Remember: food eaten this late will almost certainly be converted to body fat; and body fat, once accumulated, comes off much slower, and
with much greater difficulty, than it goes on - a fact with which many people are already familiar.
Always eat breakfast. A cup of cream of wheat, shredded wheat, oatmeal, or an egg white omelet is a great way to start the day. It
fuels the body and mind giving you that extra bit of energy necessary to meet today’s challenges. Whatever you do don’t skip this most
important meal.
In addition to breakfast, lunch, and dinner be sure to eat a small snack midmorning, and another between lunch and dinner.
WHEN TO EAT; WHEN TO STOP
Naturally thin people typically follow both of these two simple patterns:
1) Eat only when hungry; and
2) Stop eating when no longer hungry.
This is how primitive man ate, a good indication that it is the way nature intended. Most of us have been conditioned to eat when
it’s time to eat: lunchtime, dinnertime, breakfast. But the truth is that it is far more natural to eat when you’re hungry. That means truly

Nutritional Guide
16
hungry, not just craving food. As much as possible, try to follow this simple but powerful principle of eating.
The second timing principle - to stop eating when you’re no longer hungry - is also very powerful, but may contradict some
childhood training. Remember “Eat! Children are starving in India/ Somalia/wherever...”?
That may betrue, but it is certainly no reason to stuff yourself. Childhood lessons are not always good ones. The most natural time
to stop eating is when you’re full, which is, surprisingly, not what most of us do. This principle means that you should stop even if 95% of
the food is still left on your plate or if only 5% is left. It doesn’t matter. The amount of food on the plateis of no importance;itis completely
arbitrary and irrelevant to your body’s needs. What is important is only how you feel. If you’re satisfied... if the hunger is gone... STOP.
If you can master these two basic eating concepts, you will, to a large extent, master your nutritional and weight situation forever.
RESTAURANT EATING
This is a particularly troublesome area. Restaurants, for some unknown reason, love oil and butter. Evensimple salads are drowned
in truly ridiculous amounts of oil. Vegetables are cooked in butter and topped off with more butter before being brought to the table.
This abuse of oil and butter is the single biggest problem with eating in restaurants.
Food freshness is also an area of concern. Fish, poultry and meat, in descending order, are most likely to be problematic.
Be careful. Ask plenty of questions, particularly about freshness. If there is any reason to believe your food is not fresh, order something
else, or leave.
When ordering in a restaurant follow these simple rules:
• Always ask how much oil or butter is in the dish(es) you wish to order.
• Insist that the dish(es) you want be made with no oil, or butter or at worst, a very small amount.
• Refuse any offer of sprinkled cheese to go over your food.
•Order salads with vinegar dressing only, or lemon wedges that you can squeeze onto the salad. If you must order dressing from
the house, getone that separates, like vinaigrette, so that youcan pour off the oil that floats ontop, using only thetasty part below
the oil. Or bring your own, healthful salad dressing.
• Never order anything that is deep fried! Remember to ask about this, because there are many more foods that are deep fried than
is obvious from most menus. For example, Italian restaurants often deep fry their “eggplant parmigiana”. You must ask, and avoid
all foods that are so prepared.
• Avoid creamy foods. Many dishes that are normally prepared with cream are just as tasty without it. Ask the kitchen to prepare
it the way you want it.
•Order a salad first, the larger the better, and ask that it be brought out immediately. Avoid the oily/cream dressings, and eat the
salad as soon as it comes out.
• Say ‘no’ to the rolls and butter.
• Try to resist the temptation to order dessert. If you must do so, get one that is as close to “real recognizable food” as you can get.
A cup of fruit, or a fruit tart may do. In any event, avoid the creamy cakes and pies.
• In general, do not be afraid to ask for what you want. If they say “no”, say “good-bye”. There are plenty of restaurants that will be
only too happy to accommodate you, so don’t put up with anything less than what you know is right for your body.
CHEATING (indulging)
Yes, you are going to slip once in a while. It’s OK as long as you don’t use it as an excuse to revert to your old eating habits. Just get
back on track with your next meal. Don’t feel guilty. Just remind yourself how well you’ve been doing and give yourself a pat on the
back for coming so far. Learn to reject your old, bad ways — to renew your dedication to yourself and to the new body and health you are
determined to achieve.
HOW TO HELP PREVENT CRAVINGS
1) BREAK THE CYCLE!
• Food quality: This is the most important factor you can change in the area of negative food cycles. Avoid all junk food. Avoid all
foods that trigger cravings. Avoid all added highly processed foods. Eat real, recognizable food.
• Avoid all added fats: Themost important diet principle of all. Added fats and oils (a) make you fatterfaster than anything else you
can do or eat, (b) increase your risk of heart disease and cancer, and shorten your life, and (c) can cause you tocrave sweets, which
in turn further damage your health and increase fat levels.

Nutritional Guide
17
• Avoid sugar: Refined white sugar (table sugar) is damaging to your health in many ways, and will (a) directly cause weight gain,
and (b) cause cravings for fats that will further cause weight gain.
• Drink plenty of water: This is an easy, healthful way to help avoid cravings. Often, a perceived craving for food, particularly fatty
food,may besatisfied with a cup or two of water! Drinking plentyof water also helps to naturallycontrol appetitethrougha direct
effect on the stomach. Always drink pure, fresh water; avoid tap water laden with chlorine and other chemicals. Aim for at least
6-8 cups of water per day.
• Try brushing your teeth instead of eating! Often, a craving for a particular food, especially high-fat, high-sugar food, is causedby
something no more complicated than a bad taste in the mouth. A quick, refreshing tooth brushing or mouthwash rinse will often
get rid of cravings immediately and painlessly.
• Food timing: Do not skip breakfast; this only leads to hypoglycemia and severe cravings sometime around mid-morning, which
may, in turn, cause you to eat cookies or doughnuts with coffee and sugar, which in turn can set you up for a roller-coaster blood
sugar ride for the rest of the day. Not a good idea.
• Avoid eating anytime within three hours of bedtime. Not eating anything near bedtime can lower your fat levels and can change
your eating patterns so that you are hungrier in the morning, leading you to indeed eat a small-to-moderate breakfast. This in
turn helps control your mid-morning cravings.
• When you need to snack between meals, eat some fresh vegetables, or fat-free turkey deli slices, or a whole grain (not white flour)
product, or some fruit.
• Meal size: A pattern of smaller, more frequent meals throughout the day is much more conducive to craving control than a
pattern of starvation or mild snacking during most of the day combined with one large (often very large) daily meal. Studies have
also shown that spreading food intake throughout the day helps in the weight loss effort, while concentrating calories all in one
large meal sabotages it.
• Avoid overly salted foods, if they lead to sugar cravings or if you suffer from kidney disease or high blood pressure.
• Eat slowly: This will help minimize the effect of cravings, because you will find that you are satisfied sooner than you would be
if you were wolfing your food down.
• Vary your diet: Boredom is what causes most people to abandon their weight loss efforts. Imagine if you ate nothing but carrot
sticks and celery or cabbage soup for every meal. It wouldn’t be too long before you’d be driving into the first McDonald’s or
stopping at the first bakery yousaw. There are plenty of great tasting foods to give youall the variety you need for the rest of your
life which won’t make you fat. Experiment with herbs and spices and different cooking methods.
• Try the following trick: Carry with you a small pad of paper on which to write down everything you decide to eat before you
actually eat it. This will introduce an important time delay during which you are writing down what you’re about to do. There is
a good chance you will often find yourself changing your mind.
NUTRITIONAL SUPPLEMENTATION
It is often thought that a good, balanced diet should contain all the nutrients your body needs. But in today’s world, with mass food
production and soil depletion, it usually doesn’t. And besides, how many of us really eat a “good, balanced diet”?
For these reasons, and because optimal nutrition is especially important during a period of active fat metabolism and breakdown,
we recommend that a good multi-vitamin-mineral be taken regularly.
TIPS:
• One-pill-a-day multi-vitamin preparations are usually poor in quality and not very helpful. Better quality formulas require
at least 3 tabs/caps per day. Multi-nutrient formulas should usually always be taken with at least some food. This helps
improve absorption, prevent abdominal discomfort, and prevent the “niacin flush” that sometimes otherwise occurs.
• Look for a formula that contains a full range of B vitamins, vitamins A, C, E and D, and a full complement of minerals.
Vitamin B6, magnesium and chromium are particularly important, yet often deficient in typical diets.
• Many people benefit additionally from taking extra Essential Fatty Acids, vitamin C, and sometimes, a digestive enzyme
called bromelain.
• The best place to find high-quality, complete nutritional supplementation is usually your local health store.
•Finally, don’t forget to drink plenty of clear, pure water to help flush out all those toxins your body stores along with its fat.

Nutritional Guide
18
GOOD JUDGEMENT
In general, use your good judgment. Do not overdo anything. Keep all nutritional supplementation to levels consistent with what
nature intended for the human body.
And look at the ingredient list of any packaged item you put in your mouth. Look at the source. The maker of a food or food
supplement should be a reputable company, with qualified experts doing the formulations.
IF YOU ENCOUNTER PROBLEMS
Most people who experience this weight loss system meet with complete, ecstatic success.
If you sense that your results should be different, remember that every human on this planet is distinct from every other and you
are likely to react differently from anyone else to a given external stimulus. So if by some chance your rate of fat loss seems too slow, note
this important fact:
Everyone loses fat at his or her own individual pace.
Just continue following the system and working out with your OrbiTrek Pro™ and your goals WILL be reached. You may simply be
one of the few who are “slow reactors”. It may take a bit longer, but you WILL get there!
Also, you will want to make sure you’re maximizing your success by following the ENTIRE program outlined here. This is most
important for anyone whose initial results may be slower in coming than others.
WHEN TO SEE YOUR DOCTOR
In general, see your doctor if any physical symptom or sign occurs that is unusual or makes you uncomfortable or
worried in any way!

Manuel Du Propriétaire
19
AVIS DE SÉCURITÉ IMPORTANT
1) LA CAPACITÉ PONDÉRALE MAXIMALE D’ORBITREK PRO EST DE 275 LBS.
Les personnes dont le poids dépasse cette limite ne devraient PAS utiliser cet appareil.
2) Gardez les enfants et les animaux domestiques à l’écart du OrbiTrek Pro en tout
temps. NE laissez PAS les enfants sans surveillance dans la pièce où se trouve l’appareil.
3) Si l’utilisateur se sent étourdi, a des nausées, des douleurs thoraciques ou tout autre
symptôme anormal, il doit CESSER l’entraînement immédiatement. CONSULTEZ UN
MÉDECIN IMMÉDIATEMENT.
4) Posez l’OrbiTrek sur une surface non encombrée et à niveau. Placez un tapis sous
l’appareil pour aider à le garder stable et pour protéger le plancher.
5) Portez toujours des vêtements de sport adéquats lorsque vous vous entraînez. Il faut
également porter des chaussures de course ou aérobiques.
6) Utilisez l’OrbiTrek Pro uniquement à des fins d’entraînement, tel que décrit dans le
présent manuel. N’utilisez PAS d’autres accessoires non recommandés par le fabricant.
7) NE placez PAS d’objets tranchants près de l’OrbiTrek Pro.
8) Les personnes handicappées ne devraient pas utiliser l’OrbiTrek Pro sans qu’un
professionnel de la santé qualifié ou un médecin ne soit présent.
9) Faites toujours des exercices d’étirement avant de vous entraîner.
10) N’utilisez JAMAIS l’OrbiTrek Pro s’il ne fonctionne pas convenablement.
11) Resserez tous les boulons régulièrement.
12) N’utilisez ps l’OrbiTrek Pro sans les couvercles du moteur à double flux.
MISE EN GARDE : AVANT DE DÉBUTER UN ENTRAÎNEMENT SUR CET APPAREIL OU TOUT
AUTRE PROGRAMME D’EXERCICES, CONSULTEZ D’ABORD VOTRE MÉDECIN. CELA EST
PARTICULIÈREMENT IMPORTANT POUR LES PERSONNES DE PLUS DE 35 ANS OU LES
PERSONNES AYANT DES PROBLÈMES DE SANTÉ PRÉEXISTANTS. LISEZ TOUTES LES
DIRECTIVES AVANT D’UTILISER L’APPAREIL. THANE FITNESS N’ASSUME AUCUNE
RESPONSABILITÉ POUR LES BLESSURES OU DOMMAGES MATÉRIELS SUBIS LORS DE
L’UTILISATION DE CE PRODUIT
CONSERVEZ CES DIRECTIVES
Table of contents
Languages:
Other Thane Fitness Elliptical Trainer manuals
Thane Fitness
Thane Fitness ORBITREK MX User manual

Thane Fitness
Thane Fitness OrbiTrek OR1000-PRO User manual

Thane Fitness
Thane Fitness Elite Orbitrek User manual
Thane Fitness
Thane Fitness Orbitrek Elite BK2080 User manual

Thane Fitness
Thane Fitness Magnetic Elite Orbitrek User manual

Thane Fitness
Thane Fitness OrbiTrek Platinum User manual

Thane Fitness
Thane Fitness Orbitrek Elite BK2080 User manual

Thane Fitness
Thane Fitness Orbitrek Elite BK2080 User manual
