manuals.online logo
Brands
  1. Home
  2. •
  3. Brands
  4. •
  5. The Bradley Collection
  6. •
  7. Indoor Furnishing
  8. •
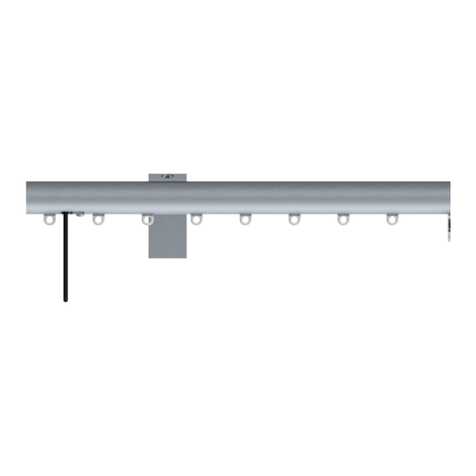
  9. The Bradley Collection Express Curtain Pole User manual

The Bradley Collection Express Curtain Pole User manual

thebradleycollection
EXPRESS
Installation Instructions
CONTACT
Web www.bradleycollection.com
Email [email protected]
Follow
WORLD
The Bradley Collection Ltd
Lion Barn • Maitland Road
Needham Market • Suffolk
IP6 8NS • UK
Telephone +44 (0)1449 722 724
Fax +44 (0)1449 722 728
USA & Canada
The Bradley Collection Inc.
3625 Hayden Avenue, Suite E
Culver City • CA • 90232 • USA
Telephone +1 (310) 815 8255
Fax +1 (310) 815 9255
Modern Brackets
Bracket positioning and fixing
Side brackets should be positioned approximately 100mm (4”) in from the end of the pole.
To align the brackets, the top of the passing brackets should be fitted below the top of the side brackets. (see dimension Z)
Tools
For the installation of the system the following items may be required.
EXPRESS
Installation Instructions
THANK YOU FOR YOUR ORDER
Before fitting this product please ensure
that you have thoroughly read these
instructions.
We have taken every care to design and
manufacture a quality system; incorrect
installation could lead to poor
performance.
If any queries arise when reviewing these
instructions or during installation please
feel free to contact us for assistance.
We will be glad to talk you through the
process.
Please retain these instructions for future
reference.
CONTACT
Web www.bradleycollection.com
Email [email protected]
World +44 (0)1449 722 724
USA & Canada +1 (310) 815 8255
Follow
Fixings
As a courtesy we have supplied a set of fixings for the system.
These screws and wall plugs are designed to be used in wood and brick walls. We understand our
systems may be used on a variety of materials; drywall, aluminim and steel stud, or lath and plaster.
To properly secure a system onto these or other types of
surfaces; appropriate fixings must be independently obtained.
Care & Maintenance
This pole can be cleaned using a soft
cloth and furniture polish.
Please do not use any solvent or
chlorine based cleaners as this
will damage the finish.
!
Side Passing
Dimension Z
Exploded bracket assembly
Assess your own wall construction and source the appropriate screw type.
Please note that the enclosed fixings may not be suitable for all wall types.
!
Diameter Dimension Z
19mm (3/4”) 15mm (9/16”)
25mm (1”) 5mm (9/16”)
Dimension Z
Side Passing
Diameter Dimension Z
19mm (3/4”) 7mm (1/14”)
25mm (1”) 9mm (3/8”)
Traditional Brackets
Bracket Positioning & Fixing
Side brackets should be positioned approximately
100mm (4”) from the ends of the pole.
Mark the position of the brackets. for longer poles a mid/passing
bracket is required. For bay window poles, passing brackets are
used in conjunction with passing curtain rings.
Drill holes & insert plugs.
Screw each bracket into position.
Push coverplate & arm into place, lock arm with set screw.
Finials
Attach the finials
by pushing them
into position.
Fitting Rings and Pole
Slide the curtain rings on to the pole, allowing approximately one ring
for every 100mm (4”). On systems where passing rings are used
ensure the open side of the ring is facing the wall.
Keep aside two rings, one for the outside of each end of the bracket.
Place the pole on the brackets, making sure that the overhangs at
each end are equal. If the pole is made of two connected lengths,
the mid/passing bracket should cover the join.
Joining the pole
Poles are supplied pre-cut to your specified
lengths, in some cases the pole may be made
in two or more parts, joined by a connector.
Push the joiner into the pole ends and push the
poles together.
MODERN
Passing Brackets
The pole snaps into the passing bracket. this operation should only be done
once, as repeated attempts can damage the finish.
Ensure that the pole is in the correct position first. Then gently pull the pole
down whilst holding the bracket up.
!
TRADITIONAL
Bracket Positioning & Fixing
Side brackets should be positioned approximately
100mm (4”) from the ends of the pole.
Mark the position of the brackets. for longer poles a mid/passing
bracket is required. For bay window poles, passing brackets are
used in conjunction with passing curtain rings.
Drill holes & insert plugs.
Screw each bracket into position.
Finials
Attach the finials
by pushing them
into position and
tightening the set
screws either on
the finial.
Fitting Rings and Pole
Slide the curtain rings on to the pole, allowing approximately one ring
for every 100mm (4”). On systems where passing rings are used
ensure the open side of the ring is facing the wall.
Keep aside two rings, one for the outside of each end of the bracket.
Place the pole on the brackets, making sure that the overhangs at
each end are equal. If the pole is made of two connected lengths,
the mid/passing bracket should cover the join.
Joining the pole
Poles are supplied pre-cut to your specified
lengths, in some cases the pole may be made
in two or more parts, joined by a connector.
Push the joiner into the pole ends and push the
poles together.
Passing Brackets
The pole snaps into the passing bracket. this operation should only be done
once, as repeated attempts can damage the finish.
Ensure that the pole is in the correct position first. Then gently pull the pole
down whilst holding the bracket up.
!

Other The Bradley Collection Indoor Furnishing manuals

The Bradley Collection GLIDERPOLE User manual

The Bradley Collection

The Bradley Collection GLIDERPOLE User manual

The Bradley Collection GLIDERPOLE User manual

The Bradley Collection

The Bradley Collection GLIDERPOLE User manual

Popular Indoor Furnishing manuals by other brands

Regency LWMS3015 Assembly instructions

Regency

Regency LWMS3015 Assembly instructions

Furniture of America CM7751C Assembly instructions

Furniture of America

Furniture of America CM7751C Assembly instructions

Safavieh Furniture Estella CNS5731 manual

Safavieh Furniture

Safavieh Furniture Estella CNS5731 manual

PLACES OF STYLE Ovalfuss Assembly instruction

PLACES OF STYLE

PLACES OF STYLE Ovalfuss Assembly instruction

Trasman 1138 Bo1 Assembly manual

Trasman

Trasman 1138 Bo1 Assembly manual

Costway JV10856 manual

Costway

Costway JV10856 manual

moss DESIGN Caisson Credenza Assembly instructions

moss DESIGN

moss DESIGN Caisson Credenza Assembly instructions

Aquaglide FULL DECK 15.0 owner's manual

Aquaglide

Aquaglide FULL DECK 15.0 owner's manual

AREBOS AR-HE-SW30 user manual

AREBOS

AREBOS AR-HE-SW30 user manual

Till-Hilft Fulda 87005.330 Assembly instructions

Till-Hilft

Till-Hilft Fulda 87005.330 Assembly instructions

Twoey Outside 2010 quick start guide

Twoey Outside

Twoey Outside 2010 quick start guide

Hettich Easys 200 operating instructions

Hettich

Hettich Easys 200 operating instructions

The bedboss RELAX 404 Series owner's manual

The bedboss

The bedboss RELAX 404 Series owner's manual

Oeseder Möbelindustrie Bern 991 720 Assembly instructions

Oeseder Möbelindustrie

Oeseder Möbelindustrie Bern 991 720 Assembly instructions

Costway HW68469 user manual

Costway

Costway HW68469 user manual

Next ALIX A27743 Assembly instructions

Next

Next ALIX A27743 Assembly instructions

BROSA Hans Assembly guide

BROSA

BROSA Hans Assembly guide

Prodigg MINIKA PBA015T-FUR installation manual

Prodigg

Prodigg MINIKA PBA015T-FUR installation manual

manuals.online logo
manuals.online logoBrands
  • About & Mission
  • Contact us
  • Privacy Policy
  • Terms and Conditions

Copyright 2025 Manuals.Online. All Rights Reserved.