TherAdapt BC-100 User manual

Bolster Chair
Please read all of the following information before using this product.
TherAdapt®Products Inc. has designed and manufactured this product with the well being of the user
and caregiver(s) in mind. It is our endeavor to provide products which are attractive, comfortable,
useful, highly adjustable, long lasting and safe. As when using any product, precautions must be taken.
THE MANUFACTURER IS NOT RESPONSIBLE FOR INJURIES RESULTING
FROM ANY CUSTOMIZATION OR MODIFICATION OF THE EQUIPMENT THAT
WAS NOT COMPLETED BY THE MANUFACTURER.
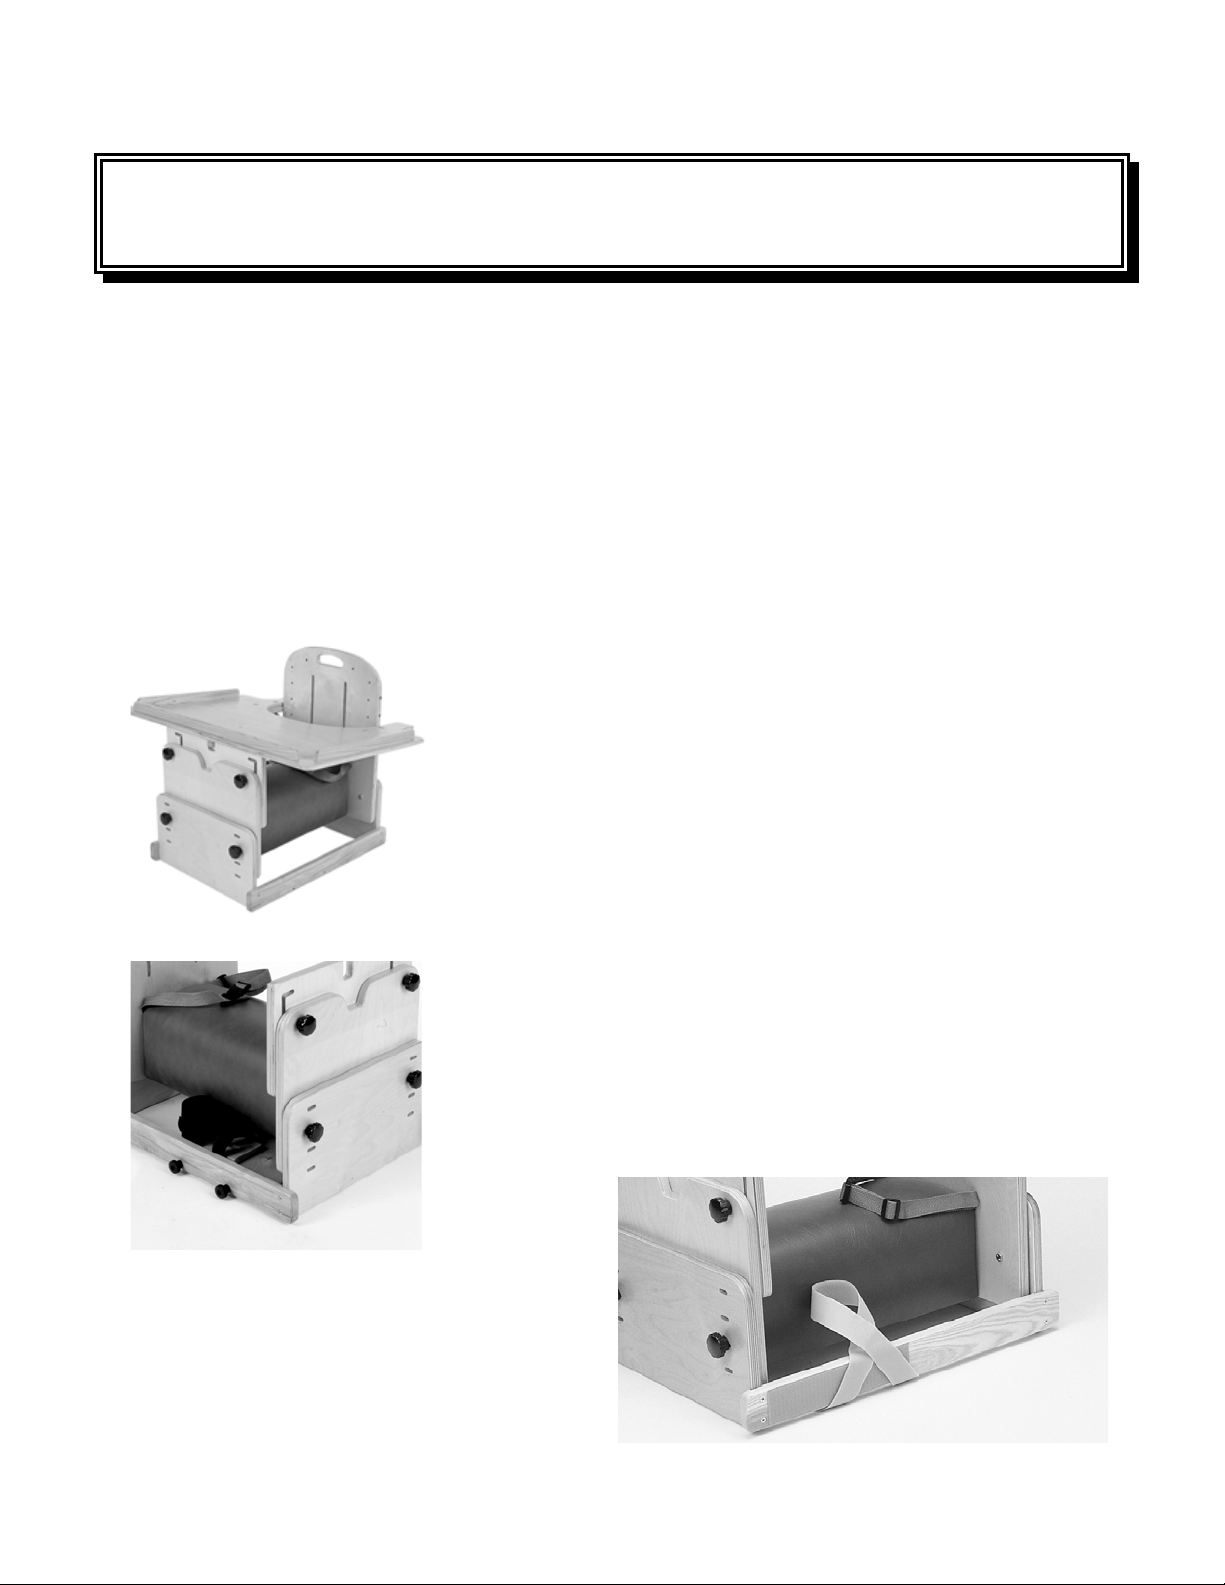
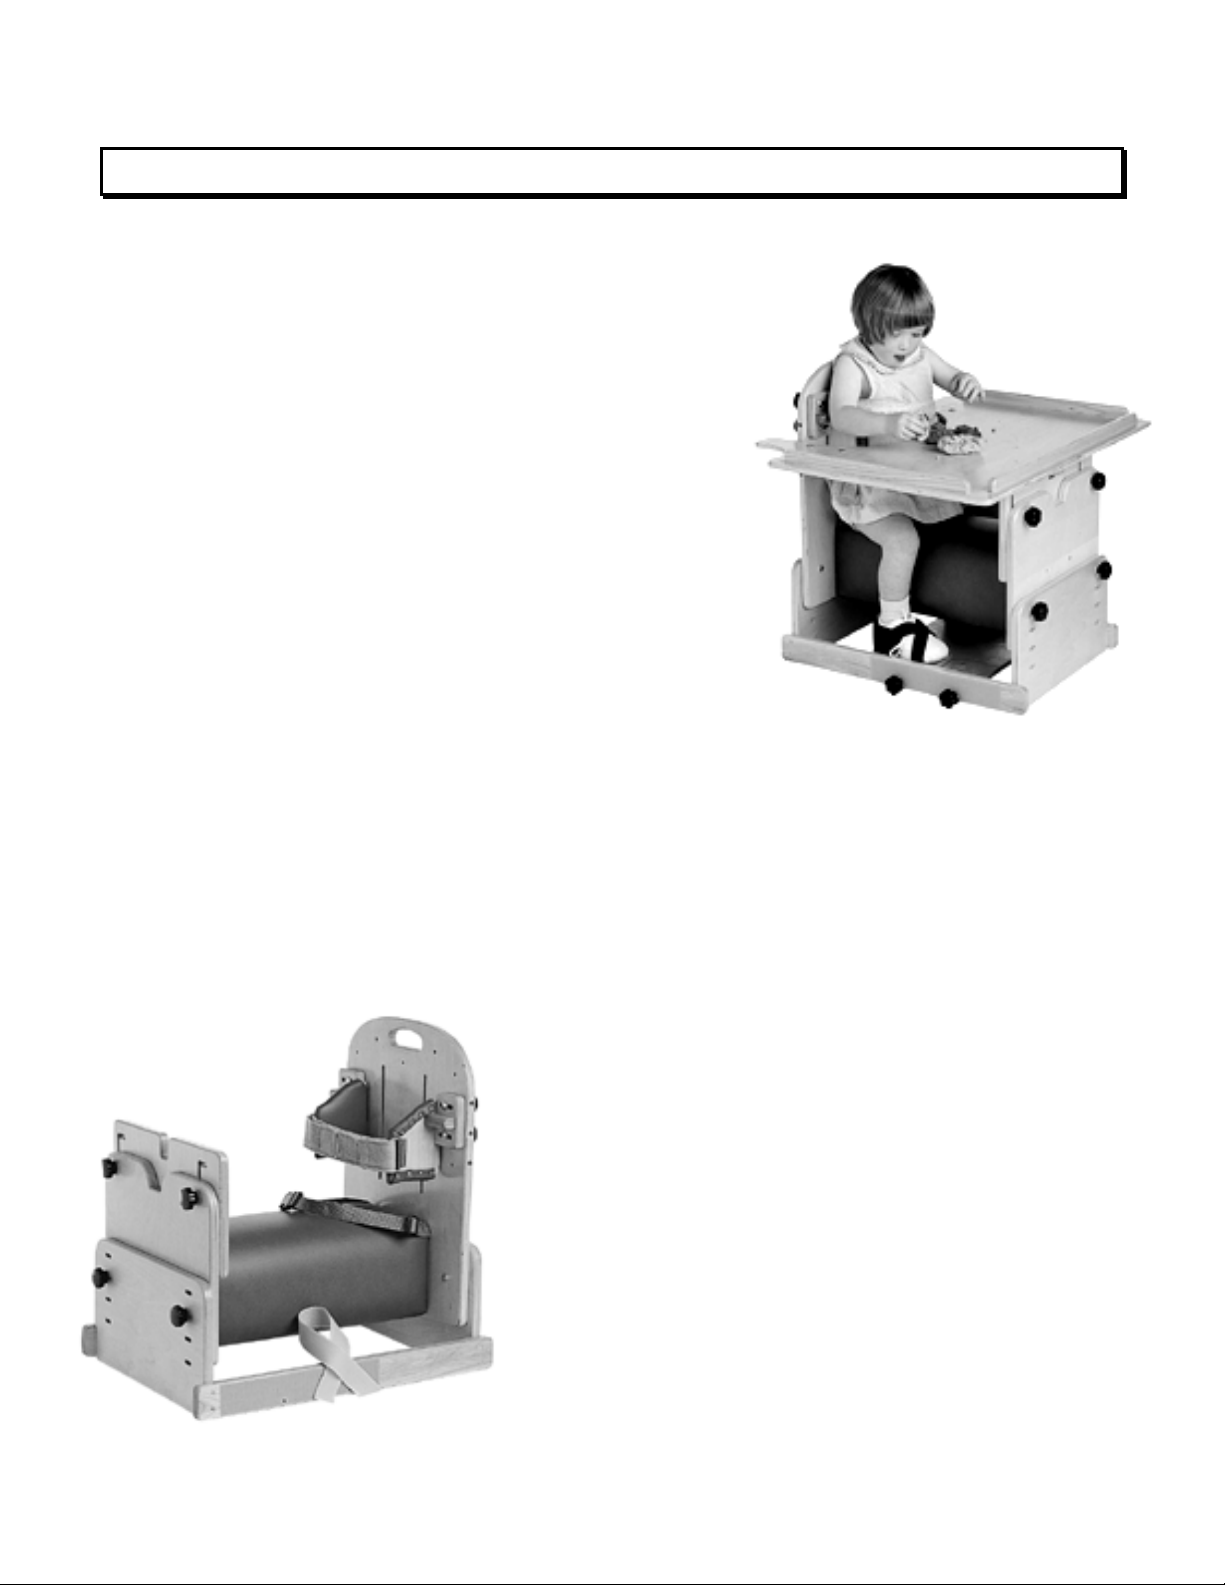
USE: The Bolster Chair is designed for a single purpose: as a freestanding chair. It is to be used on the floor only. No other
use is permitted, including, but not limited to a seat used for transportation in an automobile, stroller, or any other mobility
device. Extreme caution must be used when using the Bolster Chair in conjunction with a TherAdapt®Mobile Base.
CARE: Take care to inspect the ongoing condition of all parts of your Bolster Chair. Verify that all knobs, bolts, and
washers are properly positioned and secure. Contact the manufacturer for replacement or repair of necessary items. All
components may be cleaned with mild soap and water, or a gentle sanitizing spray. Do not use abrasive cleaners. Wipe
wood components dry after cleaning. Excess amounts of liquid on the wood may damage the finish. Always store indoors.
PLEASE COMPLETE AND RETAIN FOR YOUR RECORDS
Bolster Chair BC-_________________ Serial Number: _____________________
Purchase date: ___________________
WARNING: This product must onl
y
be used under the
recommendation of a ph
y
sician and / or licensed therapist and with
adult supervision. Never leave user unattended. It is
y
our
responsibility to properl
y
use and maintain
y
our Bolster Chair.
Failure to follow USE and CARE instructions or ASSEMBLE the
chair properly as outlined may result in bodily injury.
TherAdapt®Products Inc.
(800) 261-4919 phone (866) 892-2478 fax
www.theradapt.com
WARRANTY: The manufacturer provides a full one (1)
y
ear warrant
y
, be
g
innin
g
the date
shipped b
y
the manufacturer. The warrant
y
provides full replacement of all parts a
g
ainst
breaka
g
e when used in compliance with the manufacturer’s USE and CARE instructions. Use
or modification beyond the normal capacity or range of adaptability designed into the products
will void the warranty. The foregoing is TherAdapt’s sole liability for consequential damages.
TherAdaptBolster Chair (BC-100/200/300) Instructions
Packing List:
(1) Basic chair with vinyl padded seat, base, and rectangular, slotted tray support
(1) 1” wide pelvic strap with (1) side release buckle and (2) double slotted rings
(1) Tray with (2) quick release spring loaded lock pins and (4) 1 ½” ¼ -20 carriage bolts
(2) Foot straps of “loop” fastener
(6) 1 ¾” ¼ -20 hex head bolts
(10) Thru-knobs with ¼ -20 threaded inserts
(10) Nylon washers
The basic Bolster Chair comes pre-assembled (except tray) but it should be adjusted properly to
the individual user to provide a customized fit.
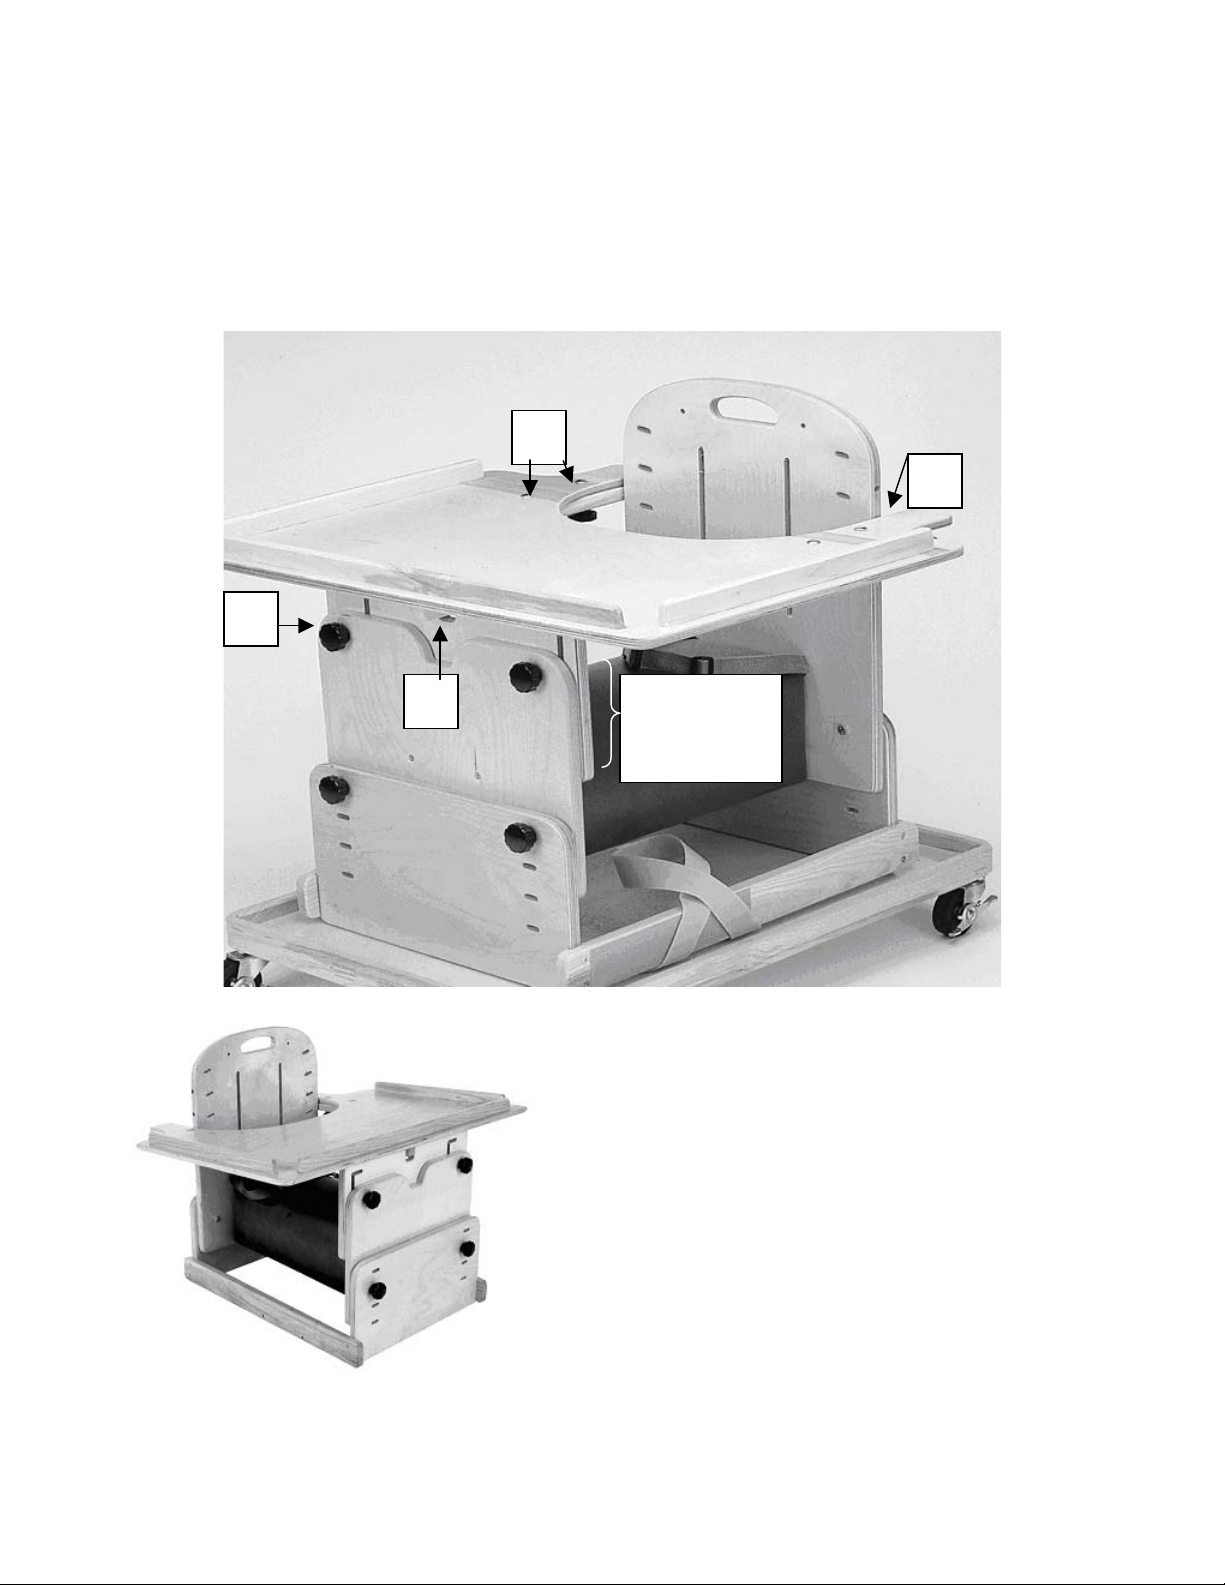
1. Adjust the seat height.
Remove the (4) knobs and bolts on the base. Adjust the
seat to the appropriate height and re-install the bolts
through the appropriate paired holes. Replace the knobs
with a nylon washer between the knob and the wood.
Tighten securely.
Note: when using the optional footplate attach it to the base
first, and then adjust the seat height for a proper fit.
2. Adjust the pelvic positioning belt. The 1” pelvic belt
with side release buckle should be positioned in the notch
created by the bend of the lap between the thigh and the
pelvis, and tightened snugly. Note: The double slotted
rings on each side of the pelvic strap have the loose ends
threaded back through. This prevents the strap from
slipping, makes the belt completely adjustable, and allows
the belt to snap closed at any location.
3. Secure the feet / lower leg with straps
Place the loop strap in a figure “8” around the
Lower leg and secure on the hook along the
base of the chair.
TherAdapt®Bolster Chair (BC-100/200/300) Instructions: Page 1 of 5
4. Attach the tray and adjust.
A. Adjust tray height by loosening the upper pair of knobs (A) and slide the inner, slotted,
rectangular board into the appropriate niche. Re-tighten knobs securely.
B. Place the front of the tray in the notch (B) on the rectangle tray support.
C. Pull the quick release spring lock pins, line the
tray up with the holes on the sides of the chair
back (C), and release the pins. Note: The
easiest way to attach or detach the tray is to
stand behind the Bolster Chair.
D. The depth of the tray is adjustable by loosening
the knobs on the underside of the tray (D) and
sliding the tray to the appropriate depth.
Re-tighten knobs securely before use.
FOR PROFESSIONAL ASSISTANCE CALL 1-800-261-4919
TherAdapt®Bolster Chair (BC-100/200/300) Instructions: Page 2 of 5
A.
B.
C.
D.
Note: The tray
can be angled
by raising the
front end here.
TherAdaptBolster Chair Options- Instructions
1. Attach the adjustable footplate. (BC-200FP, BC-300FP)
Packing List:
(1) Footplate with (2) slotted metal brackets
(2) Foot sandals with hook heel cups
and loop cross straps
(4) 1 ¾” ¼ -20 hex head bolts
(4) 1 ¼” ¼ -20 carriage bolts
(8) Thru-knobs with ¼ -20 threaded inserts
(8) Nylon washers
A. Attach each foot sandal to the footplate.
Place (2) hex bolts through the center slot on the
sandal and attach through the slots on the footplate.
Secure with knobs on the underside of the footplate.
Place a nylon washer between the knob and the
wood. Tighten knobs securely before using.
B. Attach footplate to the base of the chair.
Remove the loop fastener. Place (2) carriage bolts through the slotted metal bracket and through
the holes on each side of the base. Secure with knobs. Place a nylon washer between the knob
and hook fastener. Tighten knobs securely before using.
Note: When the Bolster Chair, with the footplate, is used on a TherAdapt®Mobile Base you must
replace the (4) thru-knobs and (4) nylon washers with (4) metal washers and (4) 7/16” locking nuts
which will be provided or available upon request.
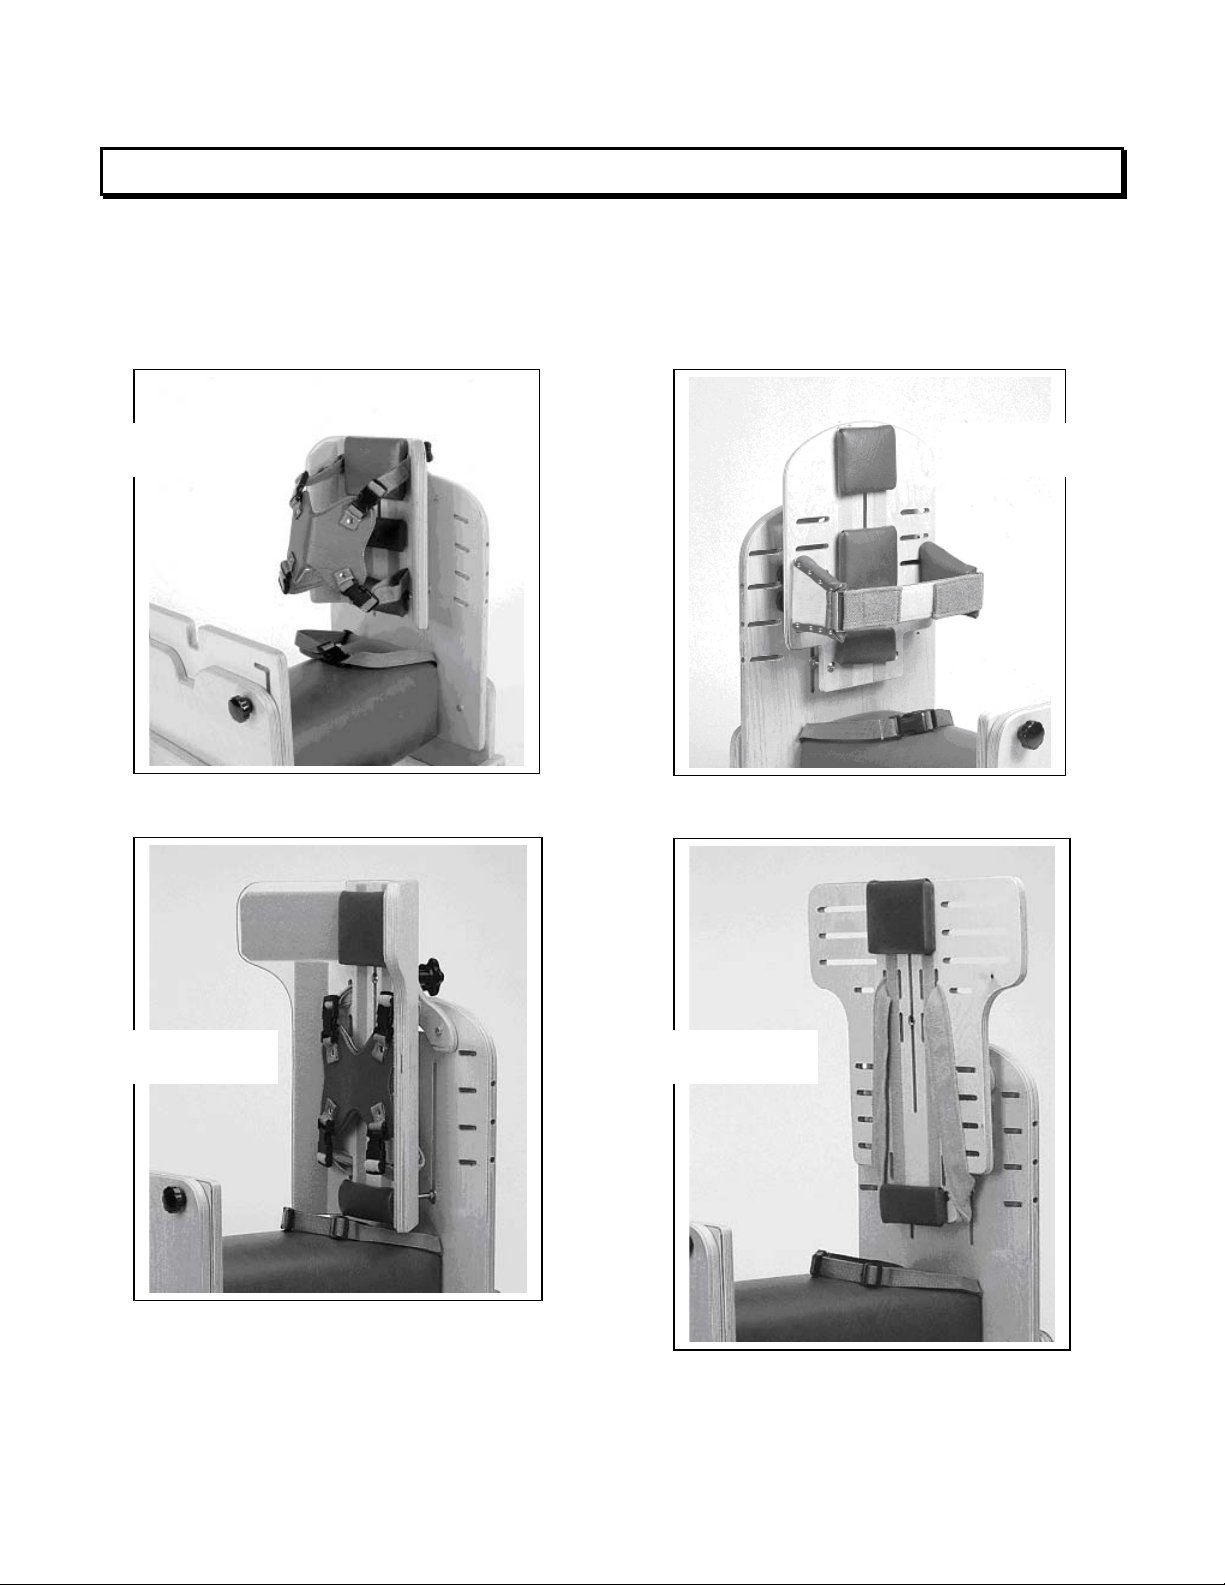
2. Attach the thoracic pads.
(BC-100TP, BC-200TP, BC-300TP)
Packing List:
(2) Thoracic Pads with D-rings
(1) Chest strap
(4) Knobs with ¼ -20 inserts
(4) Nylon washers
Place the two hanger bolts on the rear of each pad
support into the appropriate set of slots on the chair
back. Before securing with knobs, place a nylon
washer between the knob and the wood. Adjust the
pads to the desired width and tighten knobs securely.
Place the chest strap through the D-rings and secure
hook and loop fastener.
TherAdapt®Bolster Chair (BC-100/200/300) Instructions: Page 3 of 5
TherAdaptBolster Chair Accessory Information
Note: The back slots allow the TherAdapt®Corner Back Insert, Low Back Insert,
Flat Back Insert, and Winged Back Insert to interface with the Bolster Chair
providing head and/or trunk support as needed. The Bolster Chair Thoracic Pads cannot
be used with an Insert.
Please refer to the insert instructions provided
when attaching an insert to the Bolster Chair.
FOR PROFESSIONAL ASSISTANCE CALL 1-800-261-4919
TherAdapt®Bolster Chair (BC-100/200/300) Instructions: Page 4 of 5
Corner Back Insert Low Back Insert
Flat Back InsertWinged Back Insert

Use of the Mobile Base allows the chair to me moved safely about the home, clinic or
classroom. Caution must be exercised when doing this and the casters should be locked
immediately upon arrival at the new location.
For BC-100 use MB-A
For BC-200 use MB-A
For BC-300 use MB-B
FOR PROFESSIONAL ASSISTANCE CALL 1-800-261-4919
TherAdapt®Bolster Chair (BC-100/200/300) Instructions: Page 5 of 5
This manual suits for next models
2
Table of contents
Other TherAdapt Indoor Furnishing manuals


