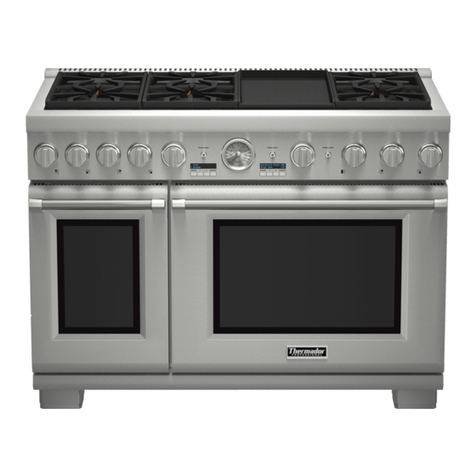
Thermador Pro Harmony PA48GLBH User manual

CAUTION
The Pot and Pan Shelf can get very hot!
DO NOT place any of the following items on top of the Pot
and Pan Shelf:
• “Plastics” or containers that can melt.
• Flammable items.
• A total load over 30 pounds (13.6 kg).
BACKGUARD INSTALLATION INSTRUCTIONS — PRO HARMONY™ DUAL FUEL RANGES
Front of Range
WARNING
To avoid possible burn or re hazard, a backguard designed
specically for this range must be installed whenever the
range is used.
The back panel of backguard is positioned
inside these two guide channels on the back of
the range.
• Thebackguardmustbeattachedbeforeslidingtherangeintothenal,installedposition.
A Low Back or Pot-and-Pan Shelf must be installed when there is less than 12” clearance
fromacombustiblebackwallandthebackoftherangeabovethecookingsurface.SEE
RANGEINSTALLATIONMANUAL.
• An Island Trim is available for covering the backguard area of the range for island
installations;however,theIslandTrimcanonlybeusedwherethereisaminimumof12”
horizontalclearancebetweenacombustiblebackwallandthebackoftherange.
• Thebackguardisinsertedinsidetheguidechannelsonthebackoftherange,asshown
intheillustration.(Removethegriddleorgrillassemblyforsufcientinstallationclearance
onmodelssoequipped.)UsingaT-20sizeTorxdriver,fastenthebackguardwithfour(4)
screwstotherangesidepanels.
• Pot-and-PanShelfmodelsrequirepre-assemblyofthetoppaneltotheshellusingnine
(9)oftheenclosedTorxheadscrews.Forsufcientloadstrength,YOUMUSTattachtwo
(2)Torxheadscrewsthroughthebackcornersofthetopdownintotheshell.
• Tosecurethefrontofthebackguard,installthree(3)oftheTorxheadscrewsthroughthe
lowerfrontpanelofthebackguard,intotheangeatthebackoftherange’scooktop.
• ThePot-and-PanShelfmodelsprovideashelfabovethecooktoptokeepfoodshotor
storecookingpans.
OBSERVE CAUTIONS BELOW.
Range
Width
6”
Low Back
9”
Low Back 22” Pot and
Pan Shelf
Island
Trim
30”
36”
48”
Includedwith
Range
N/A
N/A
N/A
PA36GLBH
PA48GLBH
PA30GHSH
PA36GHSH
PA48GHSH
PA30GITH
Includedwith
Range
Includedwith
Range
BACKGUARD MODEL NUMBERS

ATTENTION
La tablette peut être très chaude !
NE PAS placer ces articles sur le dessus de la tablette à
casseroles :
• « plastique » ou contenant pouvant fondre.
• articles inammables.
• charge totale de 30 lb (13.6 kg).
INSTRUCTIONS D’INSTALLATION DU DOSSERET —
CUISINIÈRES À COMBUSTION JUMELÉE PRO HARMONY™
Devant de
cuisinière
AVERTISSEMENT
Pour éviter brûlure ou risque d’incendie, le dosseret est
conçu spéciquement pour cette cuisinière et doit être
installé chaque fois que la cuisinière est utilisée.
• Ledosseretdoitêtreinstalléavantdeglisserlacuisinièreenposition.Lemodèleprolé
oulatablettedoitêtreinstallélorsqu’ilyamoinsde12podedégagemententrelemur
arrièrecombustibleetledosdelacuisinière,au-dessusdelasurfacedecuisson.VOIR
LEGUIDED’INSTALLATIONDELACUISINIÈRE.
• Unegarnitured’îlotestdisponiblepourcouvrirledosseretpourlesinstallationsenîlot;
toutefois elle peut seulement être utilisée lorsqu’il y a un minimum de dégagement
horizontalde12poentrelemurarrièrecombustibleetledosdelacuisinière.
• Ledosseretestinsérédanslesguidesaudosdelacuisinière,commeillustré.(Enlever
lagrilleoul’assemblagegrilpourundégagementsufsantpourl’installationpourles
modèlesainsiéquipés.)AvecuneclédynamométriqueT-20,xerledosseretavec4vis
surlespanneauxlatériauxdelacuisinière.
• Latabletterequiertunassemblagedupanneausupérieurauboîtieràl’aidede9visà
têteTorx.Pourunerésistancedechargesufsante,ILFAUTxer2visparlescoins
arrièreduhautdansleboîtier.
• Pourxerledevantdudosseret,installer3visTorxparlepanneauavantinférieurdu
disseret,danslerebordaudosdelasurfacedecuissondelacuisinière.
• Latabletteau-dessusdelacuissonpermetdegarderlesalimentschaudsouranger
descasseroles.
OBSERVER LES AVERTISSEMENTS CI-DESSOUS.
Largeur de
cuisinière
Dosseret
bas 6 po
Dosseret
bas 9 po
Tablette à
casserole 22 po Garniture
d’îlot
30po
36po
48po
Comprisavec
la cuisinière
N/D
N/D
N/D
PA36GLBH
PA48GLBH
PA30GHSH
PA36GHSH
PA48GHSH
PA30GITH
Comprisavec
la cuisinière
Comprisavec
la cuisinière
NUMÉROS DE MODÈLES DU DOSSERET
Le panneau arrière du dosseret est à l’intérieur
de ces 2 guides au dos de la cuisinière.

PRECAUCIÓN
El estante para ollas puede calentarse mucho!
NO coloque cualquiera del siguiente encima de el estante
para ollas:
• “plásticos” o contenedores que se pueden derretir.
• artículos inamables.
• una máxima carga arriba de 30 libras (13.6 kg).
INSTRUCCIONES DE INSTALACIÓN DE LA CONSOLA TRASERA DE PROTECCIÓN —
ESTUFAS DE DOBLE COMBUSTIBLE PRO HARMONY™
Frente de la estufa
ADVERTENCIA
Para evitar posibles quemaduras o fuego, se debe
instalar una consola trasera de protección diseñada
especícamente para esta estufa, siempre que se use la
estufa.
La consola trasera de protección se instala
adentro de estos dos canales guía en la parte
trasera de la estufa.
• Sedebeinstalarlaconsolatraseradeprotecciónantesdedeslizarlaestufaasuposición
nal.Sedebeinstalarunaconsolatraserabajaounestanteparaollascuandohaymenosde
12”(30.5cm)deespaciolibreentrematerialescombustibles(paredtrasera)ylapartetrasera
delaestufaarribadelasupercieparacocinar.VEAELMANUALDEINSTALACIÓNDELA
ESTUFA.
• Unamolduratipoislaestádisponibleparatapareláreadelaconsolatraseradelaestufacon
instalacionestipoisla;sinembargo,sepuedeutilizarlamolduratipoislasolamentecuando
hayunespaciomínimolibrede12”(30.5cm)entrematerialescombustibles(paredtrasera)
ylapartetraseradelaestufa.
• Seinstalalaconsolatraseradeprotecciónadentrodeloscanalesguíaenlapartetrasera
delaestufacomosemuestraenlailustración.(Quiteelconjuntodelaplanchaodelasador
enlasestufasconplanchaoasadorparatenersucienteespaciolibreparalainstalación en
modelosasíequipados.)UsandoundestornilladorTorxtamañoT-20,jelaconsolatrasera
con(4)tornillosalospaneleslateralesdelaestufa.
•
Enlosmodelosconestanteparaollassedebeensamblarprimeroelpanelsuperioralarmazón
usandonueve(9)delostornillosdecabezatorxincluidos.Paralograrsucientefuerzadecarga,
USTEDDEBEjardos(2)tornillosdecabezaTorxatravésdelasesquinastraserasdelaparte
superioralarmazón.
• Parajarelfrentedelaconsolatrasera,instaletres(3)delostornillosdecabezaTorxa
travésdelpaneldelanteroinferiordelaconsolatraseraenlabridadelapartetraseradela
parrilladelaestufa.
• Los modelos con estante para olla tienen un estante arriba de la parrilla para mantener
calientesalimentosoparaguardarollas.
OBSERVE LAS PRECAUCIONES ABAJO.
Ancho de
estufa
6” Consola
Baja
9” Consola
Baja
22” Estante para
Ollas y Sartenes Ajuste
de Isla
30”
36”
48”
Incluidacon
estufa
N/D
N/D
N/D
PA36GLBH
PA48GLBH
PA30GHSH
PA36GHSH
PA48GHSH
PA30GITH
Incluidacon
estufa
Incluidacon
estufa
NUMEROS DE MODELOS DE CONSOLA TRASERA

5551McFaddenAvenue,HuntingtonBeach,CA92649•800-735-4328•www.thermador.com
9000476088•5U02LA•Rev.A•06/09•©BSHHomeAppliancesCorporation,2009•Allrightsreserved
LithoinUSA
This manual suits for next models
3
Table of contents
Languages:
Other Thermador Cooker manuals

Thermador
Thermador PRD364WIGU User manual

Thermador
Thermador Pro Grand User manual
Thermador
Thermador PRD486WIGC User manual

Thermador
Thermador Pro Harmony Professional Series User manual
Thermador
Thermador PRG304US User manual
Thermador
Thermador PRG486JDG/01 User manual

Thermador
Thermador PRD364WIGU User manual
