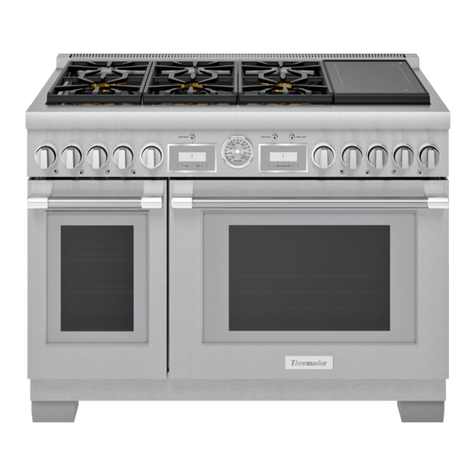
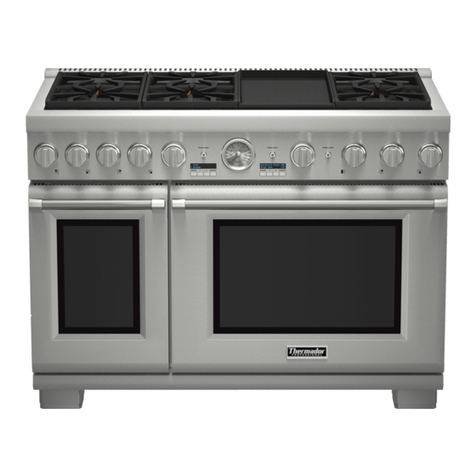
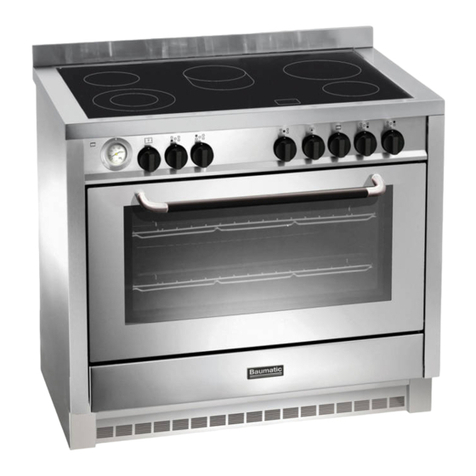
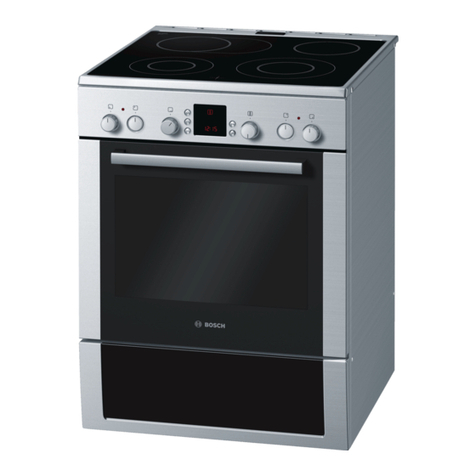
Thermador PRD364WIGU User manual

Use and care
GUIDE
Induction module
PRD364WIGU PRD486WIGU
PRD48WISGU PRD364WIGC
PRD486WIGC
THERMADOR.COM

2
Table of contents
1 IMPORTANT SAFETY INSTRUCTIONS.................... 3
1.1 Safety definitions....................................................... 3
1.2 Safe use.................................................................... 3
1.3 Electromagnetic interference..................................... 4
1.4 State of California Proposition 65 Warnings .............. 4
2 Preventing material damage .................................... 5
2.1 Overview of the most common types of damage....... 5
3 Environmental protection and energy-saving ........ 5
3.1 Disposal of packaging............................................... 5
3.2 Saving energy........................................................... 5
4 Suitable cookware .................................................... 6
4.1 Size and characteristics of the cookware .................. 6
5 Familiarizing yourself with your appliance ............. 6
5.1 Induction zone........................................................... 6
5.2 Control knobs............................................................ 6
5.3 Touch keys and displays........................................... 6
6 Operation................................................................... 7
6.1 Setting the power level.............................................. 7
6.2 Turning off the induction module ............................... 7
6.3 Recommended cooking settings ............................... 7
6.4 Liberty® cooking zone............................................... 8
6.5 PowerBoost® ........................................................... 8
6.6 HeatShift® function................................................... 8
6.7 Kitchen timer............................................................. 9
7 Cleaning and maintenance....................................... 9
7.1 Cleaning agents........................................................ 9
7.2 Cleaning the glass ceramic cooktop.......................... 9
7.3 Cleaning recommendations..................................... 10
7.4 Maintenance ........................................................... 11
8 Troubleshooting...................................................... 12
9 Disposal................................................................... 13
9.1 Disposal of your old appliance ................................ 13
10 Customer Service ................................................. 13

en-us
3
Read all instructions carefully before use. These precautions will reduce the risk of electrical shock, fire and injury to
persons. When using kitchen appliances, basic safety precautions must be followed including those in the following
pages.
1.1 Safety definitions
Here you can find explanations of the safety signal words
used in this manual.
WARNING
This indicates that death or serious injuries may occur as
a result of non-observance of this warning.
CAUTION
This indicates that minor or moderate injuries may occur
as a result of non-observance of this warning.
NOTICE:
This indicates that damage to the appliance or property
may occur as a result of non-compliance with this advi-
sory.
Note:This alerts you to important information and/or tips.
1.2 Safe use
All product manuals may be downloaded online at
www.thermador.com/us/support/owner-manuals.
WARNING
Please review the appliance’s Use and Care Guide and
Installation Guide for other important safety information re-
garding the appliance.
When properly cared for, your new appliance has been
designed to be safe and reliable.
▶Read all instructions carefully before use. These pre-
cautions will reduce the risk of burns, electric shock,
fire, and injury to persons.
▶When using kitchen appliances, basic safety precau-
tions must be followed, including those in the following
pages.
WARNING
DO NOT TOUCH SURFACE UNITS OR AREAS NEAR
UNITS. Surface units may be hot even though they are
dark in color. Areas near surface units may become hot
enough to cause burns.
▶During and after use, do not touch, or let clothing,
potholders, or other flammable materials contact sur-
face units or areas near units until they have had suffi-
cient time to cool. Among these areas are the cooktop
and areas facing the cooktop.
After each use, turn off the cooking zone using the control
knob. DO NOT rely on the pan detection feature to turn off
the cooking zones when you remove the pans.
WARNING
When cooking with a double-boiler, the cooktop and cook-
ing vessel may crack due to overheating.
▶The cooking vessel in the double-boiler must not come
in direct contact with the bottom of the pot filled with
water.
IMPORTANT SAFETY INSTRUCTIONS
READ AND SAVE THESE INSTRUCTIONS

en-us
4
▶Use only heat-resistant cookware.
Liquid between the pot base and the cooktop may build up
steam pressure. This may cause the pot to jump suddenly
causing injury.
▶Always keep the cooktop and bases of pots dry.
WARNING
WARNING - DO NOT PLACE METALLIC OBJECTS
SUCH AS KNIVES, FORKS, SPOONS, AND LIDS ON
THE COOKTOP SURFACE SINCE THEY CAN GET
HOT.
WARNING
Do Not Cook on a Broken Cooktop - If the cooktop should
break, cleaning solutions and spillovers may penetrate the
broken cooktop and create a risk of electric shock.
▶Contact an authorized service provider immediately.
1.3 Electromagnetic interference
WARNING
This induction cooktop generates and uses ISM frequency
energy that heats cookware by using an electromagnetic
field. It has been tested and complies with Part 18 of the
FCC Rules for ISM equipment. This induction cooktop
meets the FCC requirements to minimize interference with
other devices in residential installation. Induction cooktops
may cause interference with television or radio reception.
If interference occurs, the user should try to correct the in-
terference by
▶Relocating the receiving antenna of the radio or televi-
sion.
▶Increasing the distance between the cooktop and the
receiver.
▶Connecting the receiver into an outlet different than the
cooktop.
▶It is the user's responsibility to correct any interference.
CAUTION
Persons with a pacemaker or similar medical device
should exercise caution when standing near an induction
cooktop while it is in use.
▶Consult your doctor or the manufacturer of the pace-
maker or similar medical device for additional informa-
tion about its effects with electromagnetic fields from an
induction cooktop.
1.4 State of California Proposition 65
Warnings
This product may contain a chemical known to the State
of California, which can cause cancer or reproductive
harm. Therefore, the packaging of your product may bear
the following label as required by California:
IMPORTANT SAFETY INSTRUCTIONS
READ AND SAVE THESE INSTRUCTIONS

Preventing material damage en-us
5
Preventing material damage
2 Preventing material damage
Preventing material damage
NOTICE:
Cookware with rough bottoms scratch the glass ceramic
surface.
▶Check the bottom of the cookware before setting it
down.
Salt, sugar or grains of sand scratch the glass ceramic
surface.
▶Never use the cooktop as a working surface or for set-
ting things down.
Overheating can damage the cookware.
▶Do not heat empty pots or pans.
Hot cookware can cause the electronics to overheat.
▶Never set down hot pans and pots on the control panel
or the cooktop frame.
When hard or sharp objects fall on the cooktop, they can
cause damage.
▶Do not let hard or pointed objects fall on the cooktop.
Aluminum foil and plastic melt on hot cooking zones.
▶Do not let aluminum foil or plastic come into contact
with hot cooking zones.
▶Do not use cooktop protective film.
Unsuitable cleaning agents can cause shimmering metallic
discolorations on the glass ceramic surface.
▶Refer to the cleaning recommendations in this manual.
→
"Cleaning and maintenance", Page9
2.1 Overview of the most common types
of damage
Here you can find an overview of the most common types
of damage and suggestions how to avoid them.
Stains
Cause How to avoid
Boiled-over food Remove boiled-over food imme-
diately with a glass scraper.
Unsuitable cleaning
agents Use cleaning agents that are suit-
able for glass ceramic cooktops.
Scratches
Cause How to avoid
Salt, sugar and sand Do not use the cooktop as a work
surface or storage space.
Cookware with rough
bases Check the cookware.
Discolorations
Cause How to avoid
Unsuitable cleaning
agents Use cleaning agents that are suit-
able for glass ceramic cooktops.
Pot abrasion (e.g.
aluminum) Lift pots and pans when moving
them.
Blisters
Cause How to avoid
Sugar, food with a
high sugar content Remove boiled-over food imme-
diately with a glass scraper.
Environmental protection and energy-saving
3 Environmental protection and en-
ergy-saving
Environmental protection and energy-saving
3.1 Disposal of packaging
The packaging materials are environmentally compatible
and can be recycled.
▶Sort the individual components by type and dispose of
them separately.
3.2 Saving energy
If you follow these tips, your appliance consumes less en-
ergy.
Select cookware with a base diameter that matches the
cooking zone. Center the cookware on the cooking zone.
Tip:For frying pans, cookware manufacturers usually
state the top diameter of the cookware. The diameter of
the pan base is usually smaller.
aThe energy is targeted at the cookware.
If you use cookware that is too small, energy is wasted.
If the cookware is too large, much energy is used to
heat up the cookware.
Close cookware with a fitting lid.
aCooking without a lid consumes more energy.
Only lift the lid when necessary.
aIf you lift the lid, a lot of energy can escape.
Use a glass lid.
aIf you use a glass lid, you can look inside the cookware
without lifting the lid.
Use cookware with a solid flat bottom.
aCurved cookware bases increase energy consumption.
Use a cookware size that matches the amount of food you
want to cook.
aLarge cookware with little content consumes a lot of en-
ergy.
Cook with a small amount of water.
aMore water requires more energy to heat it up.
Select a lower power level as soon as possible. Select a
suitable power level to continue cooking.
aFor ongoing cooking a lower power level is sufficient.

en-us Suitable cookware
6
Suitable cookware
4 Suitable cookware
Suitable cookware
Cookware that is suitable for induction cooking must have
a ferromagnetic base, i.e. it must be attracted by a mag-
net. The base must also match the size of the cooking
zone. If cookware is not detected on a cooking zone, place
it on the cooking zone with the next smallest diameter.
4.1 Size and characteristics of the cookware
To be able correctly detect the cookware, you must take
the size and the material of the cookware into considera-
tion. All cookware bases must be perfectly flat and
smooth.
Cookware Materials Properties
Recommended cook-
ware Stainless steel cookware in a sandwich design
that distributes the heat well. This cookware distributes the heat evenly,
heats up quickly, and ensures that it can be de-
tected.
Ferromagnetic cookware made of enameled
steel, cast iron or special induction cookware
made of stainless steel.
This cookware distributes the heat evenly,
heats up quickly, and ensures that it can be de-
tected.
Suitable The base is not fully ferromagnetic. If the ferromagnetic area is smaller than the
base of the cookware, only the area that is fer-
romagnetic heats up. As a result, the heat is
not distributed evenly.
Cookware bases with aluminum content. These cookware bases reduce the ferromag-
netic area, which means that less power is
emitted to the cookware. This cookware may
not be sufficiently detected or may not be de-
tected at all, and therefore does not heat suffi-
ciently.
Not suitable Cookware made from normal thin steel, glass,
clay, copper or aluminum.
Notes
¡Do not use adapter plates between the cooktop and the
cookware.
¡Do not heat up empty cookware and do not use cook-
ware with a thin base, as this may become very hot.
Familiarizing yourself with your appliance
5 Familiarizing yourself with your ap-
pliance
Familiarizing yourself with your appliance
5.1 Induction zone
Your rangetop is equipped with an induction cooking zone.
1
2
3
4
1
Rear single cooking zone
2
Front single cooking zone
3
When used as combined cooking zone:
¡Liberty® bridge zone
¡HeatShift® function
4
Control panel
5.2 Control knobs
You can adjust the settings for the induction module with
the two control knobs below the induction module.
Position Setting
OFF Cooking zone turned off
1 - 9 Power levels
HeatShift® function
Use the Liberty® cooking zone as a bridge
zone
XHI PowerBoost® function
5.3 Touch keys and displays
The display at the front of the induction module shows the
active functions and lets you set a kitchen timer.
The indicator lights above the printed words show which
functions are active.
HOT SURFACE Cooking zone and residual heat indica-
tor:
Lights up when the cooking zone is
turned on and remains lit while the
cooking zone emits heat.
DO NOT touch the cooking zones as
long as the indicator lights up, even if
the cooking zone is already turned off.
XHI PowerBoost® function

Operation en-us
7
TIMER I - I + Setting a kitchen timer
BRIDGE Liberty® function
Activate bridge zone for larger cook-
ware
HEAT SHIFT HeatShift® activated
Indicator bar of the currently active
zone lights up bright
MIN - MED -
MAX Preset power levels for HeatShift®
no pot No cookware detected
. . Timer and error display
Operation
6 Operation
Operation
Here you will find everything you need to know about op-
erating your appliance.
6.1 Setting the power level
1. Push in the control knob and turn it left or right to the
desired power level.
aThe cooking zone indicator light turns on.
2. Place cookware on the cooking zone within 30seconds.
Notes
¡If there is no cookware on the cooking zone, or the
cookware is not suitable for induction cooking, the cook-
ing zone turns off automatically after 30seconds. To re-
activate the cooking zone, turn the control knob to OFF
and reset the power level.
¡If you remove the pan while the cooking zone is on, the
no pot indicator flashes.
6.2 Turning off the induction module
▶Turn both control knobs to the OFF position.
aThe residual heat display remains lit until the cooking
zone has cooled down, even if the knob is turned OFF.
6.3 Recommended cooking settings
Here you can find recommendations on cooking and an
overview of various dishes with suitable heat levels.
¡Stir thick liquids occasionally.
¡Food that needs to be seared quickly, or food which
loses a lot of liquid during initial frying, is best seared in
several small portions.
¡When you cook with a lid on, turn the heat setting down
as soon as steam escapes between lid and cookware.
¡Keep the lid on the cookware after cooking until you
serve the food.
¡When you cook with a pressure cooker, observe the
manufacturer's instructions.
¡Do not cook food for too long or in too much water. Oth-
erwise the nutrients will be lost. You can use the kitchen
timer to set the optimum cooking time.
→
"Kitchen timer", Page9
¡Do not heat oil or grease until it smokes. You will
achieve healthier cooking results.
¡When you brown food, fry small portions one after the
other.
¡Cookware may become very hot during cooking. We
recommend the use of pot holders.
¡→
"Saving energy", Page5
Cooking charts
The cooking chart shows which power level is suitable for
each type of food. The cooking time may vary depending
on the type, weight, thickness and quality of the food.
CAUTION
Stews or liquids can heat up very quickly during cooking
and may overflow or spatter, e.g. soups, sauces or drinks.
▶Stir continuously.
▶Heat the food at a suitable power level.
Melting
Type of food Power level
Chocolate 1-2
Chocolate chips 1-2
Butter 1-2
Heating
Broth 3-4
Thick soup 2-3
Milk11-2
1Cook without lid
Simmering
Delicate sauce, e.g. Béchamel sauce 1-2
Spaghetti sauce 1-2
Pot roast 4-5
Fish14-5
1Ongoing cooking without lid
Cooking
Rice, with double amount of water 1-2
Boiled potatoes, with 1-2cups of water 6-8
Fresh vegetables, with 1-2cups of wa-
ter 6-8
Frozen vegetables, with 1-2cups of
water 6 - 8
Pasta, with 2-4qt. water18-9
Pudding23-4
Cereals 3-4
1Ongoing cooking without lid
2Cook without lid
Frying
Pork chop18-9
Chicken breast17-8
Bacon 8-9
Eggs 6-7
Fish 8-9
Pancakes 6-7
1Turn the food several times.
Deep-fat frying
Fry in 1-2qt. oil without a lid.
Deep-frozen foods, e.g. chicken
nuggets (0.5lb per serving) 8-9

en-us Operation
8
Other, e.g. donuts (0.5lb per serving) 5 - 6
6.4 Liberty® cooking zone
The Liberty® zone allows you to use cookware of different
sizes and shapes. It consists of 4induction elements,
which are controlled independently from each other. When
you use the Liberty® function, only the area that is cov-
ered by cookware is activated.
Positioning the cookware
The flexible cooking zone can be configured in two ways,
depending on which cookware is used. In order to provide
good thermal detection and heat distribution, we recom-
mend positioning the cookware in the center, as shown in
the images.
As a connected cooking zone
Recommended for cooking with just one item of cookware.
¡Position the cookware depending on the size:
¡Recommended oblong cookware :
As two separate cooking zones
Recommended for cooking with two items of cookware.
You can use the front and rear zone independently of one
another, and set a separate power level for each zone.
Activating the Liberty® zone
1. Place the cookware on the cooking zone.
2. Turn the right control knob for the induction zone to .
aThe BRIDGE indicator lights up on the cooking zone.
3. Set the desired power level with the left control knob.
aThe appliance detects the cookware and activates the
section that is covered by the cookware.
4. To use the Liberty® zone as two individual cooking
zones, set a power level with both control knobs.
6.5 PowerBoost®
With this function you can heat larger quantities of water
faster than with power level 9. This function temporarily in-
creases the top output of the selected cooking zone.
You can also use this function on the flexible cooking zone
if it is used as a joined cooking zone.
Restrictions for using PowerBoost®
¡Both cooking zones are equipped with the Power-
Boost® function.
¡This function can only be used on one cooking zone
segment at a time. The illustration shows these seg-
ments of your cooktop.
If the function is active on one cooking zone segment and
you set a power level on the other cooking zone segment,
the function will be deactivated. The cooking zone is auto-
matically set to power level 9.
Activating PowerBoost®
▶Turn the control knob of the desired cooking zone to
XHI.
Deactivating PowerBoost®
If you do not deactivate the PowerBoost® function, it turns
off automatically after 10minutes. The cooking zone con-
tinues operating with power level 9.
▶Turn the control knob of the desired cooking zone to
any other power level.
Note:The function does not turn on automatically when it
becomes available again. To turn it on manually, set the
control knob to any other heat level and then to XHI again.
6.6 HeatShift® function
You can change the power level for an item of cookware
by moving it to a different position on the flexible cooking
zone. The flexible cooking zone is divided into 3cooking
areas with different power levels.
Activating the Move function
Activating HeatShift®
▶Turn the left control knob for the induction zone to .
aThe HEAT SHIFT indicator lights up on the cooking
zone.

Cleaning and maintenance en-us
9
Positioning and moving the cookware
Use only one item of cookware. The cooking area de-
pends on the size and position of the cookware.
Each cooking area has a predefined power level:
¡Front area = Power level 9
¡Center area = Power level 5
¡Rear area = Power level 1
You can change the power levels in the basic settings.
Deactivating HeatShift®
▶Turn the right control knob to a different power level.
6.7 Kitchen timer
You can use the Kitchen timer to set a time of up to
99minutes.
The Kitchen timer is independent from other settings and
does not switch off a cooking zone.
Setting the Kitchen timer
WARNING
Boilovers can cause smoke and some foods and oils may
catch fire if left on high temperature settings.
▶When using a timer, always supervise the cooktop.
▶Do not allow anything to boil over or burn.
1. Press TIMER.
a lights up in the timer display.
2. Set the desired duration with or within 10seconds.
Notes
¡If you do not make any settings the timer turns off au-
tomatically.
¡Touch and hold or to increase or decrease the
set duration more rapidly.
3. Press TIMER to confirm.
aA beep sounds and the timer starts to count down.
aIf you do not press TIMER the timer begins to count
down automatically after 10seconds.
aWhen the time has elapsed, a beep sounds. blinks in
the timer display.
4. Press TIMER or operate a control knob to turn off the
signals. After 3minutes the signals stop automatically.
Changing or canceling the kitchen timer
1. Press TIMER.
2. Adjust the duration with or .
To cancel the kitchen timer, set the time to .
Cleaning and maintenance
7 Cleaning and maintenance
Cleaning and maintenance
To keep your appliance working efficiently for a long time,
it is important to clean and maintain it carefully.
7.1 Cleaning agents
You can purchase suitable cleaners and glass scrapers
from Customer Support or in our online shop www.ther-
mador.com/us/accessories.
Recommended cleaning agents
¡Glass ceramic cooktop cleaner
¡BonAmi®1
¡Soft Scrub®1 (without bleach)
¡White vinegar
Unsuitable cleaning agents
¡Glass cleaners which contain ammonia or chlorine
bleach. These cleaners may damage or permanently
stain the cooktop.
¡Caustic cleaners such as Easy Off®1. These cleaners
may stain the cooktop surface.
¡Abrasive cleaners.
¡Metal scouring pads and scrub sponges such as Scotch
Brite®1. These cleaners may scratch the cooktop sur-
face and/or leave metal marks.
¡Soap-filled scouring pads such as SOS®1. These clean-
ers may scratch the cooktop surface.
¡Powdery cleaners containing chlorine bleach. These
cleaners may permanently stain the cooktop surface.
¡Flammable cleaners such as lighter fluid or WD-40.
7.2 Cleaning the glass ceramic cooktop
WARNING
Clean Cooktop With Caution.
▶If a wet sponge or cloth is used to wipe spills on a hot
cooking area, be careful to avoid steam burn.
▶Some cleaners can produce noxious fumes if applied to
a hot surface.
▶Do not clean the appliance while it is still hot.
CAUTION
Do not use any kind of cleaner on the glass while the sur-
face is hot; use only the glass scraper. The resulting
fumes can be hazardous to your health. Heating the
cleaner can chemically attack and damage the surface.
1These marks are registered trademarks of their respective owners. All other trademarks are trademarks of BSH Home
Appliances Corporation or its affiliated companies.

en-us Cleaning and maintenance
10
Requirements
¡The cooktop has cooled off.
¡Exception: Remove dry sugar, sugar syrup, milk and
tomato products immediately.
→
"Cleaning recommendations", Page10
1. Wipe off splatters with a clean, damp sponge or a paper
towel.
2. Rinse and dry.
3. If a smudge remains use white vinegar.
4. Rinse and dry again.
5. Apply a small amount of cooktop cleaner with a clean
paper towel or cloth and let it dry.
6. Buff the surface with a clean paper towel or cloth.
7.3 Cleaning recommendations
Follow these cleaning instructions for removing common
soiling.
WARNING
The blade of the glass scraper is extremely sharp. You
can cut yourself.
▶Replace the blade immediately, when you see any im-
perfections.
▶Follow the manufacturer's instructions.
NOTICE:
Diamond rings may scratch the ceramic cooktop surface.
▶Take off any rings before you clean the ceramic cooktop
surface.
Type of soil Recommendation
¡Dry sugar
¡Sugar syrup
¡Milk
¡Tomato spills
¡Melted plastic film
or foil
REMOVE IMMEDIATELY. Failure
to remove these substances im-
mediately can permanently dam-
age the ceramic cooktop surface.
Remove the soil with the glass
scraper while the cooktop surface
is still hot.
Use a new, sharp razor in the
glass scraper.
¡Remove the cookware and
turn off the cooking zone.
¡Put on an oven mitt.
¡Hold the glass scraper at 30°
angle and scrape off the soil.
Be careful not to gouge or
scratch the glass ceramic sur-
face.
¡Push the soil off the heated
area.
¡Let the surface cool.
¡Remove the residue and apply
glass ceramic cooktop cleaner.
1These marks are registered trademarks of their respec-
tive owners. All other trademarks are trademarks of
BSH Home Appliances Corporation or its affiliated
companies.
Type of soil Recommendation
¡Burned-on food
soil
¡Dark streaks
¡Dark specks
¡Lay a damp paper towel or
sponge on top of the soil for
30minutes to soften the soil.
¡Remove the soil with a plastic
scrubber and glass ceramic
cooktop cleaner or with the
glass scraper.
¡Rinse the cooktop surface and
dry it.
Greasy spatters ¡Remove grease with a soapy
sponge or cloth.
¡Rinse the cooktop surface
thoroughly and dry it.
¡Apply glass ceramic cooktop
cleaner.
Metal marks: irides-
cent stain Pans with aluminum, copper or
stainless steel bases may leave
marks.
Treat metal marks immediately
after the cooktop surface has
cooled off. Failure to do so
makes removal very difficult.
¡Clean the cooktop surface with
glass ceramic cooktop cleaner.
¡If this does not remove the
marks, clean the cooktop sur-
face with a damp paper towel
and a mild abrasive (Bon
Ami®1, Soft Scrub®1 without
bleach).
¡Rinse the cooktop surface and
apply glass ceramic cooktop
cleaner.
Hard water spots Hot cooking liquids may drip or
spill on the cooktop surface. The
minerals in some water can be
transferred onto the surface and
cause stains.
Remove boilovers and stains be-
fore using the cooktop again.
¡Clean the cooktop surface with
undiluted white vinegar.
¡Rinse the cooktop surface and
dry it.
¡Apply glass ceramic cooktop
cleaner.
Surface scratches Small scratches are common and
do not affect cooking. They be-
come smoother and less notice-
able with daily use of the glass
ceramic cooktop cleaner.
¡Apply glass ceramic cooktop
cleaner before cooking to re-
move sand-like grains and grit
such as salt and seasoning.
¡Scratches can be reduced by
using pans with bases that are
smooth, clean, and dry before
use. Use recommended glass
ceramic cooktop cleaner daily.
1These marks are registered trademarks of their respec-
tive owners. All other trademarks are trademarks of
BSH Home Appliances Corporation or its affiliated
companies.

Cleaning and maintenance en-us
11
7.4 Maintenance
This appliance requires no maintenance other than daily
cleaning.
For best results, apply cooktop cleaning cream daily.

en-us Troubleshooting
12
Troubleshooting
8 Troubleshooting
Troubleshooting
You can eliminate minor issues on your appliance your-
self. Please read the information on eliminating issues be-
fore contacting Customer Service. This may avoid unnec-
essary repair visits.
WARNING
Improper repairs are dangerous.
▶Only authorized service providers should repair the ap-
pliance.
▶If the power cord of this appliance becomes damaged, it
must be replaced by the manufacturer, the manufac-
turer's Customer Service, or an authorized service
provider in order to prevent injury.
▶Only original spare parts may be used to repair the ap-
pliance.
▶If the appliance has an issue, call Customer Service.
Issue Cause and troubleshooting
The induction module is not work-
ing The power supply has been disconnected.
▶Check whether the lighting in your kitchen or other appliances in the room are
working.
The appliance has not been connected as shown in the circuit diagram.
1. Disconnect the appliance from the power supply.
2. Make sure the appliance has been connected as shown in the circuit diagram.
There is an electronics fault
▶If the fault cannot be eliminated, call Customer Service.
The no pot indicator blinks and
turns off The cooking zone is unable to detect cookware.
1. Place cookware on the cooking zone within 30seconds after setting a power
level.
2. If cookware is present on the cooking zone, check if the cookware is suitable for
induction cooking.
The cooking zone has turned OFF,
the indicator light is blinking. The control knob has not been moved for a long time. The safety lock has been ac-
tivated.
▶Turn the control knob to OFF and then set a power level again.
All cooking zones have switched
off automatically. After a power failure, the induction module remains off for over 25seconds for
safety reasons.
▶Turn the control knob to OFF and then set a power level again.
/ / and numbers There is an electronics fault
1. Disconnect the appliance from the power supply.
2. Wait a couple of seconds and reconnect the appliance to the power supply.
3. If the message persists, call Customer Support.
+ / and cooking zones not
heating The cooking zone has been operating continuously for an extended period of time
without interaction. The automatic time limitation has been triggered.
▶Touch any control element.
aYou can set the cooking zone and continue to cook.
The electronics have overheated. The induction module has switched off.
1. Wait until the electronics have cooled down sufficiently.
2. Touch any control element.
aWhen error message disappears, the electronics have cooled down sufficiently.
You can continue to cook.
and the power level flash alter-
nately. A signal tone sounds. There is hot cookware near the control panel. The electronics are at risk of over-
heating.
▶Remove the cookware from the control panel.
aYou can continue to cook.
and audible signal There is hot cookware near the control panel. The cooking zone has switched off to
protect the electronics.
1. Remove the cookware from the control panel.
2. Wait a few seconds.
3. Touch any control element.
aWhen error message disappears, the electronics have cooled down sufficiently.
You can continue to cook.
/ The cooking zone has overheated. It has switched off to protect the work surface.
1. Wait until the electronics have cooled down sufficiently.
2. Switch the cooking zone back on.
aYou can continue to cook.

Disposal en-us
13
Issue Cause and troubleshooting
The control knobs are not connected to the induction module.
▶Call Customer Service.
/ There is an electronics fault
1. Disconnect the appliance from the power supply.
2. Wait a couple of seconds and reconnect the appliance to the power supply.
3. If the message persists, call Customer Support.
There is hot cookware near the control panel. The cooking zone has switched off to
protect the electronics.
1. Remove the pot from the cooking zone.
2. Turn all control knobs to OFF.
3. The error message goes out once the surface has cooled down sufficiently. Set a
new power level if desired.
4. If the malfunction persists, call Customer Service.
The supply voltage is incorrect. It is outside the normal operating range.
▶Contact your electrical utility provider.
/ The cooking zone has overheated. It has switched off to protect the work surface.
1. Remove the pot from the cooking zone.
2. Turn all control knobs to OFF.
3. The error message goes out once the surface has cooled down sufficiently. Set a
new power level if desired.
4. If the malfunction persists, call Customer Service.
8.1 Normal operating noises
The following noises are normal and do not constitute a
malfunction or issue.
Type of
noise Cause
Low hum-
ming, like
a trans-
former
Cooking at a high power level.
It is based on the amount of energy trans-
ferred from the cooking surface to the cook-
ware. The noise ceases or quiets down when
you reduce the power level.
Quiet
whistling Cookware is empty.
It ceases once you place water or food in the
cookware.
Crackling Cookware is comprised of various materials
layered one upon the other.
It is caused by the vibrations of the surfaces
where different materials meet. The noise oc-
curs on the cookware and can vary depend-
ing on the amount and method of preparation
of the food.
Loud
whistling Cookware is comprised of different materials
layered one upon the other, and maximum
power level is used on both cooking zones.
The noise ceases or quiets down when the
heat level is reduced.
Disposal
9 Disposal
Disposal
9.1 Disposal of your old appliance
Environmentally compatible disposal allows valuable raw
materials to be recycled.
▶Dispose of the appliance in an environmentally respon-
sible manner.
Information about current disposal methods can be ob-
tained from your specialist dealer or local authority.
Customer Service
10 Customer Service
Customer Service
With any warranty repair, we will make sure your appli-
ance is repaired by an authorized service provider using
genuine replacement parts. We use only genuine replace-
ment parts for all repairs.
Detailed information on the warranty period and terms of
warranty can be found in the Statement of Limited Product
Warranty, from your retailer, or on our website.
If you contact the Customer Service, you will need the
model number (E-Nr.) and the production number (FD) of
your appliance.
USA:
1-800-735-4328
www.thermador.com/support
www.thermador.com/us/accessories
CA:
1-800-735-4328
www.thermador.ca
www.thermador.ca/en/support/filters-cleaners-accessories

fr-ca
14
Table des matières
1 IMPORTANTES CONSIGNES DE SÉCURITÉ ........ 15
1.1 Définitions des termes de sécurité .......................... 15
1.2 Utilisation sécuritaire............................................... 15
1.3 Interférence électromagnétique............................... 16
1.4 Mises en garde conformément à la proposition 65
de l'État de Californie .............................................. 16
2 Prévenir les dommages matériels ......................... 17
2.1 Vue d'ensemble des types de dommages les plus
courants.................................................................. 17
3 Protection de l'environnement et économies ....... 17
3.1 Mise au rebut de l’emballage .................................. 17
3.2 Économiser de l’énergie.......................................... 17
4 Ustensiles adaptés ................................................. 18
4.1 Dimensions et propriétés des ustensiles ................. 18
5 Description de l'appareil ........................................ 18
5.1 Zone d'induction...................................................... 18
5.2 Boutons de commande ........................................... 19
5.3 Touches tactiles et écrans....................................... 19
6 Fonctionnement...................................................... 19
6.1 Réglage du niveau de puissance ............................ 19
6.2 Éteindre le module d'induction ................................ 19
6.3 Paramètres de cuisson recommandés .................... 19
6.4 Zone de cuisson Liberty® ....................................... 20
6.5 PowerBoost® ......................................................... 21
6.6 Fonction HeatShift®................................................ 21
6.7 minuterie de cuisine ................................................ 21
7 Nettoyage etentretien ............................................ 22
7.1 Produits de nettoyage ............................................. 22
7.2 Nettoyage de la table de cuisson vitrocéramique .... 22
7.3 Recommandations en matière de nettoyage ........... 23
7.4 Entretien ................................................................. 24
8 Dépannage .............................................................. 25
9 Élimination .............................................................. 26
9.1 Éliminer un appareil usagé...................................... 26
10 Service à la clientèle............................................. 26

fr-ca
15
Lisez toutes les instructions attentivement avant l’utilisation. Ces précautions réduiront le risque d’électrocution,
d’incendie et de blessure pour les personnes utilisant l’appareil. Lorsque vous utilisez des appareils électroménagers,
il importe de suivre les précautions de sécurité de base, y compris celles indiquées dans les pages suivantes.
1.1 Définitions des termes de sécurité
Vous trouverez ici des explications sur les mots de
signalisation de sécurité utilisés dans ce manuel.
AVERTISSEMENT
Signale un risque de mort ou de blessure grave si
l’avertissement n’est pas respecté.
MISE EN GARDE
Signale un risque de blessures mineures ou modérées si
l’avertissement n’est pas respecté.
AVIS :
Ceci indique que la non-conformité à cet avis de sécurité
peut entraîner des dégâts matériels ou endommager
l'appareil.
Remarque:Ceci vous signale des informations et/ou
indications importantes.
1.2 Utilisation sécuritaire
Tous les manuels des produits peuvent être téléchargés
en ligne à l'adresse www.thermador.com/us/support/
owner-manuals.
AVERTISSEMENT
Veuillez revoir l'appareil manuel et manuel d'installation
pour d'autres informations de sécurité importantes
concernant l'appareil.
Lorsqu'il est correctement entretenu, votre nouvel appareil
a été conçu pour être sûr et fiable.
▶Lisez toutes les instructions attentivement avant
l’utilisation. Ces consignes réduiront le risque de
brûlure, d'électrocution, d’incendie et de blessure pour
les personnes utilisant l'appareil.
▶Lorsque vous utilisez des appareils électroménagers, il
importe de suivre les précautions de sécurité de base,
y compris celles indiquées dans les pages suivantes.
AVERTISSEMENT
NE PAS TOUCHER LES UNITÉS DE SURFACE OU LES
ZONES À PROXIMITÉ DES UNITÉS. Les éléments de
surface peuvent être chauds, même s'ils sont foncés. Les
zones à proximité des éléments peuvent devenir
suffisamment chaudes pour causer des brûlures.
▶Pendant et après l'utilisation, ne touchez pas et ne
laissez pas les vêtements, les maniques ou autres
matériaux inflammables entrer en contact avec les
unités de surface ou les zones proches des unités
avant d'avoir suffisamment de temps pour refroidir.
Parmi ces zones se trouvent la table de cuisson et les
zones faisant face à la table de cuisson.
Après chaque utilisation, éteignez la zone de cuisson à
l'aide du bouton de commande. NE comptez PAS sur la
fonction de détection de casserole pour éteindre les zones
de cuisson lorsque vous retirez les casseroles.
IMPORTANTES CONSIGNES DE SÉCURITÉ
LIRE ET CONSERVER CES INSTRUCTIONS

fr-ca
16
AVERTISSEMENT
Lors de la cuisson au bain-marie, la table de cuisson et le
récipient de cuisson peuvent se fissurer en raison d'une
surchauffe.
▶Le plat de cuisson du bain-marie ne peut entrer en
contact direct avec le fond de la casserole remplie
d'eau chaude.
▶N'utiliser que des ustensiles de cuisson résistants à la
chaleur.
Le liquide entre la base de pot et la table de cuisson peut
augmenter la pression de vapeur. Cela pourrait faire
sauter le pot soudainement et causer des blessures.
▶Gardez toujours la table de cuisson et les bases des
casseroles sèches.
AVERTISSEMENT
AVERTISSEMENT - NE PLACER PAS DES OBJETS
MÉTALLIQUES TELS QUE LES COUTEAUX, LES
FOURCHETTES, LES CUILLÈRES ET LES
COUVERCLES SUR LA SURFACE DE CAISSON
PUISQU'ILS PEUVENT DEVENIR CHAUDS.
AVERTISSEMENT
Ne pas cuire sur une surface de cuisson cassée - Si la
surface de cuisson se brise, les solutions de nettoyage et
les débordements peuvent pénétrer dans la surface de
cuisson cassée et créer un risque de choc électrique.
▶Contactez immédiatement un fournisseur de services
agréé.
1.3 Interférence électromagnétique
AVERTISSEMENT
Cette table de cuisson à induction génère et utilise de
l'énergie à fréquence ISM qui chauffe les casseroles en
utilisant un champ électromagnétique. Elle a été testée et
est conforme avec la partie18 des règlements FCC
régissant les appareils ISM. Cette table de cuisson est
conforme aux exigences FCC visant à réduire la
perturbation des autres dispositifs dans des installations
résidentielles. Les tables de cuisson à induction peuvent
perturber la réception radio et télévision. En cas
d'interférence, l'utilisateur doit essayer de corriger
l'interférence en
▶Relocalisant l'antenne de réception de la radio ou du
téléviseur.
▶Augmentant la distance entre la table de cuisson et le
récepteur.
▶Branchant le récepteur à une prise différente de celle
du récepteur.
▶C'est à l'utilisateur qu'il incombe de corriger toute
perturbation.
MISE EN GARDE
Les personnes avec un stimulateur cardiaque ou autre
dispositif médical similaire devraient redoubler de
vigilance lorsqu'elles sont à proximité d'une table de
cuisson à induction en marche.
▶Consultez votre médecin ou le fabricant du stimulateur
cardiaque pour de plus amples renseignements sur les
effets que peuvent causer les champs
électromagnétiques provenant d'une table de cuisson à
induction.
1.4 Mises en garde conformément à la
proposition 65 de l'État de Californie
Ce produit pourrait contenir un produit chimique reconnu
par l'État de la Californie comme cancérigène ou ayant
des effets nocifs sur la reproduction. Par conséquent,
vous pourriez devoir apposer l'étiquette suivante sur
l'emballage du produit comme requis par la Californie:
IMPORTANTES CONSIGNES DE SÉCURITÉ
LIRE ET CONSERVER CES INSTRUCTIONS

Prévenir les dommages matériels fr-ca
17
Prévenir les dommages matériels
2 Prévenir les dommages matériels
Prévenir les dommages matériels
AVIS :
Les plats de cuisson dont le dessous est rugueux peuvent
rayer la surface en vitrocéramique.
▶Vérifiez le fond de l'ustensile avant de le poser.
Du sel, du sucre ou des grains de sable rayent la surface
de la vitrocéramique.
▶Ne jamais utiliser la table de cuisson comme surface de
travail ou pour y déposer des objets.
La surchauffe peut endommager la batterie de cuisine.
▶Ne chauffez pas de casseroles ou poêles vides.
Les ustensiles de cuisson chauds peuvent provoquer une
surchauffe des composants électroniques.
▶Ne posez jamais de poêles et de casseroles chaudes
sur le panneau de commande ou le cadre de la table de
cuisson.
Lorsque des objets durs ou pointus tombent sur la table
de cuisson, ils peuvent l'endommager.
▶Ne laissez pas d'objets durs ou pointus tomber sur la
table de cuisson.
Le papier d'aluminium et le plastique fondent sur les zones
de cuisson chaudes.
▶Ne laissez pas de papier d'aluminium ou de plastique
entrer en contact avec les zones de cuisson chaudes.
▶N'utilisez pas de film protecteur pour table de cuisson.
Des agents de nettoyage inappropriés peuvent provoquer
des décolorations métalliques chatoyantes sur la surface
vitrocéramique.
▶Reportez-vous aux recommandations de nettoyage de
ce manuel.
→
"Nettoyage etentretien", Page22
2.1 Vue d'ensemble des types de
dommages les plus courants
Vous trouverez ici un aperçu des types de dommages les
plus courants et des suggestions pour les éviter.
Taches
Cause Comment éviter
Éclaboussure de
nourriture Retirez immédiatement les
éclaboussures de nourriture à
l'aide d'un grattoir à verre.
Produits de nettoyage
inappropriés Utilisez des agents de nettoyage
adaptés aux tables de cuisson en
vitrocéramique.
Rayures
Cause Comment éviter
Sel, sucre et sable N'utilisez pas la table de cuisson
comme surface de travail ou
espace de rangement.
Ustensiles de cuisine
à fond rugueux Vérifiez la batterie de cuisine.
Décolorations
Cause Comment éviter
Produits de nettoyage
inappropriés Utilisez des agents de nettoyage
adaptés aux tables de cuisson en
vitrocéramique.
Cause Comment éviter
Abrasion de
casserole (par ex.
Aluminium)
Soulevez les casseroles et les
poêles lorsque vous les
déplacez.
Cloques
Cause Comment éviter
Sucre, aliment à
haute teneur en sucre Retirez immédiatement les
éclaboussures de nourriture à
l'aide d'un grattoir à verre.
Protection de l'environnement et économies
3 Protection de l'environnement et
économies
Protection de l'environnement et économies
3.1 Mise au rebut de l’emballage
Les matériaux d'emballage sont écologiques et
recyclables.
▶Veuillez éliminer les pièces détachées après les avoir
triées par matières.
3.2 Économiser de l’énergie
Si vous suivez ces conseils, votre appareil consomme
moins d'énergie.
Choisissez des ustensiles de cuisine dont le diamètre de
base correspond à la zone de cuisson. Centrez la
casserole sur la zone de cuisson.
Conseil:Pour les poêles à frire, les fabricants
d'ustensiles de cuisine indiquent généralement le
diamètre supérieur de la batterie de cuisine. Le diamètre
de la base de la casserole est généralement plus petit.
aL'énergie est destinée à la batterie de cuisine.
Si vous utilisez des ustensiles de cuisine trop petits,
vous gaspillez de l'énergie. Si la batterie de cuisine est
trop grande, beaucoup d'énergie est utilisée pour
chauffer la batterie de cuisine.
Fermez la casserole avec un couvercle approprié.
aCuire sans couvercle consomme plus d'énergie.
Ne soulevez le couvercle que si nécessaire.
aSi vous soulevez le couvercle, beaucoup d'énergie peut
s'échapper.
Utilisez un couvercle en verre.
aSi vous utilisez un couvercle en verre, vous pouvez
regarder à l'intérieur de l'ustensile sans soulever le
couvercle.
Utiliser des ustensiles de cuisson à base solide plate.
aLes bases incurvées des ustensiles de cuisine
augmentent la consommation d'énergie.
Utilisez une taille d'ustensile qui correspond à la quantité
d'aliments que vous souhaitez cuire.
aLes gros ustensiles de cuisine avec peu de contenu
consomment beaucoup d'énergie.
Faites cuire avec un peu d'eau.
aPlus d'eau nécessite plus d'énergie pour la chauffer.

fr-ca Ustensiles adaptés
18
Sélectionnez un niveau de puissance inférieur dès que
possible. Sélectionnez un niveau de puissance adapté
pour poursuivre la cuisson.
aPour une cuisson en cours, un niveau de puissance
inférieur est suffisant.
Ustensiles adaptés
4 Ustensiles adaptés
Ustensiles adaptés
Les ustensiles adaptés à la cuisson par induction doivent
être dotés d'une base ferromagnétique, c'est-à-dire,
pouvoir être attirés par un aimant. Par ailleurs, leur base
doit correspondre à la taille du foyer. Si un ustensile n'est
pas détecté sur un foyer, placez-le sur le foyer de
diamètre immédiatement inférieur.
4.1 Dimensions et propriétés des ustensiles
Pour pouvoir détecter correctement la batterie de cuisine,
vous devez tenir compte de la taille et du matériau de la
batterie de cuisine. Tous les fonds de batterie de cuisine
doivent être parfaitement plats et lisses.
Ustensile de cuisson Matériaux Propriétés
Ustensiles de cuisson
recommandées Batterie de cuisine en acier inoxydable au
design en sandwich qui répartit bien la chaleur. Cette batterie de cuisine répartit la chaleur
uniformément, chauffe rapidement et garantit
qu'elle peut être détectée.
Batterie de cuisine ferromagnétique en acier
émaillé, fonte ou batterie de cuisine spéciale
induction en acier inoxydable.
Cette batterie de cuisine répartit la chaleur
uniformément, chauffe rapidement et garantit
qu'elle peut être détectée.
Convient La base n'est pas entièrement
ferromagnétique. Si la zone ferromagnétique est plus petite que
le fond de l'ustensile, seule la zone
ferromagnétique s'échauffe. En conséquence,
la chaleur n'est pas répartie uniformément.
Bases d'ustensiles de cuisine contenant de
l'aluminium. Ces bases de batterie de cuisine réduisent la
zone ferromagnétique, ce qui signifie que
moins de puissance est émise vers la batterie
de cuisine. Cette batterie de cuisine peut ne
pas être suffisamment détectée ou ne pas être
détectée du tout, et donc ne chauffe pas
suffisamment.
Ne convient pas Ustensiles de cuisine en acier fin normal,
verre, argile, cuivre ou aluminium.
Remarques
¡N'utilisez pas de plaques d'adaptation entre la table de
cuisson et la batterie de cuisine.
¡Ne faites pas chauffer d'ustensiles de cuisine vides et
n'utilisez pas d'ustensiles de cuisine à fond fin, car cela
peut devenir très chaud.
Description de l'appareil
5 Description de l'appareil
Description de l'appareil
5.1 Zone d'induction
Votre table de cuisson est équipée d'une zone de cuisson
à induction.
1
2
3
4
1
Zone de cuisson simple arrière
2
Zone de cuisson simple avant

Fonctionnement fr-ca
19
3
En cas d'utilisation comme zone de cuisson
combinée:
¡Zone de pont Liberty®
¡Fonction HeatShift®
4
Panneau de commande
5.2 Boutons de commande
Vous pouvez ajuster les paramètres du module d'induction
avec les deux boutons de commande sous le module
d'induction.
Position Réglage
OFF Zone de cuisson désactivée
1 - 9 Niveaux de puissance
Fonction HeatShift®
Utilisez la zone de cuisson Liberty® comme
zone pont
XHI Fonction PowerBoost®
5.3 Touches tactiles et écrans
L'affichage à l'avant du module à induction indique les
fonctions actives et vous permet de régler une minuterie
de cuisine.
Les voyants lumineux au-dessus des mots imprimés
indiquent les fonctions actives.
HOT SURFACE Zone de cuisson et indicateur de
chaleur résiduelle:
S'allume lorsque la zone de cuisson est
allumée et reste allumée tant que la
zone de cuisson émet de la chaleur.
NE touchez PAS les zones de cuisson
tant que le voyant est allumé, même si
la zone de cuisson est déjà éteinte.
XHI Fonction PowerBoost®
TIMER I - I + Réglage d'une minuterie de cuisine
BRIDGE Fonction Liberty®
Activez la zone de pont pour les
ustensiles de cuisine plus grands
HEAT SHIFT HeatShift® activé
La barre d'indication de la zone
actuellement active s'allume
MIN - MED -
MAX Niveaux de puissance prédéfinis pour
HeatShift®
no pot Aucun ustensile de cuisine détecté
. . Minuterie et affichage des erreurs
Fonctionnement
6 Fonctionnement
Fonctionnement
Vous trouverez ici tout ce que vous devez savoir sur le
fonctionnement de votre appareil.
6.1 Réglage du niveau de puissance
1. Appuyez sur le bouton de commande et tournez-le vers
la gauche ou vers la droite jusqu'au niveau de
puissance souhaité.
aLe voyant de la zone de cuisson s'allume.
2. Placez les ustensiles de cuisine sur la zone de cuisson
dans les 30secondes.
Remarques
¡S'il n'y a pas d'ustensile sur la zone de cuisson ou si
l'ustensile n'est pas adapté à la cuisson par induction, la
zone de cuisson s'éteint automatiquement au bout de
30secondes. Pour réactiver la zone de cuisson,
tournez le bouton de commande sur OFF et réinitialiser
le niveau de puissance.
¡Si vous retirez la casserole pendant que la zone de
cuisson est allumée, l'indicateur no pot clignote.
6.2 Éteindre le module d'induction
▶Tournez les deux boutons de commande sur la position
OFF.
aL'affichage de la chaleur résiduelle reste allumé jusqu'à
ce que la zone de cuisson ait refroidi, même si le
bouton est tourné OFF.
6.3 Paramètres de cuisson recommandés
Vous trouverez ici des recommandations sur la cuisson et
un aperçu de différents plats avec des niveaux de chaleur
appropriés.
¡Brassez les liquides épais occasionnellement.
¡Les aliments qui doivent être poêlés rapidement, ou les
aliments qui perdent beaucoup de liquide au cours de la
friture initiale, devraient normalement être poêlés en
petites portions.
¡Lorsque vous cuisinez avec un couvercle, baissez le
niveau de chaleur dès que de la vapeur s'échappe
entre le couvercle et la casserole.
¡Gardez le couvercle sur l'ustensile après la cuisson
jusqu'à ce que vous serviez les aliments.
¡Lorsque vous cuisinez avec un autocuiseur, respectez
les instructions du fabricant.
¡Ne faites pas cuire les aliments trop longtemps ou dans
trop d'eau. Sinon, les nutriments seront perdus. Vous
pouvez utiliser la minuterie de cuisine pour régler le
temps de cuisson optimal.
→
"minuterie de cuisine", Page21
¡Ne faites pas chauffer l'huile ou la graisse jusqu'à ce
qu'elle fume. Vous obtiendrez des résultats de cuisson
plus sains.
¡Lorsque vous faites dorer les aliments, faites-les frire
les unes après les autres.
¡Les ustensiles de cuisine peuvent devenir très chauds
pendant la cuisson. Nous recommandons l'utilisation de
maniques.
¡→
"Économiser de l’énergie", Page17
Tableaux de cuisson
Le tableau de cuisson indique le niveau de puissance
adapté à chaque type d'aliment. Le temps de cuisson peut
varier en fonction du type, du poids, de l'épaisseur et de la
qualité des aliments.
MISE EN GARDE
Les ragoûts ou les liquides peuvent chauffer très
rapidement pendant la cuisson et peuvent déborder ou
éclabousser, par ex. soupes, sauces ou boissons.
▶Remuez en permanence.
▶Faites chauffer les aliments à un niveau de puissance
approprié.

fr-ca Fonctionnement
20
Fondre
Type d’aliment Niveau de
puissance
Chocolat 1-2
Brisures de chocolat 1-2
Beurre 1-2
Chauffer
Bouillon 3-4
Soupe épaisse 2-3
Lait11-2
1Cuisinez sans couvercle
Mijoter
Sauce délicate, p. ex. Sauce béchamel 1-2
Sauce à spaghetti 1-2
Bœuf braisé 4-5
Poisson14-5
1Cuisson continue sans couvercle
Cuisiner
Riz, avec le double de la quantité d'eau 1-2
Pommes de terre bouillies avec
1à2tasses d'eau 6-8
Légumes frais avec 1à2tasses d'eau 6-8
Légumes congelés avec 1à2tasses
d'eau 6 - 8
Pâtes avec 2à4pintes d'eau18-9
Pouding23-4
Céréales 3-4
1Cuisson continue sans couvercle
2Cuisinez sans couvercle
Frire
Côtelette de porc18-9
Poitrine de poulet17-8
Bacon 8-9
Œufs 6-7
Poisson 8-9
Crêpes 6-7
1Retournez les aliments plusieurs fois.
Grande friture de gras
Frire dans 1 à 2 pinte huile sans couvercle.
Produits alimentaires surgelés, p. ex.,
croquettes de poulet (0,5 lb par portion) 8-9
Autre, par ex. beignes (0,5lb par
portion) 5 - 6
6.4 Zone de cuisson Liberty®
La zone Liberty® vous permet d'utiliser des ustensiles de
cuisine de différentes tailles et formes. Il se compose de
4éléments à induction, qui sont contrôlés
indépendamment les uns des autres. Lorsque vous
utilisez la fonction Liberty®, seule la zone couverte par les
ustensiles de cuisine est activée.
Positionnement de l’ustensile de cuisson
La zone de cuisson flexible peut être configurée de deux
manières, selon la batterie de cuisine utilisée. Afin
d'assurer une bonne détection thermique et une bonne
répartition de la chaleur, nous vous recommandons de
positionner la batterie de cuisine au centre, comme
indiqué sur les images.
En tant que zone de cuisson connectée
Recommandé pour cuisiner avec un seul ustensile.
¡Positionnez la batterie de cuisine en fonction de la
taille:
¡Batterie de cuisine oblongue recommandée :
Comme deux zones de cuisson séparées
Recommandé pour cuisiner avec deux ustensiles de
cuisine.
Vous pouvez utiliser les zones avant et arrière
indépendamment l'une de l'autre et définir un niveau de
puissance distinct pour chaque zone.
Activer la zone Liberty®
1. Placez les ustensiles de cuisine sur la zone de cuisson.
2. Tourner le bouton de commande droit de la zone
d'induction sur .
aL'indicateur BRIDGE s'allume sur la zone de cuisson.
Other manuals for PRD364WIGU
1
This manual suits for next models
4
Table of contents
Languages:
Other Thermador Cooker manuals

Thermador
Thermador Pro Grand User manual

Thermador
Thermador Pro Harmony Professional Series User manual

Thermador
Thermador PRG304US User manual

Thermador
Thermador PRG486JDG/01 User manual

Thermador
Thermador PRD364WIGU User manual

Thermador
Thermador PRD486WIGC User manual

Thermador
Thermador Pro Harmony PA48GLBH User manual