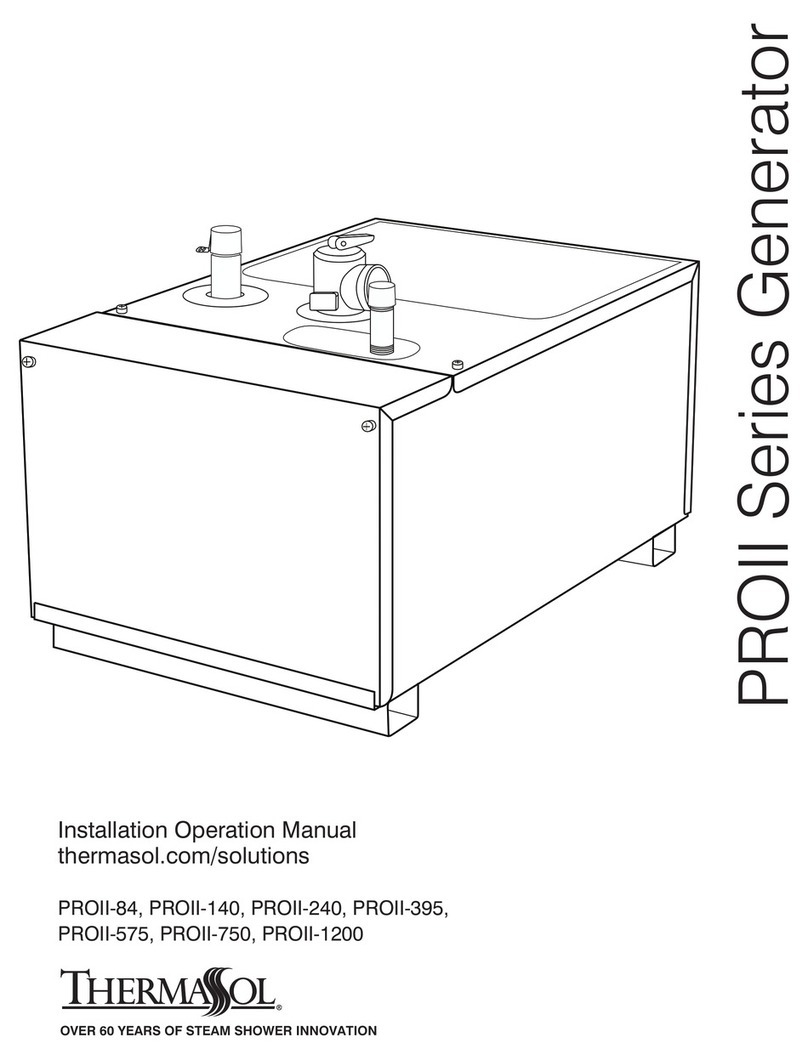
Thermasol PowerPak Series 240V Manual

DOC NO. 81028 1 OF 11 Rev D 08/17/06 NJL
ThermaSol PowerPak Series 240 Volt
Installation & Operating Instructions
Commercial Steam Bath Generators (Three Phase)
Note: For better technical assistance and before contacting Technical Support, please have this
model number, serial number, and date code ready.
TECHNICAL AND WARRANTY SUPPORT ONLY: 1-800-776-0711
(Monday – Thursday, 7:00 a.m. to 5:00 p.m. PST; Friday, 8:00 a.m. – 12:00 p.m. PST)
FOR ALL OTHER CUSTOMER SUPPORT PLEASE CONTACT YOUR DEALER
CUSTOMER WARNINGS
•DO NOT USE THIS PRODUCT UNLESS YOU HAVE CONSULTED YOUR DOCTOR AND RECEIVED WRITTEN
PERMISSION TO DO SO. USE OF THIS PRODUCT MAY BE HAZARDOUS TO YOUR HEALTH.
•STEAM IS HOT! DO NOT TOUCH OR GO NEAR THE STEAM HEAD FROM THE TIME THE UNIT IS “ON”, UP TO
ONE HOUR FROM THE TIME THE UNIT IS OFF. SEVERE BURN WILL OCCUR IF YOU COME IN CONTACT WITH
THE STEAM HEAD OR STEAM EMITTING FROM THE STEAM HEAD.
•NEVER ATTEMPT TO FILL AROMA THERAPY RESERVOIR ON THE STEAM HEAD WHEN UNIT IS IN THE “ON”
POSITION. SEVERE BURNS WILL OCCUR.
•DO NOT USE THERMASOL AROMA THERAPY OILS OR SKIN CARE PRODUCTS OR ANY PRODUCT IN
CONJUNCTION WITH YOUR THERMASOL UNIT WITHOUT CONSULTING WITH YOUR ALLERGIST OR DOCTOR
BEFORE USE. THESE PRODUCTS MAY BE HAZARDOUS TO YOUR HEALTH.
•YOUR SHOWER MAY BE A SLIP AND FALL HAZARD CHECK WITH YOUR CONTRACTOR OR TILE
MANUFACTURER REGARDING THE SAFE USE OF YOUR FLOORING IN A STEAM APPLICATION. SLIPPING
AND FALLING INTO THE STEAM HEAD ITSELF OR INTO THE STREAM OF STEAM EMITTING FROM THE
STEAM HEAD WILL CAUSE SERIOUS BURNS, OR PHYSICAL INJURY.
•DO NOT USE A STEAM ROOM WHILE UNDER THE INFLUENCE OF ALCOHOL OR DRUGS, AS THIS CAN BE
HAZARDOUS TO YOUR HEALTH.
•IF YOU ARE FEELING UNCOMFORTABLE, DIZZY, FAINT, OR STARTING TO FALL ASLEEP, IMMEDIATELY EXIT
THE STEAM ROOM.
•DO NOT USE A STEAM ROOM IF YOU ARE UNDER THE AGE OF 16 UNLESS SUPERVISED BY AN ADULT.
•THERMASOL GENERATORS ARE FOR INDOOR USE ONLY. THEY SHOULD NEVER BE LOCATED OUTSIDE
THE HOME.
•THERMASOL GENERATORS ARE NOT TO BE USED FOR SPACE HEATING PURPOSES.
•FOR SAFETY, SMOOTH OPERATION PRACTICE AND LIABILITY. IF YOU ARE A PLUMBER/INSTALLER,
PLEASE ENSURE THIS OWNERS MANUAL & WARRANTY INFORMATION IS IN THE OWNER’S POSSESSION
WITH SPECIFIC DELEGATION FOR THE PURPOSE OF COMPLETELY FAMILIARIZING ANY USERS WITH THIS
PRODUCT.
•FAILURE TO FOLLOW INSTALLATION INSTRUCTIONS SPECIFICALLY WILL CAUSE THE WARRANTY TO BE
VOID.
PLACE SERIAL # HERE DATE
CODE
HERE

DOC NO. 81028 2 OF 11 Rev D 08/17/06 NJL
Sizing Your Steam Room
Steam Room Size Formula: L X W X H = volume in cubic feet (ft3)
All measurements to be in units of feet. For non-standard ceilings (above 8 ft. high), apply a
correction factor (add 10% per foot).
Examples: a 9 ft. ceiling requires correction factor 1.1 x (room size)
a 10 ft ceiling requires correction factor 1.2 x (room size)
Model Number Steam Room Capacity
(cu. ft.)
5500-1203 1000
5500-1503 1250
For further assistance call toll-free 800-776-0711

DOC NO. 81028 3 OF 11 Rev D 08/17/06 NJL
Generator Installation Instructions
Parts Enclosed
•Steam generator / built-in control
•Steam room sensor & 25 foot Lead wire
•Polished chrome steamhead
Materials Needed
•Brass ball valve
•Pipe compound
•Copper or brass nipples
(Size and quantities per Instructions)
•In-line filter (recommended)
•3/8” brass or copper union
•Wire (sizes and quantities per Instructions)
•Copper tubing or pipe
•Wire cap nuts
•Flex conduit
•Brass or copper tee
Connection & plug
Tools Needed
•Pipe wrench
•Tubing cutter
•Flaring tool (if flared fittings are used)
•Pipe thread cap
•Wire cutters or wire strippers
•Adjustable wrench
•Screwdrivers (Philips &Regular)
•Solder & Flux
•3/16” & 1.5” masonry drill bits
•Drill motor
•Propane Torch
•Other tools as required
All Thermasol steam generators are designed
to build NO PRESSURE during operation.
This is for your safety.
NOTE:
Failure to follow instructions specifically
will cause warranty to be void.

DOC NO. 81028 4 OF 11 Rev D 08/17/06 NJL
Requirements for proper installation
1. Use copper or brass fittings only. (NEVER USE GALVANIZED FITTINGS)
2. The water inlet, steam outlet and pressure relief valve, need brass unions for easy removal.
3. The generator must be upright, accessible and on a level surface with all connections on the back.
Access panel on top and front must be unobstructed and allow for easy access.
4. Unit may be installed up to 50 feet away from shower area.
5. Do not plumb a trap in the steam line or plumb the pressure relief valve into the steam line.
6. Pitch steam line back towards generator avoid perfectly level plumbed lines.
7. Before connecting water line to the generator, flush water line into a five-gallon pail to remove any silt
or other materials that may be in the line. A Thermasol in-line water filter is recommended.
Caution: If the unit is run without water, serious damage may result! This
possible damage is not covered under Thermasol’s limited warranty.
Note: Failure to follow specific installation instructions will cause the warranty to be void.
Water Inlet
Refer to Figure 1 for the following:
1. Connect tee to the hot or cold water line. Install copper pipe or tubing to the tee. If an in-line filter is to
be installed on the water line to the generator, (which is suggested), it would be preferable to install the
tee on the cold water line.
2. Install a brass shut-off valve on the water inlet line in an accessible area prior to the brass union and
recommended in-line water filter.
3. Before making the last connection to the 3/8” water inlet line coming to the unit, flush the water line
into a five-gallon pail to remove any silt or other materials that may be in the line.
4. Make the final connection and turn on water. All Thermasol generators are equipped with an automatic
water fill system. The water will stop after unit is filled. Make sure the power flush is in the closed
position.
IMPORTANT: MAXIMUM WATER PRESSURE 70 P.S.I.

DOC NO. 81028 5 OF 11 Rev D 08/17/06 NJL
Steamhead Installation
1. Drill a 1.5” diameter hole in the shower wall or wall for the steam outlet line, (Refer to Figure 1a) as a
guide for the proper location of the hole.
♦Caution: The steamhead is hot! And should not be located near a seat or bench!
2. Connect 1” F.I.P. copper pipe or copper tubing and 1” brass union onto the steam outlet. Run a 1”
copper pipe from the union to the 1.5” hole in wall. Install a 1” M.I.P. on the end of the 1” pipe for the
steamhead.
3. Attach the steamhead and escutcheon to the copper pipe.
CAUTION: Do not obstruct the steam line with any shut-off valves, plugs or caps. ALL
Thermasol steam generators are designed to build NO PRESSURE.
♦The steam line can run up, down, or horizontal; but cannot run down and then up. If it does, a steam
trap will be produced at the low point blocking the flow of steam. Insulate the steam outlet piping if the
piping run exceeds 10 feet or is exposed to cold areas. NOTE: Use steam rated insulation.
NOTE: DO NOT mount sensor near steamhead!
25 foot sensor control wire
Fi
g
ure 1 Fi
g
ure 1a

DOC NO. 81028 6 OF 11 Rev D 08/17/06 NJL
CONSUMER WARNING
DO NOT USE THIS PRODUCT UNLESS YOU HAVE CONSULTED WITH YOUR DOCTOR AND
RECEIVED WRITTEN PERMISSION TO DO SO. USE OF THIS PRODUCT MAY BE
HAZARDOUS TO YOUR HEALTH.
WARNIN
G
WARNIN
G
STEAM IS HOT! DO NOT TOUCH OR GO NEAR THE STEAM HEAD FROM THE TIME THE
UNIT IS “ON”, UP TO ONE HOUR AFTER IT HAS SHUT OFF. SEVERE BURN WILL OCCUR
IF YOU COME IN CONTACT WITH THE STEAM HEAD OR STEAM EMITTING FROM THE
STEAM HEAD.
WARNIN
G
NEVER ATTEMPT TO FILL AROMA RESERVOIR ON THE STEAM HEAD WHEN UNIT IS IN
THE ON POSITION. SEVERE BURNS WILL OCCUR.
WARNIN
G
DO NOT USE THERMASOL AROMA THERAPY OILS OR SKIN CARE PRODUCTS OR ANY
PRODUCT IN CONJUNCTION WITH YOUR THERMASOL UNIT WITHOUT CONSULTING
WITH YOUR ALLERGIST OR DOCTOR BEFORE USE. THESE PRODUCTS MAY BE
HAZARDOUS TO YOUR HEALTH.
WARNIN
G
YOUR SHOWER MAY BE A SLIP AND FALL HAZARD CHECK WITH YOUR CONTRACTOR
OR FLOORING MANUFACTURER REGARDING THE SAFE USE OF YOUR FLOORING IN A
STEAM APPLICATION. SLIPPING AND FALLING INTO THE STEAM HEAD ITSELF OR
INTO THE STREAM OF STEAM EMITTING FROM THE STEAM HEAD WILL CAUSE
SERIOUS BURNS, OR PHYSICAL INJURY.

DOC NO. 81028 7 OF 11 Rev D 08/17/06 NJL
32
HEATER A
1
FUSES
208/240V
SOLENOID
CONTACTOR
1
231
2
3
T1 L1
T2
T3
L2
L3
TOUCH
PAD
PCB
POWER
SUPPLY
PCB
208/240V
J3
J7
(J6)
J2
J1
J5
J4
FLOAT
SWITCH
230 VAC
3 PHASE
TEMPERATURE SENSOR
LINE IN
LINE IN
LINE IN
208/240V COIL
RED
RED
ORN
ORN
WHT 14
RED 14
RED 14
WHT 14
BLK 6
BLK 6
BLK 6
BLK 6
BLK 6
BLK 6
SOLDERLESS
CRIMP
BLK 14
HEATER B
HEATER C
BLK 6
BLK 6
BLK 6
Electrical Instruction
Wire sizes recommended by National Electric code. Minimum wire temperature rating 90C.
Generator Model Phase Wire Gauge Breaker Size Fuse Cubic
Feet kW
5500-1203 3 4 90 50A 1200 30
5500-1503 3 4 110 60A 1500 36
1. Turn off all electricity to the working area at the main breaker panel.
2. Connect 230-volt A.C. electrical lines to wire labeled 1, 2 and 3 in junction box on generator (see
Figure 2).
NOTE: All electrical wiring must be done per local electrical codes.
Figure 2

DOC NO. 81028 8 OF 11 Rev D 08/17/06 NJL
3. Install the temperature control sensor with bulb guard in the steam room approximately 5 feet above
the floor (see Figure 1).
NOTE: DO NOT mount sensor near steamhead!
4. Bring the control sensor wire to the generator. With the top cover removed (see Figure 3), connect the
control sensor wires, using wire nuts, to the two loose wires on the back of the control panel.
5. Replace top access cover. Turn on both water and power to the generator.
6. Test the touch pad to ensure it is properly wired. If any technical problems arise, call toll free
800-776-0711.
Failure to follow installation instructions specifically may cause the warranty to be void!
Fi
g
ure 3

DOC NO. 81028 9 OF 11 Rev D 08/17/06 NJL
CONSUMER WARNING
DO NOT USE THIS PRODUCT UNLESS YOU HAVE CONSULTED WITH YOUR DOCTOR AND
RECEIVED WRITTEN PERMISSION TO DO SO. USE OF THIS PRODUCT MAY BE
HAZARDOUS TO YOUR HEALTH.
WARNIN
G
WARNIN
G
STEAM IS HOT! DO NOT TOUCH OR GO NEAR THE STEAM HEAD FROM THE TIME THE
UNIT IS “ON”, UP TO ONE HOUR AFTER IT HAS SHUT OFF. SEVERE BURN WILL OCCUR
IF YOU COME IN CONTACT WITH THE STEAM HEAD OR STEAM EMITTING FROM THE
STEAM HEAD.
WARNIN
G
NEVER ATTEMPT TO FILL AROMA RESERVOIR ON THE STEAM HEAD WHEN UNIT IS IN
THE ON POSITION. SEVERE BURNS WILL OCCUR.
WARNIN
G
DO NOT USE THERMASOL AROMA THERAPY OILS OR SKIN CARE PRODUCTS OR ANY
PRODUCT IN CONJUNCTION WITH YOUR THERMASOL UNIT WITHOUT CONSULTING
WITH YOUR ALLERGIST OR DOCTOR BEFORE USE. THESE PRODUCTS MAY BE
HAZARDOUS TO YOUR HEALTH.
WARNIN
G
YOUR SHOWER MAY BE A SLIP AND FALL HAZARD CHECK WITH YOUR CONTRACTOR
OR FLOORING MANUFACTURER REGARDING THE SAFE USE OF YOUR FLOORING IN A
STEAM APPLICATION. SLIPPING AND FALLING INTO THE STEAM HEAD ITSELF OR
INTO THE STREAM OF STEAM EMITTING FROM THE STEAM HEAD WILL CAUSE
SERIOUS BURNS, OR PHYSICAL INJURY.

DOC NO. 81028 10 OF 11 Rev D 08/17/06 NJL
POWERPAK INSTRUCTIONS
1. After installation – turn on power to unit at the breaker. You will see a flashing dash and “12” in the
upper window & “00” in the lower window.
2. First set the clock by pressing the “clock-start-stop” button once. You should see the light next to the
“set clock” come on. Next, press the “day select” button until you reach the day you are at. The day is
indicated on the left side o the upper window. (Monday = 1, Tuesday = 2, etc., etc.).
** (It is very important clock be set for the current day. If you are programming this unit on a Tuesday,
then set the clock and day for Tuesday, day 2.) Using the arrows to the right of both windows set the
current time in military time (24-hour clock). As an example 11:32 am would read 11 in the upper
window and 32 in the lower window. 2:45 PM would read 14 in the upper window and 45 in the lower
window.
3. Now you will set the “Steam Start Time”. Press the “Clock-Start-Stop” button once. You should see
the light next to the “Start Time” come on and the light next to the “Steam” come on. Using the arrows
set the time you want the steam to begin on that day from now onward. The day is “Select” button for
each day and using the arrows to set the time you want the unit to begin steaming. Always end on the
day you started with to ensure you have all the days programmed.
4. Next, set the “Steam Stop Time”. Press the “clock-Start-Stop” button once. You should see the light
next to the “Stop Time” come on and the light next to the “Steam” remain on. Using the arrows set the
time you want the steam to stop for that day from now onward. The day is indicated on the left side of
the upper window. To program the rest of the week, press the “Day Select” button the day you started
with to ensure you have all the days programmed.
5. Now you will set the Powerflush program. ** You must set the “Flush” time at least ½ hour past
the “Steam Stop” time when no one is inside the steam room. Press the “Clock-Start-Stop” button
once. You should see the light next to the “Start Time” come on and the light next to the “flush” come
on. Using the arrows, set the time you want the flush to start for that day from now press the “Day
Select” button for each day and using the arrows to set the time you want the unit to begin its
Powerflush. Always end on the day you started with to ensure you have all the days programmed. The
Powerflush stops automatically at the end of its cycle. (Approximately 45 minutes).
6. Next set the temperature. Press the “Clock-Start-Stop” button once. You will see the day indicated now
on the right side of the lower window and the desired temperature in the upper window. Using the
arrows set the temperature you want for that day from now onward. The day is now indicated on the
right side of the lower window. To program the rest of the week, press the “day Select” button for each
day and using the arrows to set the temperature you want for that day. Always end on the day you
started with to ensure you have all the days programmed.
7. It is now time to jump out of the program area. You are currently in the temperature setting mode.
Make sure your day is correctly set. (Monday = 1, Tuesday = 2, etc., etc.). Remember, the day is now
indicated on the right side of the lower window. Press the “Clock-Start-Stop” button once. This will
take you out of the program mode and into the sleep (non-active) mode. A dash and the current time
should be showing.
** AFTER PROGRAMMING** To have the unit steam immediately, press the
ON/OFF manual button once. You should see the “Steam” light flash continuously.
TECHNICAL SUPPORT 800-776-0711

DOC NO. 81028 11 OF 11 Rev D 08/17/06 NJL
Power Flush
(True inner tank cleaning)
Steam Show generator demonstrating Thermasol
unique PowerFlush system.
Be sure no one is in the shower area
during this cycle!
♦Use of the Powerflush will vary according to
local water conditions… speak with your
plumber regarding conditions in your area.
Saturday at 3:35
PM, military time.
Start time of 6:30
AM on Tuesday. Showing a 106
Degree temperature
On Tuesday.
Table of contents
Other Thermasol Portable Generator manuals
Popular Portable Generator manuals by other brands
Champion
Champion 73531i Owner's Manual and Operating Instructions
EOD
EOD MEDI EORG instructions

Harbor Freight Tools
Harbor Freight Tools 94192 Assembly and operating instructions
ALLPOWER
ALLPOWER APG3590CN owner's manual

North Star
North Star M165920S owner's manual
mr. steam
mr. steam CU-360 Installation, operation & maintenance manual
