Thermics LUNA 2T User manual

LUNALUNA
User terminal manual
Reversible heat pump with inverter technology
Translation of the Original Instructions Rev. 2.0
EN-GB
LUNA 2T

Dear Customer,
Thank you for choosing a Thermics energie machine, an innovative, modern and quality product that
will ensure your well-being, silence operation and safety for a long time.
This instruction manual contains important indications and suggestions that must be observed in order
to make the installation and use of the machine as easy as possible.
Thank you again.
Thermics energie

4
LUNA 2T | USE
1 Use
1.1 Control panel
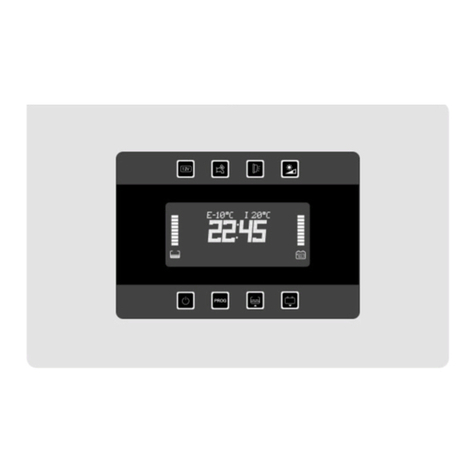
The control panel consists of a display and programming keys.
1 Alarms It illuminates in the presence of alarm states.
Press the button to display the type of alarm or to reset it.
2 Programming Allows you to access the programming pages or read the
parameters.
3 ESC Allows you to exit the programming pages.
4 Up arrow Moves the blinking cursor to the previous page or increases the value
to be changed.
5 ENTER To conrm and enter the parameter to be modied.
6 Down arrow Moves the blinking cursor to the next page or decreases the value to
be changed.
7 Display Information display.
41
2
3
5
6
7

5
LUNA 2T | USE
1.2 Display
Display Description
1Operating information
2
Shortcut menu
ON-OFF unit menu.
Setpoint setting and setpoint 2 activation menu.
Operating mode change menu: heating, cooling and domestic hot water only.
Unit information display.
3
Reference temperature (DHW or system water inlet).
Standard display: the standard setpoint is active.
Negative display: setpoint 2 is active.
4Date and time.
5Active compressor with speed bar.
6DHW circulator with speed bar.
7System circulator with speed bar.
8Fan(s) with speed bar.
9
Setpoint 2 activation and/or Boost coil.
SET 2 Setpoint 2 is active and the reference temperature numbers are negative.
The DHW coil is active.
The DHW coil and setpoint 2 are active.
ii / ii / ii
ii : ii
SET2 -28.9°C
OFFbyALRM
1 2
3
4
5 12678
9
10
11

6
LUNA 2T | USE
Display Description
10
Operating modes (heating, cooling and DHW).
Operation in DHW production mode.
Operation in system heating mode.
Operation in system cooling mode.
Operation in DHW priority in heating mode.
Operation in DHW priority in cooling mode.
Defrost function active.
Drip function active.
Hot gas defrost valve open.
11 Program active.
1.2.1 Operating information
Function Description
STAND-BY All setpoints are satised, units on hold.
OFFbyALRM Unit OFF due to an active alarm.
OFFbyBMS Unit OFF from Modbus connection.
OFFbyDI Unit OFF by remote contact.
OFFbyKEYB Unit OFF from control panel.
OFFbyChgOvr Unit OFF for operating mode change.
SEASON CHG. Season change active.
PLANT REG. Unit active on system regulation
DEFROST Defrost status active.
SHUT DOWN Shut down procedure active.
CYCL. INV. Cycle inversion after defrosting.
AFREEZE ADV Advanced antifreeze mode active.
ALARMS Alarms present with unit ON.
DHW REG. Unit active on DHW regulation.

7
LUNA 2T | USE
1.3 Access levels
It has 3 consultation and programming levels:
access levels
Without password
To start/stop the unit, program the setpoints,
activate/deactivate the most common functions,
change the season and refer to the active
setpoints and the main temperatures detected.
With User password (Default: “2345”)
To check the unit's programming, change
date and time, activate a time, daily, annual
programming and make some simple settings.
With Maintainer password To read and program the setpoints and check
the machine parameters.
With Manufacturer password To read, program and edit software settings.

8
LUNA 2T | USE
1.4 Procedures
1.4.1 Machine start-up
The machine must be started up for the rst time by personnel authorised by the manufacturer.
1. Set the QF main differential switch located outside the machine to the OFF position.
2. Set any remote ON/OFF switch to OFF.
3. Remove the front panel rst, then the electrical panel.
4. Lift the lever of the compressor's thermal-magnetic circuit breaker.
5. Close the cover of the electrical panel.
6. Place the thermal-magnetic circuit breaker in the electrical panel to ON.
7. Set the QF main differential switch to ON.
8. At this point the control panel will turn on to indicate that the machine is powered.
9. To allow the oil inside the compressor to warm up, select the "OFF" operation on the control
panel and wait at least two hours before activating the unit.
1.4.2 Control panel settings
1. Enter your Service password.
2. Set the language of the control panel.
3. Set date and time.
4. Activate the remote contact (if provided) or alternatively select the function of the
multifunction input F3.
5. Modify the setpoints according to the type of system.
6. If required, set the parameters of the heating or cooling curve related to the dynamic
setpoint (not provided for the DHW setpoint).
7. Select the operating season.
8. Check the correct reading of the BT6 DHW cylinder probe (if present).
1.4.3 Entering the password
To enter the password:
1. Use the and keys to select the rst number.
2. Press the key to conrm the selected number and move on to the next number.
3. Select the next password numbers using the and keys and conrm by pressing .

9
LUNA 2T | USE
1.4.4 Starting
1. Press the and keys to select the ON/OFF menu.
2. Press the key to select ON (1).
3. Press the key to return to the main page.
4. Press the key to move to the "operating mode" menu.
5. Use the and keys to select the desired operating mode: summer, winter and DHW
only.
6. Conrm by pressing .
1.4.5 Changing the season
1. Press the and keys to select the "operation mode" menu.
2. Press the key.
3. Press the key again and select the desired operating mode: summer, winter and DHW
only (2).
Unit On/O Qa001
ON
Mode Qb005
Summer / Winter / DHW:
Summer
1
2

10
LUNA 2T | USE
1.4.6 Switching off
1. Press the and keys to select the ON/OFF menu.
2. Press the key.
3. Press the and keys to move to OFF.
4. Press to conrm.
1.4.7 Setting the setpoints
1. Press the and keys to select the "setpoint settings" menu.
2. Press to conrm.
3. The "Qb01"(3) screen displays the winter setpoints "Set" and "Set 2" (the latter is only
active if the "Set 2" mode is activated).
4. Press the key to move the cursor to the rst setpoint ("Set").
5. Press the and keys to select the desired temperature.
6. Press the key again to change the "Set 2" setpoint
7. Press the key again to move the cursor to the screen header line.
8. Press the and keys to access pages "Qb02" (domestic hot water), "Qb03" (cooling)
and "Qb04" (Set 2 setting).
9. To modify the setpoints of pages Qb02 and Qb03, repeat the operations listed above from
point 4 to 8.
10. On page "Qb04" ("Set 2" setting) it is possible to activate/deactivate the "Set 2" mode:
moving to the ON/OFF menu, press the and keys.
Heating Qb01
Set
30. 0°C
Set2: 35. 0°C
3

11
LUNA 2T | USE
1.4.8 Boost coil activation (optional)
1. Press the and keys to select the "coil" menu (4).
2. Press the key.
3. Press the key to select ON.
1.4.9 Boost coil deactivation (optional)
1. Press the and keys to select the "coil" menu.
2. Press the key.
3. Press the key to select ON.
1.4.10 Information menu display
1. Press the and keys to select the "coil" menu.
2. Press the key.
1.4.11 Setting current date and time
1. Press the key.
2. Enter the user password (see paragraph “1.4.3 Entering the password”).
3. Press the key to enter the "programming" menu.
4. Press the and keys to select "a. Date and Time".
5. Press the key to enter the "Ha001" menu.
6. Press the key again to move the cursor to the "date" eld display mode.
7. The and keys can be used to change the parameter if necessary.
8. Move the cursor back to the "date" eld by pressing .
9. Press the and keys to change the numerical value of the day.
21/08/19
10:28
28.9°C
OFFbyKEYB
4

12
LUNA 2T | USE
10. Press the key to change the month and then the year.
11. Move the cursor back to the "time" eld by pressing .
12. Press the and keys to change the hour.
13. Press the key to change the "minutes" eld.
14. Press the key again to move the cursor to the screen header line where you can select
other items from the "programming" menu.
1.4.12 Setting the language
1. Press the key.
2. Enter the user password (see paragraph “1.4.3 Entering the password”).
3. Press the key to enter the "programming" menu.
4. Press the and keys to select "H. Settings".
5. Press to conrm.
6. Press the and keys to select "c. Language".
7. Press the key to enter the "Language" menu.
8. Press the key again to move the cursor to the language selection eld.
9. Press the and keys to change the parameter if necessary.
10. Press the key to return to the Home screen.
1.4.13 Alarms
In the event of a malfunction, the alarm indication appears on the main screen:
1. Press the key to display the alarm.
2. Press the key to not reset the alarm.
3. Press the key to reset the alarm.

13
LUNA 2T | USE
1.4.14 Program activation
System program:
1. Press the key.
2. Enter the user password (see paragraph “1.4.3 Entering the password”).
3. Press the key to enter the "programming" menu.
4. Press the and keys to select "I. Time Program”
Menu "Fc001":
1. Press the key to enter the "Fc001" menu.
2. Press the key again to move the cursor to the time program enable parameter for the
"Heating/Cooling" circuit.
3. Press the and keys to change to "YES": Time, day of the week and date will be
displayed. In addition, information about the active time band and the currently active
operating mode will be displayed.
4. Press the key again to move the cursor to the screen header line.
5. Press the and keys to continue programming.
Menu "Fc002":
1. Press the key to enter the "Fc002" menu.
2. Press the key again to set the daily operation to four different time bands by moving the
cursor over the various elds.
3. In the last eld of the page it is possible to save the time program: press the key and
change the eld entry to "YES" with the and keys.
Once you have saved your selection, you can copy the settings to other days of the week:
1. Press the key to move with the cursor over the indicated eld.
2. Press the and keys to change the item by selecting the day of the week on which to
copy the daily program.
3. Once the program for the "Heating/Cooling" circuit has been completed, move the cursor
to the "Header" eld.
4. Press the key and change page with the and keys.
Menu "Fc003":
1. On page "Fc003" you can set the special operation to 3 different periods in the year using
the as described in the previous points.
Menu "Fc004":
1. On page "Fc004" you can set the special daily operation on 6 different days of the year by
moving the cursor over the various elds using the key.
IMPORTANT
You can set the DHW program (from menu "Fc005" to menu "Fc008") by following
the procedures of the system program (menu "Fc001" corresponds to menu "Fc005",
"Fc002" to "Fc006", etc.).

14
LUNA 2T | USE
1.4.15 Enabling the Supplementary Source
On the control panel:
1. The “PROGRAMMING” button can be used to access the programming menu after entering
the Service password.
2. Buttons and can be used to select the rst number of the password, after conrming
by pressing the button, you can move to the second number and so on until reaching the
fourth.
3. After selecting the fourth number and pressing , if the password is correct, you can access
the programming menu.
4. Press the and buttons, select the "D. Heater” option and press .
5. You will access menu D0001. Pressing the button will move the cursor to the parameter
for enabling the supplementary source on the system side. This will make all subsequent
screens visible for parameterization.
6. In the following screens, the operation can be adjusted by using to move the cursor to
the required eld, and to modify the parameter and by pressing again to conrm
and move the cursor to the next eld. When the cursor is in the upper left corner, you can
change page by using and.
7. Choosing functions:
By enabling the individual items, it will be possible to access the relative submenus to set the trip
thresholds according to the outdoor temperature, set a hysteresis value for the outdoor temperature and
a temperature value as an alarm threshold to activate the boiler.
The following parameters are available:
operating moDe Description
INTEGRATION The supplementary source is activated in addition to the
heat pump to generate heat
SUBSTITUTION The heat pump switches off and the supplementary source
is activated
INTEGRATION BY ALARM The supplementary source takes over from the heat pump
as it was stopped by mistake
S Heater D0003
User Functions
Integration:
Substitution:
Integration
by alarm:

15
LUNA 2T | USE
INTEGRATION
operating moDe Description
THRESH external probe value for boiler switch on
(recommended value 7°C)
DIFF hysteresis threshold between the operation of one generator
and another (recommended value 3.0°C)
DELAY boiler activation delay (recommended value 180s)
IMPORTANT
Page D0005 shows the parameters that can be used to specify when one and the other
source switches on.
These parameters should be modied by qualied technical personnel.
SUBSTITUTION
S Heater D0004
User Integration
Thresh.: 20.0°C
Di.: 2.0°C
Delay: 175s
S Heater D0006
User Substitution
Thresh.: 6.0°C
Di.: 2.0°C
operating moDe Description
THRESH external probe value for switching on (recommended value
5°C)
DIFF hysteresis threshold between switching on and off
(recommended heat 3°C)
IMPORTANT
Page D0007 displays the parameters for managing the circulator and requests.
These parameters should be modied by qualied technical personnel.

16
LUNA 2T | USE
Intervention parameters for distance from the setpoint
Screen for setting the operating mode of the warning due to an excessive divergence from the setpoint
that activates the supplementary source.
operating moDe Description
MNG.TYPE is set as active for outdoor temperature, it can also be set as
always on or always off.
SETPOINT OFFSET permitted divergence from the setpoint temperature before the
count is activated.
STARTUP
waiting time after which the supplementary source is activated,
it is activated when the reference temperature is lower than the
setpoint – offset temperature
RUN system start-up time within which the supplementary source is
not enabled in any way.
8. The conguration of the supplementary source on the DHW side then starts. Pressing
the button on page D0010 will move the cursor to the parameter for enabling the
supplementary source on the system side. This will make all subsequent screens visible for
parameterization.
9. Choosing functions:
S Heater D0012
Heater Functions
Legionella:
Integration:
Substitution:
Int. by alarm:
Int. by boost:
By enabling the individual items, it will be possible to access the relative submenus to set the trip
thresholds according to the outdoor temperature, set a hysteresis value for the outdoor temperature and
a temperature value as an alarm threshold to activate the boiler.
S Heater D0008
Low water temp.alarm
Mng.type:
Ext.Temp.Active
Setpoint oset: 5.0°C
Startup: 30min
Run: 180s

17
LUNA 2T | USE
The following parameters are available:
operating moDe Description
LEGIONELLA The supplementary source is activated to carry out the
disinfection cycle.
INTEGRATION The supplementary source is activated in addition to the heat
pump to produce DHW
SUBSTITUTION The heat pump switches off and the supplementary source is
activated
INTEGRATION BY ALARM The supplementary source takes over from the heat pump as it
was stopped by mistake
INTEGRATION BY BOOST The supplementary source is activated in addition to the heat
pump to produce DHW at a higher setpoint.
IMPORTANT
On pages D0013, D0014 and D0016, you can decide the mode and frequency of the
disinfection cycle.
On page D0016, you can also set an alarm to check how many times the cycle has not
been completed within the set time.
This parameter should be modied by qualied technical personnel.
INTEGRATION
operating moDe Description
THRESH external probe value for boiler switch on
(recommended value 7°C)
DIFF hysteresis threshold between the operation of one generator
and another (recommended value 3.0°C)
DELAY boiler activation delay (recommended value 180s)
S Heater D0017
DHW Integration
Thresh.: -5.0°C
Di.: 4.0°C
Delay: 60s

18
LUNA 2T | USE
SUBSTITUTION
operating moDe Description
THRESH external probe value for switching on (recommended value
5°C)
DIFF hysteresis threshold between switching on and off
(recommended heat 3°C)
IMPORTANT
Pages D0019 and D0020 display the parameters for managing the circulator and
requests. These parameters should be modied by qualied technical personnel.
BOOST
S Heater D0018
DHW Substitution
Thresh.: -15.0°C
Di.: 5.0°C
S Heater D0021
DHW Boost
Oset: 5.0°C
Di.: 2.0°C
Max setpoint: 85.0°C
Min setpoint: 7.0°C
operating moDe Description
OFFSET setpoint temperature increase (recommended value 5°C)
DIFF hysteresis threshold between switching on and off (recommended
heat 2 °C)
MAX SETPOINT maximum allowed resulting setpoint value
MIN SETPOINT minimum allowed resulting setpoint value

19
LUNA 2T | USE
Intervention parameters for distance from the setpoint
On this screen, we can set the operating mode of the warning due to an excessive divergence from
the setpoint that activates the supplementary source, where:
operating moDe Description
MNG.TYPE is set as active for outdoor temperature, it can also be set as
always on or always off.
SETPOINT OFFSET permitted divergence from the setpoint temperature before the
count is activated.
STARTUP
waiting time after which the supplementary source is activated,
it is activated when the reference temperature is lower than the
setpoint – offset temperature
RUN system start-up time within which the supplementary source is
not enabled in any way.
10. Pressing the ESC key repeatedly will take you back to the main screen.
S Heater D0022
Low water temp.alarm
Mng. type:
Ext. Temp. Active
Setpoint oset:
20.0°C
Startup: 45min
Run: 180s

20
LUNA 2T | USE
1.4.16 Enabling the heating or cooling curve
On the control panel:
1. The “PROGRAMMING” button can be used to access the programming menu after entering
the Service password.
2. Buttons and can be used to select the rst number of the password, after conrming
by pressing the button, you can move to the second number and so on until reaching the
fourth.
3. After selecting the fourth number and pressing , if the password is correct, you can
access the programming menu.
4. Press the and buttons, select the "A. Regulation” option and press .
5. Select the submenu “a. Plant” and press .
6. Move through the pages as far as Aa023, pressing the button will move the cursor to
the “Set. Compens. HP” and “Set. Compens. CH” parameters in order to enable the heating
or cooling curves for winter and summer respectively. This will make all subsequent screens
visible for parameterization.
7. In the following screens, the operation can be adjusted by using to move the cursor to
the required eld, and to modify the parameter and by pressing again to conrm
and move the cursor to the next eld. When the cursor is in the upper left corner, you can
change page using and .
8. Enabling heating or cooling curves
In order to provide a more efcient and rational use of energy, which is also aimed at improving the
heat comfort in the environment, temperature adjustment curves for both heating and air conditioning
can be enabled, where:
operating moDe Description
SET.COMPENS.HP enables the heating compensation curves
SET.COMPENS.CH enables the cooling compensation curves
S Plant Aa023
Functions selection
Set. compens .HP:
Set. compens .CH:
Other manuals for LUNA 2T
2
Table of contents
Popular Control Panel manuals by other brands

Carrier
Carrier INFINITY ZONING CONTROL installation instructions
My ADT
My ADT DSC Power PC1864 quick guide
Truma
Truma CP operating instructions

Honeywell
Honeywell ControLinks YP7999A1000 installation instructions
Mircom
Mircom FR-320 Series Installation and operation manual
Coastal Climate Control
Coastal Climate Control Guardian manual

