ThinkVision LT2452pwC User manual

LT2452pwCFlat Panel Monitor
User's Guide

Product numbers
60A6-MAR2-WW
First Edition (December 2012)
© CopyrightLenovo 2012.
Allrights reserved.
LENOVOproducts, data,computersoftware, andservices have beendeveloped exclusivelyat privateexpense and are
sold togovernmentalentities as commercial itemsas defined by48 C.F.R. 2.101with limitedandrestricted rightstouse,
reproduction and disclosure.
LIMITEDAND RESTRICTEDRIGHTSNOTICE:Ifproducts, data,computer software, or services are delivered
pursuant aGeneral ServicesAdministration "GSA"contract, use, reproduction, or disclosure is subject to restrictions set
forth in Contract No.GS-35F-05925.
©Copyright Lenovo 2012.i

Contents
Safetyinformation......................................................................................................
.......................................................................................
iii
Chapter1.Getting started1-1
Shipping contents.........................................................................................................................................................
..........................................................................................................................................................
................................................................................................................................................
............................................................................................................................................................................
1-1
Product overview1-2
Types ofadjustments1-2
Tilt1-2
Swivel......................................................................................................................................................................
....................................................................................................................................................
...........................................................................................................................................................
............................................................................................................................................................
1-2
HeightAdjustment1-3
Monitor Pivot1-3
Usercontrols1-3
Cablelockslot..........................................................................................................................................................
.................................................................................................................................................
.................................................................................................................
...............................................................................................................................................
1-4
Setting up your monitor1-4
Connecting and turning on your monitor1-4
Registeringyouroption1-11
Chapter 2.Adjusting and using your monitor........................................................
............................................................................................................................................
2-1
Comfortandaccessibility2-1
Arrangingyour workarea.......................................................................................................................................
2-1
Positioningand viewing your monitor................................................................................................................2-1
Quick tips forhealthyworkhabits.........................................................................................................................
........................................................................................................................................
2-2
Accessibilityinformation2-3
Adjustingyourmonitorimage.....................................................................................................................................
.............................................................................................................................
.......................................................................................................
............................................................................................................................
2-3
Using thedirectaccess controls2-3
Using theOn-ScreenDisplay(OSD)controls2-3
Selectingasupporteddisplay mode2-6
Image rotation..............................................................................................................................................................
.............................................................................................................................
...............................................................................................................................................
2-7
Understandingpower management2-7
Caring foryourmonitor2-8
Detachingthe monitorstand.........................................................................................................................................2-9
Wall Mounting (Optional)............................................................................................................................................2-9
Chapter3.Referenceinformation..........................................................................3-1
Monitorspecifications.................................................................................................................................................3-1
Troubleshooting............................................................................................................................................................3-3
Manualimage setup.................................................................................................................................................3-4
Manually installing the monitor driver....................................................................................................................3-5
Getting further help..............................................................................................................................................3-8
Service information..................................................................................................................................................3-8
Productnumbers..................................................................................................................................................3-8
Customer responsibilities......................................................................................................................................3-8
Service parts.........................................................................................................................................................3-9
Appendix A. Service and Support..........................................................................A-1
Appendix B. Notices.................................................................................................B-1
©Copyright Lenovo 2012.ii

Safetyinformation
General Safety guidelines
For tips to help you use your computer safety, go to:
http://www.lenovo.com/safety
Before installing this product, read the Safety Information.
íí
í
©Copyright Lenovo 2012.iii

Chapter 1. Getting started
This User’s Guide contains detailed information on the ThinkVision®LT2452pwC Flat
Panel Monitor. For a quick overview, please see the Setup Poster that was shipped
with your monitor.
Shipping contents
The product package should include the following items:
·Information flyer
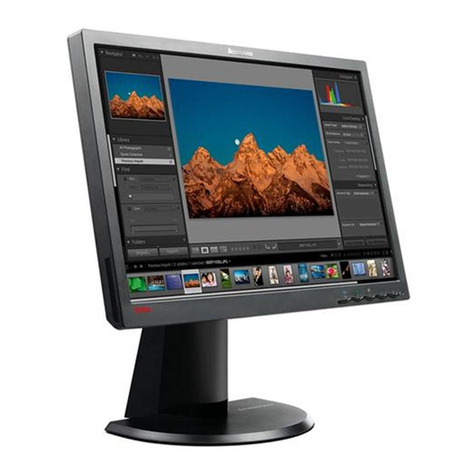
·ThinkVision LT2452pwC Flat Panel Monitor
·Power Cord
·Digital Cable
·Analog Signal Cable
·USB Cable
·Cable Cover
·Cable Wrapper
Note: To attach a VESA mount, please see
“Detaching the monitor stand” on page 2-9.
© Copyright Lenovo 2012.1-1

Product overview
This section will provide information on adjusting monitor positions, setting user
controls,and using the cable lockslot.
Typesofadjustments
Tilt
Please seetheillustrationbelow foran exampleof the tiltrange.
Swivel
With the built-inpedestal,you can tiltand swivelthemonitorforthe most
comfortable viewing angle.
-45o45o
1-2 LT2452pwC FlatPanel Monitor User’sGuide

HeightAdjustment
After pressing the topof the monitor,removethe fixedpin and adjust theheightof the
monitor.
110mm
MonitorPivot
-Adjust height to the top position before rotationthe monitor.
-Rotateclockwise untilthe monitorstopsat 90°.
User controls
Your monitorhas controls on the frontwhichare used toadjust the display.
Forinformationon howto use these controls,pleasesee
“Adjusting your monitor image” on page 2-3. Chapter 1. Getting started 1-3

Cablelockslot
Yourmonitoris equippedwith a cable lock slotlocatedonthe rearof your monitor(in
the lowerleftcorner).Pleasefollowthe instructions thatcamewith thecablelock to
attach it.
Settingupyour monitor
This section provides information tohelpyou set upyour monitor.
Connecting and turning on your monitor
Note: Besureto readtheSafety Information locatedin the information flyer
before carrying outthis procedure.
1.Poweroffyourcomputer and allattached devices, andunplug the computerpower
cord.
2.Connecttheanalog signalcableto the D-SUB porton the back of the computer.
1-4 LT2452pwC FlatPanel Monitor User’sGuide

Connect the digital signal cable to the DVI connector of the monitor and the
other end on the back of the computer.
noisiVknihT91L0x
Connect one end of the DP cable to the DP connector on the back of the computer, and
the other end to the DP connector on the monitor.
DisplayPort* * This port does not support being connected to any AV equipment.
Lenovo recommends that customers who require to use the Display Port input on their
monitor purchase the "Lenovo Display Port to Display Port cable 0A36537".For more
information, go to one of the following:
www.lenovo.com/support/accessories
www.lenovo.com/support/displayport-cables
www.lenovo.com/accessoriesguide
Chapter 1. Getting started 1-5

Connect one end of the USB hub cable to the USB connector on the back of the
computer, and the other end to the upstream USB connector on the monitor.
Plug the monitor power cord and the computer cord into grounded electrical outlets.
Note: A certified power supply cord has to be used with this equipment. The relevant
national installation and/or equipment regulations shall be considered. A certified
power supply cord not lighter than ordinary polyvinyl chloride flexible cord
according to IEC 60227 (designation H05VV-F 3G 0.75mm2or H05VVH2-F2 3G
0.75mm2) shall be used. Alternative a flexible cord be of synthetic rubber according
to IEC 60245 (designation H05RR-F 3G 0.75mm2) shall be used.
1-6 LT2452pwC Flat Panel Monitor User’s Guide

Rotate the head of the monitor into portrait view.
Chapter 1. Getting started 1-7

Place the cables through the Main Clip. Then fasten the clip.
Wrap the Cable Wrapper around the cables.
1-8 LT2452pwC Flat Panel Monitor User’s Guide

Remove the Rubber Cover from the back of the stand.
Replace the Cable Cover.
Chapter 1. Getting started 1-9

Poweron themonitor andthe computer.
Install the monitor driver, download the driver of the corresponding monitor model from the
Lenovo Website: http://support.lenovo.com/LT2452pwC, and then click on the driver and install
it following the on-screen instructions.
Tooptimizeyourmonitorimage,ifusing the analog cable,press theAutomaticImage
Setup key.Automatic imagesetup requires that the monitor is warmed upfor atleast 15
minutes. This is not requiredifyouareusing theDVI cable.
Note: If automatic image setup does notestablish theimage thatyou prefer, perform
manual image setup.See“Manualimage setup” on page 3-4.
1-10 LT2452pwC FlatPanel Monitor User’sGuide

Registering youroption
Thank you for purchasing this Lenovo®product.Please takea fewmoments toregister
yourproductandprovide us withinformationthatwillhelpLenovo to betterserve you
in the future.Your feedback isvaluabletous in developing products and servicesthat
are important toyou,as well as in developing better ways to communicatewith you.
Register your option on the followingWeb site:
http://www.lenovo.com/register
Lenovo willsend you information and updates on yourregistered productunless you
indicateon the Websitequestionnairethatyou donot wanttoreceive further
information.
Chapter 1.Gettingstarted 1-11

Chapter2. Adjusting and using yourmonitor
This sectionwillgive you information onadjusting and using yourmonitor.
Comfortandaccessibility
Goodergonomicpracticeis important togetthemostfrom yourpersonalcomputer
and to avoiddiscomfort.Arrange your workplace and theequipmentyou use to suit
yourindividualneeds and the kind of work thatyouperform. Inaddition, use health
work habits tomaximize your performance and comfort whileusing your computer.
Formoredetailedinformationonany ofthesetopics,visit the HealthyComputing
Websiteat: http://www.lenovo.com/healthycomputing/
y
Arrangingyourworkarea
Use aworksurface of appropriateheightand available working areatoallowyouto
work in comfort.
Organizeyour work areatomatchthe way youuse materialsandequipment. Keep
yourwork areacleanand clear forthematerialsthatyou typically useand placethe
items thatyou use mostfrequently,such as the computermouseortelephone,within
the easiestreach.
Equipmentlayoutand setupplay alarge rolein yourworking posture.The following
topics describehowtooptimizeequipment setup toachieve andmaintain good
working posture.
Positioning and viewing your monitor
Position and adjust your computermonitorforcomfortableviewing byconsidering
the following items:
·Viewingdistance:Optimalviewing distancesformonitors range from
approximately510mmto760mm(20in to30in)and canvarydepending on
ambient light and time of day.Youcanachieve differentviewing distancesby
repositioning yourmonitororbymodifying yourpostureorchairposition.Usea
viewing distancethatis mostcomfortablefor you.
·Monitorheight:Positionthemonitorsoyourheadand neck arein acomfortable
and neutral(vertical,orupright)position. If your monitordoes not haveheight
adjustments, you might have to placebooks orothersturdyobjectsunderthe base
of the monitortoachieve thedesiredheight. Ageneralguidelineis toposition the
monitorsuchthatthetopof the screenisat orslightlybelowyoureye-height
when youarecomfortably seated.However,besureto optimizeyour monitor
heightsothe lineof sitebetweenyour eyes and thecenterthe monitorsuitsyour
preferences forvisualdistanceand comfortableviewing whenyour eye muscles
arein arelaxedstate.
2-1 ©Copyright Lenovo 2012.

·Tilt: Adjust the tiltofyour monitortooptimize the appearanceof thescreen
contentandtoaccommodateyourpreferredheadandneck posture.
·Generallocation:Positionyour monitor toavoidglare orreflections on the
screen from overheadlighting ornearby windows.
The following aresome othertips forcomfortableviewing of yourmonitor:
·Use adequatelighting forthetypeofworkyou are performing.
·Use themonitorbrightness, contrast,andimage adjustment controls, ifequipped,
tooptimizethe imageon your screen tomeetyour visualpreferences.
·Keep yourmonitorscreenclean so you canfocus on the screen’scontents.
Anyconcentratedand sustained visualactivitycan betiring for your eyes.Besureto
periodicallylookawayfromyour monitorscreen and focus onafarobject to allow
youreye muscles to relax.Ifyou havequestions oneyefatigue or visual discomfort,
consultavision carespecialist foradvice.
Quicktipsforhealthyworkhabits
The following informationis asummary of someimportant factorsto considerto
helpyouremaincomfortableandproductive whileyou use your computer.
·Good posture startswithequipment setup:The layout of your work area and
the setupofyour computerequipment have alarge effecton yourposturewhile
using your computer.Besuretooptimizethepositionand orientationofyour
equipmentbyfollowing thetipsoutlinedin“Arranging yourworkarea” onpage2-1
soyou canmaintainacomfortableand productive posture.Also, besuretousethe
adjustment capabilities of your computercomponentsand officefurnituretobest
suityourpreferences nowand asyour preferenceschangeovertime.
·Minorchanges inposture canhelp avoid discomfort:The longeryousitand
work with yourcomputer,themoreimportantitis toobserve your working
posture. Avoidassuming anyonepostureforanextendedperiodoftime.
Periodicallymake minormodifications in yourposturetohelpdeterany
discomforts thatmight arise.Make useof anyadjustments that youroffice
furnitureorequipment provide toaccommodatechanges inposture
·Short,periodicbreaks help ensurehealthycomputing:Becausecomputing is
primarily astatic activity,itisparticularlyimportanttotake short breaks from
yourwork. Periodically,stand upfrom yourwork area, stretch, walkforadrink of
water,orotherwisetake ashortbreak from using your computer.Ashortbreak
from work givesyour body awelcomechangeinpostureand helps to ensureyou
remain comfortable and productivewhileyou dowork.
Chapter 2. Adjusting and using your monitor 2-2

Accessibilityinformation
Lenovo is committedtoproviding greateraccess toinformation andtechnologyto
people with disabilities. With assistive technologies, users can access informationin
the way most appropriatetotheirdisability.Someof these technologies arealready
provided in youroperating system; otherscanbepurchased through vendorsor
accessedat: https://lenovo.ssbbartgroup.com/lenovo/request_vpat.php
Adjustingyour monitor image
This sectiondescribestheusercontrolfeatures usedtoadjust your monitorimage.
Usingthedirectaccesscontrols
The directaccess controls can beused when theOn Screen Display(OSD)is not
displayed.
Table2-1.Directaccess controls
IconControlDescription
ImageSetupActivatesautomaticimageadjustment.
BrightnessDirectaccess toBrightnessadjustment.
InputChangeSwitches thevideo inputsource.
UsingtheOn-Screen Display(OSD) controls
The settings adjustable with the usercontrols areviewed through the On-Screen
Display (OSD),asshownbelow.
2-3 LT2452pwC FlatPanel Monitor User’sGuide

To use the controls:
1. Press to open the main OSD menu.
2. Use or to move among the icons. Select an icon and press to access
that function. If there is a sub-menu, you can move between options using or
then press to select that function. Use or to make adjustments. Press to
save.
3. Press to move backwards through the sub-menus and exit from the OSD.
4. Press and hold for 10 seconds to lock the OSD. This will prevent accidental
adjustments to the OSD. Press and hold for 10 seconds to unlock the OSD and allow
adjustments to the OSD.
5. Enables DDC/CI by default. Use OSD Exit Key, Press and hold the button for
10 seconds to disable / enable DDC/CI function. The words “DDC/CI Disable” or
“DDC/CI Enable” will be displayed.
Chapter 2. Adjusting and using your monitor 2-4

Table2-2.OSDfunctions
OSD Icon
onMain
Menu
SubmenuDescriptionControls and
Adjustments
(Analog)
Controls
and
Adjustments
(Digital)
Brightness-
/Contrast
Brightness
Adjustsoverallbrightness
Contrast Adjustsdifference betweenlightanddarkareas
.
Sameas
Analog
Image
Position
HorizontalPosition Moves theimageleftorright
VerticalPosition Moves theimageupordown.
Controls
Locked not
required for
digitalinput
Image
Setup
Automatic Automaticallyoptimizes theimage.
Manual Manuallyoptimizes theimage. See "Menualmagesetup"page3-4.
.Clock .Phase .Save
Image
Properties
Color
Presetmode
Custom
Adjustsintensityofred, green,andblue.
ReddishsRGB *NeutralBluish
.. ..
.Red:Increases ordecreasesthesaturationof"red"intheimage.
.Green:Increases ordecreasesthesaturationof"green"intheimage.
.Blue:Increases ordecreases thesaturationof"blue"intheimage.
.Save:Savesthecustomcolorchoices.
InputSignal
Thismonitorcanacceptvideo signalsthroughthree different
connectors. Mostdesktop computers useaD-SUB connector.Select
digitalamongOSDControlswhenyouuse DVI connector.
.Selects D-SUB(Analog)
.Selects DVI (Digital)
.Selects DP
Scaling
Expends imagesizetofullscreen.
.Off (OriginalAR):sameAspectRatiowithinputsignal.
.On(Full):Expends imagesizetofullscreen.
Over Drive
Super Visual
Response time enhancement.
Enhance visual performance.
Sameas
Analog
Shows resolution,refreshrate, andproductdetails. Note:Thisscreen
Information does notallowanychangestothesettings.Options
Thissectionliststhelanguages supported byyourmonitor.
Note: ThelanguagechosenonlyaffectsthelanguageoftheOSD.It
MenuLanguage has noeffectonany softwarerunning onthecomputer.
Sameas
Analog
*Note:Brightness and Contrast cannotbe adjusted insRGBmode.
2-5 LT2452pwC FlatPanelMonitorUser’sGuide
Table of contents
Other ThinkVision Monitor manuals
