12
各部件名稱 -------------------------
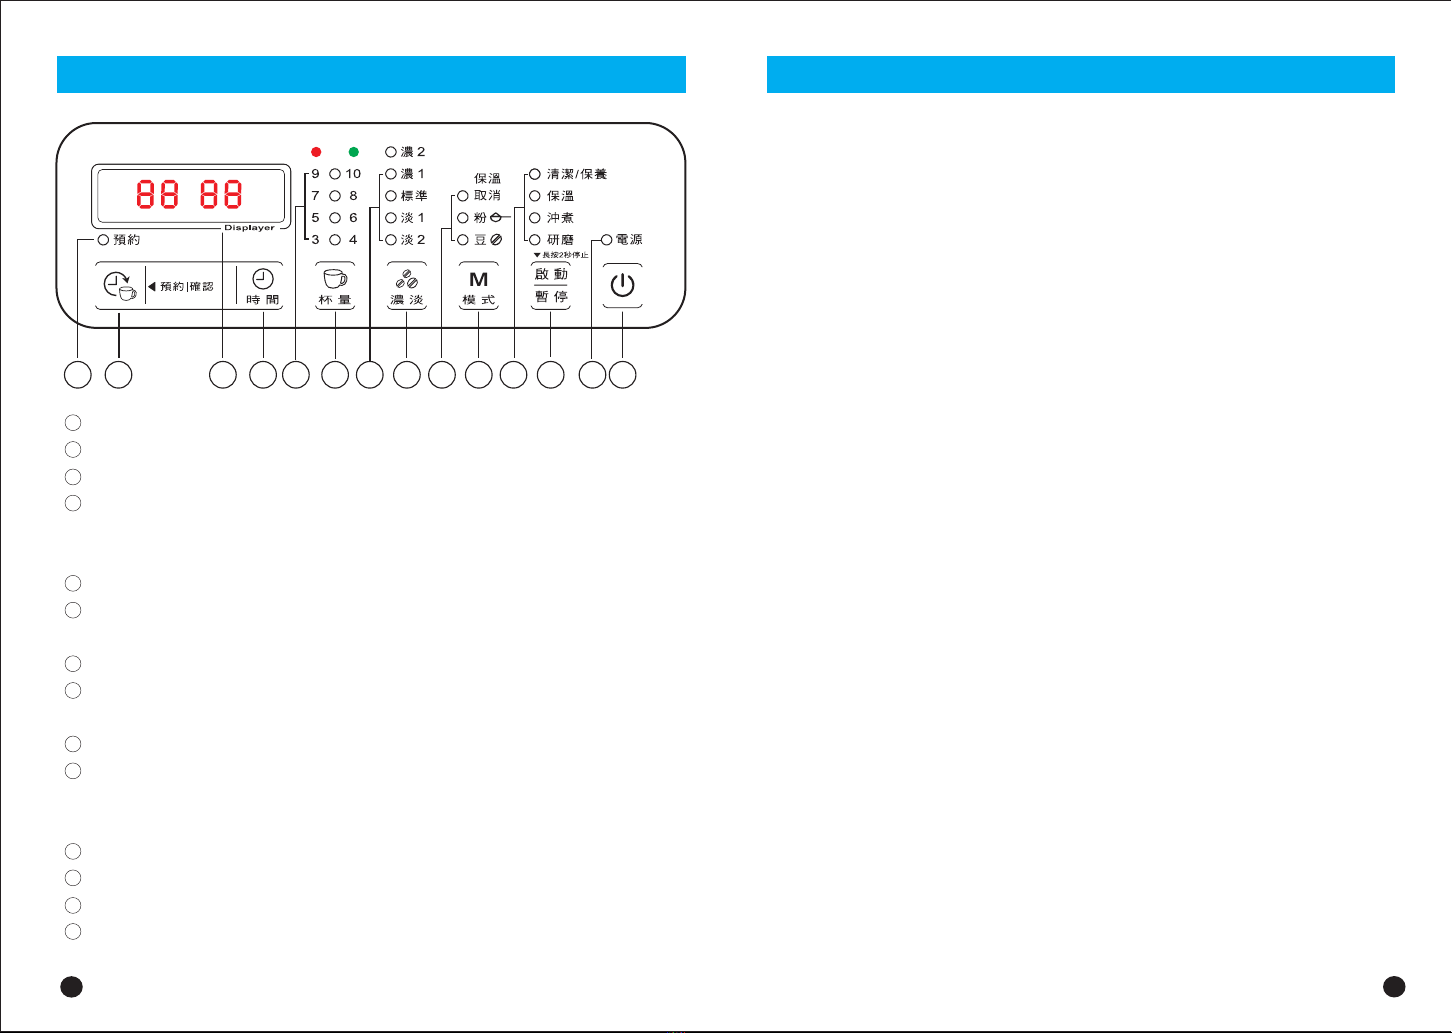
控制面板說明- ----------------------
安全注意事項- ----------------------
首次使用前- ------------------------
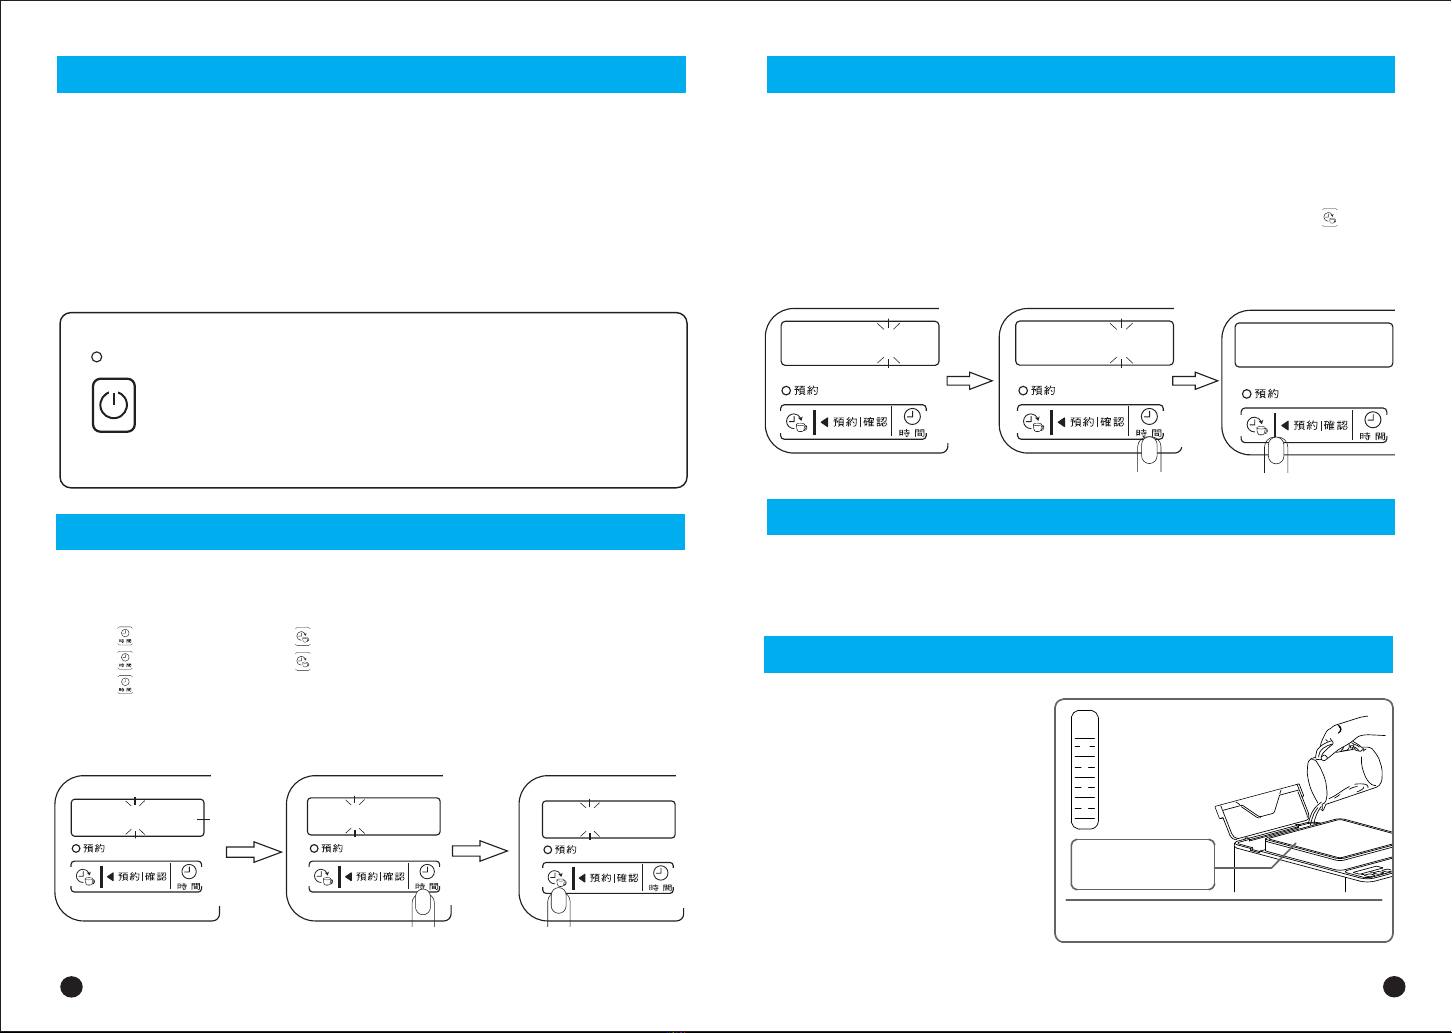
設置時鐘 --------------------------
設置保溫時間- ----------------------
沖洗產品 --------------------------
給水箱注水- ------------------------
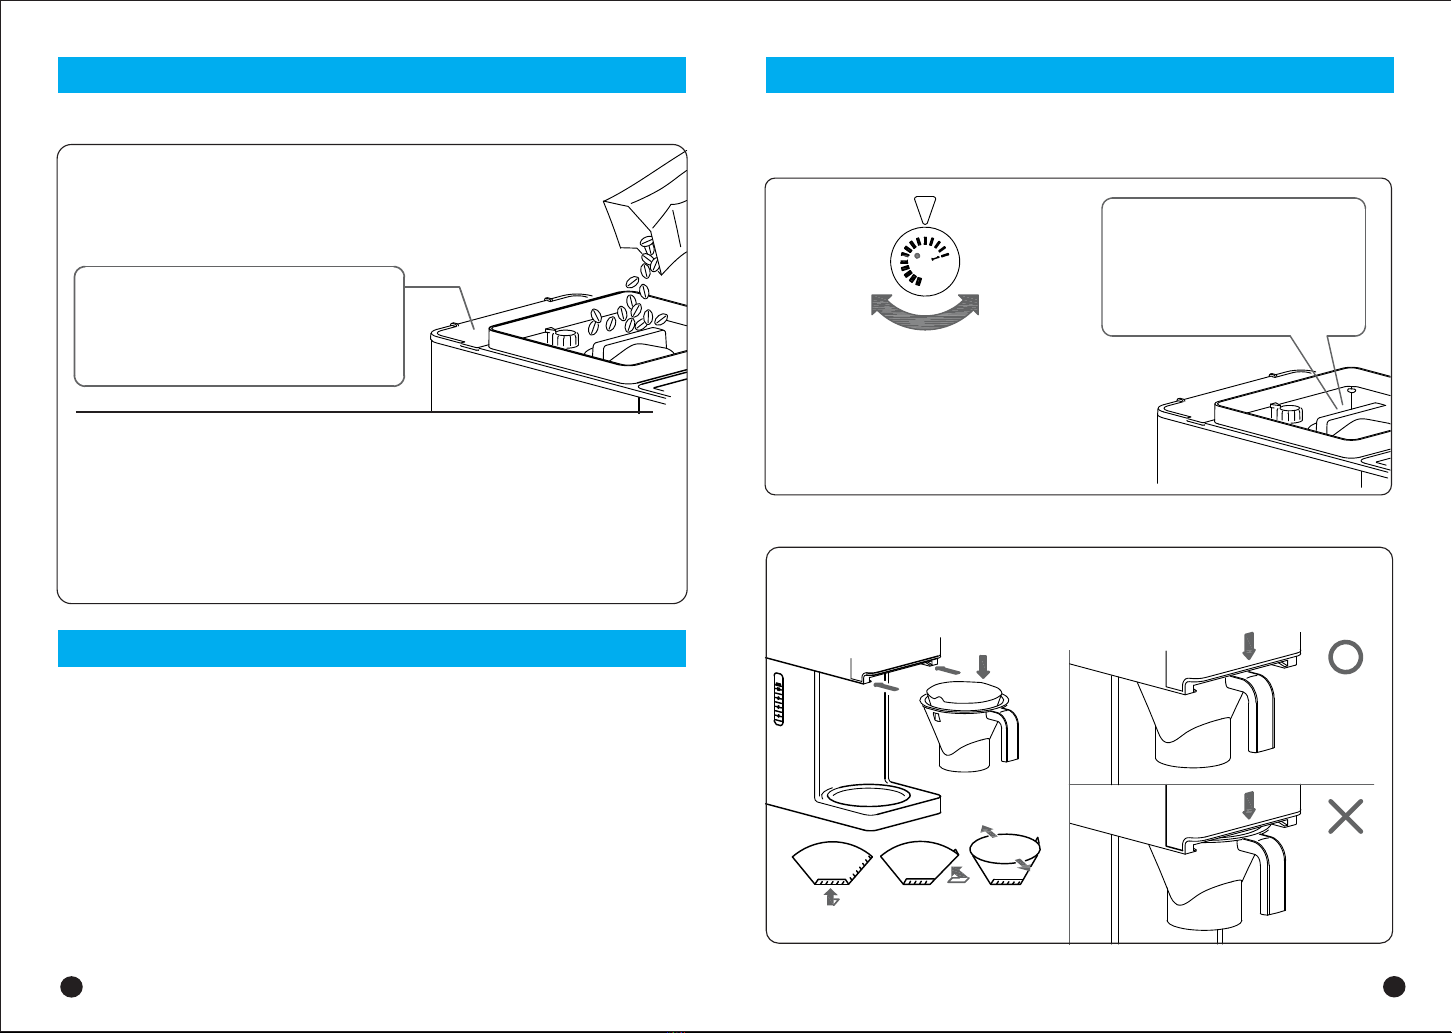
使用咖啡豆- ------------------------
研磨程度设置 -----------------------
将咖啡壶放到保温板上 ----------------
开始沖煮 --------------------------
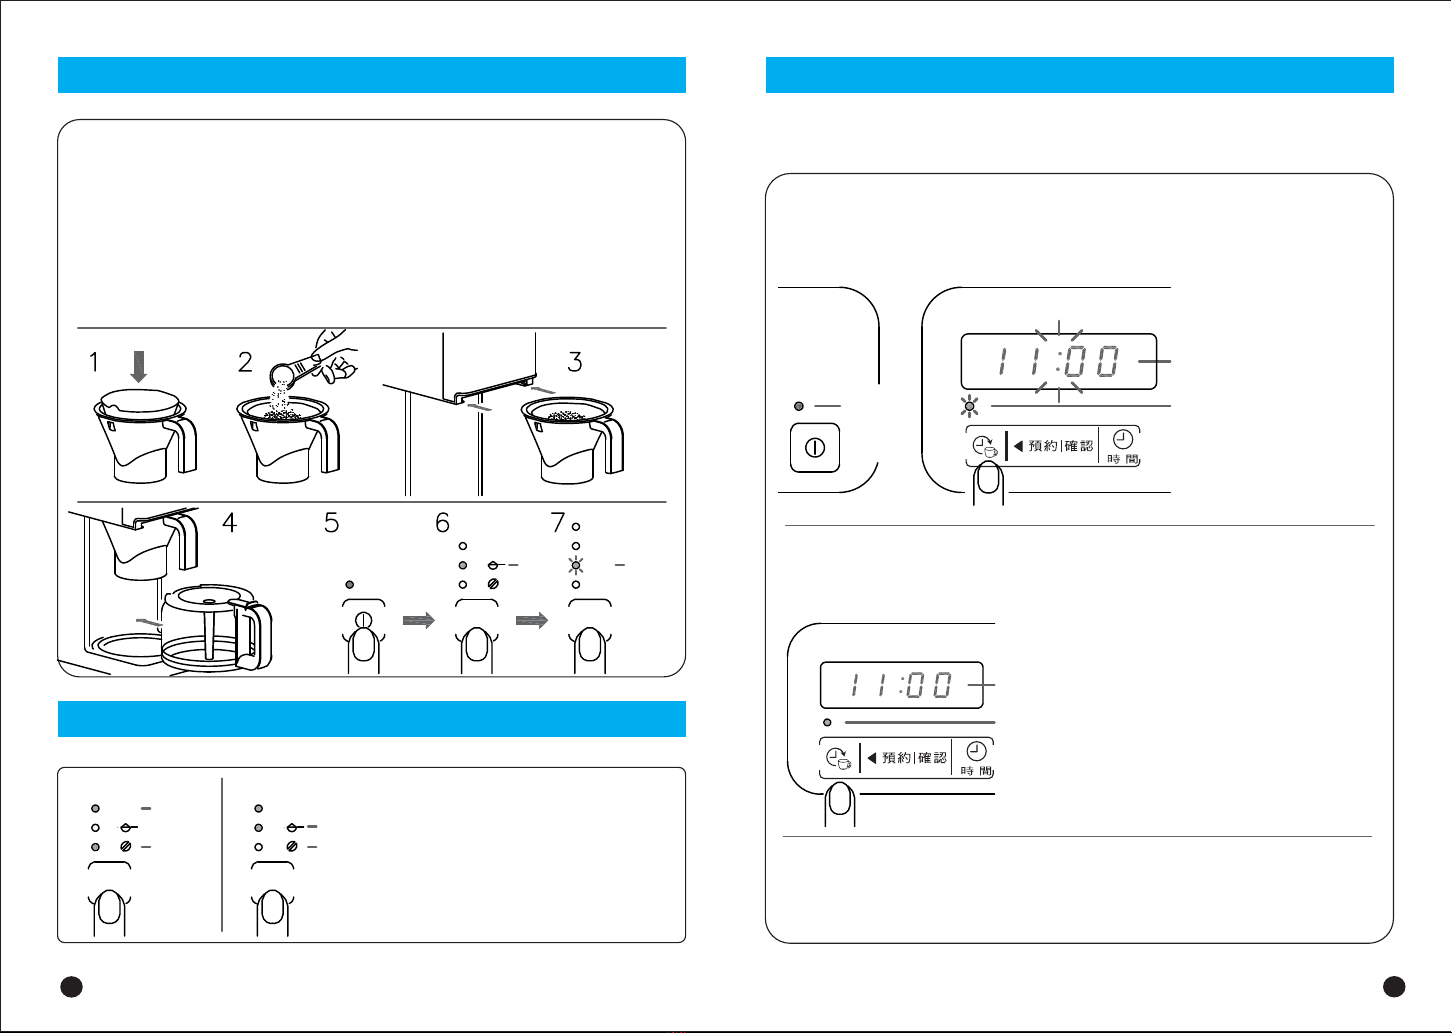
使用預磨咖啡 -----------------------
保溫取消 --------------------------
設置/使用預約計時器 -----------------
沖煮暂停 --------------------------
防滴功能 --------------------------
清潔和保養-------------------------
清潔和保養研磨器/開啓咖啡通道
拆卸與組裝保護蓋/拆卸上研磨刀
清潔下研磨器/組裝上研磨刀/爲咖啡機除垢
故障種類與處理方法/故障診斷 ----------- 19-20
規格------------------------------ 20
⽬錄
免責 聲明
聲明:
本手冊業經仔細檢查及校對,但仍不排除文字拼寫及技術錯誤之可能,若因錯誤
導致與實機不符時,以實機為準,此種錯誤或疏漏不能當呈堂的依據,其將於新
版予以修正。
本手冊之全部內容,本公司享有隨時修改之權力,且不另行通知。
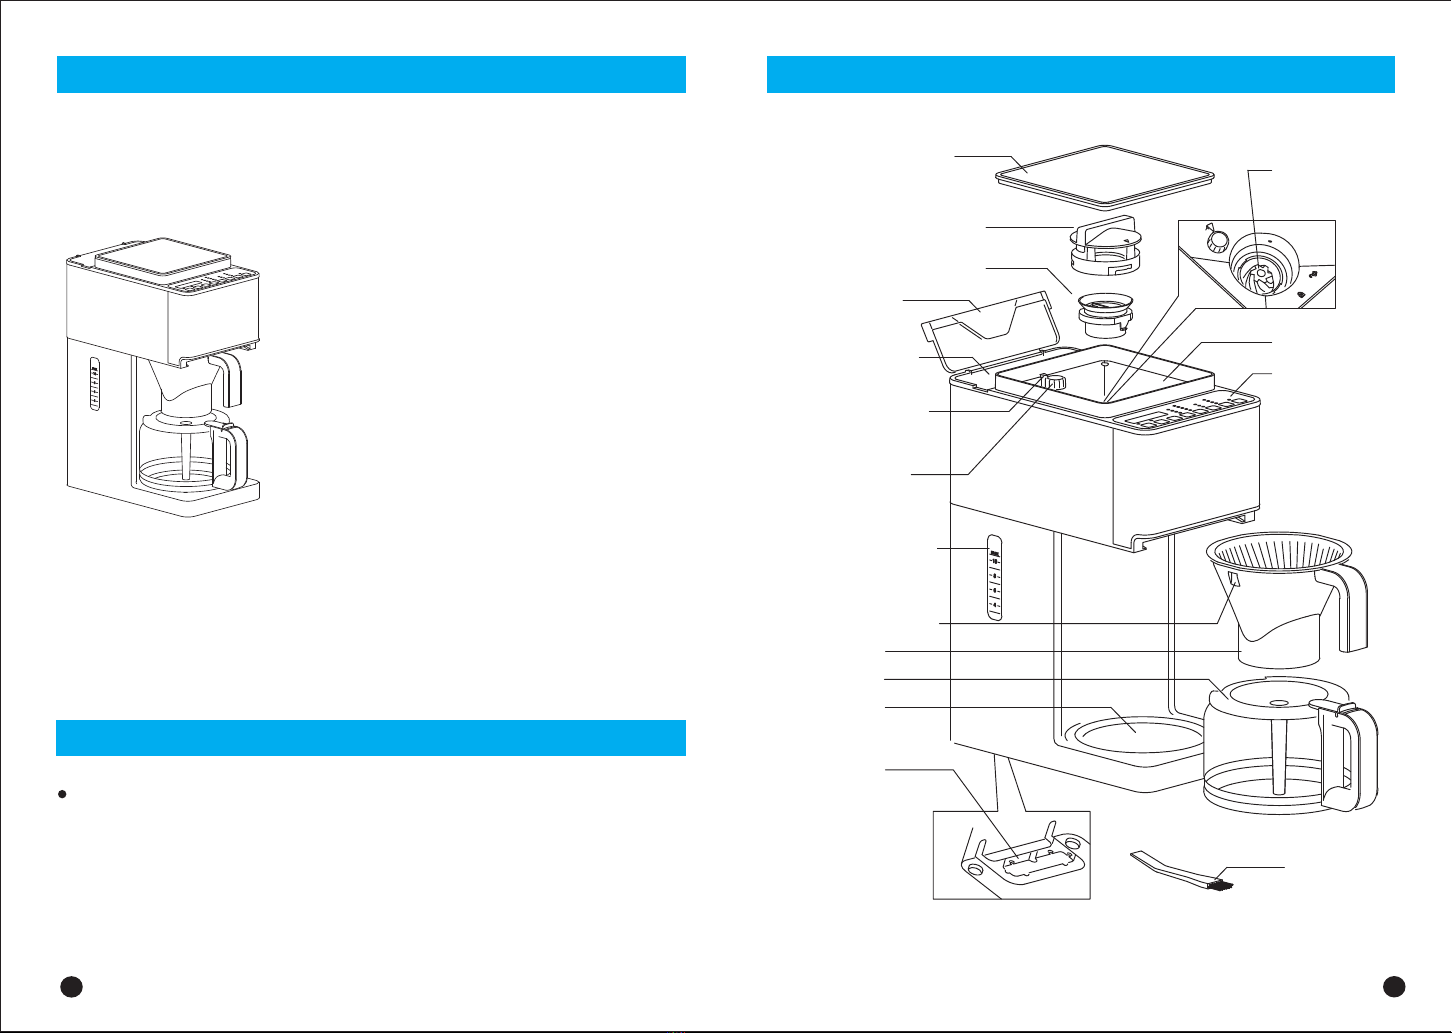
各部件名稱
上研磨刀(可拆卸)
A.咖啡豆容器盖
B.安全保护盖(可拆卸)
C.水箱盖
水箱注水口
D.粗细指示器
(上研磨刀释放)
E.粗细选择旋钮
(上研磨刀释放)
水箱水位刻度
F.过滤杯溢水口
G.过滤杯
H.咖啡壶
I.保温板
J.理线槽
(将多余的线绕於此)
下研磨刀
(不可拆卸)
咖啡豆容器
控制面板
刷子
2
3
4
5
5
6
6
6
7
8
9
10
11
11
12
13
13
14-18