5EN
A - SAFETY INSTRUCTIONS
1 - OPERATING PRECAUTIONS
• Follow all instructions as improper installation
maycauseseriousinjury.
• ThecompanyAvidsenwaivesallresponsibility
for damage if the installation has not been
madeasindicatedinthisguide.
• This product is suitable for its intended use,
ie a motorized shutters. Any other use is
considereddangerous.
• It is strictly forbidden to change any of the
informationprovidedinthis kitoruseanother
elementnotspeciedinthisguide.
• The power supply of the motorized shutters
must comply to standards (NF C 15-100)
andshouldbepreferablyinstalledbyqualied
personnel.
• The power cable of this product can be
replacedbyacableofthesametypeprovided
bythecompanyAVIDSEN.Donotattemptto
openorrepairanycomponents,exceptforthe
insertionorreplacementofbatteries.
• This appliance is not intended for use by
persons (including children) with reduced
physical,sensoryormentalcapacities,orlack
ofexperienceorknowledge,unlesstheyhave
been given instruction concerning the use of
theappliancebyapersonresponsiblefortheir
safety.Childrenshouldbesupervisedtoensure
theydonotplaywiththeappliance.
• Controldevicesmustbeinstalledataheightof
atleast1.5mawayfrommovingparts.
• Make sure that the characteristics of the
components are compatible with the rated
torqueandtheoperatingtimeassigned.
2 - MAINTENANCE AND CLEANING
• Always unplug the products from the mains
beforecarryingoutanymaintenance.
• Beforeanymaintenance,cutoffpowersupply
(circuitbreakerposition«OFF»).
• Do not change the motor gear unless
authorisedbyourtechnicalservice.
• Incaseoffailure,thepartmustbereplacedby
anewandoriginalpartandnothingelse.
• Performperiodicalcheckstodetectanysigns
of wear or damage to the panel, mechanical
partsandassembly.
• Do not use the appliance if any repair or
adjustmentisnecessary.
3 - RECYCLING
Disposing of used batteries in the
household waste is strictly forbidden.
Batteries/accumulatorscontaining harmful
substances are marked with symbols
(shownopposite)whichindicatethatitisforbidden
to discard them in the household waste. The
corresponding heavy metal designations are as
follows:
Cd=cadmium,Hg=mercury,Pb=lead.
You can dispose of these batteries/accumulators
at local recycling amenities (centres for sorting
recyclable materials) which are required to accept
them.Keepbatteries/buttoncells/accumulatorsout
ofreachofchildrenandstoretheminasafeplace
notaccessibletothemastheycouldbeswallowed
by children or domestic animals. May be fatal if
swallowed.Intheeventthatabatteryisswallowed,
consult a doctor immediately. Take care not to
shortcircuitthebatteries,throwthemintothere,
or recharge them as there is a danger they might
explode!
This logo denotes that devices which are
no longer used must not be disposed of
as household waste as they are likely to
contain hazardous substances which are
dangeroustohealthandtheenvironment.
Takethesedevicesbacktoyourdealeroruseyour
council’sselectiverecyclingfacilities.
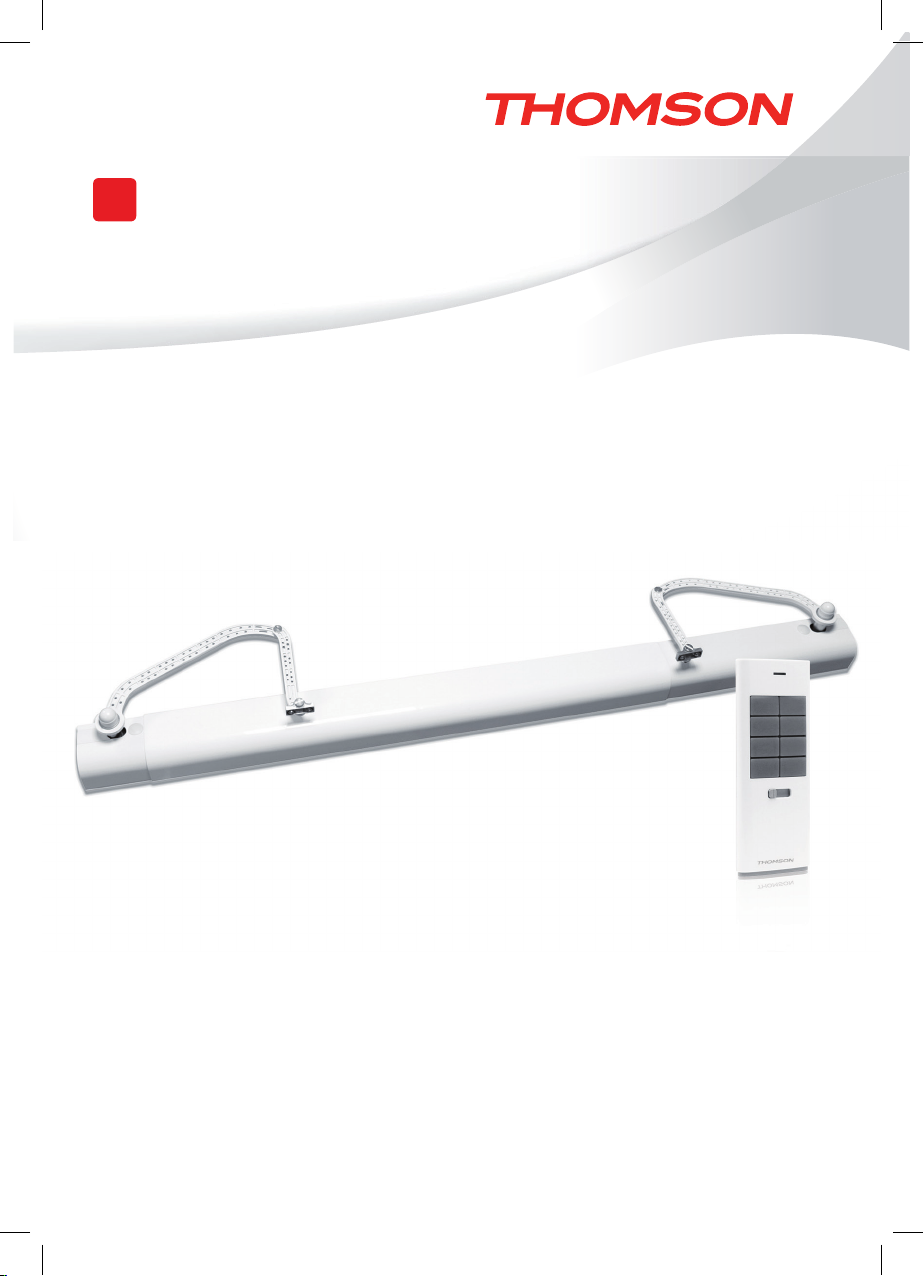
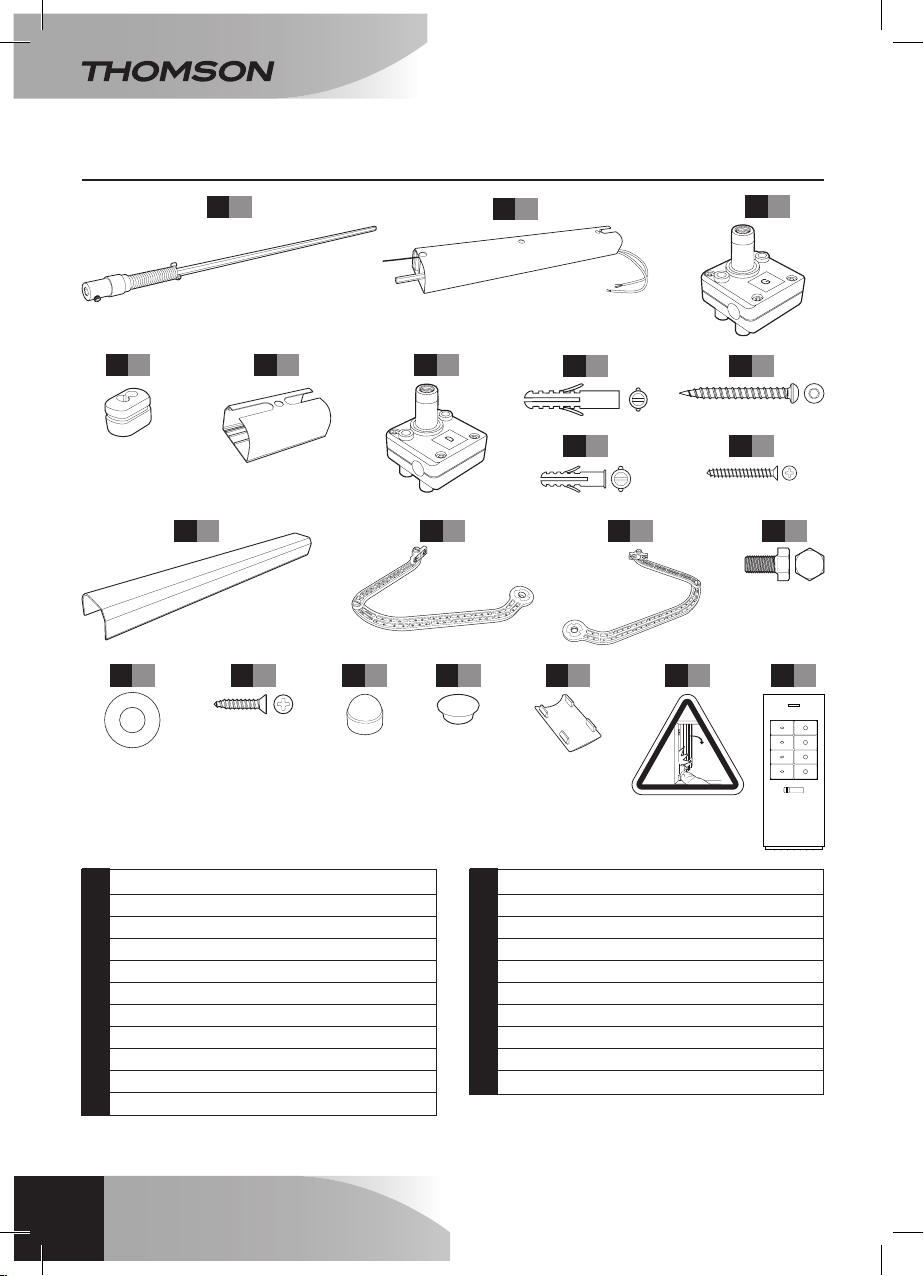
MOTORISED KIT WITH ARTICULATED ARMS
FOR SINGLE OR DOUBLE LEAF SHUTTERS