1
2
3
4
1
IP40 IK07
1.Installation to be carried out by a qualified electrician in accordance with local wiring regulations. Ensure that the
rated voltage and frequency of the luminaire are compatible with the electrical supply.
2.Disconnect mains supply before installing, servicing or maintaining the luminaire.
3.The manufacturer, shall not be liable for any damage resulting from inappropriate modifications to the luminaire or
faulty installation.
4.The light source contained in this luminaire shall only be replaced by the manufcturer or their serice agent or a
similar qualified person.
5.The light source can’t be replaced. The control gear provides basic insulation between the LV supply and the
control circuit.
6.Specification: These luminaires are designed to comply with the requirements of AS/NZS 60598 and AS/NZS 2293.
EN Installation Instructions
VOYAGER BLADE SURFACE
SAP code
96294579
Product Description
VOYAGER BLADE SURFACE 24M E2M
EAN
9415167080238
Length*Width*Height
Power consumption
Input Voltage
Battery
Charging time
Autonomy
Temperature
Operating mode
Viewing distance
Spacing classification
Ingress protection
Material/finish
Mounting
Warranty
Zumtobel LIGHTING GmbH
Schweizer Strasse 30 A-6851 Dornbirn AUSTRIA
1
2
3
4
5
x1
x1
x1
x1
x1
23
5
4
350*73*220
3W
220-240V AC, 50/60Hz
Lithium-iron phosphate (LiFePO4)
16 hours
3 hours
0°C to 40°C
Maintained with manual test switch
24m (for single or double sided viewing)
C0=D8, C90=D4
IP40
Polycarbonate
Ceiling, Wall
5 years luminaire, 3 years battery
L
N
L
N
Input
L
L
73mm
220mm
350mm
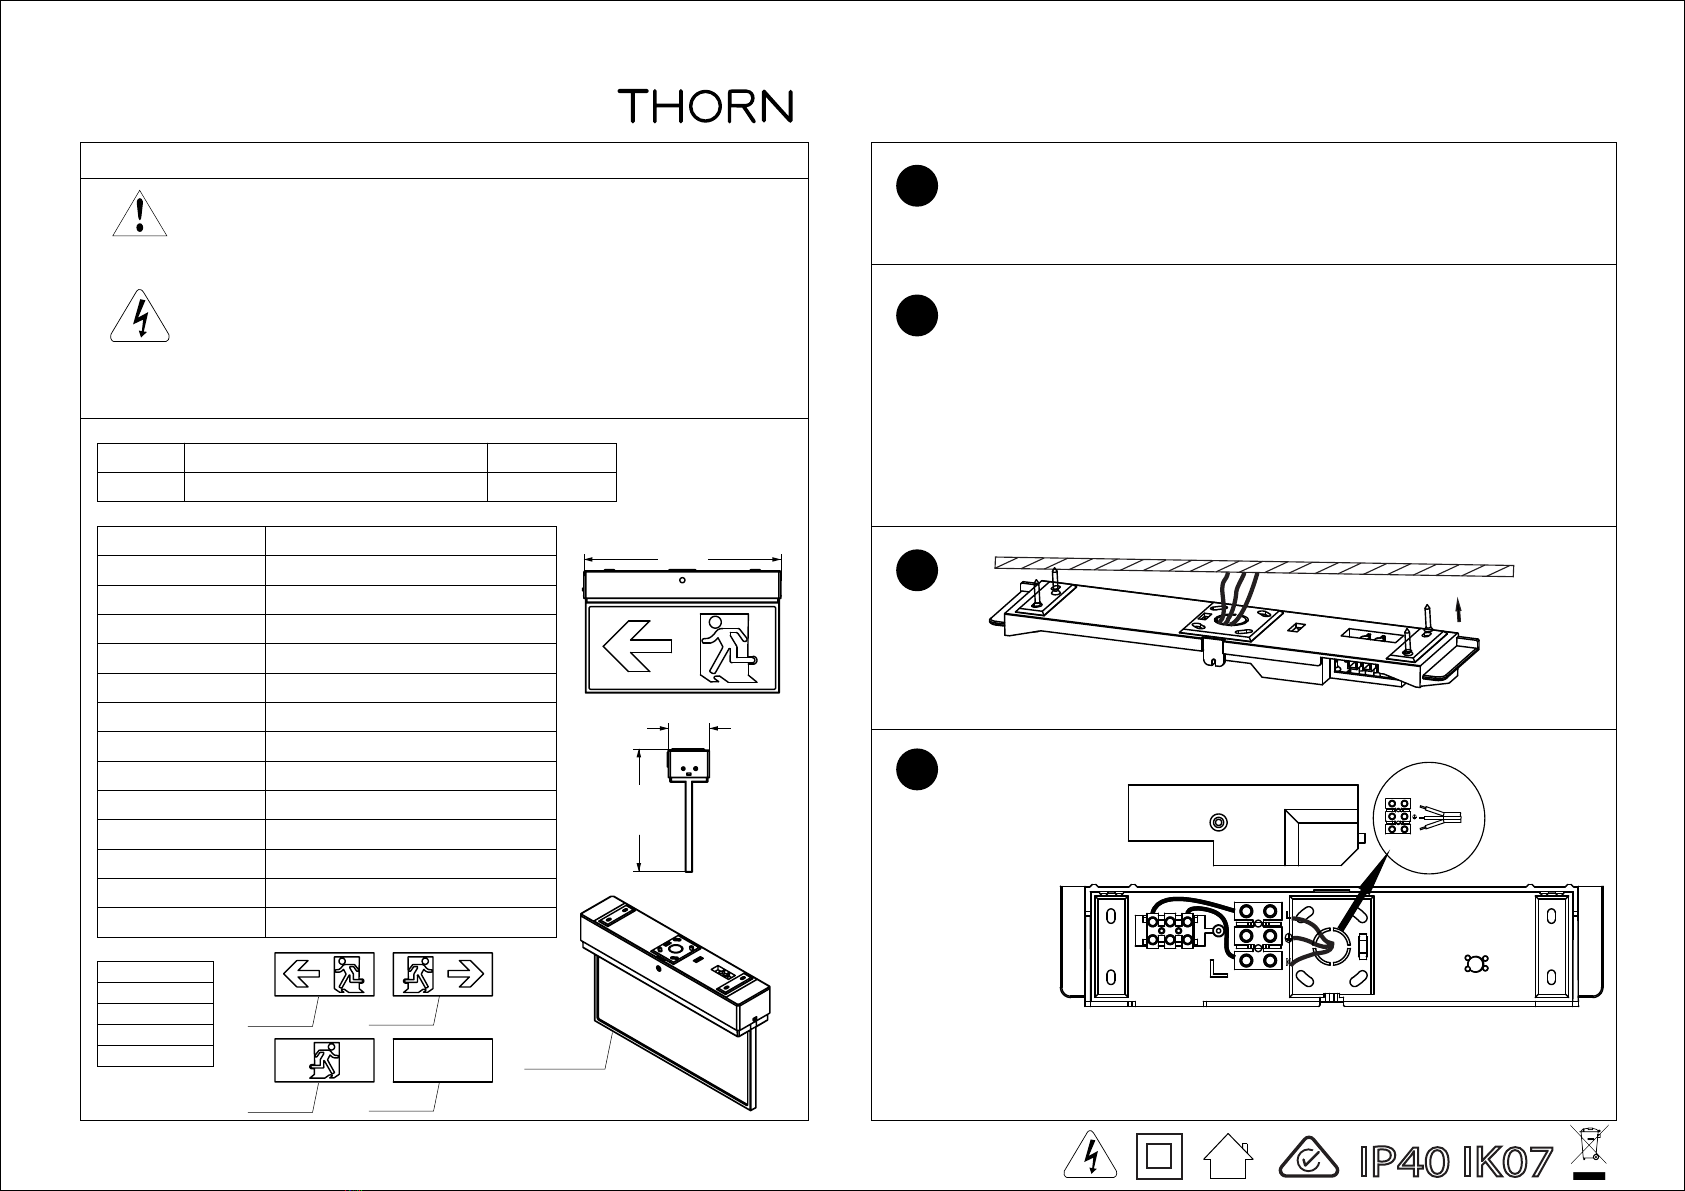
1
Determine Location
In accordance with the relevant parts of AS/NZS 2293 determine a suitable location for installation.
Attach the Signage Screens
Ensure that hands are clean and no dirt or dust can be trapped beneath the screens. Determine the
appropriate signage screens to use based on the luminaire installation location.
NB- Take care not to crease the sign media or damage the edges. Ensure the signage points in the correct
orientation.
To insert the screen gently slide into the top cavity of the diffuser panel and gently bend and slide
into position observing the diffuser brackets on the sides and bottom.
Gently pull the bottom diffuser bracket downwards to assist fitting or removing screens.
Remove the plate by slding it away. Mount the plate to the ceiling or wall.
Unscrew the cover for the
terminal block.
Connect wiring to the terminals, then secure the cover back on.


