Thornwave Labs PowerMon-D4 User manual

1
PowerMon-D4
Bluetooth LE Enabled
4.3” Color Display with Touchscreen
–USER MANUAL –

2
BRIEF
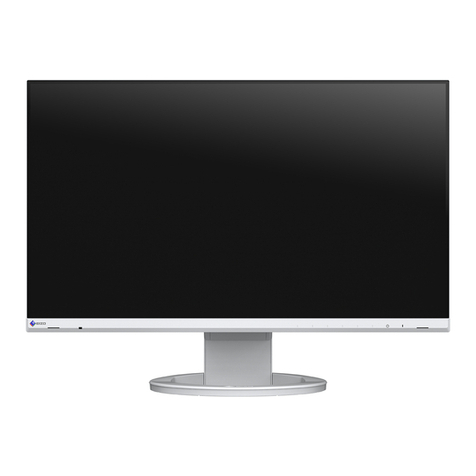
PowerMon-D4 is a low-power, 4.3-inch color touchscreen display intended to be used together with the
PowerMon line of battery monitors / DC power meters. The display can be mounted on any flat surface and has
a modern, low-profile look. The display connects to the PowerMon battery monitors via the integrated
Bluetooth Low Energy radio. No wiring is required, other than supplying 8 ~ 65V power. The screen is optimized
for low power consumption. Multiple power saving modes are available from reducing the brightness after a
period of inactivity to completely turning the screen off.

3
FEATURES
•4.3”, IPS, high resolution (800x480), true
color screen with capacitive touchscreen
•Visible from wide angles
•Bluetooth Low Energy radio
•WiFi enabled (802.11n)
•Can operate in 12, 24 and 48V systems (8 ~
65V)
•Optimized for low power consumption (as
low as 15mA @ 48V)
•Displays information from the PowerMon
battery monitors
TYPICAL APPLICATIONS
•RVs, boats, off-the-grid cabins
•Solar and wind alternative energy systems
•Backup electrical systems

4
SPECIFICATIONS
Absolute Maximum Ratings 1
Maximum power supply voltage
+65V DC
Operating temperature
-30°C to +85°C
Performance Parameter 2, 3
Value
Power supply voltage
8V to 65V DC
Typical current consumption (brightness at 70%, WiFi
off, connected to BLE battery monitor)
at 12V
at 24V
at 36V
at 48V
at 60V
81 mA
44 mA
31 mA
26 mA
23 mA
Minimum power consumption (power saving mode
active, WiFi off, connected to BLE battery monitor)
at 12V
at 24V
at 36V
at 48V
at 60V
38 mA
23 mA
18 mA
15 mA
14 mA
Minimum power consumption (power saving mode
active, screen off, WiFi off, connected to BLE battery
monitor)
at 12V
at 24V
at 36V
at 48V
at 60V
29 mA
18 mA
14 mA
12 mA
11 mA
1. Stresses greater than those listed under “Absolute Maximum Ratings” may cause permanent damage to the device.
2. All measurements are made at 25C (77F)
3. Enabling WiFi will increase the current consumption by 2mA on average

5
COMPLIANCE STATEMENTS
FCC
ATTENTION: Changes or modifications not expressly approved by Thornwave Labs Inc could void the
user's authority to operate the equipment.
ATTENTION:This device complies with Part 15 of the FCC rules. Operation is subject to the following two
conditions: (1) this device may not cause harmful interference and (2) this device must accept any interference
received, including interference that may cause undesired operation.
ATTENTION: Cet appareil est conforme à la Partie 15 des règlements de la FCC. L'opération doit se
conformer aux deux conditions suivantes: (1) cet appareil ne peut causer d'interférences nuisibles et (2) cet
appareil doit accepter toute interférence reçue, y compris les interférences qui peuvent provoquer un
fonctionnement indésirable.
IC RSS-102 RF Exemption
This system has been evaluated for RF Exposure per RSS-102 and is in compliance with the limits specified
by Health Canada Safety Code 6.
L’exposition aux radiofréquences de ce système a été évaluée selon la norme RSS-102 et est jugée
conforme aux limites établies par le Code de sécurité 6 de Santé Canada.
IC RSS-Gen 8.4
This device complies with Industry Canada license-exempt RSS standard(s). Operation is subject to the
following two conditions: (1) this device may not cause interference, and (2) this device must accept any
interference, including interference that may cause undesired operation of the device.
Le présent appareil est conforme aux CNR d'Industrie Canada applicables aux appareils radio exempts
de licence. L'exploitation est autorisée aux deux conditions suivantes: (1) l'appareil ne doit pas produire de
brouillage, et (2) l'utilisateur de l'appareil doit accepter tout brouillage radioélectrique subi, même si le
brouillage est susceptible d'en compromettre le fonctionnement.

6
SAFETY INSTRUCTIONS
Warning!
Read all the instructions and cautions before using the PowerMon-D4 device. Thornwave Labs Inc does
not assume responsibility for any injury or property damage caused by improper installation, bad wiring, or use
of PowerMon-D4 outside of its intended purpose. The device should be installed by a professional.
Warning!
The PowerMon-D4 device should not be used for any medical purposes, life-sustaining equipment, safety
applications, or any application where equipment failure can cause injury, death, fires, or any other hazard.
Warning!
There are no serviceable parts or fuses inside the screen! Do not disassemble or attempt to repair! The
unit operates with voltages up to 65V which can be lethal or cause serious and permanent injury.
Warning!
Do not submerge under water or other liquids. Do not allow condensation to form on the screen. The
device is neither weatherproof nor waterproof.
Warning!
The device is to be connected to DC circuits only, not exceeding 65V. Failure to do so will result in
equipment damage. Use a fuse or circuit breaker that is properly sized for the circuit.

7
OVERVIEW
Installation. PowerMon-D4 was designed to be installed indoors, where it will be protected from water,
high humidity, condensation, and battery or other corrosive gases. Use the supplied cable to connect power to
the screen. Make sure the connector is fully snapped in to avoid it falling off. The red wire is the positive and
the black wire is the negative. The circuit should be able to supply 8V to 65V at 0.25A minimum. A properly sized
fuse or circuit breaker should be used. The recommended rating is 1A.
The screen can be installed on any flat surface, box, equipment cabinet, wood cabinets and so on. The
device can be installed using the supplied plastic clips or it can be glued. Either way, a cutout must be made in
the surface where the screen is installed. The dimensions for the cutout are shown at the end of this document.
If installed using the supplied clips, the screen can accommodate panel thickness of up to 17mm (0.67”).
The mounting clips can be installed in 2 positions (see images). Position 1 should be used if the panel thickness
is less than 12mm. If the panel is thicker than 12mm (about ½”) then position 2 should be used. Access from the
back of the screen is required for this mounting option.
Position 1 Position 2

8
After selecting the position to install the clips in, prepare them by threading the screws until they barely
exit on the other side of the clip. If they protrude through, you will not be able to rotate the entire clip (needed
later). Do not thread the screws if the ambient temperature is lower than 65F. Cold plastic can crack. The
warmer the better.
Insert the screws mounting the clip to the display. Use the mounting clip as a guide to ensure the screw
is perfectly perpendicular to the back surface of the display. Do not tighten yet.
Rotate the mounting clip 90 degrees with the flat surface facing the outside of the display. This will allow
you to insert the screen through the panel opening. After inserting the screen, rotate the plastic clips back, as
shown in the previous images. At this point you can tighten the screws that hold the clip to the screen. Do not
overtighten.
The screws that hold against the back of the panel should not be overtighten. Insert them until they
touch the back of the panel and only slightly tighten (about 10-15 degrees of rotation after they touch the panel).
Gluing the screen does not require access from the back. Place a bead of glue (epoxy, rubber glue or
some glue that will adhere to both ABS plastic and the panel). Do not apply too much glue to avoid it squeezing
out. Apply the glue towards the skirt of the plastic bezel (away from the edge) to decrease the chances of it
coming out. Press the screen in firmly and apply blue tape to hold it until the glue sets.
Operation. PowerMon-D4 integrates a Bluetooth LE radio, allowing it to connect to the PowerMon line
of battery monitors. The battery monitors require at least version 2.10 of firmware. Only devices with hardware
revision 2.3 or higher can be updated to the latest firmware (all devices sold after mid 2019). A cellphone and
the mobile app are still required to configure the battery monitor since PowerMon-D4 does not have that
capability. Also, PowerMon-D4 cannot connect to a device that is password protected. Remove the password
protection on the battery monitors that PowerMon-D4 will access.
Up to two battery monitors can be used at the same time. To add a device, tap and hold the screen until
the menu overlay appears. Tap on “Add Device”. The display will scan for available devices. Tap on the device
you wish to add. The screen must be able to retrieve information about the device before it can be added. If the
name or the type of a device had not been detected (possibly out of range), it cannot be added. To remove, tap
and hold on a device and select “Forget Device”.
Tap on a device to see the details page. In the same way the mobile application works, tap and hold on
a measurement tab to access features pertaining that measurement.
PowerMon-D4 also has a WiFi network interface. This is used for updating the display firmware
whenever newer one becomes available. This also future proofs the device for features like remote and cloud
access. WiFi can be enabled by accessing the menu (tap and hold) and tapping on WiFi. Select an access point

9
and enter the password if security is used. Captive access points are not supported (typically found at
hotels and airports).
If newer firmware is available, you will be prompted to update when entering the About page.
From the Settings page, the user can change the theme color, adjust the brightness, configure the power
saving features, and reset to factory defaults. The power saving, if enabled, becomes active after 30 seconds of
inactivity (no taps detected).

10
DIMENSIONS
Panel cutout dimensions.

11
ORDERING
Part Number
Description
PowerMon-D4
Bluetooth LE Enabled, 4.3” Color Display with Touchscreen
Table of contents

