Bring your life
thule.com
Date: 05/01/2015
Prod no.: 307056 - 307060; 309920 - 309924
Document: SLW900-02 Bring your life
thule.com
SLW900-03
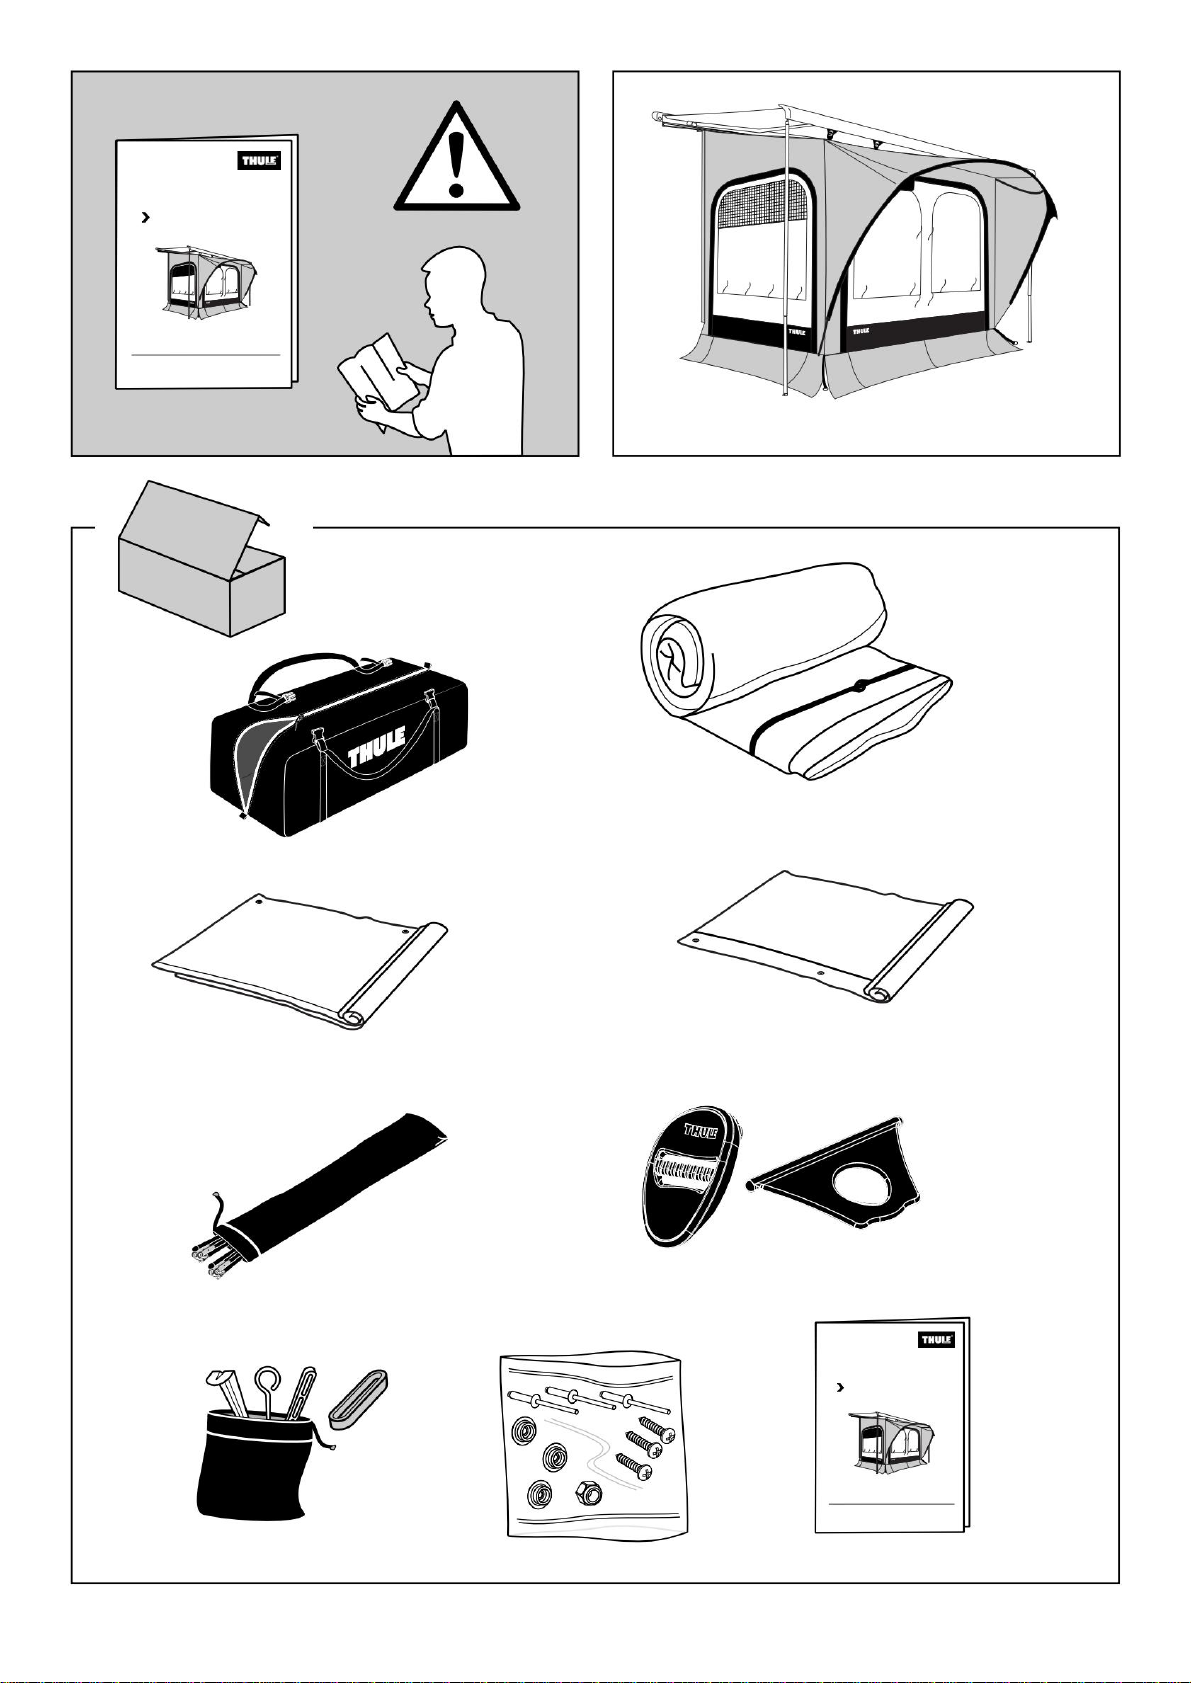
x1
x1 x1
x1
15.7 - 18.4 kg
x1
x1
x8
x1
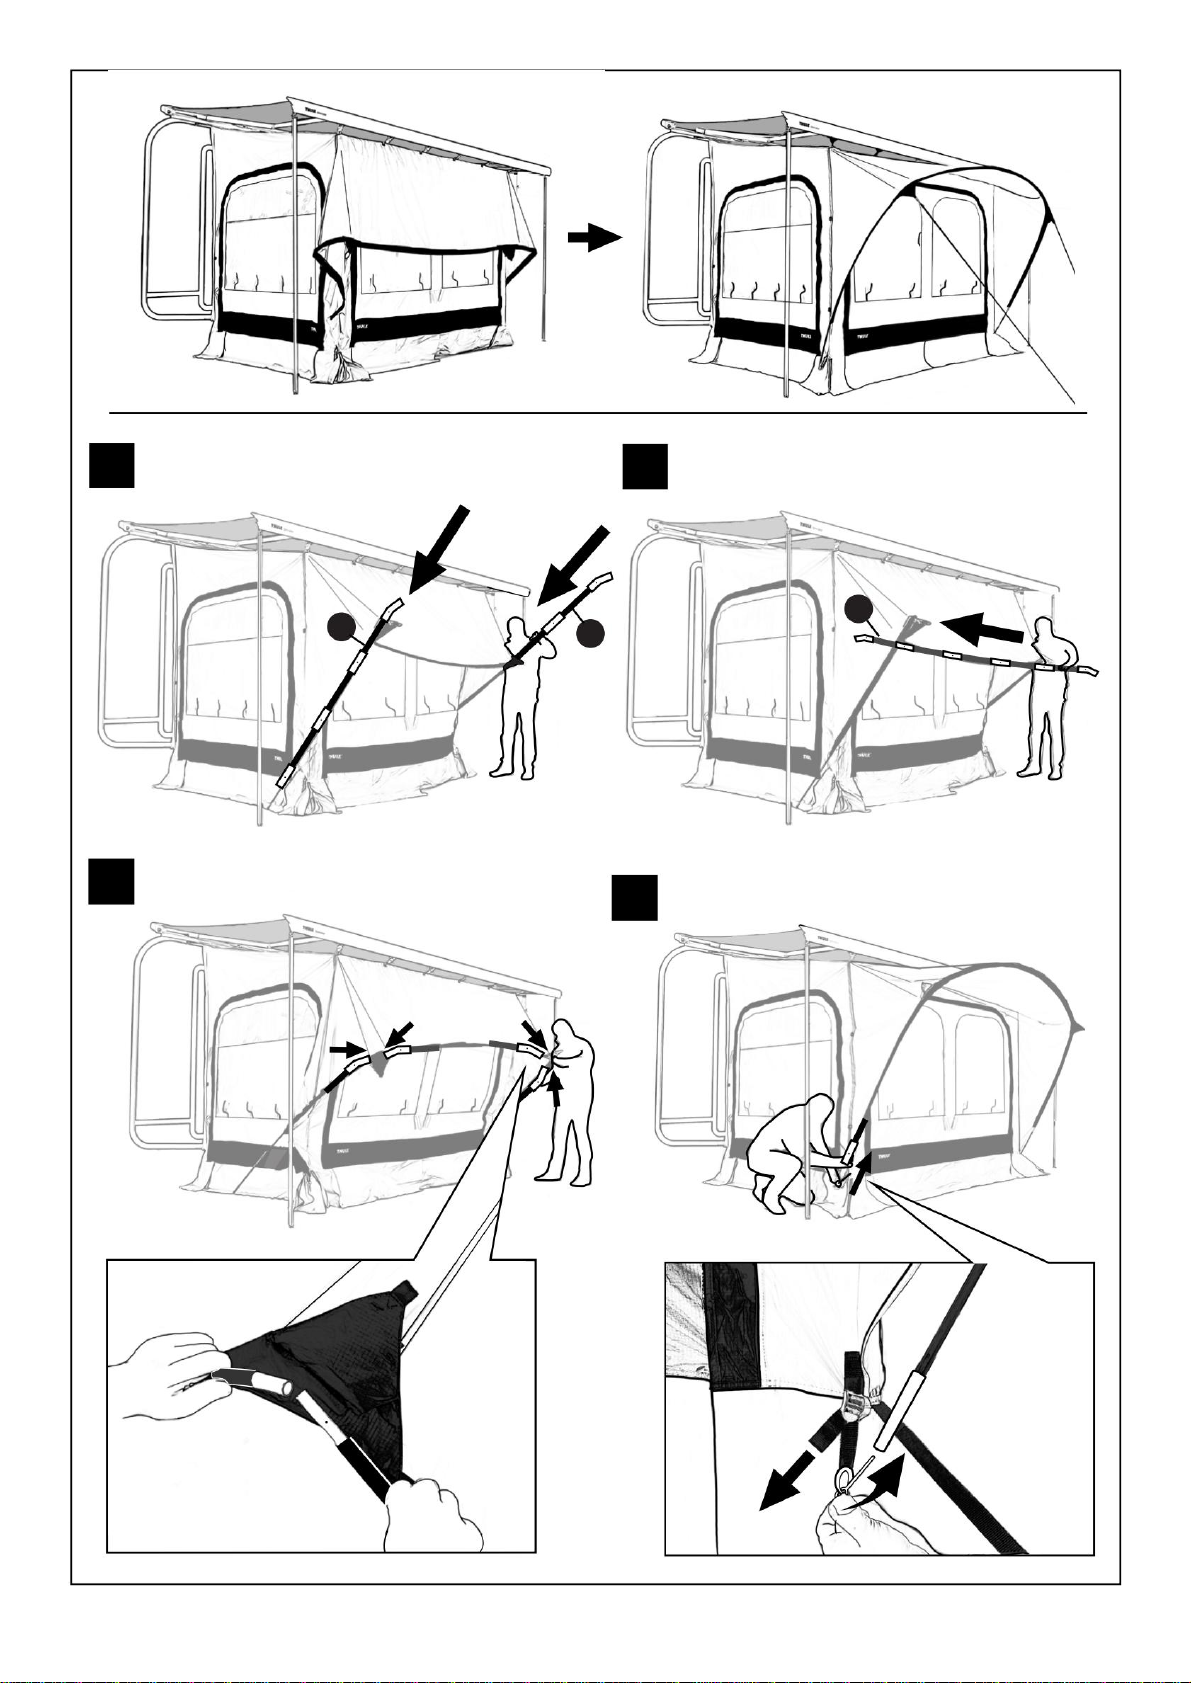
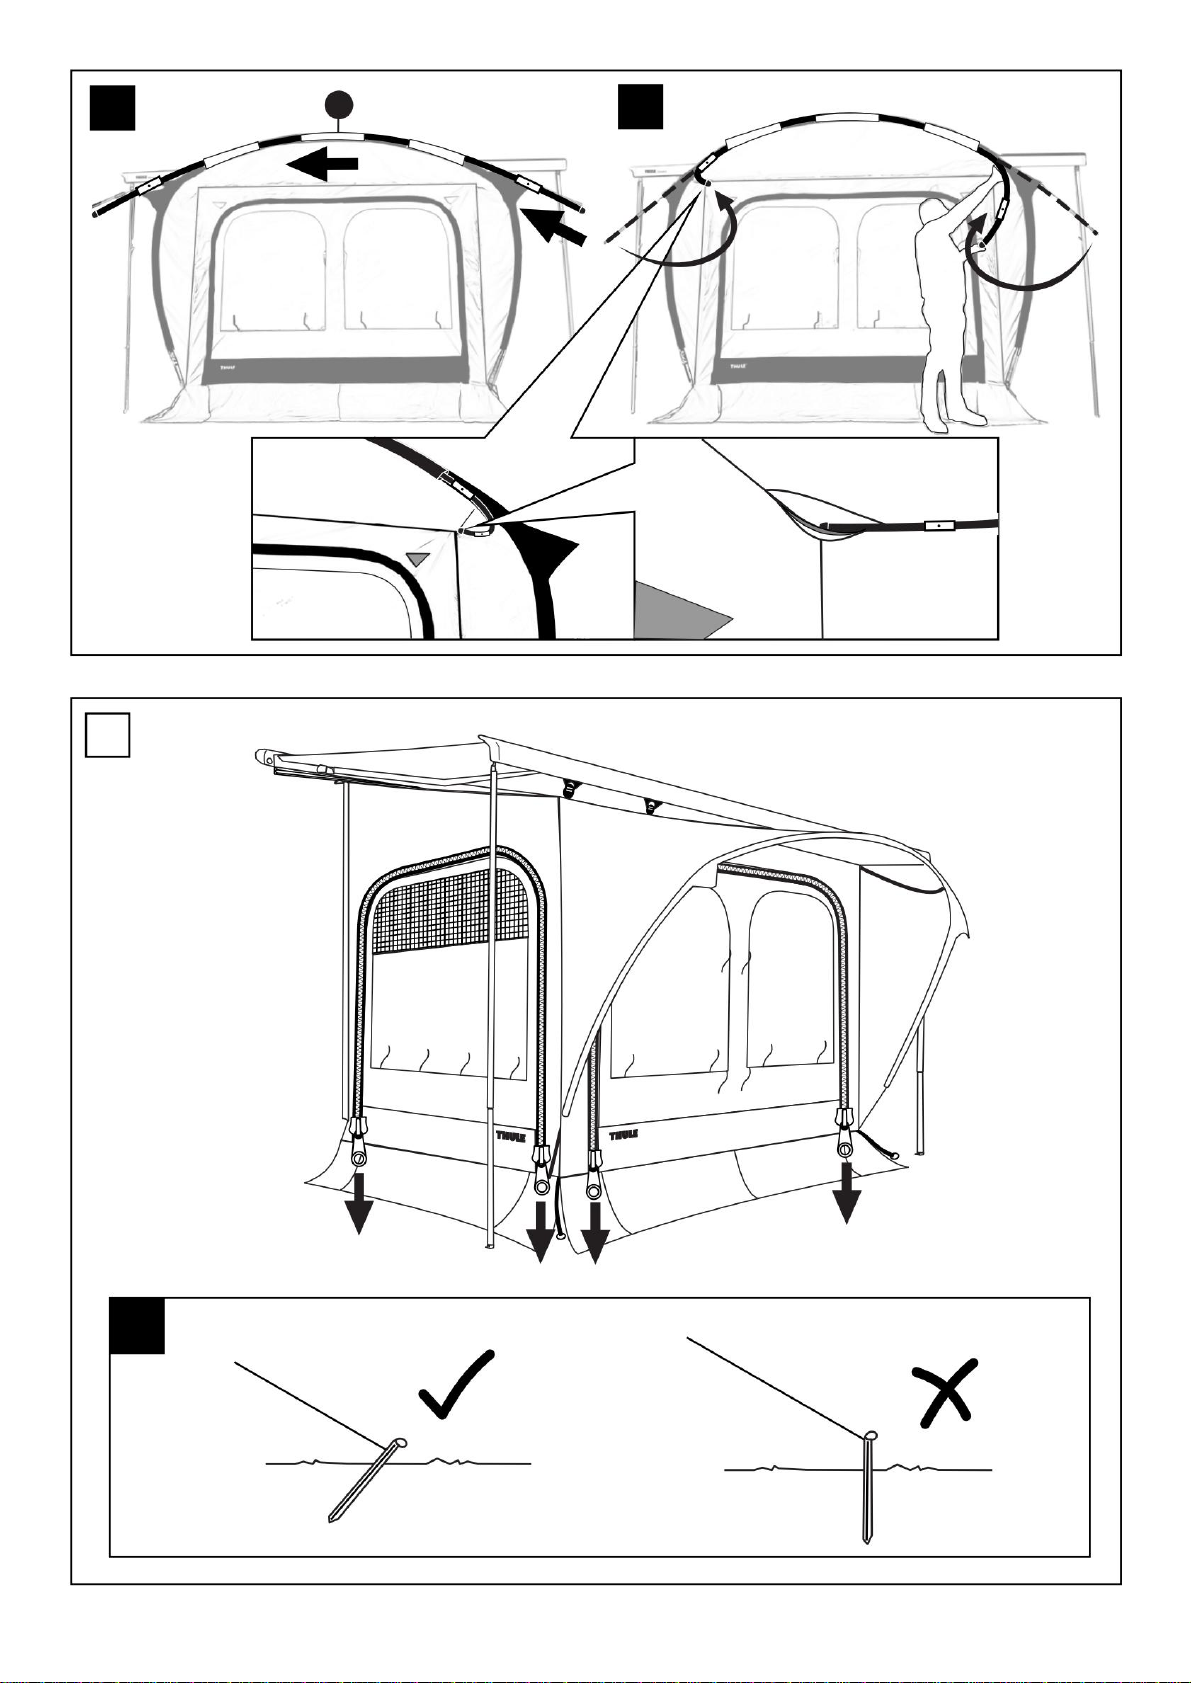
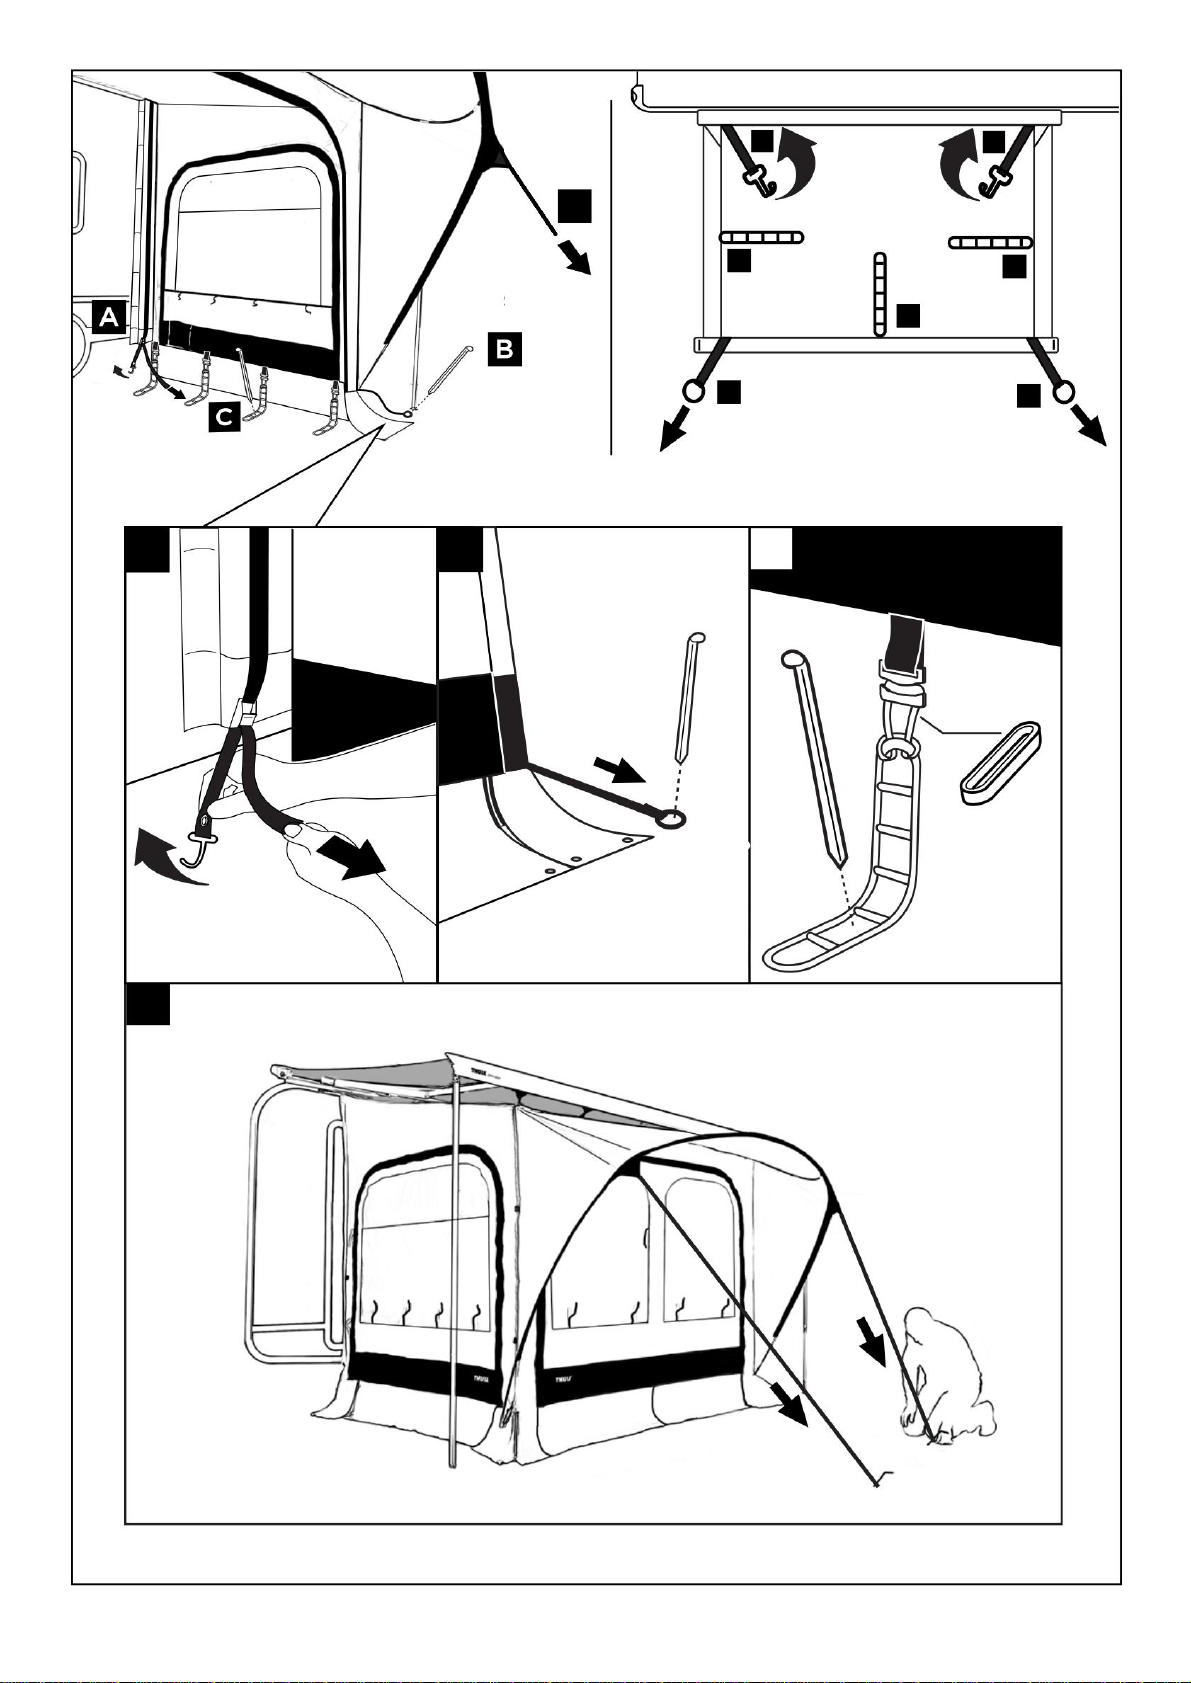
2
SWEDEN
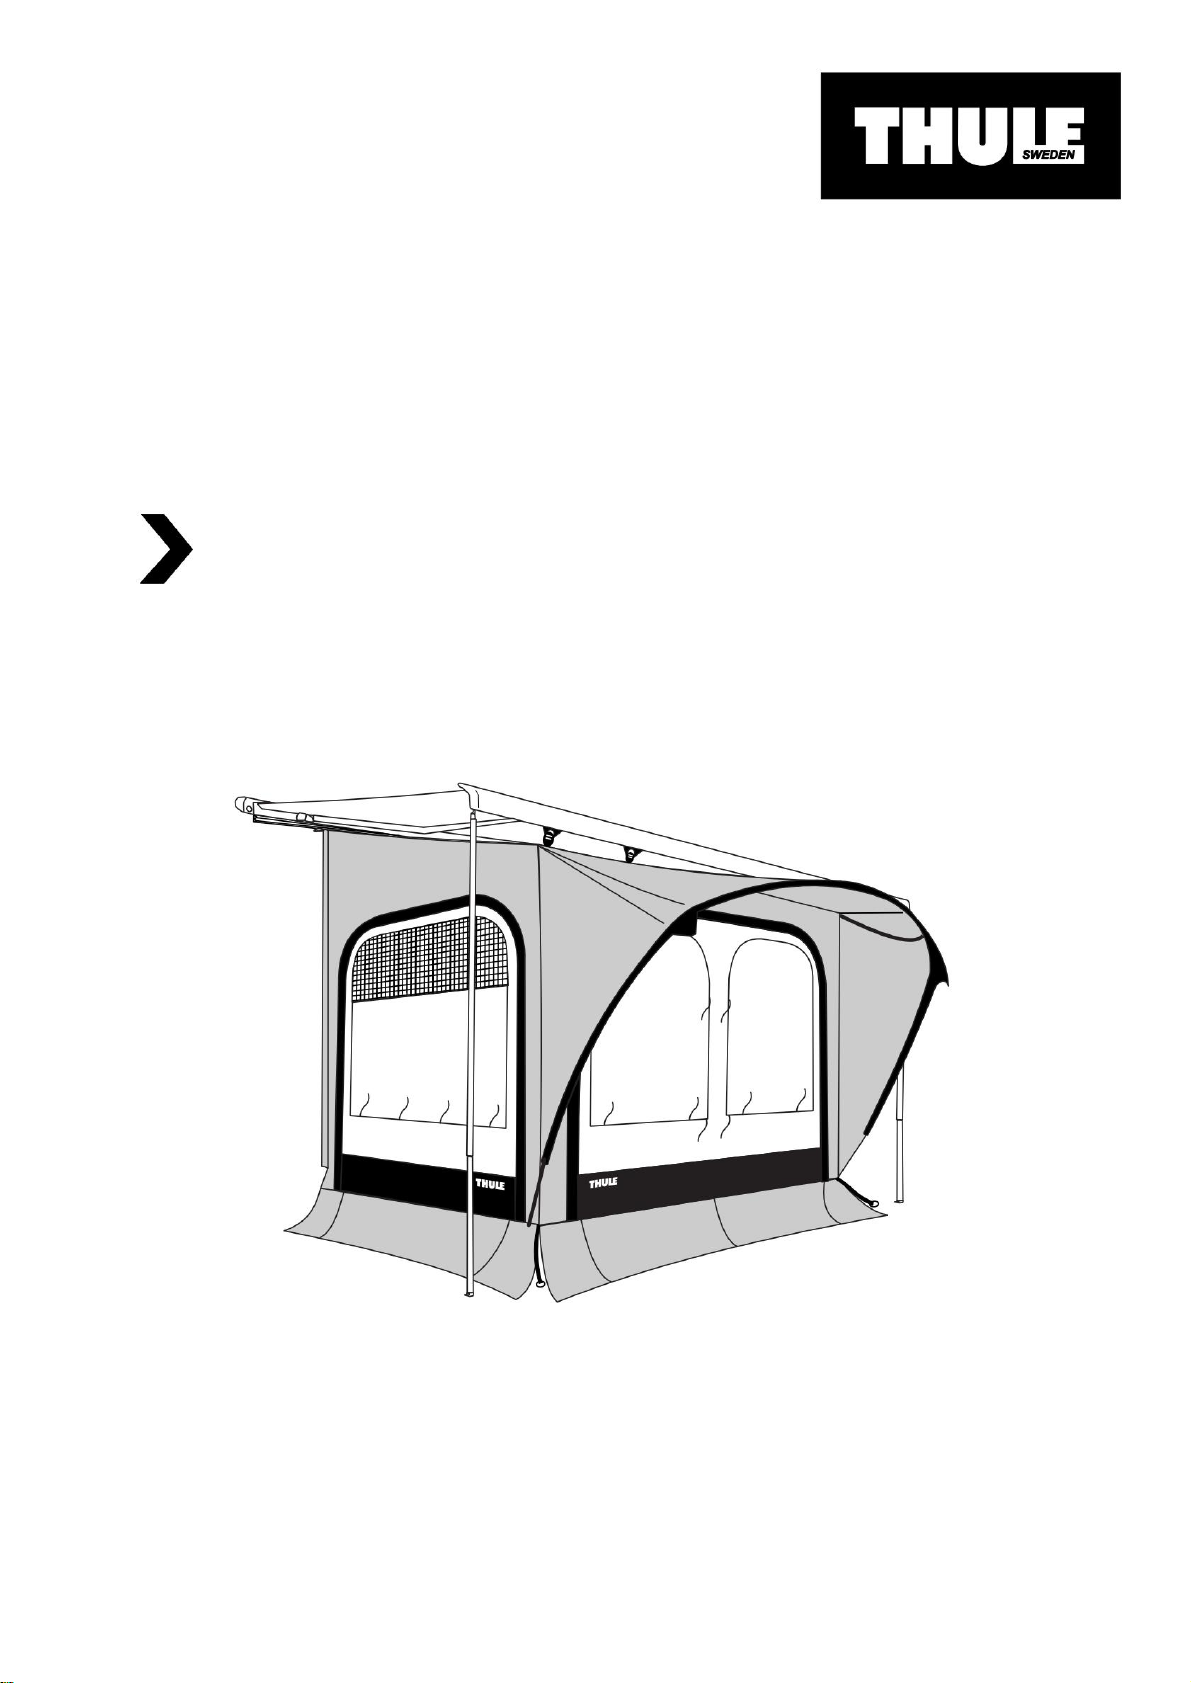
THULE
Instructions
Thule QuickFit
THULE
Thule QuickFit
Instructions
x1 Prod no.: 307056 - 307060; 309920 - 309924
Document: SLW900-02
Date: 05/01/2015
THULE
Machine Translated by Google