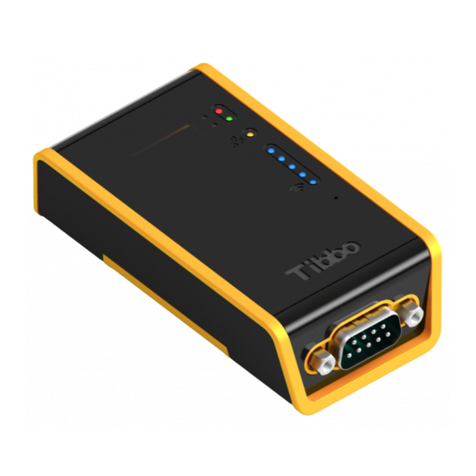
Tibbo DS1100 User manual

Tibbo DS110X Serial-over-IP Controller
Quick Installation Manual
1. Device Overview
The DS110X are a series of serial-over-IP controllers with many
options ranging from WiFi to OLED display. The device can also
be turned into a Tibbo BASIC programmable device when loaded
with TiOS firmware.
Features
Configurable multi-port RS232 or RS232/422/485 , up to
460kbps *
Web-based configuration over Ethernet or WiFi
802.11b/g WiFi with WEP, WPA, WPA2 security modes **
OLED display for status monitoring (Optional)
Power over Ethernet (Optional)
* Varies depending on model ** DS1100 supports WEP only
2. Device and Accessories Checklist
Please verify the following contents in the product package before
installation.
Power adapter
Quick Installation Manual
Din-Rail mounting kit
3. Status LED
Ethernet Link LED: Amber when Ethernet is connected
Wireless LED Bar: WiFi strength indicator, increasing from 1 to 5
5 being strongest
Setup Button: 1. Scrolls through the status menu on the
OLED display
2. Hold for 5 second to enter “serial
programming mode”, release and hold for 5
seconds again to restore to factory presets.
Status LED: Device status indicator
Red LED (top row) Green LED (bottom row)
Power up pattern.
Error Mode, can be fixed by “initializing”
No Ethernet Connection, idle state
Attempting to establsih TCP connection
TCP connection reset / rejected
Data connection is established and is idle
*refer to user manual for other LED status
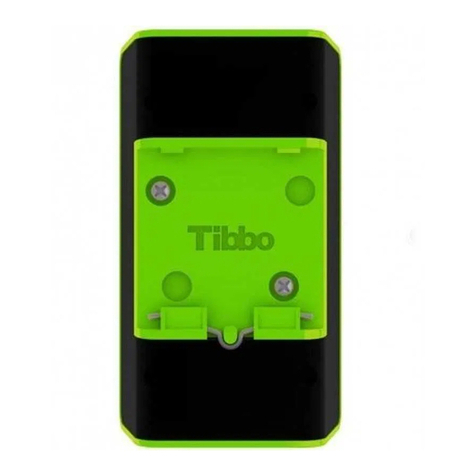
4. Din Rail and Wall Mount
Two mounting plates are provided, one for DIN rail installation,
and one for wall mounting.
5. Power Arrangement
The DS110X can be powered through adaptors with 3.5mm
diameter socket and 12VDC nominal output. Power inputs on PoE,
or serial port pin 9 are optional.
6. Ethernet port & Link LED
The Ethernet port of the DS110X is of 10/100BaseT type and the
pin arrangement is as follows:
#1 : TX+ #5 : PoE+
#2 : TX –#6 : RX-
#3 : RX+ #7 : PoE-
#4 : PoE #8 : PoE-
7. Serial Configuration
DS1100
#1 : N/A
#2 : RX
#3 : TX
#4 : DTR
#5 : GND
#6 : DSR
#7 : RTS
#8 : CTS
#9 : Power
Input
DS1101
#1 : N/A
#2 : RX
#3 : TX
#4 : DTR
#5 : GND
#6 : DSR
#7 : RTS
#8 : CTS
#9 : Power
In/Out
DS1102

Standard mapping
RS232
RS422
RS485
#1
--
RTS-
--
#2
RX
RX-
RX-
#3
TX
TX+
TX+
#4
DTR
TX-
TX-
#5
GND
GND
GND
#6
DSR
RX+
RX+
#7
RTS
RTS+
--
#8
CTS
CTS+
--
#9
--
CTS-
--
8. Software & setup
To configure the device, install the ”Current Release”of TDST
(Tibbo Device Server Toolkit), which is available for download
from the link below:
http://tibbo.com/downloads/soi/tdst.html
With the device powered on and connected to the local network,
start up “DS Manager”. Following screen should appear:
How to find the device:
The device will have the default IP of 1.0.0.1, if
multiple new units are on the network, select the
unit and press the “buzz”button to see which device is connected
by displaying the “Buzz”LED pattern.
How to access the unit for setup:
Unit can be setup by one of the following methods.
1. Setup by using DS Manager. To setup, please select the
device from the list and click the “Settings” button.
The configuration menu will popup.
2. Setup by using the web interface. Click the “Change IP”
button and give the unit a valid IP address on the
network
Once the IP is set, enter the IP address on the web browser to log
in:
There is no default password. Click “Login” to enter the unit
configuration.
Working as Programmable device
The DS110X has built-in “programmable”feature. If
programmable feature is needed, please download TIDE (Tibbo
Integrated Development Environment) from the link below:
http://tibbo.com/downloads/basic/software.html
There are sample projects available at:
http://tibbo.com/basic/resources.html
The full Tibbo BASIC documentation can be found here:
http://docs.tibbo.com/taiko/index.html
For technical support, please send requests to:
support@tibbo.com

Standard mapping
RS232
RS422
RS485
#1
--
RTS-
--
#2
RX
RX-
RX-
#3
TX
TX+
TX+
#4
DTR
TX-
TX-
#5
GND
GND
GND
#6
DSR
RX+
RX+
#7
RTS
RTS+
--
#8
CTS
CTS+
--
#9
--
CTS-
--
8. Software & setup
To configure the device, install the ”Current Release”of TDST
(Tibbo Device Server Toolkit), which is available for download
from the link below:
http://tibbo.com/downloads/soi/tdst.html
With the device powered on and connected to the local network,
start up “DS Manager”. Following screen should appear:
How to find the device:
The device will have the default IP of 1.0.0.1, if
multiple new units are on the network, select the
unit and press the “buzz”button to see which device is connected
by displaying the “Buzz”LED pattern.
How to access the unit for setup:
Unit can be setup by one of the following methods.
1. Setup by using DS Manager. To setup, please select the
device from the list and click the “Settings” button.
The configuration menu will popup.
2. Setup by using the web interface. Click the “Change IP”
button and give the unit a valid IP address on the
network
Once the IP is set, enter the IP address on the web browser to log
in:
There is no default password. Click “Login” to enter the unit
configuration.
Working as Programmable device
The DS110X has built-in “programmable”feature. If
programmable feature is needed, please download TIDE (Tibbo
Integrated Development Environment) from the link below:
http://tibbo.com/downloads/basic/software.html
There are sample projects available at:
http://tibbo.com/basic/resources.html
The full Tibbo BASIC documentation can be found here:
http://docs.tibbo.com/taiko/index.html
For technical support, please send requests to:
Other manuals for DS1100
1
Table of contents
Other Tibbo Controllers manuals