Tiger JKW-A10S User manual

JKW-A ❶
JKW-A10S
JKW-A10W
JKW-A18S
JKW-A18W
IH Microcomputer controlled
Rice Cooker/Warmer
USER MANUAL
Before using the Rice Cooker, read all these instructions through to the end.
After reading these instructions, keep them in a handy location for future reference.
IH 电饭煲
使用说明书
非常感谢您购买本公司的彦品。
在您使用之前,请仔細阅读完本说明书,并妥善保存,以便随时参阅
IH 炊飯ジャー
取扱説明書
このたびは、お買い上げまことにありがとうございます。ご使用になる前に、この取扱説明書
を最後までお読みください。
お読みになった後は、お使いになる方がいつでも見られるところに必ず保管してください。
For household use
家庭用
家庭用
TIGER CORPORATION
Head Office: 3-1 Hayamicho, Kadoma City, Osaka 571-8571, Japan

1 106
日
本
語

2
IMPORTANT SAFEGUARDS
When using electrical appliances, basic safety precautions should always be followed
including the following:
1. Read all instructions.
2. Do not touch hot surfaces. Use handles or knobs.
3. To protect against electrical shock, do not immerse cord or plugs in water or other liquid.
4. Close supervision is necessary when any appliance is used by or near children.
5. Unplug from outlet when not in use and before cleaning. Allow to cool before putting on or
taking off parts.
6. Do not operate any appliance with a damaged cord or plug or after the appliance
malfunctions or has been damaged in any manner. Return appliance to the nearest
authorized service facility for examination, repair, or adjustment.
7. The use of accessory attachments not recommended by the appliance manufacturer may
cause injuries.
8. Do not use outdoors.
9. Do not let cord hang over edge of table or counter, or touch hot surfaces.
10. Do not place the rice cooker on or near a hot gas or electric burner, or in a heated oven.
11. Extreme caution must be used when moving an appliance containing hot oil or other hot
liquids.
12. Always attach plug to the rice cooker first, then plug cord into the wall outlet.
To disconnect, turn any control to “off”, then remove plug from wall outlet.
13. Do not use the rice cooker for other than intended use.
SAVE THESE INSTRUCTIONS
Servicing should be performed by an authorized service representative.
This rice cooker is intended for household use.
A short power supply cord is provided to reduce the risk of becoming entangled in or tripping
over a longer cord. Longer detachable power supply cords or extension cords are available
and may be used if care is exercised in their use. If longer detachable power supply cords or
extension cords are to be used: (1) the marked electrical rating of the extension cord should
be at least as great as the electrical rating of the appliance; (2) if the appliance is of the
grounded type, the extension cord should be a grounding-type 3-wire cord; and (3) the cord
should be arranged so that it will not drape over the countertop or tabletop where it can be
pulled down by children or tripped over accidentally.
The following instructions are applicable to 120V only:
This appliance has a polarized plug (one blade is wider than the other). To reduce the risk
of electrical shock, this plug is intended to fit into a polarized outlet in only one way. If the
plug does not fit fully into the outlet, reverse the plug. If it still does not fit, contact a qualified
electrician. Do not attempt to defeat this safety feature.
The appliance is not intended for use by young children or disabled persons without
supervision. Ensure that young children do not play with the rice cooker.

3

4
English
Contents
1 SAFETY INSTRUCTIONS ……………………………………… 5
2 NAMES AND FUNCTIONS OF COMPONENT PARTS ……… 9
Cooking Tips for Gourmet rice ……………………………………… 11
3 BEFORE COOKING RICE ……………………………………… 12
4 HOW TO COOK RICE …………………………………………… 14
5 WHEN RICE IS COOKED ……………………………………… 16
6 HOW TO COOK OATMEAL ……………………………………… 17
7 SETTING THE TIMER …………………………………………… 19
8 KEEPING THE RICE WARM …………………………………… 21
9 REHEATING ……………………………………………………… 22
10 SLOW COOKING (“Stew•Soup”MENU) ………………………… 24
11 CLEANING AND MAINTENANCE ……………………………… 26
12 IF RICE DOES NOT COOK PROPERLY ……………………… 28
13 IF FOODS DO NOT COOK PROPERLY ……………………… 30
14 TROUBLESHOOTING …………………………………………… 31
If these indications appear …………………………………………… 32
Menu Guide …………………………………………………………… 33
Setting current time…………………………………………………… 36
Specications ………………………………………………………… 36
In case of power failure ……………………………………………… 37
Purchasing consumables and optional accessories ……………… 37
English

5
1SAFETY INSTRUCTIONS
*The precautions described below are intended to protect the user and other individuals from
physical harm and to safeguard against damage to property.
Be sure to follow the instructions since they are important safeguards.
*Do not remove the safety instructions seal attached to the unit.
Safety instructions are classified and described
as shown below, according to the level of harm
and damage caused by improper use of ignoring
instructions.
注 意
The symbol indicates a
warning or caution. The specific
details of the warning or caution are
indicated inside the symbol or in a
picture or text near the symbol.
禁 止
The symbol indicates an
action which is prohibited. The
specific details of prohibited
matters are indicated inside the
symbol or in a picture or text near
the symbol.
指 示
The symbol indicates an action
or instruction to be taken.
The specific details of instructed
matters are indicated inside the
symbol or in a picture or text near
the symbol.
Read all warnings and instructions before using the rice cooker.
“Cooking” includes cooking rice and cooking foods.
Description of symbols used
This indicates “There is a possibility
of death or serious injury*1” when an
improper handling of the unit is taken
by the user.
This indicates “There is a possibility
of injury*2 or damage to property*3”
when the unit is improperly handled
by the user.
*1: “Serious injury” is defined here as a medical condition such as loss of
sight, injuries, burns (high-temperature or low-temperature burns),
electric shocks, broken bones or poisoning which will have after-
effects and/or which will require hospitalization or long-term outpatient
care.
*2: “Injury” is defined here as a physical injury, a scald or an electric shock
which will not require hospital treatment or long-term outpatient care.
*3: “Damage to property” is defined here as damage extending to
buildings, household effects, domestic animals, pets, etc.
Warning
Caution
Warning
Use the product at local voltage only.
Using the product at another voltage may
result in fire or electrical shock.
Use an AC outlet of 7A or higher rating
exclusively for the product with 220V or
higher.
Connecting other instruments with the
same AC outlet may cause the branch
socket to overheat, resulting in fire.
Do not damage the power cord. Do not
use a damaged power cord.
Do not modify, bend, pull, twist or bundle
the cord. Do not expose it to heat. Do not
rest anything heavy on the power cord. Do
not clip it onto anything. Noncompliance
with these instructions may result in fire or
electrical shock.
Clean the plug if it is dirty.
A dirty plug may cause a fire.
Connect the plug so that the prongs are
fully inserted into the outlet.
Noncompliance with these instructions may
result in electrical shock, short-circuiting,
smoke, or fire.
Do not use the cooker if there is any
damage to the power cord or the wall
outlet, or if the plug cannot be fully
inserted into the outlet.
Noncompliance with this instruction may
result in electrical shock, short-circuiting, or
fire.
No wet
hand
Do not connect or disconnect the plug
with wet hands.
Handling the AC power cord with wet hands
may result in electrical shock or injury.
Never open the lid
while cooking rice.☆
Opening the lid may
result in burns.
Do not
touch!
Do not place your face and hands near
the steam vent.
Touching the steam vent may result in
burns. Keep out of reach of children and
infants.

6
1SAFETY INSTRUCTIONS
Do not allow children alone to use the rice
cooker. Keep it out of reach of infants.
Noncompliance with this instruction may
result in burns, electrical shock, or injury.
This appliance is not intended for
use by persons (including children)
with physical difficulties or lack of
experience and knowledge-unless
they have been given supervision or
instruction concerning to the use of the
appliance by a person responsible for
his/her safety.
Noncompliance to this instruction may result
in burns, electric shock or injury.
No
wetting!
Do not immerse the rice cooker in water
or splash it with water.
Immersing or splashing may result in short-
circuiting or electrical shock.
Disassembly
is prohibited.
Do not modify the rice cooker.
Disassembly or repairs should only
be performed by qualified service
representatives.
Noncompliance with this instruction may
result in fire, electrical shock, or injury.
Do not insert pins, needles, or other
metal objects into the air intake, air
exhaust, or gaps between parts.
Inserting such objects may result
in electrical shock or injury due to
malfunction.
Do not use the rice cooker in any
ways not specifically covered in this
instruction manual.
Improper use may cause steam or
contained matter to spray resulting in burns
or injury.
(Examples of cooking that should not be
done with this rice cooker)
• Heating ingredients or seasoning inside
of plastic bags, etc.
• Using cooking sheets or other utensil to
cover food in the rice cooker.
Stop using the rice cooker immediately
in the event of trouble.
Continued use in anything but proper
working order may result in fire, electrical
shock or injury.
(Examples of trouble)
• If the AC cord or plug becomes hot during
use
• If smoke exudes from the rice cooker or a
burning odor is detected
• If the rice cooker is cracked, loose or
rattling
• If the inner pan is deformed
• Other troubles
Immediately unplug the AC cord from its
outlet and contact the place of purchase for
inspection and servicing.
Warning
Air exhaust
Air intake
English

7
1SAFETY INSTRUCTIONS
CAUTION
Do not use the rice cooker on unstable
or heat sensitive surface which may
result in damage and fire.
Do not use the rice cooker near walls or
furniture.
Steam or heat will cause damage,
discoloration and/or deformation.
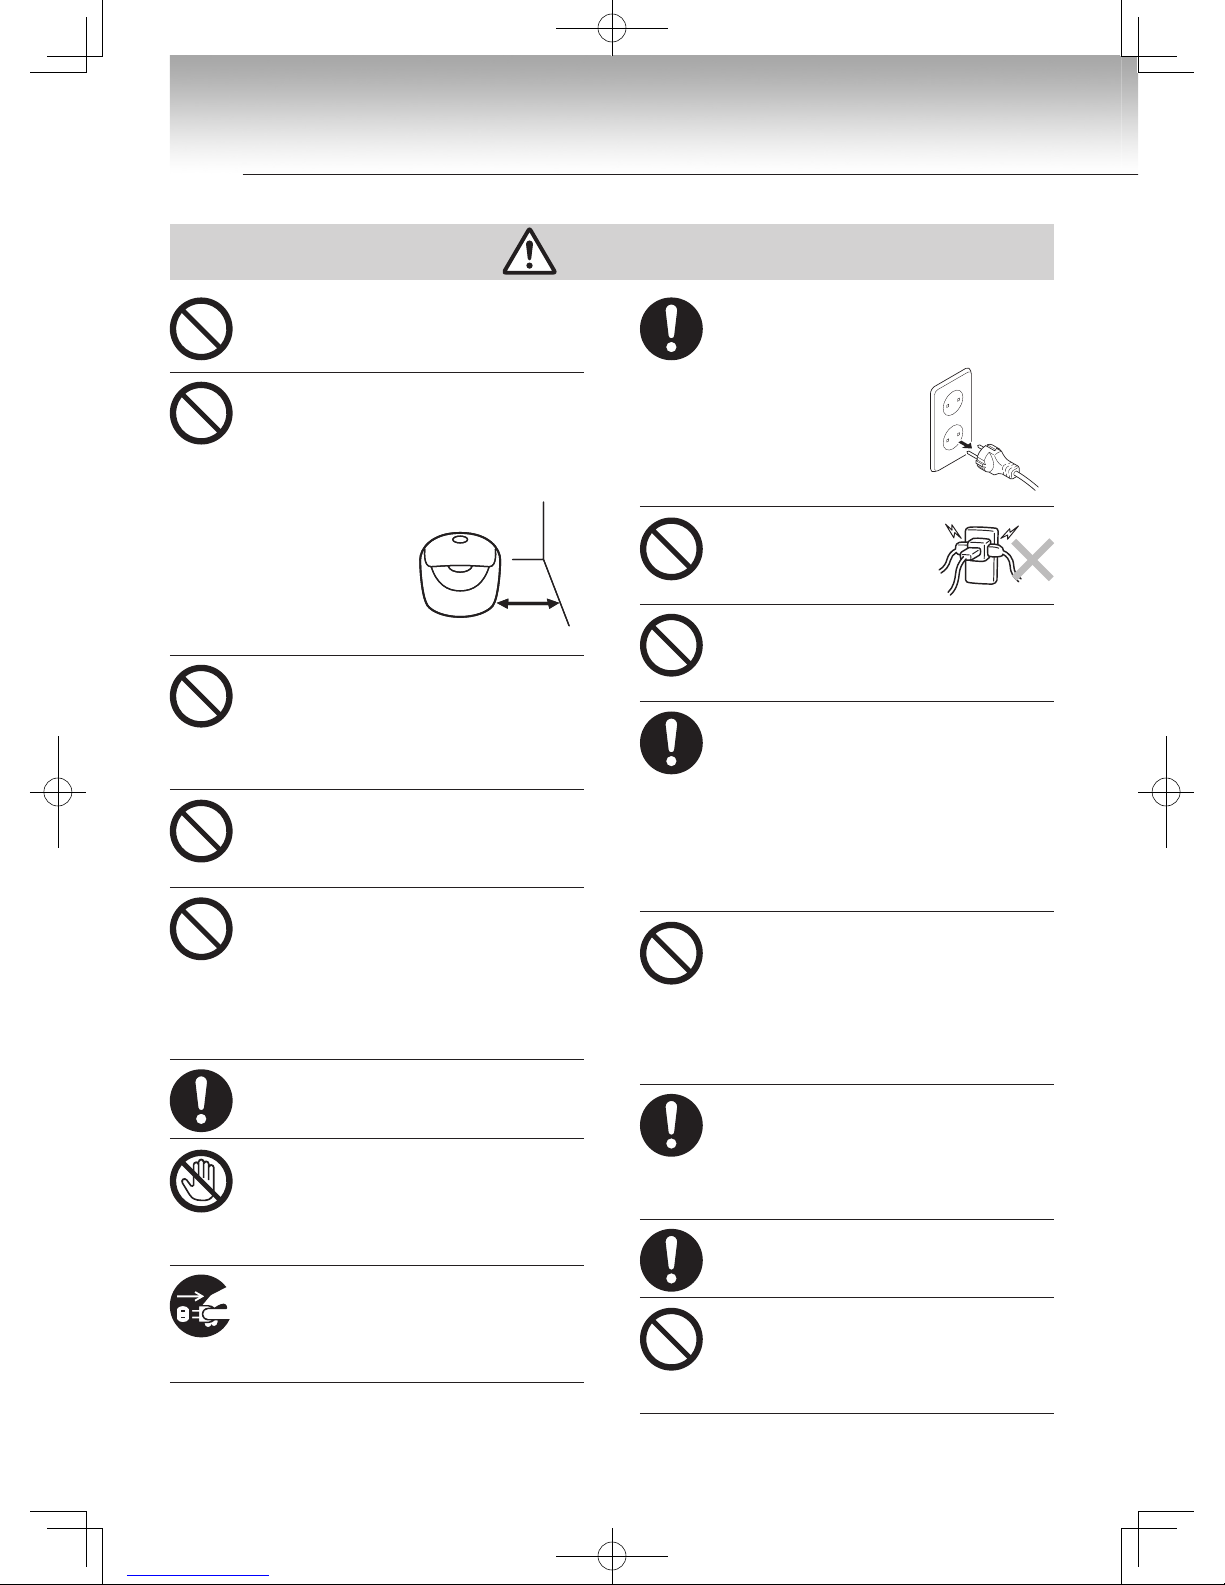
Use the rice cooker at least 30 cm or more
away from walls or furniture.
Be careful to not
allow the countertop
to become steamy
when using the rice
cooker on a kitchen
counter.
Do not use the rice cooker near a heat
source or where it may be splashed with
water.
Heat or water may cause short circuiting,
leakage, deformation of the rice cooker, fire,
or malfunction.
Use the inner pan made exclusively for
this rice cooker.
Using any other inner pans may result in
overheating or malfunction.
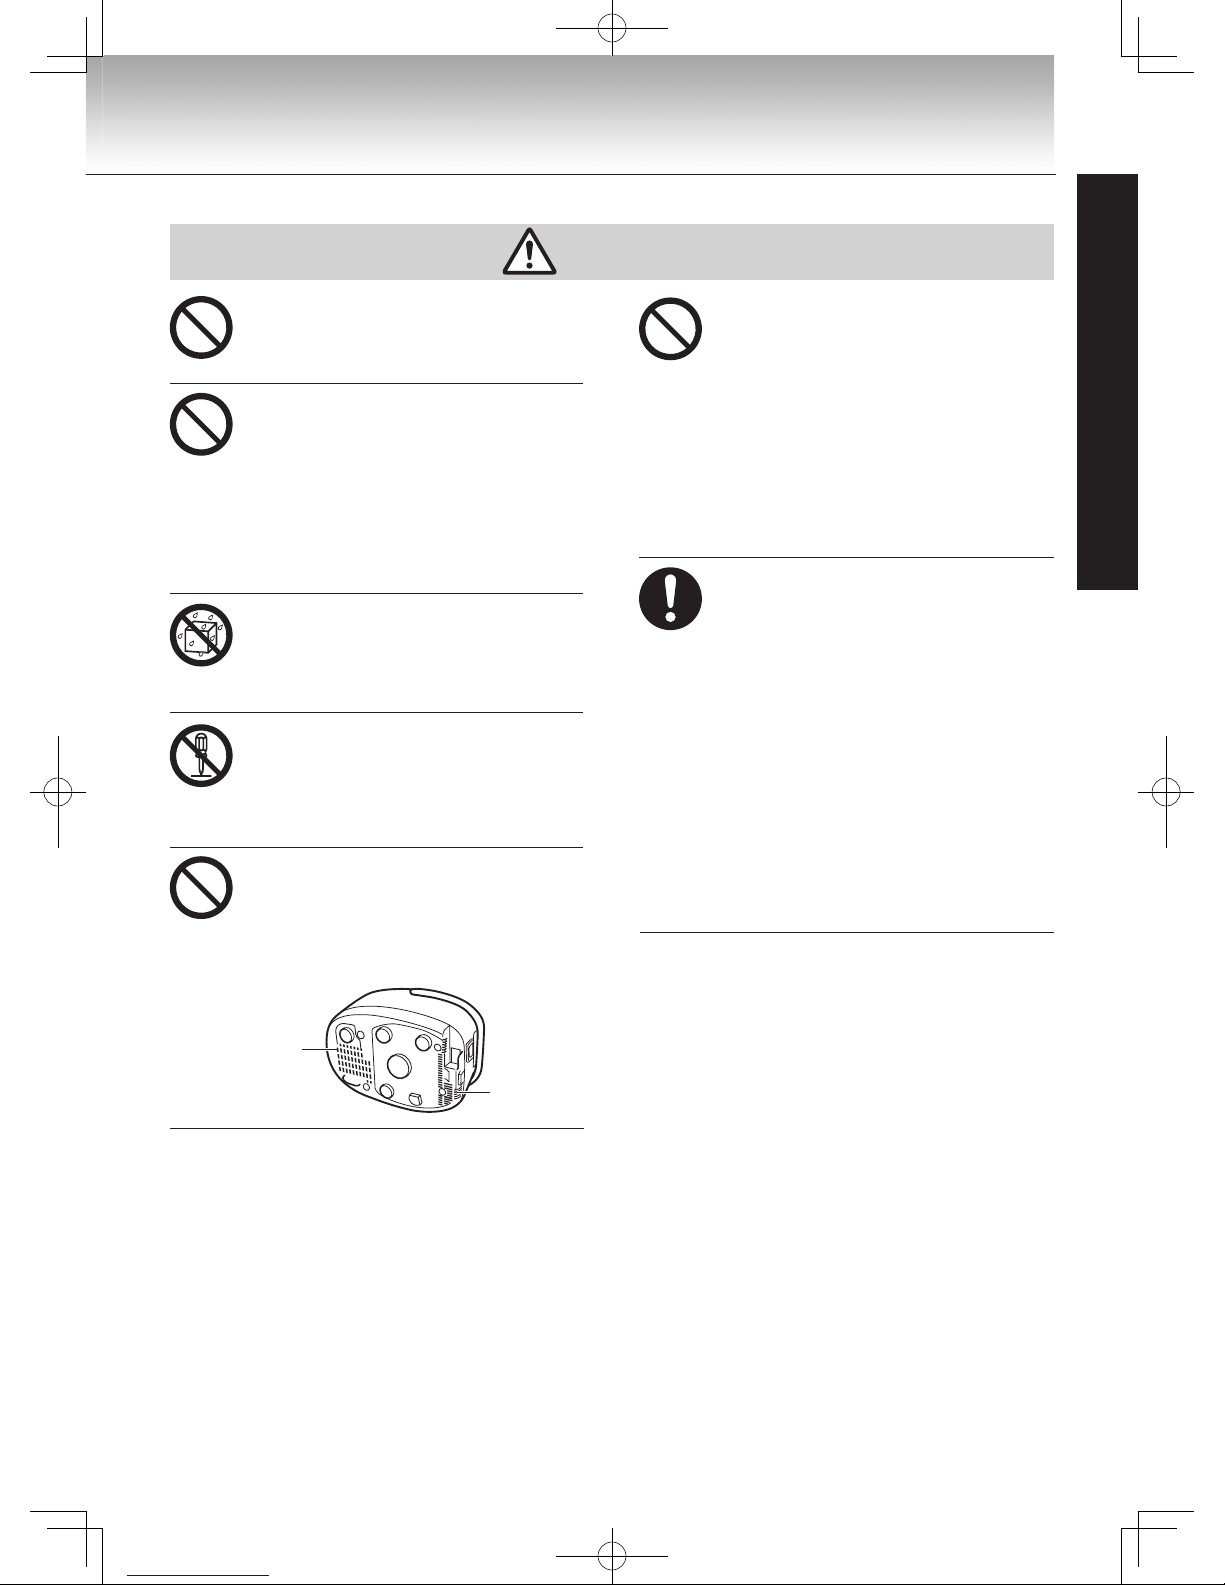
Do not use this rice cooker where the
air intake or air exhaust is blocked or
where the surrounding temperature is
high.
Do not place the rice cooker on carpets,
plastic bags, etc.
This can result in electrical shock, current
leaks, or fire.
Be careful of the escaping steam when
opening the lid.
Exposure to steam may result in burns.
Do not
touch!
Do not touch hot parts while or
immediately after cooking rice.
Touching hot parts may result in burns.
Remove the
power plug.
Unplug the AC cord when the rice
cooker is not in use.
Leaving the AC cord plugged in may
degrade insulation, resulting in injury,
burns, electrical shock, leakage, or fire.
More than
30 cm
More than
30 cm
Be sure to hold the plug when
disconnecting the AC cord from the AC
outlet.
Noncompliance with this
instruction may result in
electrical shock or short
circuiting, resulting in fire.
Do not plug in several
electrical appliances to a
single AC outlet.
Doing so may result in fire.
Handle with care.
Dropping the rice cooker or applying a
strong shock may cause injury to self or
malfunction of the rice cooker.
When cleaning, unplug the AC power
cord from the AC outlet first, and then
unplug the appliance plug from the rice
cooker insert slot.
After cleaning, make sure the appliance
plug, insert slot for plug, and the plug to
the AC outlet are not wet before using.
Do not move the rice cooker while it is
switched on.
Caution:It may cause electric shock or fire.
Magnetic waves are emitted from the
rice cooker,therefore keep anything that
is susceptible to magnetism away from
the rice cooker.
Interference may occur with TVs, radios,
and other electronic equipment.
Information on credit cards, video tapes,
and the like may be lost or damaged.
Persons with pacemakers should
consult with a physician about any
adverse affects on their pacemaker that
may result from using this rice cooker.
When operated, this rice cooker may affect
pacemakers.
Handle the rice cooker only after it has
cooled down.
Touching a hot part may result in burns.
Do not wash the entire rice cooker.
Do not wash the entire rice cooker or pour
water into the cooker or its bottom. Doing
so may result in short circuiting or electrical
shock.

8
1SAFETY INSTRUCTIONS
“Cooking” includes cooking rice and cooking foods.
Be sure to observe the following instructions when using the rice cooker.
Do not move the rice cooker while
cooking rice.☆
Doing so may cause scald or hot water may
boil over.
Do not
touch!
Do not touch the hook button when
carrying the rice cooker.
Touching the hook key may cause the lid to
open, resulting in injury or burns.
This appliance is intended to be used
in household and similar applications
such as:
• staff kitchen areas in shops, offices and
other working environments;
• farm houses;
• by clients in hotels, motels and other
residential type environments;
• bed and breakfast type environments.
● Removeburnedriceandgrainsofrice.
If rice is burned or grains of rice are left in the pan,
steam may leak or hot water may boil over, resulting
in malfunction or failure to cook rice properly.
● Donotcoverthericecookerwithatowelwhile
cooking rice.☆
Otherwise, the rice cooker body or lid may deform
or discolor.
● Thereisanopeninginthecookerthatis
designed to maintain the cooker's functions
and performance.
In very rare cases, insects or other objects may
enter the opening. Use a commercially available
insect guard sheet or take other precautions.
If damage is caused by insects entering the
rice cooker, repairs at owner's expense will be
necessary; contact the store where the rice
cooker was purchased.
● Iftheinnerpanisdeformedorcorroded,
contact the store where the rice cooker was
purchased.
● Strictlyobservethefollowinginstructionsto
avoid blistering or removing the fluorocarbon
resin from the surface of the inner pan.
• Do not put the inner pan over a gas fire or an
electromagnetic cooker. Do not heat it in a
microwave oven.
• The keep warm function is only applicable for polished
rice, rinse-free rice, and slow cooked food.
• Do not use vinegar on the inner pan.
• Use the supplied spatula or wooden spatulas only.
• Do not use hard utensils such as metal ladles,
spoons, or whisks.
• Do not place a basket in the inner pan.
• Do not place tableware and other hard utensils in
the inner pan.
• Do not clean the rice cooker with hard materials
such as metal spatulas or nylon brushes.
• Do not use dishwasher/dryer.
CAUTION
English

9
plug
Power plug
2
NAMES AND FUNCTIONS OF COMPONENT PARTS
Power cord
Steam vent
Inner lid
(See page 27)
Inner lid gasket (See page 27) Lid
Outer lid gasket
The gasket is attached
on the outer lid. It is not
removable.
Inner pan
Rice can be rinsed in the
inner pan.
Upper casing
Carrying handle
Use this handle to
carry the rice cooker.
Hook button
Center sensor
Push this button to
open the lid.
JK W-A10W・JKW-A18W JKW-A10S・JK W- A18S

< Operation Panel *Press buttons firmly. Sound signals are provided for each press. >
10
“Cooking” includes cooking rice and cooking foods.
2
NAMES AND FUNCTIONS OF COMPONENT PARTS
The reliefs on the
Start
key/
Cancel
key ( ) are for persons with visual impairments.
The rice cooker has a built-in lithium battery and
stores the current time and preset time even after
the AC power cord is unplugged.
●Thelithiumbatteryhasafour-to-five-yearlife
expectancy, provided that the power cord is
unplugged.
●Whenthelithiumbatteryrunsout,“0:00”blinkson
the display unit when the power cord is plugged in.
It is ready for normal rice cooking but the memory
for current time and elapsed warming time is not
displayed when the power cord is unplugged.
The time is displayed in the 24-hour format. It has
been properly adjusted before shipment. If it is
incorrect, adjust the current time. (See page 36.)
Sounds emitted by the rice cooker while cooking☆,
keeping warm, or reheating rice do not indicate that
something is wrong.
●Humming(Soundofthefanrotating)
●Buzzingortwittering(SoundofIHoperation)
Spatula
Measuring cup
(About 0.18 L)
Ladle
The spatula can be
kept in this holder.
Menu
key
Cancel
key
Start
key
Timer
key
Hour
Min
key
Keep Warm
key
Keep warm lamp
Display unit
Start lamp
Timer lamp
Accessories Lithium battery
Sounds emitted by the rice cooker
Checking Time
Caution
Do not replace lithium batteries yourself. Doing
so may cause damage to the rice cooker or an
accident.
To replace the batteries, contact the store
where the rice cooker was purchased.
English

Cooking for gourmet rice
Tips
11
Please refer to page 12-13 for Rice
cooking preparations and pages 14-15
for Rice cooking procedures.
Choose high quality rice
and store it in a cool place.
Choose freshly polished,
glossy rice of the same grain
size. Store it in a cool, dark,
well-ventilated place.
Carefully measure rice with
the supplied cup.
(A cup equals approximately 0.18 L.)
* Use the supplied cup for Rinse free rice
as well.
To cook rinse-free rice
●Addtherinse-freericeandwatertotheinnerpan,then
thoroughly stir the rice from the bottom so that all grains
are immersed in water. (Simply pouring water on top of
the rice from above does not submerge all of the rice and
can prevent the rice from cooking properly.)
● I f thewatercloudsupwhenaddedtotherice,itis
recommended to rinse the rice 1 or 2 times. (The clouding
is caused by the starch, not the bran. Rice that cooks in
cloudy water can burn or not cook properly, and the water
can boil over.)
Quickly rinse the rice
Use a generous amount
of water, then pour out
the water.
Repeat this process until
the water runs clear.
To cook rolled barley, multi-grain, germinated
brown rice, haiga rice (rice with embryo buds) and
semi-polished rice, select the [Plain rice] Menu.
Use a generous
amount of water
and rinse the
rice quickly
Push the rice
with the palm
of your hand
to rinse.
Adjust the volume of water according to the
type of rice and personal preferences.
●Guidelinesforfineadjustmentofwater
Cooking Sweet rice
After washing the Sweet rice, make
sure none is above the water level.
* When cooking rinse-free rice, add slightly more water
than the [Plain rice] scale (the water should just cover
the level mark).
* Do not adjust water amount more or less than 2 oz from
original water level marks.
* When cooking haiga rice, rolled barley, germinated
brown rice, semi-polished rice, add water to the [Plain
rice] scale of the inner pan.
* Some germinated brown rice and multi-grain rice
packages specify the quantity of water required to cook.
Please refer to package directions.
When Mixing White rice with Brown rice or multi-
grain rice
● W h e n theproportionofbrownriceormulti-grainriceis
greater than that of white rice, please choose the [Brown
rice] Menu.
● W h e n theproportionofbrownriceormulti-grainriceis
less than or equal to that of white rice, please choose the
[Plain rice] Menu. (In this case, soak the brown rice for
1-2 hours before cooking.)
Menu
Guideline for water
(see the scales inside the inner pan)
Plain rice•Quick
Use the scale for “Plain rice” and adjust
according to personal preference.
Brown rice Use the scale for “Brown rice” and adjust
according to personal preference.
Mixed rice
Use the scale for “Mixed rice” and adjust
according to personal preference.
Sweet rice
(glutinous rice)
Use the scale for “Sweet rice” and adjust
according to personal preference.
Sweet rice
(glutinous and
non-glutinous
rice)
Adjust to the middle of “Plain rice” and
“Sweet rice”.
Long-grain rice Use the scale for “Long-grain rice” and
adjust according to personal preference.
Porridge
Use the scale for “Porridge-soft” or
“Porridge-hard” for soft and hard
porridge.
Adjust to the middle of the two scales for
mid-type porridge.
Adding vegetables and meat to your rice
Total ingredient amount should be less than 70 g for each
cup of rice. (e.g.: if you are cooking 3 cups of rice, 210 g is
the maximum ingredient amount you can add to your rice.)
Stir the water, seasoning and rice well. And then place the
ingredient on top of the rice. Ingredient must be chopped
finely. There is the maximum cooking amount for each
menu, see the chart below.
Menu
5.5-cup Rice Cooker
10-cup Rice Cooker
Brown rice
3 cups 5 cups
Mixed rice
4 cups 7 cups
Sweet rice
3 cups 6 cups
Porridge•hard
1 cup 2 cups
* When cooking white rice and other grains together, layer
the grains on top of the rice before cooking.
Mixing the 2 types of rice may result in uneven cooking.
Maximum cooking capacity when cooking white rice with
multi-grain.
5.5cup: less than 5.5 cups 10cups: less than 10 cups
* When cooking brown rice and other grains together, select
the [Brown rice] Menu, and layer the grains on top of the
rice when cooking.
Mixing the 2 types of rice may result in uneven cooking.
Maximum cooking capacity when cooking brown rice with
multi-grain.
5.5cup: less than 3.5 cups 10cups: less than 6 cups
Cooking Long-grain rice
When cooking Long-grain rice, select the [Long-grain
rice] menu.
May boil over and pick the other menus.

3
BEFORE COOKING RICE
For tips on cooking,
refer to page 11.
12
Use the measuring cup supplied with the rice
cooker. (One level cup of rice is about 0.18 liters.)
1Measure rice and put it into the
inner pan.
Use the supplied cup for rinse-free rice as
well.
<Correct measurement> <Wrong measurement>
2Rinse rice by hand.
(Rice can be rinsed in the inner pan.)
*Rinse-free rice does not need rinsing.
(See page 11)
3Place the inner pan on a level
surface and adjust the water
level to the scale on the inside of
the inner pan.
Check the type of rice and the menu. Adjust the
water volume according to personal preference.
(See the guideline on page 11.)
4Outer surface and brim of the in-
ner pan
<Outer surface and brim of the inner pan>
Caution
Follow the specified volume of rice (see the
specifications on page 36) or the rice may not
cook properly. In particular, failure to observe
the maximum volume may cause the rice to
boil over or to cook improperly. (A cup equals
approximately 0.18 liters.)
See the specification on Page 11 when you
cook “Mixed rice”.
Caution
Rinse rice well.
Do not use hot water (over 95°F/35°C) to rinse
rice.
<Inner side of the rice cooker body>
Caution
Remove any rice or other material adhering to
the upper casing and the area around the hook
button. Such material can prevent the casing
from closing or cause it to open while the rice
is cooking.☆
Center sensor
Hook
button
Inner lid gasket
Inner lid
Upper casing
When cooking three
cups of polished
rice, adjust the water
level to the [3] on the
“Plain rice” scale.
“Cooking” includes cooking rice and cooking foods.
English

For tips on cooking,
refer to page 11.
3BEFORE COOKING RICE
❷
❶
13
Caution
5Place the inner pan in the rice
cooker. 6Attach the power plug to the rice
cooker, and then plug the power
cord into the AC outlet.
Caution
If the Keep warm lamp is on, press the
Cancel
key, and the lamp will shut off.
Sound
If the
Start
key or
Keep Warm
key is pressed
without setting the inner pan, an alarm will go
off.
Close the lid.
Inner pan
Always
secure
the inner
lid before
cooking.
Make sure that the inner pan is correctly and firmly
seated.
Inner
pan
❶ ❷
Blinks

4HOW TO COOK RICE
For tips on cooking,
refer to page 11.
14
Every press of the Menu key changes the menu in
the order shown below.
1Press the Menu key to select a
menu.
2When selecting [Porridge], set
the correct cooking time.
The rice starts cooking.
3Press the Start key.
* Unnecessary to select a menu if previously chosen.
Blinks
Beep
Plain rice
Beep-beep
Grains
other than
plain rice
On
Beep
Blinks
Beep
The time remaining before completion of steaming
is displayed in 1-minute intervals on the display unit.
* Steaming time will vary depending on the menu.
4Steaming process
Set the cooking time using the
Hour
and
Min
keys.
Cooking time can be set in 5-minute intervals from
40 to 120 minutes.
* Each time the
Hour
key is pressed, the cooking time
increases by 5 minutes.
Each time the
Min
key is pressed, the cooking time
decreases by 5 minutes.
English

For tips on cooking,
refer to page 11.
4HOW TO COOK RICE
15
* The above indicates the time from pressing the [Start] button to the end of steaming (at a voltage of JKW-A10W•
JKW-A18W: 220V / JKW-A10S•JKW-A18S: 220-230V; at a room and water temperature of 23°C centigrade; and at
standard water level).
* The cooking time varies according to the volume and type of rice, volume and type of vegetable, meat, room
temperature, water temperature, volume of water, voltage, and whether the timer is used.
APPROXIMATE COOKING TIMES
Proportions
Please refer to page 11 regarding ingredients' proportions.
Menu
Size Mixed rice•Sweet rice Long-grain rice
Oatmeal(Steel Cut)
5.5-cup Rice Cooker 35 - 65 minutes 28 - 50 minutes 36 - 46 minutes
10-cup Rice Cooker 37 - 67 minutes 35 - 60 minutes 39 - 49 minutes
Menu
Size Plain rice Quick Brown rice
5.5-cup Rice Cooker 44 - 54 minutes 18 - 38 minutes 70 - 90 minutes
10-cup Rice Cooker 19 - 44 minutes

5WHEN RICE IS COOKED
16
Inner pan
Water is
collected in
the Upper
casing
After Using Cooker/Warmer
The cooker automatically switches to the keep warm
function when cooking is completed.
When cooking is completed, be sure to stir and
loosen the rice immediately.
1Stir and loosen the cooked rice.
Press the
Cancel
key.
2Unplug the power cord from the AC
outlet and disconnect the plug from
the rice cooker.
* When cooking with [Porridge], if you are adding
ingredients or if the cooking time is insufficient, the
keep warm lamp will come on.
Press the
Hour
key, set the additional time, and
press the
Start
key.
(It is possible to extend cooking 3 times; max. 30
minutes each.)
3Clean the cooker.
(See page 26-27)
1
* Because of the shape of the inner pan, the rice is slightly
sunken at the center when cooking is finished.
* Use an oven mitt or potholder to hold the inner pan steady.
Caution
If hot water drops into the groove or on the outer
surface of the cooker when opening the lid
immediately after cooking or while warming, wipe it off.
Caution
Be sure to press
Cancel
key before unplug
power cord from wall socket, otherwise rice
cooker will resume the last function.
Beep
Off
Remember to
On
Off
Beep, beep, ...
(8 times)
Current
time
When cooking is completed
English

6HOW TO COOK OATMEAL
17
■Recommended cooking amount/quantity/volume for
oatmeal.
5.5-cup Rice Cooker 10-cup Rice Cooker
1-2 1⁄2cups 1-3 cups
■Guidelinesforfineadjustmentofwater
Cooking amount 5.5-cup
Rice Cooker
10-cup
Rice Cooker
1 cup 3 cups 3 1⁄2cups
1 1⁄2cups 4 1⁄2cups 4 1⁄2cups
2 cups 5 cups 5 cups
2 1⁄2cups 5 1⁄2cups 6 cups
3 cups – 7 cups
* Be sure to use measuring cup
On
Caution
Do not open the lid during the cooking cycle.
1Set oatmeal and water into the
inner pan and close the lid
3Press the Menu key to select
"Oatmeal".
Making Oatmeal (steel cut) became that much easier!
4Press the Start key.
The oatmeal starts cooking.
Blinks
2Attach the power plug to the rice
cooker, and then plug the power
cord into the AC outlet.
(See page 13)
Beep
Beep

6HOW TO COOK OATMEAL
18
5When cooking is completed
The keep warm lamp blinks.
6Mix oatmeal well until consisten-
cy becomes even.
After Using Cooker/Warmer
Press the
Cancel
key.
2Unplug the power cord from the AC
outlet and disconnect the plug from
the rice cooker.
Beep
Remember to
Off
1
Beep, beep, ...
(8 times)
Blinks
Off
Current
time
Blinks
3Clean the cooker.
(See page 26-27)
Caution
If you unplug the power cord without pressing
the
Cancel
key, the keep warm lamp will
come on when using the rice cooker the next
time, and cooking cannot be done.
* The keep warm lamp will blink. However, this does
not indicate that it is kept warm. Serve and eat
immediately.
English

7SETTING THE TIMER
19
The time may be preset to finish cooking.
●Thetimecanbepresetto“TIMER1”and“TIMER
2”.
●Bothpresettimescanbestored.
e.g.:[Timer1] for breakfast time, [Timer 2] for
dinner time.
●Thericecookerstoresthepresettimeevenifthe
AC power cord is unplugged.
* Unnecessary to select a menu if previously
chosen.
1Check the current time.
*See page 36 for setting the current time.
About the “TIMER 1” and
“TIMER 2” settings.
Beep
For example: When “TIMER 1” is preset at
13:30 (1:30 PM), cooking will be finished at
13:30.
Blinks
・
2Press the Menu key to select a
menu.
Blinks
Blinks
Set the cooking time using the
Hour
or
Min
keys.
Cooking time can be set in 5-minute intervals
from 40 to 120 minutes.
Each time the
Hour
key is pressed, the cooking time
increases by 5 minutes. Each time the
Min
key is
pressed, the cooking time decreases by 5 minutes.
Blinks
Beep
3When selecting [Porridge], set
the cooking time.
This manual suits for next models
3
Table of contents
Other Tiger Rice Cooker manuals

Tiger
Tiger JBX-A User manual

Tiger
Tiger JBV-A10U User manual

Tiger
Tiger JBV-S10U User manual

Tiger
Tiger tacook JAJ-A55U User manual

Tiger
Tiger JNP-S55U User manual

Tiger
Tiger JCC-2700 User manual

Tiger
Tiger JKT-D Series User manual

Tiger
Tiger JKC-R10U User manual

Tiger
Tiger JAX-T10U User manual

Tiger
Tiger JAJ-A55S User manual

Tiger
Tiger JKT-W10W User manual

Tiger
Tiger JNO-B360 User manual

Tiger
Tiger JAG-S10U User manual

Tiger
Tiger JBX-B Series User manual

Tiger
Tiger JBX-B18U User manual

Tiger
Tiger JPT-H10S User manual

Tiger
Tiger JKT-S10A User manual

Tiger
Tiger JPK-G10A User manual

Tiger
Tiger JBA-T10W User manual

Tiger
Tiger JKJ-G10U User manual