Tiger JAI-G55S User manual

JAI-G55S
JAI-G55S
电饭煲
使用说明书
非常感谢您购买本公司的产品。
在您使用之前,请仔細阅读完本说明书,并妥善保存,以便随时参阅。
炊飯電子鍋
使用說明書
感謝您購買TIGER(虎牌)微電腦炊飯電子鍋。
使用前請務必仔細閱讀本操作說明的全部內容。
家庭用
家庭用
Rice Cooker / Warmer
OPERATING INSTRUCTIONS
Thank you for purchasing this TIGER rice cooker/warmer.
Please read these instructions carefully before use and observe them during use.
For household use

3
Contents
1 Important Safeguards................................................................................................ 4
2 Names and Functions of Component Parts ............................................................ 9
Menu options and features ......................................................................................11
Tips on making delicious rice................................................................................. 12
3 Before Cooking Rice................................................................................................ 14
4 How to Cook Rice .................................................................................................... 16
Cooking time guidelines ......................................................................................... 16
5 Once the Rice Is Done Cooking.............................................................................. 17
6 Setting the Timer...................................................................................................... 18
7 Keeping the Rice Warm ........................................................................................... 20
8 Reheating Cooked Rice........................................................................................... 21
9 Slow Cooking (“Slow Cook” Menu) ....................................................................... 22
10 Baking a Cake (“Cake” Menu) ................................................................................ 24
11 Cleaning and Maintenance...................................................................................... 26
12 If Rice Does Not Cook Properly.............................................................................. 30
13 Slow Cook or Cake Does Not Go As Expected ..................................................... 32
14 Troubleshooting....................................................................................................... 33
If these indications appear...................................................................................... 34
Menu Guide .............................................................................................................. 35
Setting the present time .......................................................................................... 39
Specications........................................................................................................... 40
In case of a power outage ....................................................................................... 40
Purchasing consumables and optional accessories ........................................... 40
English
IMPORTANT SAFEGUARDS
When using the appliance, basic safety precautions should always be followed including the
following:
1. Read all instructions.
2. Do not touch hot surfaces. Use handles or knobs.
3. To protect against electrical shock, do not immerse cord or plug in water or other liquid.
4. Close supervision is necessary when the appliance is used by or near children.
5. Unplug from outlet when not in use and before cleaning. Allow to cool before putting on or
taking off parts.
6. Do not operate the appliance with a damaged cord or plug or after the appliance
malfunctions or has been damaged in any manner. Return appliance to the nearest
authorized service facility for examination, repair, or adjustment.
7. The use of accessory attachments not recommended by the appliance manufacturer may
cause injuries.
8. Do not use outdoors.
9. Do not let cord hang over edge of table or counter, or touch hot surfaces.
10. Do not place the appliance on or near a hot gas or electric burner, or in a heated oven.
11. Extreme caution must be used when moving the appliance containing hot oil or other hot
liquids.
12.Alwaysattachplugtotheappliancerst,thenplugcordintothewalloutlet.
To disconnect, turn any control to “off”, then remove plug from wall outlet.
13. Do not use the appliance for other than intended use.
14. Risk of electric shock, cook only in removable container.
SAVE THESE INSTRUCTIONS
Servicing should be performed by an authorized service representative.
This appliance is intended for household use.
1. A short power cord (or detachable power cord) is provided to reduce the risks of becoming
entangled in or tripping over a longer cord.
2. Longer detachable power cords or extension cords are available and may be used if care
is exercised in their use.
3. If a longer detachable power cord or extension cord is used:
a. The marked electrical rating of the extension cord should be at least as great as the
electrical rating of the appliance.
b. The extension cord should be arranged so that it will not drape over the countertop or
tabletop where it can be pulled by children or tripped over unintentionally.
The appliance is not intended for use by persons (including children) with reduced physical,
sensory or mental capabilities, or lack of experience and knowledge, unless they have been
given supervision or instruction concerning use of the appliance by a person responsible for
their safety.
Children should be supervised to ensure that they do not play with the appliance.
The following instructions are applicable to 120V only:
This appliance has a polarized plug (one blade is wider than the other). To reduce the risk
ofelectricalshock,thisplugisintendedtotintoapolarizedoutletinonlyoneway.Ifthe
plugdoesnottfullyintotheoutlet,reversetheplug.Ifitstilldoesnott,contactaqualied
electrician. Do not attempt to defeat this safety feature.

5
4
English
Do not touch
the unit with
wet hands
Do not plug in or unplug with wet
hands.
This is to avoid electric shock or injury.
Do not let infants or children lick the
appliance plug.
Be especially careful infants and
children do not lick the appliance plug
accidentally.
Doing so may result in electric shock or
re.
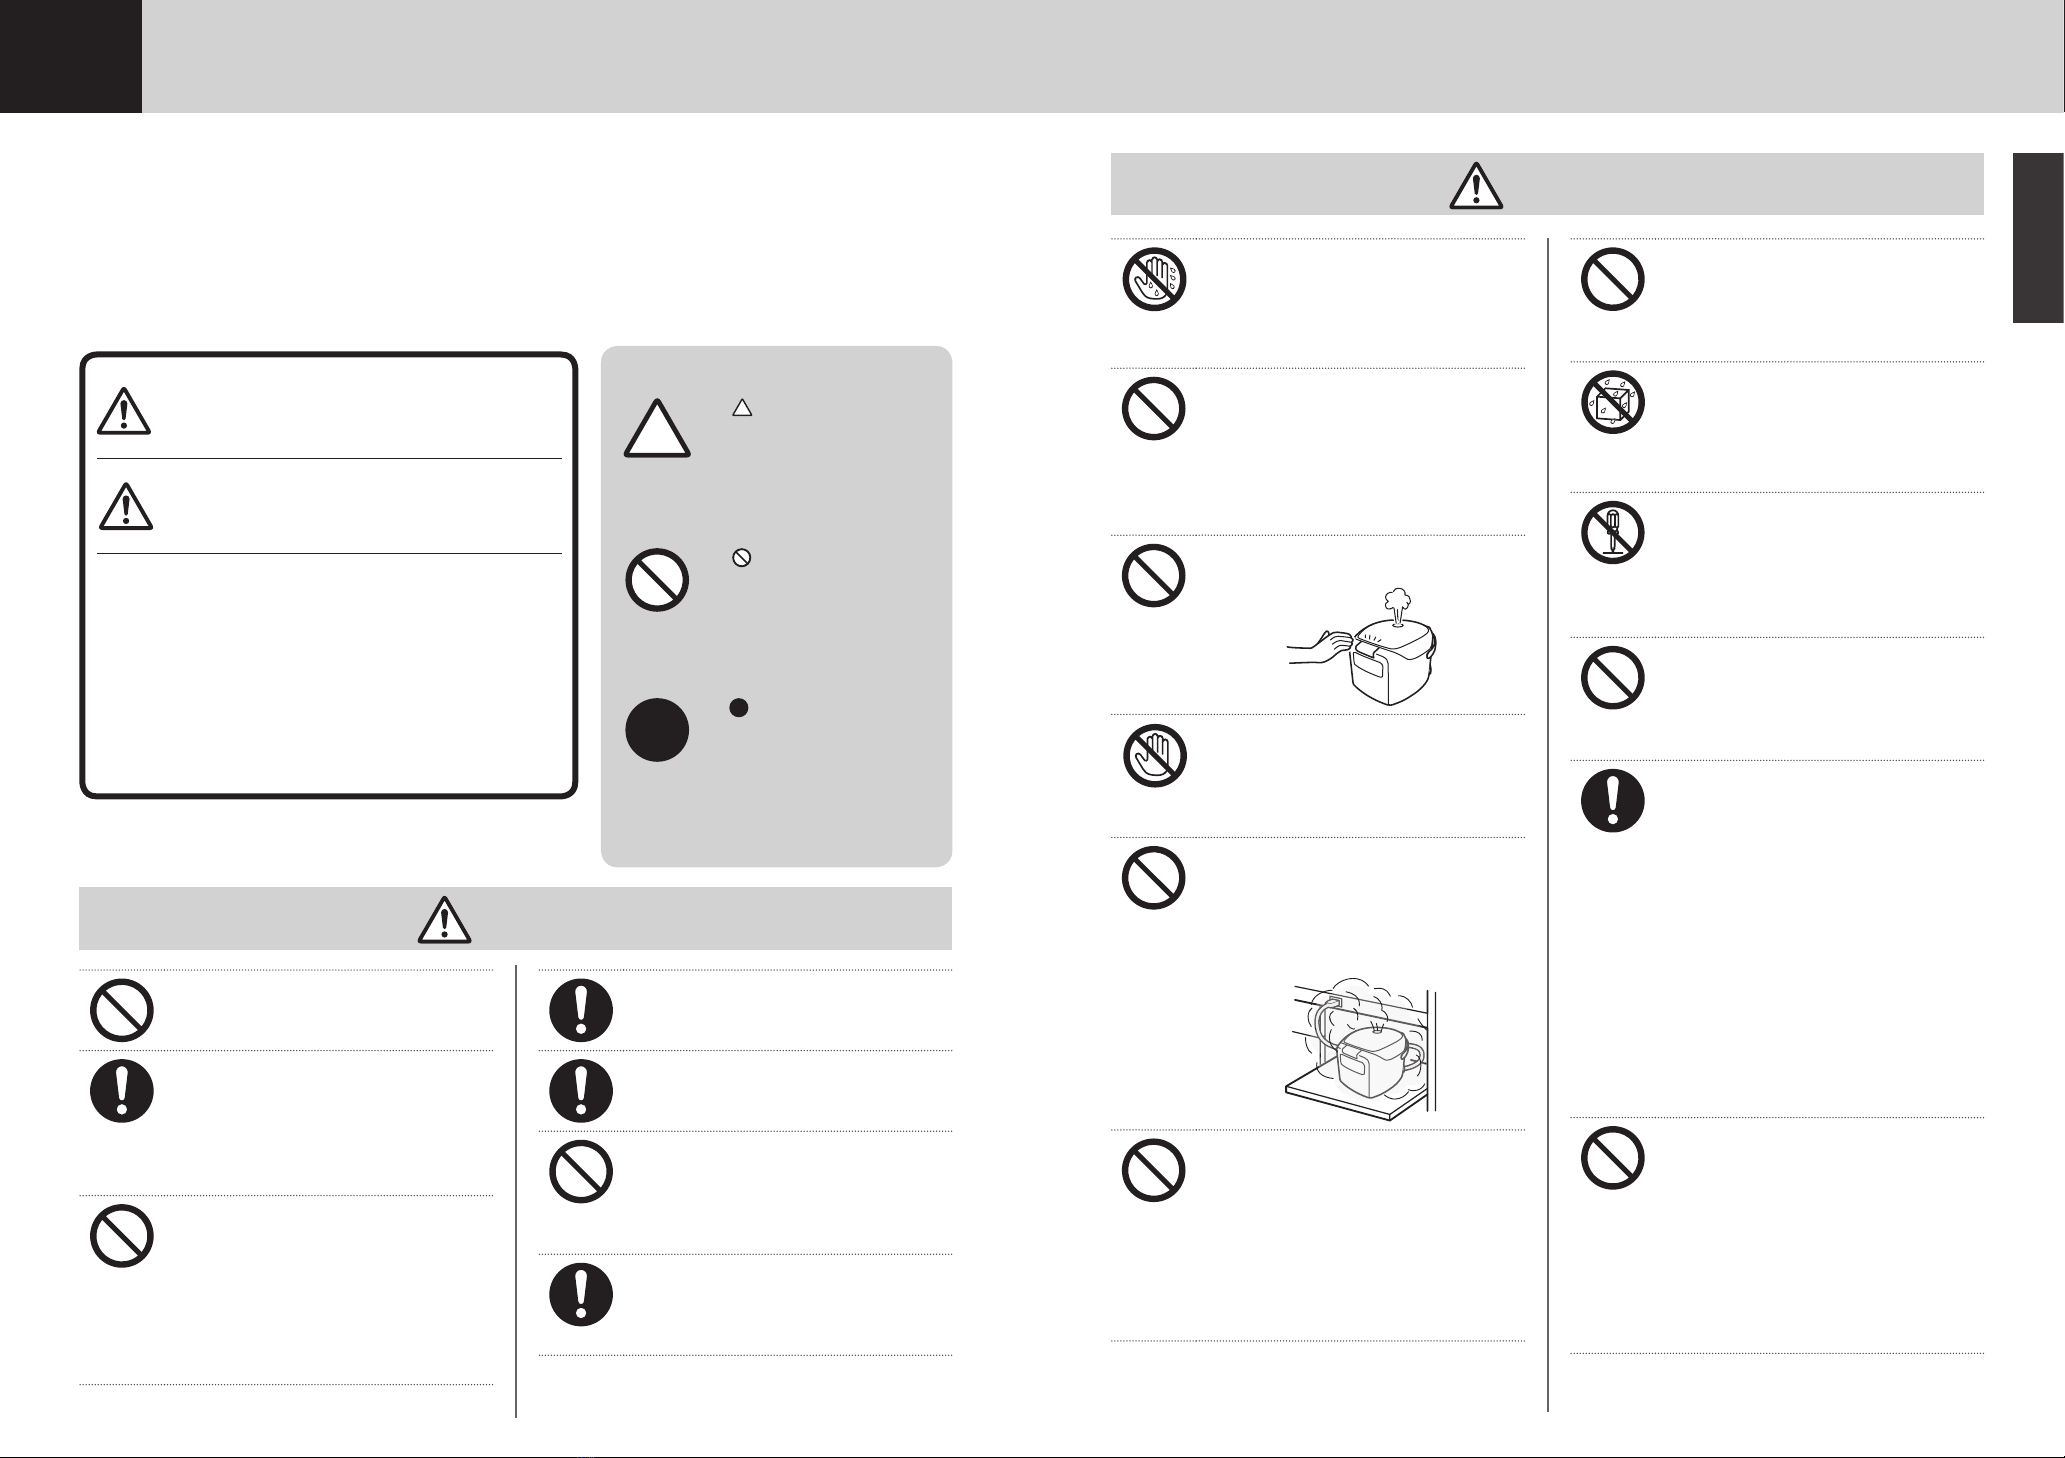
Never open the lid during cooking.
Doing so may result in burns.
Do not touch
Do not place your face or hands near
the steam vent.
Doing so may result in burns. Be
especially careful to keep out of reach of
infants and children.
Do not expose the plug to steam.
Doing so may result in electric shock
orre.Whenusingtheproductona
sliding table, be careful not to expose
the product to steam.
Do not use the rice cooker on a
sliding tabletop that can not easily
bear its weight.
Falling from the tabletop may result in
injury, burns, or malfunction of the unit
itself.
Beforeusingthericecooker,conrm
thattheslidingtabletopissufciently
able to bear its weight.
Do not allow children to use the
appliance by themselves and do not
put within reach of infants or toddlers.
Failing to do so may result in burns,
electric shock, or injury.
Never immerse
the unit in water
or other liquid
Do not immerse the appliance
in water, or pour water into the
appliance;
this is to avoid short circuits, electric
shocks, and malfunctions.
Disassembly
is prohibited
Do not attempt to disassemble, repair,
or modify the product. Repairs should
only be performed by a qualied service
representative.
Doingsomayresultinre,electric
shock, or injury.
Do not insert any metal objects the
air inlet or air outlet, or any gaps
between parts.
Doing so may result in electric shock or
malfunction.
Stop using the appliance immediately if
you incur any malfunction or trouble.
Notdoingsomayresultinre,electric
shock, or injury.
Examples of trouble:
• The power cord and/or plug become
abnormally hot.
• Smoke is emitted from the rice cooker or
a burning odor is detected.
• The rice cooker is cracked or there are
loose or rattling parts.
• The inner pot is deformed.
• There are other problems or abnormalities.
Immediately unplug the power cord from the
outlet and contact the place of purchase.
Do not use this product in anyway
not described in the operating
instructions.
Steam or contents may spray out
causing burns or other injuries.
(Examples)
• Heating ingredients inside of plastic
cooking bags, etc.
• Using parchment paper to cover food
in the rice cooker.
警 警
Use only rated voltage power.
Use of any other power supply voltage
mayresultinreorelectricshock.
Use an electrical outlet rated 7A
or higher and do not plug in other
devices at the same time.
Connecting other devices in the same
outlet may cause the outlet to overheat
orresultinre.
Do not damage or use a damaged
power cord.
Do not forcefully bend, twist, fold, or
modify the cord.
Do not place near high temperature
surfaces or under/between heavy objects.
Adamagedpowercordcancausereor
electric shock.
Wipe the plug thoroughly in the case dust
or other foreign objects are collected.
Thisistoavoidre.
Firmly insert the plug into the outlet.
This is to avoid electric shock, shorting,
smoke,orre.
Do not use the product if the power
cord or plug is damaged or the plug
is loose in the outlet.
This is to avoid electric shock shorting,
orre.
If the supply cord is damaged, it
must be replaced by a special cord
or assembly available from the
manufacturer or its service agent.
Read and follow all safety instructions before using the rice cooker.
• The WARNINGS and CAUTIONS described below are intended to protect the user and other individuals from
physical harm and household damage. To ensure safety, please follow carefully.
• Do not remove the caution/warning seal attached to the appliance.
Safetyinstructionsareclassiedanddescribedaccordingtothelevelofharmanddamagecausedby
improper use, as shown below.
1 Important Safeguards
Warning
Warning
This symbol indicates there
is a possibility of death or
serious injury*1 when the unit is
improperly handled.
Caution
This symbol indicates there is a
possibility of injury*2 or damage
to property*3 when the unit is
improperly handled.
*1 "Seriouslyinjury"isdenedhereaslossofsight,burns(high
and low temperature), electric shock, broken bones, poisoning,
or other injuries severe enough to require hospitalization or
extended outpatient care.
*2 "Minorormoderateinjury"isdenedhereasaphysicalinjury,
burn, or electric shock which will not require hospital stay or
extended outpatient care.
*3 "Damagetoproperty"isdenedhereasdamagetowardsa
building, furniture, or pets.
Description of Symbols
The symbol indicates
a warning or caution. The
specicdetailsofthewarning
or caution are indicated inside
the symbol or in an illustration
or text near the symbol.
The symbol indicates a
prohibitedaction.Thespecic
details of the prohibited
action are indicated inside the
symbol or in an illustration or
text near the symbol.
The symbol indicates an
action that must be taken or an
instruction that must be followed.
Thespecicdetailsoftheaction
or instruction are indicated inside
the symbol or in an illustration or
text near the symbol.
Warning

7
6
English
Be sure to rmly hold the plug when
removing from an outlet; this is to
avoid electric shock, shorting, or re.
Do not use multiple outlet
receptacles; this is to avoid re.
Do not cook with the inner pot empty.
Doing so may result in overheating or
malfunction.
Handle the rice cooker with care.
Dropping the rice cooker or exposing it
to a strong impact may result in injury or
malfunction of the unit itself.
Wait until the appliance has cooled
down before performing maintenance;
this is to avoid burns from hot surfaces.
Do not wash the entire appliance.
Do not pour water into the appliance or
into the base of the appliance; this is to
avoid short circuits and electric shocks.
Do not handle the inner pot with your
bare hands when the rice cooker is or
has recently been in operation; use
oven mitts to pick up the pot.
Touching the hot pot may result in burns.
Inner pot
Do not move the rice cooker while it
is still cooking.
Doing so may cause the contents to spill
and cause burns.
It may also cause the appliance’s plug to
detach and lead to incomplete cooking.
Do not touch
Do not touch the hook button
while carrying the rice cooker.
Doing so may cause the lid to open,
resulting in injury or burns.
Household use only.
This appliance is intended to be used in
household and similar applications such
as:
• staffkitchenareasinshops,ofces
and other working environments
• farm houses
• by clients in hotels, motels and other
residential type environments
• bed and breakfast type environments
Do not use on an unstable surface, or
on a table or rug that is vulnerable to
heat.
Doingsomayresultinreordamageto
the table or mat.
Do not use near the wall or furniture.
Steam and heat may cause damage,
discoloration and/or deformation. Use the
rice cooker at least 30cm away from walls
or furniture. When using the appliance on
a kitchen rack or cabinet, make sure the
steam or heat is not trapped.
At least 30cm
CautionWarning
Caution
Do not use the rice cooker near a heat
source or where it may be splashed
with water.
Doing so may result in electric shock,
short-circuiting,re,ordeformationor
malfunction of the rice cooker.
Do not use the rice cooker on an IH
cooking heater.
Doing so may result in malfunction.
Use only the inner pot made
exclusively for this rice cooker.
Using any other pot may result in
overheating or malfunction.
Use only the power cord provided for
this product. Do not use this power
cord for other appliances.
Doing so may cause the appliances to
malfunctionorcatchre.
Be careful of the escaping steam
when opening the lid.
Exposure to steam may result in burns.
Do not touch
Do not touch hot parts during or
immediately after cooking.
Doing so may result in burns.
Do not use the rice cooker in a small
space where the operation panel is
exposed to steam.
Steam and heat may result in deformation
of the operation panel, and/or damage,
discoloration, deformation, and/or
malfunction of the rice cooker. When
using the rice cooker on a sliding tabletop,
pull the tabletop out so that the operation
panel is not exposed to the emitted steam.
Unplug the
power cord
Unplug power cord when not in use.
This is to avoid injury, scalds, electric
shock,orrecausedbyashort-circuit.

9
8
English
Checking the accessories
The spatula
can be
inserted
into this
holder.
Spatula
Measuring cup
1 cup (about 0.18 L),
about 150 g
Before the rst use
Please wash the inner pot, inner lid and accessories
rstbeforeuse.(Seep.26to29)
Sounds emitted by the rice cooker
The following sounds coming from the rice cooker
when cooking, steaming, using the Keep Warm
function, or reheating is normal and does not
indicate a problem:
• A clicking sound (This is the sound of the
microcomputer controller.)
• A scraping sound (This is the sound of metal
contracting and rubbing together due to heat.)
• A sound like boiling water (Only during cooking or
steaming.)
2
Names and Functions of Component Parts
Following these safety instructions
will allow the appliance to be used
for many years.
●Remove any burnt rice or remaining grains of rice.
Failure to do so may cause steam to leak
or contents to boil over. This may result in
malfunction or improperly cooked rice.
●Do not cover the rice cooker
with a cloth or other object
during cooking.
Doing so may cause the rice
cooker or the lid to become
deformed or discolored.
●Do not reheat rice using the Keep Warm function
when it is cold. Doing so may result in an
unpleasant odor.
●The holes on the rice cooker are designed to
maintain its functions and performance. In
extremely rare cases, dust or even insects may
enter these holes and cause malfunction. To
prevent this, a commercially available insect
prevention sheet, etc., is recommended. If a
malfunction does occur due to this problem, it will
not be covered by warranty. Contact the place of
purchase.
● Theinnerpot'suorocarbonresincoatingmay
wear and peel with extended use. This material is
harmless to humans and this situation presents no
hindrance to actual cooking or to the rice cooker’s
heat insulating capability. In the case you would
like to purchase a new inner pan, you can do so
by contact the place of purchase.
●Strictly observe the following instructions
tokeeptheuorocarbonresincoatingfrom
scratching or peeling.
• Do not place the inner pot directly over gas,
electric, or IH stove top. Do not place in the
microwave or oven.
• Use the Keep Warm function for white rice
and rinse-free rice only. Do not use for mixed
or seasoned rice, etc.
• Do not use vinegar inside the inner pot.
• Use only the supplied spatula or a wooden
spatula.
• Do not use hard utensils such as metal
ladles, spoons, or whisks.
• Do not place a basket inside inner pot.
• Do not place tableware and other hard
utensils or objects inside the inner pot.
• Do not clean the inner pot with hard materials
such as metal spatulas or nylon scouring
sponges.
• Do not use a dishwasher/dryer to clean the
inner pot.
• Be careful not to scratch the inner pot when
washing rice.
• If the inner pot becomes deformed, contact
the place of purchase.
Operation panel
[Hour] and
[Min] keys
[Menu] key
Keep Warm lamp
[Keep Warm/
Cancel] key
Display
[Timer] key
[Start] key
• The reliefs ( ) on the [Start] and [Keep Warm/Cancel] keys are to aid persons with a visual impairment.
Start lamp
Timer lamp
Lid
Gasket
This gasket is
not removable;
do not attempt
to remove it.
Carrying handle
Use when carrying
the rice cooker.
Center sensor
Inner
lid
Inner pot
You can wash rice.
Upper casing
Hook button
Push to open
the lid.
Plug receptacle
Power cord
Steam
vent
Heating plate
Power plug
<Power cord>
(Connect this end
to an outlet.)
Appliance plug
(Connect this
end to the plug
receptacle.)

11
10
English
The lithium battery
The rice cooker has a built-in lithium battery that
stores the present time and the preset timer settings
even with the power plug disconnected.
• Thislithiumbatteryhasafour-to-ve-yearlife
expectancy with the power plug disconnected.
• If the lithium battery runs out, “0:00” will blink on
the display when the power cord is plugged back
in. Normal cooking is still possible, but the present
time, preset timer settings, and elapsed Keep
Warm time will no longer be stored in memory
when the power plug is disconnected.
Note
●Do not attempt to replace the lithium battery
yourself.
To replace the battery, contact the place of
purchase.
Checking the present time
The time is displayed in a 24-hour format. It should
be adjusted if the correct time is not displayed. (See
p.39.)
Menu options and features
Menu
Timer
function
availability
Keep
Warm
function
availability
Feature
Eco
Select when cooking white rice (rinse-free rice). Cooking using this
menuwillmakericermercomparedtothe“Plain”menu.However,
power can be saved (approx. 7.5 to 13.5% reduction).
Plain Select when cooking white rice (rinse-free rice).
Quick — Select when quickly cooking white rice (rinse-free rice).
Sweet • Mixed — Select when cooking seasoned rice or steamed glutinous rice.
Porridge Select when making porridge.
Brown Select when cooking brown rice or multi-grain-brown rice (brown rice
mixed with grains).
Slow Cook — Select when cooking a stew or soup from the menu guide.
Cake — — Select when making a cake from the menu guide.
See p.40 for cooking capacities.
:DonotusetheKeepWarmfunctionbecauseitsavormaynotbemaintained.
Note
●When using the “Porridge” menu, the porridge can become pasty if kept warm for too long; serve as
soon as possible.

13
12
English
Tips on making delicious rice
Read
p.14
to
15
for preparations
before cooking rice, and
p.16
to
19
for how to cook rice.
Select high quality rice and store it in a
cool location.
Choose freshly polished, glossy rice with a uniform
grain size. Store in a cool, dark, well-ventilated place.
Carefully measure the rice with the
supplied measuring cup.
One cup equals about 0.18 L.
Use the supplied measuring
cup for rinse-free rice as
well. This rice cooker has an
excellent rice cooking function,
so it is not necessary to use
the supplied measuring cup for
rinse-free rice.
Wash the rice quickly.
Stir the rice around with your hand in a generous
amount of water, pour out the water, and repeat until
the water remains clear.
When cooking semi-polished rice, whole
rice, rice boiled with barley, germinated
brown rice, and rice mixed with grains,
select the “Plain” menu.
• When cooking porridge, select the “Porridge”
menu.
• When cooking mixed grain with white rice,
place the mixed grain on top of the white rice.
Add water according to the type of rice
and your personal preference.
●Amount of water to add
If you choose to use more or less water than the
recommended amount, do not deviate from that
amount by any more than 1/3 of one line.
Menu
Corresponding scale (Use the
corresponding scale on the inner pot
as a guide and add water according
to your personal preference.)
Eco “Eco” scale
Plain
Quick
Mixed
“Plain” scale
Sweet (glutinous
rice) “Sweet” scale
Sweet (a mixture
of glutinous and
non-glutinous rice)
Between the “Plain” and “Sweet”
scales
Brown “Brown” scale
Porridge Hard porridge: “Porridge • hard” scale
Soft porridge: “Porridge • soft” scale
• When cooking rinse-free rice, use the “Plain”
scale as a reference but add a little extra water
(until it just covers the corresponding line).
• When cooking germinated brown rice, whole
rice, semi-polished rice, grains, long-grain rice,
use the “Plain” scale as a reference.
• Iftheamountofwatertoaddisspeciedon
a package of germinated brown rice or multi-
grain rice, follow those directions and add water
according to your personal preference.
• When cooking multi-grain-brown rice, use the
“Brown” scale as a reference.
• When cooking brown rice and white rice
together, use the middle position of the “White”
and “Brown” scales as a reference.
Cooking rinse-free rice
• Add the rinse-free rice and water, and then stir
well from the bottom so that every individual grain
of rice becomes immersed in the water.(Merely
adding water to the rice will prevent it from soaking
in the water and may result in improperly cooked
rice.
• If the added water turns white, we recommend you
wash the rice thoroughly by replacing the water
once or twice. (The water turning white is due to
the starch in the rice and not its bran; however,
cooking it with the starch left in the water may
result in burned rice, the contents boiling over, or
improperly cooked rice.)
Adding other ingredients to the rice
The total amount of ingredients should be no more
than 70 g per cup of rice. Stir in any seasoning well
and then add the extra ingredients on top of the rice.
If other ingredients are to be added to the rice, be
sure to use no more than the acceptable maximum
amount (refer to the table below).
Mixed 2 cups or less
Sweet 2 cups or less
Porridge•hard 0.5 cups
Brown 1.5 cups or less
• Add water prior to adding the ingredients.
Adding water after the ingredients will result in
thecookedricebeingtoorm.
Cooking brown rice or multi-grain-brown
rice mixed in with white rice
• Multi-grain rice is brown rice mixed with grains.
• If the rice to be cooked includes more brown
rice or multi-grain-brown rice than white rice,
use the “Brown” menu.
• If there is an equal amount of brown rice or
multi-grain-brown rice and white rice, or there is
more white rice than brown rice or multi-grain-
brown rice, use the “Plain” menu. (See p.16)
(The brown rice should be soaked separately
for 1 to 2 hours before cooking.)
Cooking grains together with white rice
• Select the “Plain” menu.
• The amount of grains should equal less than
20% of the volume of the white rice.
• The combined volume of the white rice and
grains should be 3 cups at most.
• The grains should be placed on top of the
white rice. Mixing them together may result in
improperly cooked food.
• If you feel the cooked grains are too hard, soak
the grains separately for about 1 hour prior to
cooking.
Cooking grains together with brown rice
• Always use the “Brown” menu.
• The maximum acceptable amount for the
combination of brown rice and grains is 2 cups.
Cooking steamed glutinous rice
• When cooking steamed glutinous rice, select the
“Sweet • Mixed” menu.
Wash the rice, and then level it out so that all of
the rice is covered by water.
Cooking long-grain rice
• When cooking long-grain rice, select the
“Quick” menu.
When cooking seasoned rice with various
ingredients using long-grain rice, select the
“Sweet • Mixed” menu. Selecting any other
menu may result in the contents boiling over.

15
14 15
14
English
1 Measure the rice.
Always use the measuring cup supplied with
the rice cooker (for rinse-free rice as well).
Alevelllingofriceinthesuppliedmeasuring
cup equals about 0.18 L.
●Use the supplied measuring cup for rinse-free rice
as well.
Correct
measurement
Incorrect
measurement
Note
● Alwaysusethespeciedvolumeofrice(see
“Specications”onp.40).Otherwisetherice
may not cook properly.
2 Wash the rice. (This can be
done using the inner pot.)
For rinse-free rice, see p.12.
Note
●Do not use hot water (over 35°C) to wash the
rice or when adding water. It may prevent the rice
from cooking properly.
●Do not apply too much force while washing the
rice. This could damage the inner pot and prevent
rice from cooking properly.
3 Adjust the water level.
Place the inner pot on a level surface and
adjust the water level to the appropriate line
of the corresponding scale on the inside of
the pot.
●The water level should be selected according
to the type of rice and the selected cooking
menu,butcanbene-adjustedtoyourpersonal
preference. (See the guidelines on p.12.)
When cooking 2 cups
of white rice, adjust the
water level to line “2”
on the “Plain” scale.
4 Wipe off any water and rice, etc.
<Outer surface and brim of the inner pot>
<Inside the rice cooker>
Gasket
Upper casing
Heating plate
Hook
button
Center
sensor
Caution
●Be sure to remove any rice or other material adhering
to and around the heating plate, center sensor, upper
casing, and the hook button. (see p.27.)
Adhered material can prevent the lid from closing,
allow steam to leak out during cooking, or cause
the lid to open and the contents to spray out,
resulting in burns or other injuries.
3 Before Cooking Rice
5 Place the inner pot in the rice
cooker.
(1) Turn the inner pot slightly left and right so
it is positioned correctly without any tilt.
(2) Close the lid.
(2) Close lid.
(1)
Inner pot
Conrmthattheinnerlidis
set in place.
Note
●Make sure the inner pot is set securely into the
rice cooker.
Inner pot
●Be careful not to touch an operation key when
closing the lid.
6 Connect each end of the power
cord to the specied locations.
Appliance plug
(1) Connect
(2) Connect
Power plug
The power will turn on and the symbol will
blink.
Blinks
Note
●If the Keep Warm lamp is on, press the [Keep
Warm/Cancel] key to turn off the lamp.
OffOn

17
16 17
16
English
4 How to Cook Rice
1 Press the [Menu] key to move
the to the desired menu.
Each time the [Menu] key is pressed, the
selected menu will change in the order shown
below.
The symbol will blink while the menu is
being selected.
Blinks
Beep
• It is not necessary to press the [Menu] key if
the desired menu is already selected.
Note
●Owing to the shorter cooking time of the “Quick”
menu,ricewillbecookedwitharmertexture
under this menu compared to the “Plain” menu.
2 If you selected the “Porridge”
menu, use the [Hour] and [Min]
keys to set the desired cooking
time.
• Each time the [Hour] key is pressed, the
set time will increase by 5 minutes. Each
time the [Min] key is pressed, that time will
decrease by 5 minutes.
• The cooking time can be set to any 5-minute
increment between 40 and 90 minutes.
Increases by 5 min.
Decreases by 5 min.
• The default setting is for 60 minutes. Adjust
as desired.
3 Press the [Start] key.
Cooking will start.
On Beep-beep
Long
Beep
Plain rice
Grains other than plain rice
On
Cooking time guidelines
Eco Plain Quick Sweet • Mixed Brown
40 to 52 min 41 to 53 min 18 to 42 min 36 to 56 min 62 to 76 min
• The above times indicate the amount of time to the end of steaming after cooking is completed when the
rice is not soaked prior to pressing the [Start] key. (Voltage: 220 - 230 V, Room temperature: 23°C, Water
temperature: 23°C, Amount of water: normal level)
• Cooking times will differ somewhat depending upon the amount being cooked, the type of rice, the type
and quantity of ingredients, the room temperature, the water temperature, the amount of water, electrical
voltage, and whether the Timer function is used or not, etc.
5 Once the Rice Is Done Cooking
1 When the steaming process
starts…
The time until steaming is complete is shown
on the display in 1-minute increments.
• Steaming times will vary depending upon the
selected menu.
During steaming the time remaining is
displayed.
2 When cooking is complete.
The Keep Warm function starts automatically.
On Alarm (8 long
beeps)
Off
• When using the “Porridge” menu, press the
[Keep Warm/Cancel] key and take out the
rice immediately. You should serve the rice
as soon as possible after removing it. (The
Keep Warm lamp will turn on.)
• If you added ingredients under the “Porridge”
menu, or a longer cooking time is required,
etc., you can set the desired additional
cooking time. Simply press the [Hour] and
[Min] keys once the Keep Warm lamp
turns on, and then press the [Start] key.
The cooking time can be extended up to
15 minutes in increments of 1 minute, a
maximum of 3 times.
• Stir the rice well before reheating.
3 Stir and loosen the cooked rice.
Be sure to stir and loosen the rice as soon as
cooking is complete.
• Due to the shape of the inner pot, the rice is slightly
sunkenatthecenterwhencookingisnished.
• Always wear a kitchen mitten, etc., to hold
the pot while stirring.
Condensation
will collect in the
upper casing.
Inner pot
Note
●Be sure to wipe off any hot water that collects on
the upper casing or that runs onto the outside of the
rice cooker when you open the lid immediately after
cooking or while the Keep Warm function is on.
When you are done using the rice cooker...
1 Press the [Keep Warm/Cancel] key.
Off
On
Beep
Note
●If you disconnect the power plug without
canceling the Keep Warm function, the next
time you turn on the rice cooker, the Keep
Warm light turns on and you cannot cook.
2 Disconnect the power plug and then
the appliance plug.
(1) Disconnect
(2) Disconnect
3 Clean the rice cooker. (See p.26 to
29.)

19
18 19
18
English
4
1
2
3•5
6
Using the Timer function
You can preset the time that you want cooking
to be actually completed.
• You can preset the time that you want cooking to
actually be complete.
• The preset timer settings will be stored in
memory.
●Example setting: If “Timer” is set to 13:30, cooking
will be completed at 13:30.
1 Check the present time.
• Make sure the present time is correct, or
cooking will not be completed on time. See
p.39 for the procedure to set the present
time.
• The time is displayed in a 24-hour format.
Blinks
2 Press the [Menu] key to move
the to the desired menu.
• It is not necessary to press the [Menu] key if
the desired menu is already selected.
Blinks
Blinks
Beep
3 If you selected the “Porridge”
menu, use the [Hour] and [Min] keys
to set the desired cooking time.
• Each time the [Hour] key is pressed, the
set time will increase by 5 minutes. Each
time the [Min] key is pressed, that time will
decrease by 5 minutes.
• The cooking time can be set to any 5-minute
increment between 40 and 90 minutes.
Increases by 5 min.
Decreases by 5 min.
• The default setting is for 60 minutes. Adjust
as desired.
6 Setting the Timer
4 Press the [Timer] key.
Blinks
Blinks
Beep
• The previously preset time will be displayed.
It is not necessary to set the timer again if the
desired completion time is already displayed.
Note
●The Timer function is not available in the following
cases.
• When the “Quick”, “Sweet • Mixed”, “Slow
Cook”, “Cake” menu is selected
• When the preset time is less than that indicated
in the following table. (Each time setting in the
table also applies to rinse-free rice.)
Menu Minimum preset time
Eco 1 h
Plain 1 h
Porridge Cooking time + 1 min
Brown 1 h 30 min
• If you set a time that cannot be registered, and
then try to use the Timer function, rice will be
cooked for the same time as the regular course.
• When “0:00” is blinking on the display
●If the Keep Warm lamp is on, press the [Keep
Warm/Cancel] key to turn off the lamp. (The Timer
function is not available while the Keep Warm
lamp is on.)
●If you do not operate the rice cooker within about
30 seconds after pressing the [Timer] key, an
alarm (3 beeps) will sound.
●If the [Timer] or [Start] key is pressed while the
rice cooker is in a state where the Timer function
is not available, an alarm (3 beeps) will sound.
5 Use the [Hour] and [Min] keys to
set the desired completion time
• The time is displayed in a 24-hour format.
Blinks
Beep
• Press the [Hour] key to change the set time
in 1-hour increments. Press the [Min] key to
change that time in 10-minute increments.
• Hold down the corresponding key to change
the time more rapidly.
Note
●Do not set the timer to more than 12 hours, as it
may result in spoiled rice.
6 Press the [Start] key.
The Timer lamp will turn on and the Timer
function is set.
On
Beep-beep
Long
Beep
Plain rice
Grains other than
plain rice
On
• If you make a mistake or otherwise want
to reset the timer, press the [Keep Warm/
Cancel] key and repeat the procedure from
step 2on p.18.

21
20 21
20
English
7 Keeping the Rice Warm
The Keep Warm function will automatically engage
when cooking is completed.
Turning off the Keep Warm
function
Press the [Keep Warm/Cancel]
key.
The Keep Warm lamp will turn off.
Off
Beep
Restarting the Keep Warm
function
Press the [Keep Warm/Cancel]
key.
The Keep Warm lamp will turn on.
On
Beep
Keeping a small amount of rice
warm
Gather the rice at the center of the inner pot; serve
as soon as possible.
Operations during Keep Warm
The Keep Warm light turns on during Keep Warm.
Elapsed Keep Warm time display
Hold down the [Hour] key to display the elapsed
Keep Warm time. The elapsed time will be displayed
in 1-hour increments up to 24 hours (“24h”).
If more than 12 hours has elapsed, the time on the
display will blink up to 24 hours.
Note
●Avoid the following, as they may result in unusual
odors, dryness, discoloration, and spoiling of the
rice, or corrosion of the inner pot.
• Using the Keep Warm function with cold rice
• Adding cold rice to rice that is being kept warm
• Leaving a spatula in the inner pot while the
Keep Warm function is on
• Using the Keep Warm function with the power
plug disconnected
• Using the Keep Warm function for longer than
12 hours
• Keeping less than the minimum required
amount (0.5 cup) of rice warm
• Using the Keep Warm function for anything
other than white rice (including rinse-free rice)
• Keeping warm a lump of rice with a hole in the
middle.
• Turning off the Keep Warm function with the
rice left in the rice cooker.
●Be sure to remove any grains of rice that adhere
to the brim of the inner pot as well as to any
gaskets. Failure to do so can result in dryness,
discoloration, odors, and stickiness of the rice
being cooked.
●When cooking is completed using the “Porridge”
menu, press the [Keep Warm / Cancel] key and
take out the inner pot immediately. The porridge
can become pasty if kept warm for too long.
Serve it as soon as possible.
●Serve cooked rice as soon as possible in cold
climates and high temperature environments.
8 Reheating Cooked Rice
For piping hot rice, reheat the rice that is being kept
warm before serving it.
Note
●Rice will not be fully heated if more than half of
the inner pot is full.
●The rice will end up dry if reheated under any of
the following conditions.
• The rice is still hot, such as immediately after
cooking.
• There is less than the minimum required
amount of rice (0.5 cup).
• The rice is reheated 3 times or more.
1 Stir and loosen the rice that was
being kept warm.
2 Add 1 to 2 tablespoons of water
evenly over the rice.
●Adding water will prevent the rice from drying out
and result in plumper rice.
3 Make sure that the Keep Warm
lamp is on.
On
• Reheating is not available if the Keep Warm
lamp is not on. If the lamp is not on, press
the [Keep Warm/Cancel] key.(See p.20.)
4 Press the [Start] key.
Blinks
Blinks
Off
Displays the
remaining
time
On
Beep
Alarm (3 long
beeps)
• To stop reheating, press the [Keep Warm/
Cancel] key.
• Reheating is not available if the rice is too
cold (under about 55°C). In this case, a
repeated beeping alarm will sound.
5 Stir and loosen the reheated
rice well, and even it out in the
inner pot.
• Always wear a kitchen mitten, etc., to hold
the pot while stirring.

23
22 23
22
English
9
Slow Cooking (“Slow Cook” Menu)
You can prepare the following dishes with ease.
Refer to “Menu Guide” (p.38) for directions.
Withthismenu,foodisrstbroughttonearboiling,
the heat is then lowered to about 93°C and the
food left to simmer. The temperature is then
lowered even further to about 90°C and simmering
is continued. By gradually lowering the heating
temperatureinthisway,avorsareenhancedand
the liquids do not boil down even when heated for a
long period of time.
Menu examples
Vegetable and chicken pot-au-feu, Simmered
pork shoulder and lentils
●For how to cook “Vegetable and chicken pot-au-
feu” and “Simmered Pork Shoulder and Lentils”,
see the “Menu Guide” (p.38.)
Note
●Caution should be exercised when making dishes
other than those described in “Menu Guide”, as
they may boil over.
●Stir well before cooking to prevent seasonings
from settling at the bottom of the inner pot.
●When simmering foods in broth, cool the broth
before cooking.
●When using potato starch to thicken foods, add it
at the end of cooking.
Basic cooking procedure
1 Prepare the ingredients.
2 Add ingredients to the inner pot
and close the lid.
Note
●Use the “Plain” scale on the inside of the inner pot
as a reference. Using more than the maximum
acceptable amount (see the table below) can
prevent proper boiling or cause the contents to
boil over. Be careful also not to use less than the
minimum required amount either, as that can also
cause the contents to boil over.
Maximum Minimum
“Plain” scale
3 or below
“Plain” scale
1 or above
3 Connect each end of the power
cord to the specied locations.
Appliance
plug
(1) Connect
Power plug
(2) Connect
Note
●If the Keep Warm lamp is on, press the [Keep
Warm/Cancel] key to turn off the lamp.
4 Use the [Menu] key to select the
“Slow Cook” menu.
The symbol will blink while the menu is
being selected.
Blinks
Beep
5 Set the desired cooking time.
Use the [Hour] and [Min] keys to set the
desired cooking time.
The cooking time can be set to any 5-minute
increment between 5 and 120 minutes.
• Each time the [Hour] key is pressed, the
set time will increase by 5 minutes. Each
time the [Min] key is pressed, that time will
decrease by 5 minutes.
Blinks
Beep
6 Press the [Start] key.
The Start lamp will turn on and cooking will
start.
On Beep
On
Note
●Do not open the lid during cooking. Doing so may
prevent the food from cooking properly.
7 When cooking is completed.
The Keep Warm lamp will turn on and “0h”
will be displayed.
On
“0h” is
displayed
Alarm (8 long
beeps)
Off
On
• When the Keep Warm lamp is on, press
the [Hour] key to add extra cooking time,
and then press the [Start] key.(The cooking
time can be extended up to 30 minutes a
maximum of 3 times.)
Note
●If a longer cooking time is required, do not press the
[Keep Warm/Cancel] key before extending that time.
Doing so will cause the Keep Warm lamp to go out
and additional cooking will not be possible. If you
mistakenly pressed the [Keep Warm/Cancel] key,
perform the following procedure.
1. Remove the inner pot and set it on a wet towel
or cloth.
2. Leave the rice cooker lid open and cool
down the unit and the inner pot for about 10
minutes.
3. Place the inner pot back inside the rice cooker.
4. Repeat the procedure from step 4on p.22.
• If you want food that is being kept warm to be
piping hot before serving it, press the [Start]
key when the Keep Warm lamp is on in order to
reheat that food. The remaining reheating time
is displayed and an alarm (3 long beeps) sounds
when the operation is complete. After reheating,
the Keep Warm lamp turns on and the elapsed
Keep Warm time is displayed.
Once cooking is completed...
1 Press the [Keep Warm/Cancel] key.
The Keep Warm lamp will turn off.
OffOn
2 Remove any odors. (See p.29)
Note
●If the [Keep Warm/Cancel] key is not pressed
when cooking is completed, the Keep Warm
function will automatically engage and the
elapsed Keep Warm time will be displayed in
hourlyincrementsfromthersthour(“1h”)up
to 6 hours (“6h”) after that. After 6 hours has
elapsed, “6” will blink on the display.
●Do not use the Keep Warm function
continuously for more than 6 hours as some
foods will lose their taste.

25
24 25
24
English
10
Baking a Cake (“Cake” Menu)
You can bake cakes as described on p.37.
Note
●Do not try to bake types of cake other than those
described in the menu guide.
●Do not bake with a greater volume of ingredients
than indicated in the menu guide. Otherwise, the
ingredients may boil over.
1 Prepare the ingredients.
2 Pour the dough into the inner
pot.
3 Press the air out of the dough.
Note
●When squeezing the air out of the dough before
baking, do so with a soft cloth. Otherwise the
inner pot could be deformed or damaged.
4 Place the inner pot in the rice
cooker.
(1) Turn the inner pot slightly left and right so
it is positioned correctly without any tilt.
(2) Close the lid.
(2) Close lid.
(1)
Inner pot
Conrmthattheinnerlidis
set in place.
5 Connect each end of the power
cord to the specied locations.
Appliance
plug
(1) Connect
Power plug
(2) Connect
Note
●While the Keep Warm light is on, press the [Keep
Warm/Cancel] key to turn off the light.
6 Use the [Menu] key to select the
“Cake” menu.
The symbol will blink while the menu is
being selected.
Blinks
Beep
7 Set the cooking time.
Use the [Hour] and [Min] keys to set the
cooking time. Use the [Hour] and [Min] keys
to set the cooking time. The cooking time can
be set to any 1-minute increment between 1
and 60 minutes.
• Each time the [Hour] key is pressed, the
set time will increase by 1 minutes. Each
time the [Min] key is pressed, that time will
decrease by 1 minutes.
Blinks
Beep
8 Press the [Start] key.
The Start lamp will turn on and baking will
start.
On Beep
On
9 When baking is complete.
The Keep Warm lamp will start blinking.
Blinks
Alarm (8 long
beeps)
Off
Blinks
1 Open the lid and poke the center of the
cake with a wooden skewer. (If no raw
dough comes out, the center of the cake
is baked.)
• If dough comes out, while the Keep Warm light
is blinking, press the [Hour] key to add extra
baking time, and then press the [Start] key.(The
cooking time can be extended up to 15 minutes
a maximum of 3 times.)
Note
●Do not press the [Keep Warm/Cancel] key before
adding extra baking time. Doing so will cause the
Keep Warm lamp to go out and additional baking
will not be possible. If you pressed it accidentally,
follow the steps below.
1. Remove the inner pot and place it on a wet
towel or cloth.
2. Leave the main body lid open and cool down
the main body and the inner pot for about 10
minutes.
3. Place the inner pot back inside the main body.
4. Select “Cake”, and then set additional baking
time.
2 Remove the inner pot, take out the cake
and let it cool.
Note
●Wear oven mitts, etc. when removing the inner
pot and careful not to touch it with your bare
hands. Doing so may result in burns.
●Remove the cake as soon as baking is complete.
If it is left in the rice cooker, condensation on the
inner lid will drip onto the cake, making it sticky.
When baking the cake is
complete…
1 Press the [Keep Warm/Cancel] key.
The Keep Warm lamp will turn off.
OffBlinks
2 Remove any odors. (See p.29)

27
26
English
11
Cleaning and Maintenance
Any other servicing should be performed by an authorized service representative.
Perform cleaning and maintenance procedures as described on the following p.26 to 29.
Clean all parts by hand. Do not use a dishwasher/dryer.
To maintain cleanliness, always clean the rice cooker on the same day it is used. Also clean the rice cooker at
regular intervals as well.
The rice cooker should also be cleaned on the day that it is used in order to remove any odors that remain
from cooking. (See p.29.)
Note
●Be sure to disconnect the power plug and allow the rice cooker, inner pot, and inner lid to cool down before
cleaning.
●Clean with a soft sponge and cloth.
●When cleaning the rice cooker with a detergent, use only standard kitchen detergent (for tableware and
kitchen utensils).
●Rinse the parts thoroughly since detergent remaining on them may result in deterioration and discoloration
of part’s materials such as resin.
Parts to wash after every use
Inner pot
Spatula
Inner lid
Measuring cup
Steam vent
1 Clean with a soft sponge and with tap or lukewarm
water.
2 Wipe off water with a dry cloth and completely dry
all parts.
Note
●Do not clean the inner pot with the abrasive side of a heavy-
dutyscrubsponge.Doingsomaydamagetheuorocarbon
resin coating.
Do not use the abrasive side
of a heavy-duty scrub sponge.
●Do not wash dishes, etc., inside the inner pot. Also, do not
place the inner pot upside down on top of dishes, etc., to
dry.Doingsomaydamagetheuorocarbonresincoatingor
cause it to peel.
●Do not immerse the measuring cup and spatula in hot water.
Doing so may cause them to become deformed.
Parts to wash when dirty
Upper
casing
Lid heater
Center sensor
Heating
plate
Inside and outside the rice cooker
Wet a towel or cloth, wring out excess water, and wipe.
Heating plate and center sensor
Remove burned rice and any other adhering grains of rice.
If adhering objects are hard to remove, use commercially
available sandpaper (around #320), then wet a towel or
cloth, wring out excess water, and wipe.
Around the upper casing and hook button
Remove any adhering grains of rice, etc.
Note
●Do not allow water to get inside the rice cooker unit.
Power cord and plug Wipe with a dry cloth.
Note
●Do not immerse the power cord in water or even
splash it. Doing so may cause a short-circuit or electric
shock.
Note
●Do not pull the gaskets.
●Always keep the inner pot and lid clean to prevent corrosion and odors.
●Do not clean the rice cooker or its parts with thinner, cleanser, bleach, disposable cloth, metal spatulas,
nylon scouring sponges or the like.
●Always clean each part separately.
●Do not immerse the measuring cup, spatula in hot water. Doing so may cause them to become deformed.
●Do not use a dishwasher/dryer to clean the rice cooker or its parts. Doing so may cause them to become
deformed.
●Always clean the inner lid after cooking with grains (amaranths, etc.). The steam vent on the inner lid may
clog and cause problems, such as preventing the lid from opening, resulting in improperly cooked food.

29
28
English
Removing and attaching the inner lid
How to detach
Detach the inner lid toward you.
How to attach
Insert the inner lid into the hole on the lid as
showninthefollowinggure.
Inner lid
Lid
Hole
Note
●Do not pull on the lid gasket.
Once it is detached, it cannot be reattached.
Gasket
1 Add a bit of standard kitchen cream
cleanser to a nylon scouring sponge,
and remove the surface dirt.
Nylon scouring sponge
Heating plate
2 Wipe clean with a damp paper towel or
cloth.
Cleaning the heating plate
Water drops may fall from the inner lid during cooking and cause the surface of the heating plate to become
dirty. This will not affect the performance of the rice cooker but, if you would like, you can clean the heating
plate using the following procedure.
Removing odors (When odors remain in the rice cooker)
The following procedure should be performed each time after cooking, or if odors become bothersome.
1 Fill the inner pot to about 70
to 80% with water, select the
“Plain” menu and press the
[Start] key.
Conrm that the Keep Warm
lamp is on and press the [Keep
Warm/Cancel] key.
Note
●If odors become bothersome, use about 20g of citric
acid added to the water for more effective deodorizing.
It may be impossible to remove some odors
completely. In this case, contact the place of
purchase.
2 Wash the inner pot and inner
lid with a standard kitchen
detergent, and then rinse
sufciently with water.
3 Allow the rice cooker and all
parts to dry in a well-ventilated
location.

31
30
English
12
If Rice Does Not Cook Properly
Check the following points if you experience a problem with the cooked rice or with the operation of the rice
cooker, etc.
Check point
Problem
Was the amount of rice,
ingredients, and water, or the ratio
of multi-grain rice, correct?
Was more than the maximum
acceptable amount cooked?
Was cooking done with
alkaline ionized water (pH 9
or higher)?
Was cooking done with hard
water like mineral water?
Was the correct menu
selected?
Was the Timer function used?
Was the [Start] key pressed after
cooking without turning off the
Keep Warm function?
Are there grains of burned rice or
water drops adhering to the outside
bottom of the inner pot, or to the
heating plate or the center sensor?
Is the inner pot deformed?
Was there a prolonged power
outage?
Was the rice stirred and
loosened well?
Cooked rice
Is too hard
Is too soft
Is not cooked
completely
Has a hard center
Is burned
During cooking
Steam leaks
Boils over
The cooking time is
excessively long
Reference page 12-
14•40 40 — — 16 — 17 14•26-
27 — 40 17
Check point
Problem
Are there any grains of rice
adhering to gaskets or the brim
of the inner pot, etc.?
Was the rice (other than rinse-
freerice)washedsufciently?
Was hot water (35°C or higher)
used to wash the rice or adjust
the water level?
Was the rice left soaking in the
water too long after washing?
Was the rice left in a colander
after washing?
Was the lid closed securely?
Was the rice mixed with other
ingredients or multi-grain rice?
Were seasonings stirred well?
Were there a lot of cracked
grains of rice?
Was cooking continued
immediately after the initial
cooking?
Was the rice cooker and its parts
cleanedsufciently?
Cooked rice
Is too hard
Is too soft
Is not cooked
completely
Has a hard center
Is burned
Smells like rice bran
During cooking
Steam leaks
Boils over
The cooking time is
excessively long
Reference page 14•26-
27 12•14 14 — — 15•26-
29 12 — — 26-29
Problem Cause
Thereisathinlmcovering
the rice.
Athin,tissue-likelmisformedbymeltedanddriedstarch.Thisisnotharmfultoyour
health.
Rice sticks to the inner pot. Soft rice and sticky rice can easily stick to the pot.
Check point
Problem
Was the amount of rice and
water correct?
Are there grains of burned rice or
water drops adhering to the outside
bottom of the inner pot, or to the
heating plate or the center sensor?
Was there a prolonged power
outage?
Was the rice stirred and
loosened well?
Are there any grains of rice adhering
to gaskets, the brim of the inner pot,
or the lid, etc.?
Was the rice (other than rinse-
freerice)washedsufciently?
Was the rice or food reheated 3
or more times?
Was the Timer function set for
more than 12 hours in advance?
Was the Keep Warm function
used continuously for more than
12 hours?
Rice being kept warm
Has an odor
Is discolored
Is dry
Is sticky
Reheated rice is dry
Reference page 12-
14•40
14•26-
27 40 17 14•26-
27
12-
14 21 18 20
Check point
Problem
Is other than white rice or rinse-
free rice being kept warm?
Was less than the minimum
required amount of rice being
kept warm or reheated?
Is the rice concentrated around
the outer portions of the inner
pot (less rice in the middle of the
pot)?
Was cold rice added?
Was a spatula left in the inner
pot?
Was the rice cooker and its parts
cleanedsufciently?
Was the rice left in the rice
cooker with the Keep Warm
function turned off?
Did you try to reheat rice that
was just cooked and was still
hot?
Were odors removed after
cooking?
Rice being kept warm
Has an odor
Is discolored
Is dry
Is sticky
Reheated rice is dry
Reference page 20 20 20 20 20 26-29 — 21 23•29

33
32
English
13
Slow Cook or Cake Does Not Go As Expected
Check the following points if you experience a problem with the cooked.
Check point
Problem
Were the appropriate ingredients and
amounts used?
Were more than the maximum
acceptable ingredients added? *
Were less than the minimum required
ingredients added? *
Was the cooking time too short?
Was the cooking time too long?
Are there any grains of burned rice or any
other remaining grains of rice adhering to
gaskets or the brim of the inner pot, etc.?
Was the lid closed securely?
Was there a power outage during
cooking?
Cooked food
Does not boil/
Does not bake enough
Boils over
Boils down/burns
Reference page
(Slow Cook) 22 22 14•
26-27
15•
26-29 40
Reference page
(Cake) 24 24 14•
26-27
15•
26-29 40
* “Slow Cook” menu only
14
Troubleshooting
Check the following before requesting repair service.
Symptom Check point Action
Reference
page
The rice or other foods are not
cooked at all.
Is the power plug properly connected
to an outlet?
Insert the power plug fully into an
outlet. 15
Rice was not cooked completely by
the preset time.
Does the display show the correct
present time?
Set the correct present time. 39
Check “The cooking time is excessively long” under “If Rice Does Not Cook
Properly” and take the necessary action. 30
The Timer function cannot be set. Does the display show the correct
present time?
Set the correct present time.
39
Is “0:00” blinking on the display? Set the present time.
Was the “Quick”, “Sweet•Mixed”,
“Slow Cook”, or “Cake” menu
selected?
The Timer function is not available
under those menus.
19
Was an unacceptable time set? Set a time that is acceptable under
the Timer function.
An alarm (3 beeps) sounds when the
Timer function is set.
An alarm will sound if you do not
operate the rice cooker within about
30 seconds after pressing the
[Timer] key.
Continue setting the Timer function.
19
The display is blurred. Are there any grains of burned rice
or any other remaining grains of rice
adhering to gaskets or the brim of
the inner pot?
Completely remove all remaining
rice.
14•26-
29
Is the outer surface of the inner pot
wet?
Wipe with a dry cloth.
Reheating is disabled. An alarm (3 beeps) will sound if you
press the [Start] key.
The rice is cold. Rice of below
approximately 55°C cannot be
reheated.
21
Is the Keep Warm lamp off? Press the [Keep Warm/Cancel] key
and check that the Keep Warm lamp
lights up. Then, press the [Start] key
again.
21
Sounds can be heard during
cooking, reheating, steaming, or
while the Keep Warm function is on.
Do you hear a clicking sound? That is the sound of the
microcomputer controller.
It is not a malfunction. 9
Do you hear a sound like scraping
metal?
This is the sound of metal
contracting and rubbing together
due to heat. It is not a malfunction.
Do you hear a sound like boiling
water?
(Only during cooking or steaming)
It is not a malfunction.
9
Do you hear a completely different
sound from the above?
Contact the place of purchase. —
Baking a cake takes a long time. If the power voltage is low, it may take longer than the standard time to
completely bake a cake. Extend the baking time if it is not completely
baked.
25
Water or rice has gotten inside the
rice cooker unit.
Water or rice inside the rice cooker unit may cause problems. Contact the
place of purchase. —
When setting the present time,
pressing the [Hour] or [Min] key does
not access the time setting mode.
The time cannot be set during cooking, when the Keep Warm function is
on, when the Timer function is in use, or during reheating. 39
The Keep Warm lamp is blinking. Is the “Porridge” or “Cake” menu
selected?
If you leave the porridge in the
rice cooker, it will become sticky or
lumpy. Serve it as soon as possible.
20•25

35
34
English
Symptom Check point Action
Reference
page
The elapsed Keep Warm time is
blinking.
Was the Keep Warm function used
continuously for more than 12
hours?
The elapsed Keep Warm time will
blink on the display when the Keep
Warm function has been on for more
than 12 hours.
20
Was the Keep Warm function used
continuously for more than 6 hours
under the “Slow Cook” menu?
The elapsed Keep Warm time will
blink on the display when the Keep
Warm function has been on for more
than 6 hours.
23
The present time, preset timer
settings, and elapsed Keep Warm
time are lost when the power plug is
disconnected.
Does “0:00” blink on the display
when the power plug is connected
again?
The lithium battery has run out.
Contact the place of purchase. 10
The lid will not close, or it opens
during cooking.
Are there any grains of rice adhering
to around the upper casing or hook
button?
Completely remove all remaining
rice. 27
Nothing happens when a key is
pressed.
Is the connector inserted in the main
body properly, and is the power plug
properly connected to an outlet?
Insert the power plug fully into an
outlet. 15
Is the Keep Warm lamp on? Press the [Keep Warm/Cancel] key
to turn off the Keep Warm function,
then try the operation again.
15
There is a smell of plastic. Suchsmellsmayoccurwhenthericecookerisrstused,buttheyshould
go away over time as the rice cooker gets used. —
There are stripes or waves on plastic
parts.
Such stripes and waves are produced when the resin is being molded.
They do not affect the performance of the rice cooker. —
If these indications appear
Display Action
Reference
page
“Err” appears on the display and a long-
lasting or continuous beeping alarm
sounds.
If the rice cooker still does not respond, there is problem with the unit
itself. Disconnect the power plug and contact the place of purchase.
—
Plastic parts
Plastic parts that come into contact with heat or steam will deteriorate over time. In this case, contact the
place of purchase.
Porridge
Menu
Porridge with
Seven Herbs
115 kcal per
serving
Ingredients (for 2 to 3 servings)
●Rice…0.5 cups
●Salt…To taste
●Seven herbs: water dropwort, shepherd’s purse,
Jersey cudweed, starwort, nipplewort, and young
leaves of white turnip and Japanese radish
…To taste
Directions
1. Prepare 50 g of two or three kinds of the
seven herbs that are available. Boil them
lightly and soak them in the water. Wring out
excesswater,andchopthemnely.
2. Wash the rice in the inner pot and add water
to the 0.5 level of the [Porridge • hard] scale,
and then select [Porridge] and cook for 60
minutes.
3. When the cooking is completed, add the
seven herbs and salt and mix them.
Note
●Make sure to add salt after the cooking is
completed. If you add salt beforehand, the rice
may not cook properly.
●The “Porridge” menu does not have the Keep
Warm function. The porridge can become sticky
and lose its taste over time. Serve it as soon as
possible.
●Keep the water level under the top
measurement line of [Porridge] after the
ingredients are added.
Brown
Menu
Brown Rice Mixed with
Small Dried Sardines
432 kcal per
serving
Ingredients (for 2 to 3 servings)
●Brown rice…1.5 cups
●Dried sardine…15 g
●Salted kelp…5 g
●Sake…1 tbsp
●Soy sauce…1 tsp
Directions
1. Wash brown rice in the inner pot and add the
seasonings. Add water to the 1.5 level of the
[Brown] scale and mix well.
2. Place the dried sardines from which the heads
and guts have been removed, and then cook
them using [Brown]. When the cooking is
completed, add the seven herbs and salt and
mix them.
3. When the cooking is completed, add the
salted kelp and gently mix all ingredients.
Note
●Soak the brown rice in water for approx. 1 to
2 hours before cooking so that it is soft when
cooked.
●If you cook with too much seasoning, such as
soy sauce and sweet cooking rice wine, the rice
may not be cooked properly.
Menu Guide
●This Menu Guide uses a 0.18 L measuring cup (included).
●A tablespoon is 15 mL.
●A teaspoon is 5 mL.
●It is not necessary to rinse rinse-free rice.
●Use the calorie values in the recipes only as a guide.
Menu Guide

37
36
English
Sweet・Mixed
Menu
Seasoned Rice with
Various Ingredients
419 kcal per
serving
Ingredients (for 2 to 3 servings)
●Rice…2 cups ●Kelp…2 cm square
●Seasonings (soy sauce: 1 and 1/3 tbsp, sake: 1
and 1/3 tbsp, salt: 1/6 tsp)
●Chicken thigh…40 g
●Thin fried tofu…1/3 pcs
●Carrot…20 g
●Burdock root…20 g
●Konjac…25 g
●Dried shiitake mushroom…1 pc.
●Snow peas…3 to 5 pcs.
●Appropriate amount of sake, soy sauce, salt and vinegar
●Shredded laver…To taste
Directions
1. Cut the chicken into 1 cm cubes, and season
it with a small amount of sake and soy sauce.
2. Rinse off excess oil from the thin deep-fried
tofu. Cut it lengthwise into halves, and then
into thin strips.
3.
Peel the carrot, and cut it into 3 cm-long thin strips.
4. Shave the skin off the burdock root using the
back of a knife. Then, shred it into thin strips
and soak it in the vinegar water.
5.
Boil the konjac for 4 to 5 minutes. Then, wash it
with water, and cut it in the same way as the carrot.
6. Soak the dried shiitake mushrooms in water to
rehydrate and soften them. Cut off the stems,
and then slice the caps into pieces.
7. Remove the strings from the snow peas, and
boil them in salted water. After this, put the
peas in cold water so they retain their color,
and then cut them into thin pieces.
8.
Wash the rice in the inner pot and add the
seasonings. Add water to the 2 level of the [Plain]
scale and add the kelp and ingredients other
than the snow peas. Cook using [Sweet Mixed].
9.
8. When cooking is completed, remove the kelp and
add the snow peas. Mix all ingredients well in the
inner pot, and place the dish on the serving plate.
Note
●Adjust the amount of water depending on the
type of ingredients.
●The ingredients added from the beginning should
be less than approx. 45% of the weight of the rice. If
you cook with too many ingredients, the rice may not
be cooked properly. (The total amount of ingredients
should be no more than 70 g per cup of rice.)
Sweet・Mixed
Menu
Sekihan (red bean rice)
494 kcal per
serving
Ingredients (for 2 to 3 servings)
●Glutinous rice…2 cups
●Azuki (red) bean…50 g
●Sesame and salt…To taste
Directions
1. Washazukibeans.Putthemwithvetimes
the amount of water in a pan over heat. When
brought to a boil, drain the water. Add another
vetimestheamountofwatertothepanover
high heat until the beans are boiled hard.
2. Separate the azuki beans from the broth. Take
the boiled water in a bowl, and scoop the water
repeatedly with a ladle so that the boiled water
comes in contact with the air and is cooled quickly.
3. Wash the glutinous rice in the inner pot. Add
the azuki water to the 2 level of the [Sweet]
scale and mix well. If the water does not reach
this level, add more water.
4. Place the azuki beans in the inner pot, and
then cook using [Sweet Mixed].
5. When cooking is completed, mix gently. Place
in the serving bowl and sprinkle with the
sesame and salt.
Cake
Menu Sponge Cake
182kcal
per 1/8 piece
Ingredients (for 1 cake)
●Sponge
Egg (medium size)…2 pcs.
Sugar(supernesugar)…60g
Cakeour…60g
Unsalted butter…20 g
Butter (to be spread in the inner pot)…To taste
●For decoration
Whipping cream (dairy)…100 mL
Granulated sugar…12 g
Strawberries…1 package
Blueberries…10 to 15 berries
Directions
1. Bring the eggs to room temperature, and sift the
cakeour.Melttheunsaltedbutter.
2. Put the eggs and sugar in a bowl, and mix them
well.
3. Warm the bowl in hot water at 40 °C and mix the
ingredients until the sugar is completely mixed
in. Remove the bowl from the hot water.
4. Whip 3 using a hand mixer. When it becomes
whitish,drawan8inthebowl.Whentherst
line drawn disappears immediately, whipping is
complete.
5. Putthecakeourinthebowl,andmixthemwith
a rubber spatula only until they are combined
andtheouriscompletelymixedin.
Add the melted butter and mix them well.
6. Put the dough into the buttered inner pot. Tap
the inner pot on a soft cloth to release the air
bubbles, and then select [Cake] and bake for 35
minutes.
7. When baking is completed, take out the cake
from the inner pot and cool it down. Decorate the
cake with the cream whipped with granulated
sugar, strawberries and blueberries.
Note
●If the dough is not cooked enough, press the [Hour]
key with the Keep Warm lamp blinking, set the
additional bake time, and then press the [Start] key.

39
38
English
Slow Cook
Menu
Vegetable and
Chicken Pot-Au-Feu
156 kcal per
serving
Ingredients (for 2 servings)
●Chicken wings…4 pcs.
●Carrot…1/2 pcs.
●Celery…1/2 pcs.
●Onion…1/2 pcs.
●Potato…1 pcs.
●Water…300 mL
●Bouillon powder…2 tsp
●Salt and pepper…To taste
Directions
1. Cut off the ends of the chicken wings.
2. Cut the carrot into quarters, the celery into
quarters (after removing the strings from it),
the onion into six equal parts, and the potato
into eight equal parts.
3. Put all ingredients in the inner pot, add water,
bouillon powder, salt, and pepper, and mix
well. Select the [Slow Cook] menu setting and
heat it for 60 minutes.
4. When cooking is completed, place the dish on
the serving plate.
Slow Cook
Menu
Simmered Pork
Shoulder and Lentils
503 kcal per
serving
Ingredients (for 2 servings)
●Pork shoulder chunk…250 g
●Lentils (dried)…40 g
●Onion…1/4 pcs.
●Celery…20 g
●Canned tomatoes…200g
●Carrot…20 g
●Garlic…1 clove
●Bouillon…200 mL
●Whipping cream…2 tbsp
●Salt and pepper…To taste
●Olive oil…To taste
●Italian parsley…To taste
Directions
1. Cut the pork into 3 to 4 cm cubes, and then
season it with salt and pepper.
2. Cuttheonion,carrot,andcelerynely.Slice
the garlic.
3. Pour a small amount of the olive oil in a frying
panandaddthegarlictoavor.Frythesurface
of the pork, and then transfer it to the inner pot.
4. Fry the onion, carrot, and celery in the frying
pan, and then put them in the inner pot.
5. Add the tomatoes to the inner pot and mix the
ingredients while crushing the tomatoes. Add
the bouillon and lentils, and then select the
[Slow Cook] menu and heat for 90 minutes.
6. When cooking is completed, season it with
whipping cream, salt and pepper, and place the
dish on the serving plate. Pour olive oil over it
and then the sprinkle it with Italian parsley.
1 Connect each end of the power
cord to the specied locations.
Appliance plug
(1) Connect
(2) Connect
Power plug
2 Display the time setting mode.
Press the [Hour] or [Min] key to display .
Beep
Display
3 Set the present time.
• Set the hour with the [Hour] key and the
minute with the [Min] key.
• Hold down the corresponding key to change
the time more rapidly.
• Whenyouhavenishedsettingthetime,
press the [Menu] key.
Beep
Beep
go out
• To cancel setting the time, press the [Keep
Warm/Cancel] key.
Setting the present time
The present time is displayed in a 24-hour format.
The time cannot be set during cooking, when the Keep Warm function is on, when the Timer function is in
use, or during reheating.
Example: Changing the present time from “9:30” to “9:25”
●Leaving the cooker’s Keep Warm function for a short time after cooking will make stewed foods more
tenderandenhancetheiravor.
Cautions during cooking
●Stir the seasoning well to prevent it falling to the bottom of the inner pot before cooking starts.
● Whenstewingthedishesinbroth,startcookingaftertheyhavecooleddownsufciently.
●Do not use hard cooking tools such as metallic ladles, spoons, or whippers.
● Removetheodoraftercookingnishes.(Referto“Removingodors(Whenodorsremainintherice
cooker)” on p.29.)
● Whenusingthereheatingfunctionduetoinsufcientcookingtime,donotpressthe[KeepWarm/
Cancel] key. Doing so will turn off the Keep Warm lamp and discontinue cooking.
(If you pressed the [Keep Warm/Cancel] key, remove the inner pot from the main body, and place it on
the wet cloth. Leave the lid of the main body open for about 10 minutes to cool down the main body
and inner pot. After this, place the inner pot in the main body, and start cooking again.
●The number of cups shown in the ingredients list refers to measurements made using the attached
measuring cup (0.18 L).
Table of contents
Other Tiger Rice Cooker manuals

Tiger
Tiger JBV-S10W User manual

Tiger
Tiger JAY-A55U User manual

Tiger
Tiger JAX-S User manual

Tiger
Tiger JBV-S10S User manual

Tiger
Tiger JPB-G10S User manual

Tiger
Tiger JBX-A10W User manual

Tiger
Tiger JAY-A55U User manual

Tiger
Tiger JCC-2700 User manual

Tiger
Tiger JAX-S10W User manual

Tiger
Tiger JBV-A10U User manual

Tiger
Tiger JAH-A10A User manual

Tiger
Tiger JKT-D User manual

Tiger
Tiger JBX-A10U User manual

Tiger
Tiger JPT-H10S User manual

Tiger
Tiger JAJ-A55S User manual

Tiger
Tiger JNO-B360 User manual

Tiger
Tiger JBA-T10W User manual

Tiger
Tiger JKT-S10A User manual

Tiger
Tiger JBA-B10U User manual

Tiger
Tiger JBA-A10G User manual