Time Electronics
7165 High Pressure Compressor User Manual
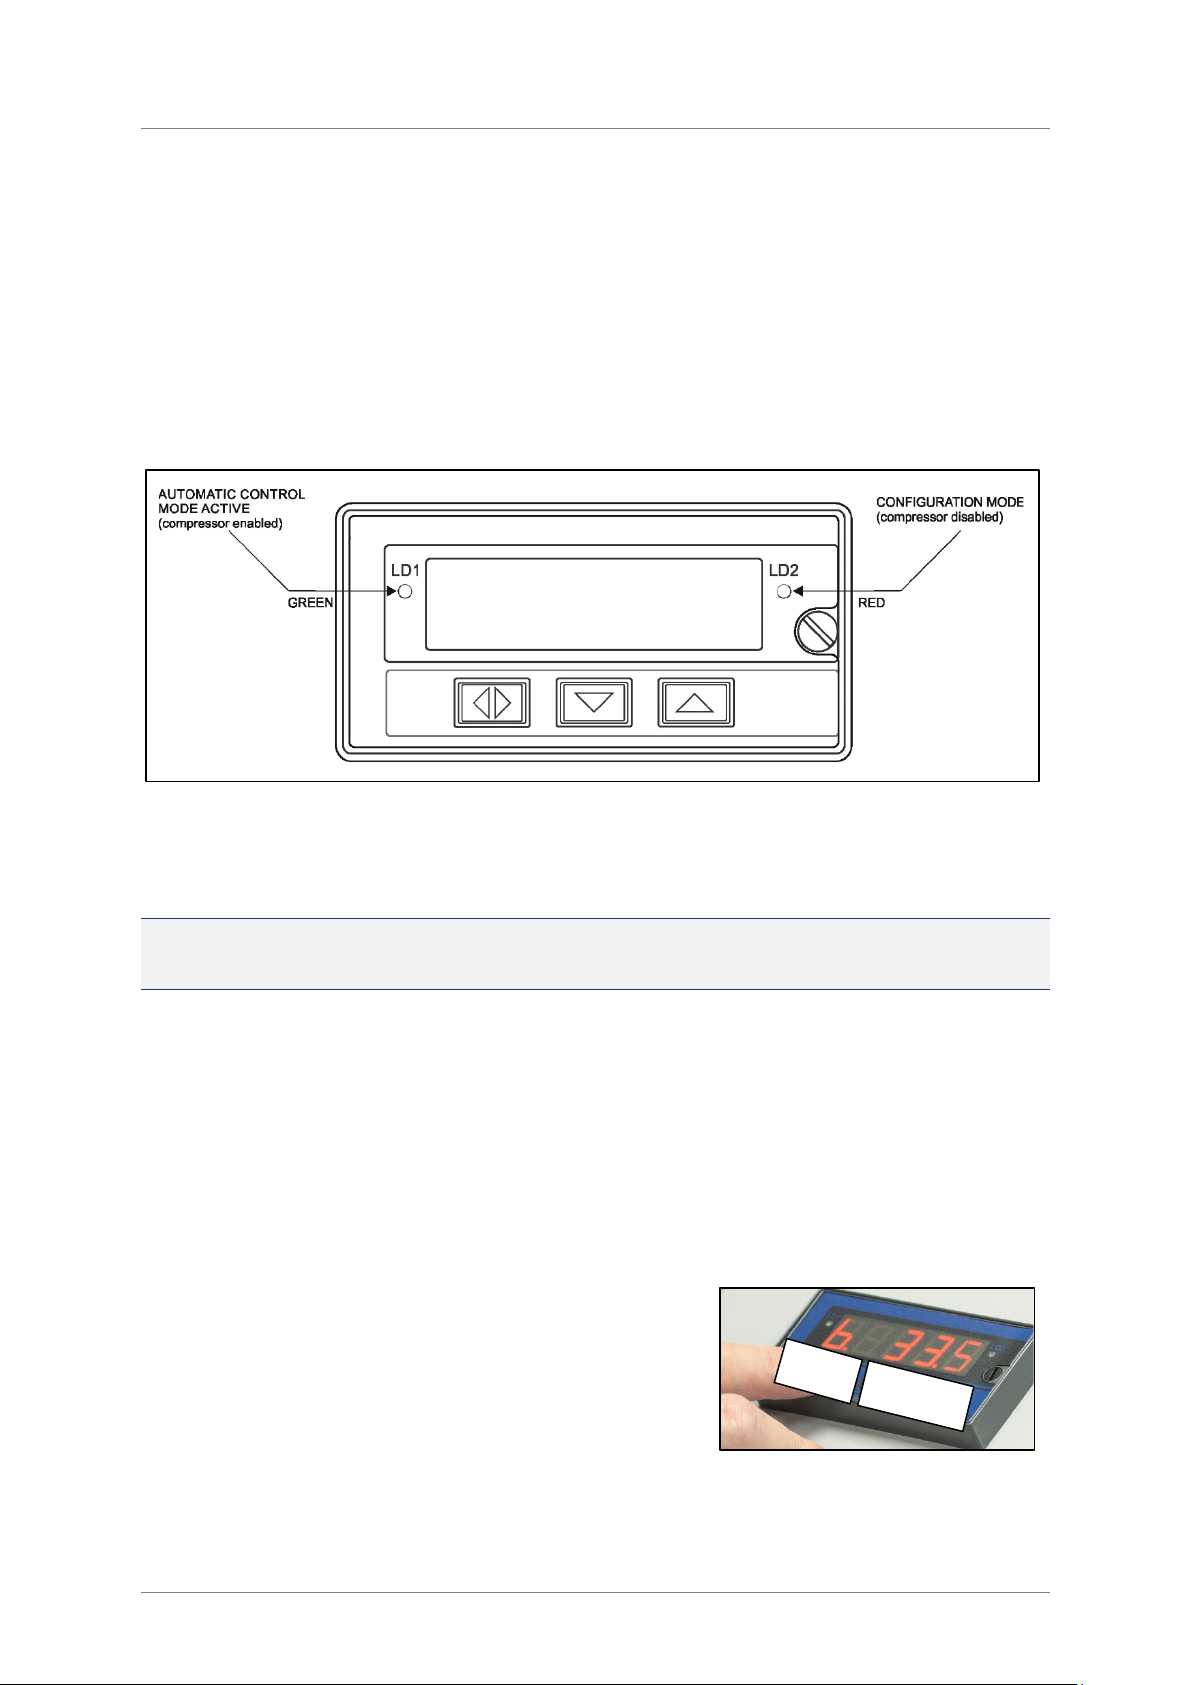
5
Warnings
The 7165 pump is designed for use with pressure controllers. These systems control a
supplied pressure source and output them to a unit under test. The 7165 is connected to the
line input of the controller. Please observe all warnings and safety instructions when dealing
with high pressure supplies and outputs. Please ensure that all users of the instrumentation
have fully read and understood operating instructions and safety procedures for handling
high pressure systems. Observe all warnings before operating pressure calibration systems.
Avoid electric shock risk when touching the equipment:
Use only suitable power cable with earth connection.
Never power the equipment to the mains socket with no earth connection.
Before working on or removing the pressure connections, perform a vent operation on the 7165.
With this operation, the 7165 discharges the pressure of the system internally, making safe the
pressure connections and hoses.
Be careful when supplying pressure to a controller, calibrator or UUT of a set range. The 7165
could over-pressure a sensor or device if set above the allowed pressure. Time Electronics is
not responsible for damage to instruments/devices over-pressurized by the compressor.
Other pressure equipment and accessories (ie hose, reservoirs, protection devices) connected
to the compressor must be appropriate to the working pressure range.
The 7165 should be operated by authorized persons qualified to work on pneumatic high
pressure systems. The user is responsible for the configuration and selection of suitable
parameters for the 7165 and related instruments. There is a potential risk of personal injury and
property damage resulting from incorrect usage. Use the 7165 according to this user manual,
any operation not described here is not allowed.
High voltage is present inside the unit. It can cause damage and injury. Do not make any repair
or service inside the equipment without removing the power supply plug from the mains.
Do not place materials under the pump or around the unit. It requires adequate ventilation.
Do not over-tighten the input or output connectors as this can damage the threads.
The fan outlet has a filter that can accumulate dust. It is recommended to clean this filter
whenever necessary to avoid overheating the compressor.
THERMAL CUT-OUT SAFETY FEATURE
The 7165 is a compressor for use in sealed systems. In cases of the extended periods of use
with high air flow and depending on the ambient thermal condition, the compressor can interrupt
its operation due to a rise of temperature detected by the safety device.
As soon as the ventilation system brings the compressor temperature back to appropriate levels,
which may take a few minutes, the instrument will return to its normal operational status.