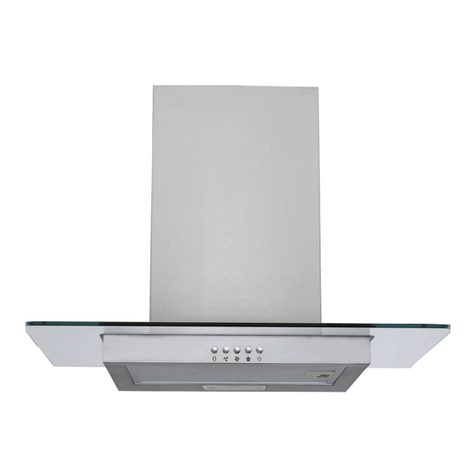
Tisira TS60SS User manual

www.tisira.com
USER MANUAL
600 & 900 // SLIDEOUT HOOD
TS60SS | TS90SS
IMPORTANT // Please ensure that you read through this user manual prior to installation and use. This
manual contains important information to ensure optimal performance and keep you safe. Please retain
your proof of purchase, as this will be required in the event that you require warranty service. Remember
to retain this manual for future reference.

pg 2 www.tisira.com | tisira
HELLO
CONGRATULATIONS ON THE SELECTION OF THIS TISIRA APPLIANCE. TISIRA
APPLIANCES HAVE BEEN SPECIFICALLY DESIGNED FOR AUSTRALIAN
AND NEW ZEALAND KITCHENS.
Please read through this user manual carefully as it contains information that
will ensure that your appliance is installed correctly, important operating & care
instructions and also some advice of what you need to do if this appliance is not
performing as intended.

tisira | www.tisira.com pg 3
HELLO 2
CONTENTS 3
WARNING & SAFETY INFORMATION 4
INSTALLATION & DUCTING 5
OPERATING INSTRUCTIONS 7
MAINTAINING YOUR RANGEHOOD 8
PRODUCT SPECIFICATION 9
WARRANTY TERMS & CONDITIONS 10
PROOF OF PURCHASE 11
CONTACT DETAILS 12
CONTENTS

pg 4 www.tisira.com | tisira
WARNING &
SAFETY
INFORMATION
This appliance is not intended for use
by persons (including children) with
reduced physical, sensory or mental
capabilities, or lack of experience and
knowledge, unless they have been
given supervision or instruction
concerning use of the appliance by a
person responsible for their safety.
Young children should be supervised
to ensure that they do not play with
the appliance.
There shall be adequate ventilation of
the room when the rangehood is
used at the same time as appliances
burning gas or other fuels.
You must read the details concerning
the method and frequency of cleaning.
There is a fire risk if cleaning is not
carried out in accordance with the
instructions.
Do not flambé under the rangehood.
Exhaust air must not be discharged
into an existing flue which is used for
exhausting fumes from appliances
burning gas or other fuels.
The minimum distance between the
hob surface and the lowest part of the
rangehood is 600mm. This distance
shall be at least 650mm, if the
rangehood is installed over a gas
hob. If the instructions for the gas
hob specify a greater distance, this
has to be taken into account.
Attention should be given to ensure
that any applicable regulations
concerning the discharge of exhaust
air is fulfilled.
If the supply cord of this equipment is
damaged, it must only be replaced by
the manufacturer or its service agent
or a similarly qualified person in
order to avoid a hazard.
This appliance has been designed for
indoor domestic use only.
Do not remove or inspect the filters
whilst the hood is in operation.

INSTALLATION &
DUCTING
IMPORTANT // Before handling the rangehood during installation, it is recommended that
you remove the filter to prevent damage
Fig 1.2 illustrates the minimum height from the hob
surface to the underside of the rangehood. Electric hob
– 600mm, Gas hob - 650mm.
NOTICE // IF THE INSTRUCTIONS FOR THE GAS
HOB SPECIFY A GREATER DISTANCE, THIS HAS TO
BE OBSERVED. ANY INSTALLATION ABOVE 750MM
WILL COMPROMISE PERFORMANCE.
600/900
66
or
44
284
165
16
40
176
(446 for 600)/(746 for 900)
76
182
(370 for 600)/(670 for 900)
71
120
10A plug fitted
23
FIG 1.1
FIG 1.2
Minimum Height
Electric Hob 600mm
Gas Hob 650mm
tisira | www.tisira.com pg 5

pg 6 www.tisira.com | tisira
1. Remove the filter.
2. Replace the 65mm front rail with the
45mm front rail (include in box)
3. Determine the most efficient path
for the ductwork, minimise bends
and keep the length of the ductwork
to a minimum.
4. Before fixing the range hood, drill a
hole to accommodate the 120mm
ducting that you have selected.
5. It is important to run and finish
(install roof / wall caps) prior to
installation of the hood.
6. Ensure that access has been allowed
for the power cable.
7. Remove the 120mm ducting cover
plate and attach the ducting adaptor.
8. Hold the hood up to the underside of
the cabinet. Screw the rangehood to
the underside of the cabinet. Ensure
that you do not damage any of the
wiring during installation.
9. Attach the ducting adaptor to the
ducting.
10. Re-install filter.
11. Plug in the power to the unit, turn on
and test.
RE-CIRCULATING OPTION
NOTICE // WHEN THE RANGEHOOD
IS RE-CIRCULATING, CARBON
FILTERS MUST BE INSTALLED.
1. Remove the filter.
2. Remove the front sealing tape to
expose the front vents. Do not remove
the top 120mm outlet cover.
3. Drill 4 fixing holes as per the drawing.
Ensure that access has been allowed
for the power cable.
4. Hold the hood up to the underside of
the cabinet; align the 4 holes in the
cabinet with the corresponding holes
in the hood. Screw the 4 screws from
the cabinet side.
5. Re-install filter.
6. Plug in the power to the unit, turn on
and test.
DUCTED OPTION
INSTALLATION &
DUCTING
FRONT RE-CIRCULATING
(Carbon filter required)
TOP DUCTING SIDE DUCTING

tisira | www.tisira.com pg 7
IMPORTANT // To operate the unit, ensure that the power is turned on and the front visor
is fully extended (slide-out). This will provide access to the light and speed controls.
FAN SPEED
LOW/OFF/HIGH switch - located on the right hand side of the unit.
This unit features 2 speed settings; single line indicate low speed, double lines indicate the
high speed.
To turn the unit off, you can either slide the visor into the closed position or set the speed
switch to the middle position (off).
LIGHT
On/Off switch - located on the left hand side of the unit as indicated in the diagram above.
OPERATING
INSTRUCTIONS
LIGHT LOW/OFF/
HIGH

pg 8 www.tisira.com | tisira
GENERAL MAINTENANCE
Ensure that the power to the unit is switched off prior to cleaning the unit. Surface should
only be cleaned with warm soapy water and a soft non-abrasive cloth. In coastal
environments and humid areas more frequent cleaning is required to maintain the finish.
FILTERS
This unit is supplied with carbon filters designed to eliminate odours from you exhaust
fumes. These filters cannot be cleaned and should be replaced every 3–6 months,
dependant on use.
Aluminium filters may be ordered from your nearest service centre for ducted installations.
Aluminium filers are dishwasher safe or can be cleaned with hot soapy water. Ensure that
filters are thoroughly dry before re-installing.
LAMPS
Your range hood is fitted with GU10 halogen lamps. Before replacing, ensure that lamps
are completely cool and the power to the unit has been switched off. Replacement lamps
can be purchased from your nearest service centre.
To remove the lamp, twist the lamp in an anti-clockwise direction. Be careful when
installing the new lamp not to make contact with the skin as this may damage the lamp and
shorten its life.
MAINTAINING
YOUR
RANGEHOOD

tisira | www.tisira.com pg 9
PRODUCT
SPECIFICATION
5364
Australia: 1300 762 219
For service please call:
New Zealand: 09 306 1020
ISS:
MODEL: SERIAL:
230V ~ 50Hz
Motor:Total:
Lights
www. .com
2306001
TS60SS
120W160W
2 x 20W
5364
Australia: 1300 762 219
For service please call:
New Zealand: 09 306 1020
ISS:
MODEL: SERIAL:
230V ~ 50Hz
Motor:Total:
Lights
www. .com
2306002
TS90SS
120W x 2280W
2 x 20W

These Terms and Conditions apply only to
Tisira products distributed in Australia and
New Zealand by Arisit Pty Limited.
1. This warranty applies for a period of 2 years
parts and labour, Australia and New Zealand,
commencing from date of purchase.
2. Evidence of the date of purchase must be shown
to the technician, when he calls, to obtain benefit
under this warranty.
3. This warranty applies only to the original
purchaser/hire purchaser of this appliance
and cannot be assigned or transferred. Failure
to produce documentary proof of the date of
original acquisition by the original purchaser will
result in a charge being levied for work done,
labour and parts supplied.
4. This warranty does not apply to:
a) Serviceable items such as filters, fuses,
light bulbs, door seals, drive belts, external
hoses, etc.
b) Damage to body work, paint work, glass,
trivets and plastic items (such as, but not
limited to windows, covers, baskets, trays,
worktops, door handles, control and kick
panels.)
c) Corrosion & rust damage.
d) Damages/blockages caused by laundry or
foreign objects.
A fee for service will be charged following warranty
claims where no fault is found with the appliance.
5. This warranty will not apply where:
a) The fault is caused by accident, misuse,
oversuds, an infestation of vermin, fire,
flood or the use of products not approved
by Arisit Pty. Limited.
b) There has been a failure to comply,
with the manufacturer’s operating and
installation instructions.
c) Service, modification or repair has been
carried out by anybody other than an
approved Tisira Service Technician.
d) The appliance has been used/installed
anywhere other than a private dwelling,
or where it has been used other than for
domestic use.
e) The appliance is subject toa rental
agreement.
6. Any defective part that has been replaced
becomes the property of Arisit Pty Limited.
7. This warranty applies only to Tisira appliances
purchased and installed in Australia and New
Zealand.
8. Loss of use of the appliance or consequential
loss of any nature is not covered.
9. A charge may be levied at the discretion of Arisit
Pty Limited ifthe call is deemed unnecessary
or ifthe cause of failure is tracedto external
sources such as, but not limited to: blown fuses,
power failure, faulty installation, etc.
10. Where the appliance, the subject of a warranty
claim or repair, is used or installed more than
TWENTY (20) kilometres from the nearest
Arisit Service Division or Authorised Service
Agent, the cost of delivery to the nearest
Service Division or travel costs for a technician
or Authorised Service Agent shall be for the
account of the Purchaser. Where a built-in
appliance is located or installed outside the
Arisit Authorised Service Agent’s normal
service area, additional travel and labour costs
shall be the account of the Purchaser
11. Arisit Pty Limitedshall not under any
circumstances be responsible in terms of this
warranty for thereplacement or repair of any
part of the equipment which may have been
damaged in transit, during and after installation
or imperfections after installation.
12. Losses caused by act of God, failure to obtain
spare parts, strikes or lockouts are not covered.
13. Service is offered during normal working hours
only, also appliances to a have clear access in
a serviceable area.
14. This warranty does not effect your statutory rights.
15. Our goods come with guarantees that cannot be
excluded under the Australian Consumer Law.
You are entitled to a replacement or refund for
a major failure and for compensation for any
other reasonably foreseeable loss or damage.
You arealso entitled to havethe goods repaired
or replaced if the goods fail to be of acceptable
quality andthe failure does not amount to a
major failure.
We reserve the right to amend any of the above
without prior notice.
WARRANTY TERMS
& CONDITIONS
Registration Form To register for your warranty please complete and return this form to
Arisit Pty Limited within 30 days of purchase.
Where did you rst hear about Tisira?
Advertising Tradesman’s Recommendation
In Store Display Recommendation by Friend/Relative
Other (please specify)
Would you like any further information on other
Tisira appliances? Please specify
Cooking Laundry
Dishwashers All
Please print in block letters
Date of Purchase / / Mr Mrs Ms
Name of Retailer
Address Address
Model Number State Postcode
Serial Number Telephone
Initials Surname
Cut this section and mailto the country of purchase (see overleaf)

tisira | www.tisira.com pg 11
PROOF OF
PURCHASE
ATTACH YOUR PROOF OF PURCHASE
FOR FUTURE REFERENCE

www.tisira.com.au
CONTACT DETAILS
AUSTRALIA
ARISIT PTY LIMITED
40-44 Mark Anthony Drive,
Dandenong South, VIC 3175,
Australia
P // 1300 762 219
F // 03 9768 0838
NEW ZEALAND
ARISIT PTY LIMITED
PO Box 68-140
Newton, Auckland 1145,
New Zealand
P // 09 306 1020
F // 09 302 0077
VERSION 1.0
TISIRA IS COMMITTED TO ONGOING RESEARCH AND DEVELOPMENT. EVERY EFFORT HAS BEEN MADE TO ENSURE ALL INFORMATION IN
THIS USER MANUAL IS CORRECT AT TIME OF GOING TO PRINT. DIMENSIONS SHOULD BE USED AS A REFERENCE ONLY AND ACTUAL
DIMENSIONS SHOULD BE TAKEN FROM THE PHYSICAL PRODUCT ONLY.
MANUFACTURER RESERVES THE RIGHT TO CHANGE SPECIFICATIONS WITHOUT NOTICE.
This manual suits for next models
1
Table of contents
Other Tisira Ventilation Hood manuals
Popular Ventilation Hood manuals by other brands
Airuno
Airuno Aida 90 Installation & user's instructions

Turboair
Turboair TURBO CERTOSA AN/A/60/PB Instruction on mounting and use

BLUE STONE
BLUE STONE HOB-8739 user manual
Air King
Air King SEV30S operating manual

Junker
Junker JD99GW52 Instructions for installation and use
VentAHood
VentAHood K250 ARS installation instructions

