> Keep proper footing and balance at all times.
14. Maintain tools with care
> Keep cutting tools sharp and clean for better and safer performance.
> Follow instruction for lubricating and changing accessories.
> Inspect too l cords periodically and if damaged have them repaired by
an authorised service facility.
> Inspect extension cords periodically and replace if damaged.
> Keep handles dry, clean and free from oil and grease.
15. Disconnect tools
> When not in use, before servicing and when changing accessories such as
blades, bits and cutters, disconnect tools from the power supply.
16. Remove adjusting keys and wrenches
> Form the habit of checking to see that keys and adjusting wrenches
are removed from the tool before turning it on.
17. Avoid unintentional starting
> Ensure switch is in “off” position when plugging in.
18. Use outdoor extension leads
> When the tool is used outdoors, use only extension cords intended for outdoor
use and so marked.
19. Stay alert
> Watch what you are doing, use common sense and do not operate the tool
when you are tired.
20. Check damaged parts
> Before further use of tool, it should be carefully checked to determine that it
will operate properly and perform its intended function.
> Check for alignment of moving parts, binding of moving parts, breakage of
parts, mounting and any other conditions that may affect its operation.
> A guard or other part that is damaged should be properly repaired or replaced
by an authorised service centre unless otherwise indicated in this instruction
manual.
> Have defective switches replaced by an authorised service centre.
> Do not use the tool if the switch does not turn it on and off.
21. Warning
> The use of any accessory or attachment other than one recommended in this
instruction manual may present a risk of personal injury.
22. Have your tool repaired by a qualified person
> This electric tool complies with the relevant safety rules. Repairs should only
be carried out by qualified persons using original spare parts, otherwise this
may result in considerable danger to the user.
23. If the replacement of the supply cord is necessary, this has to be done
TTB579PLN by TITAN
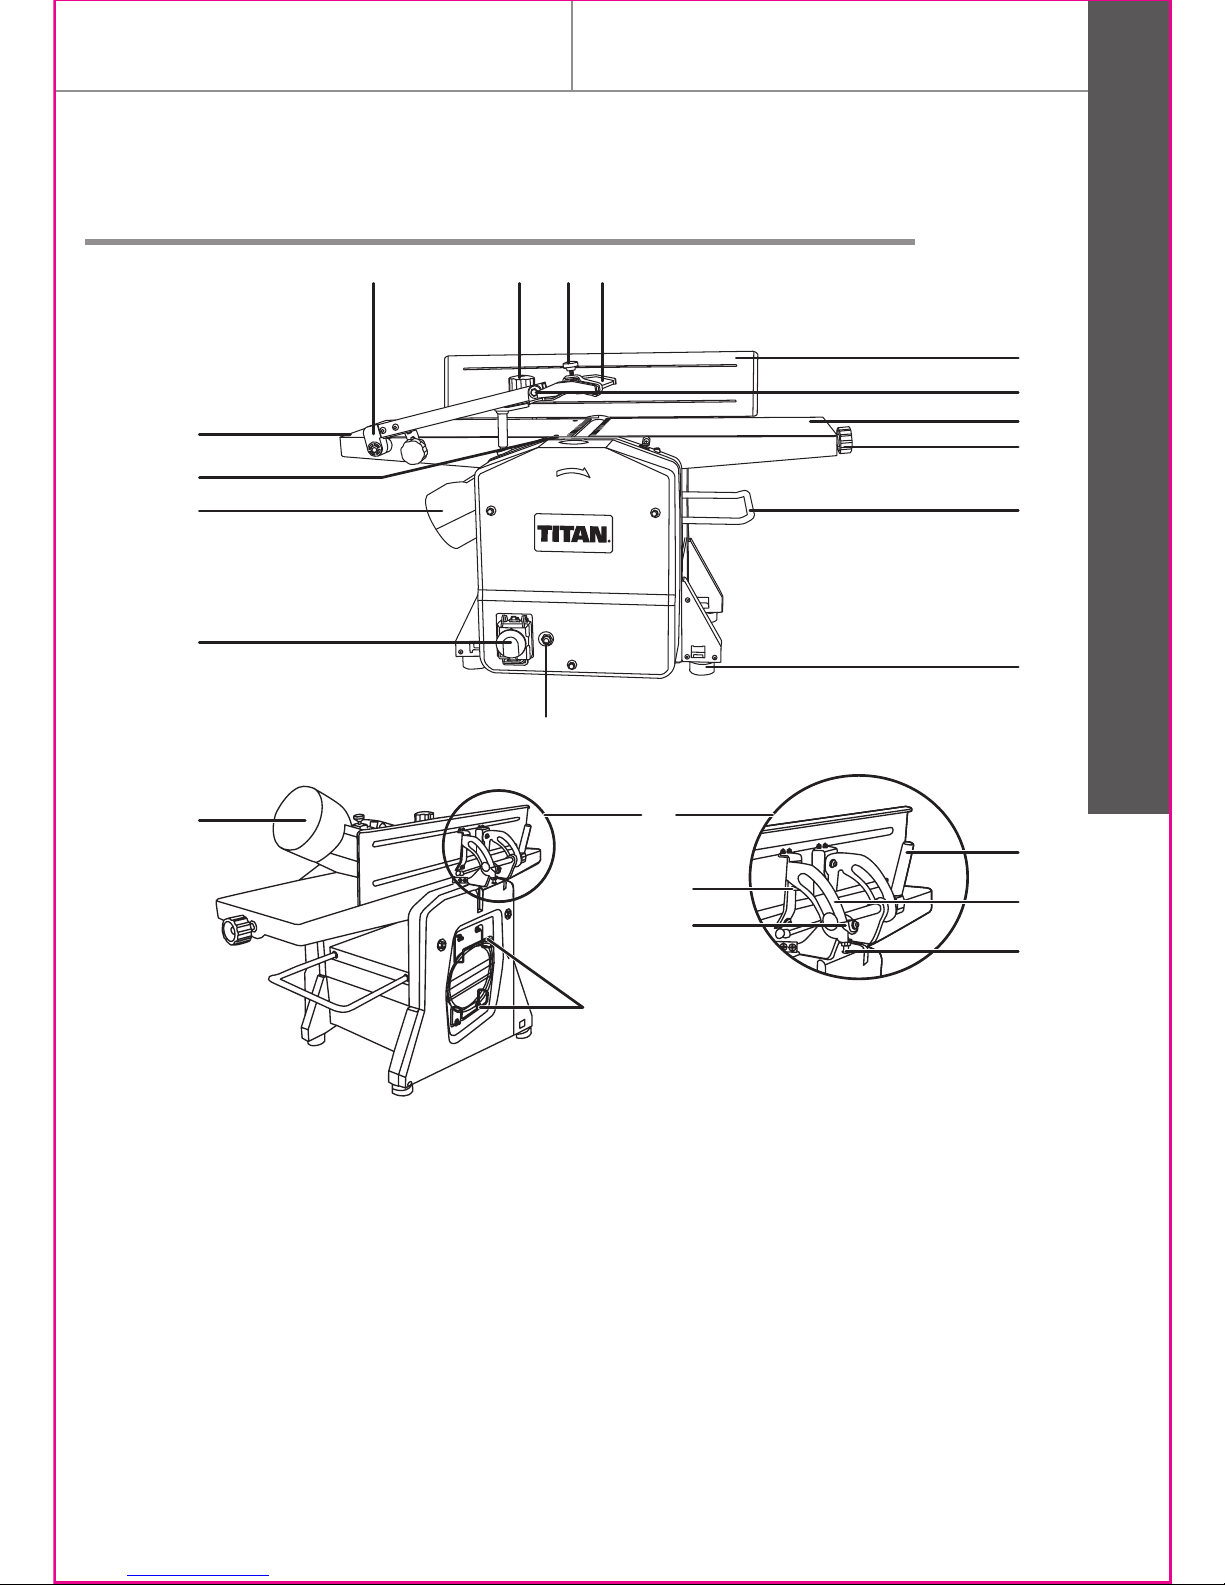
Getting started...
GB
10
IE
Technical and legal
information