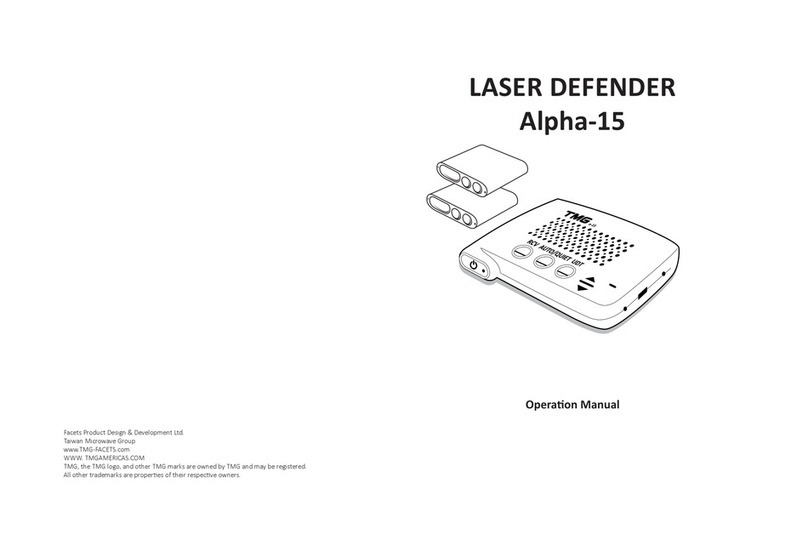
TMG a-15 User manual

LASER DEFENDER
a-15
Operaon Manual
Facets Product Design & Development Ltd.
Taiwan Microwave Group
www.TMG-FACET.com
WWW. TMGAMERICA.COM
TMG, the TMG logo, and other TMG marks are owned by TMG and may be registered.
All other trademarks are properes of their respecve owners.
2019V2

Content
Introducon ............................................................................................. 2
Installaon ............................................................................................... 4
Operaon ................................................................................................ 8
Troubleshoong ....................................................................................... 11
Warranty .................................................................................................. 12
Appendix ................................................................................................. 13
Introducon
Thank you for purchasing the TMG A-15, one of the most innovave and
sophiscated devices in its category today.
Please be sure to read this manual to familiarize yourself with the features and
operaon of this product. Enjoy the trip and drive safely.
TMG system is a class 1M laser product. Never look at the heads
closely while powered on! We recommend wearing Laser protected
eye wear, when tesng the jamming funcon with Laser guns.
Motorists are expected to exercise all cauon while using this
product, and to obey all applicable trac laws.
Check your State and local laws on usage. We encourage you to disable your
jamming funcon as soon as possible once you slow down. This can be done by the
RCV buon, front power buon, or the RCV tab on the app. Running in the “test
mode” is meant for laser jamming tesng only, and is in full me jamming mode,
and could result in suspicion that a LIDAR operator has been jammed. Auto-sleep
mode is default, and highly recommended with an Auto-kill feature to “Receive only
mode” aer 4 seconds. Jamming funcon can be disabled by adjustable Auto-kill
funcon through the App.
CPU only takes 12V power sources; A 24V power source will
damage the product permanently, and will void your 2 year
warranty.
Specicaons
Input ............................................................................... DC 12V
Laser Wavelength ........................................................... 905nm
Opcal Peak Power.......................................................... Up to 75 W
Communicaon .............................................................. BT3.0/4.0 Compable
Operaon Temperature .................................................. -10°F~150°F / -25°C~70°C
FCC ID ............................................................................. 2ARGWTMGA15
Fuse size ......................................................................... 2A 250V Glass
0.2 x 0.78 inch /
5 x 20 mm (2amp) (F2A)
Tool Requirements
• T-10 torque bit or allen wrench
• Cordless screw driver- mount the brackets
• Small screws- to mount the brackets
• Velcro or 3m tape to mount the CPU
• Tape measure- measure out the head separaon
• Electrical tape - wrap up the head connectors and the wire to feed through
the rewall.
• Metal wire to feed the
wires through the
rewall. (Oponal)
2 3
Indent
Set Screw
Detent
Coupler
Detent on transponder lines up with indent on the bracket.
Posion is locked into place with the set screw.

CHAPTER 1: Installaon
Make sure the heads are posioned approximately the same height as the
license plate and separated by at least 20 to 32 inches from each other. Being
too close together can cause interference.
Use the included green bubble level tool to make sure the heads are
horizontally posioned, and are facing straight forward, and ensure all torque
screws are ght.
When using a third head, install the head in the center of both heads,
below the car’s emblem or directly above the license plate.
The CPU computer has a capability of having 8 heads total
with an oponal splier.
Make sure
transponders
are facing
straight forward.
Make sure the heads are
horizontally installed by us-
ing the bubble level included
in the package.
Changing the Lens cover
Replace the lenses only as needed. To
replace the old lens cover with a new
one. Use a pin to pry open the old lens
cover to replace it.
Cables
Arrows on cable align for
proper t.
Oponal third head for maximum protecon.
BMW owners have the opon to install the heads vercally. However a third
horizontal head is required so you have two vercal outside heads and one center
horizontal head. For opmal performance,we recommend horizontal installaon of
the heads.
4 5
Controller is installed inside the cabin.
24” ~ 30”
a-15
UDT
AUTO/QUIETRCV
a-15
UDT
AUTO/QUIETRCV
a-15
UDT
AUTO/QUIETRCV
a-15
UDT
AUTO/QUIETRCV
24” ~ 30”
a-15
UDT
AUTO/QUIETRCV
a-15
UDT
AUTO/QUIETRCV

CHAPTER 1: Installaon Cont.
Installaon parts list
Trim removal tool
Flex claw tool
Flashlight
Zip es
Wire strippers
16g plug connectors
16g ring connectors
Add-a-fuse (oponal)
Heat shrink (assorted sizes)
3M mounng tape
Bubble level
Pre-planning
Determine best locaon for CPU Controller, parking sensors and wire roung
Tip: It’s a good idea to label the connector locaons on the parking sensor wires at
both the connector end and the sensor head to help with troubleshoong should
there be any performance problems down the road.
The following is a loose guideline for hard wiring the TMG
Installaon
1. Park on level ground
2. Shut o vehicle
3. Disconnect negave baery terminal.
4. Remove trim pieces for access to wiring passages.
5. Run sensor wires from the mounng locaon to the CPU controller. (Be sure to
keep wires secured in the engine bay and away from moving parts).
6. Access to passages through the re wall can be achieved by piggy backing on an
exisng wire route.
7. Use ex claw tool to pull wires through the rewall and into the cabin.
8. Any extra length of sensor wire should be coiled loosely and secured with a zip
e to the vehicle, under the dash or behind the glove compartment.
9. Wire the power to either the posive baery terminal or a switchable fuse in
the fuse box with an “add-a-fuse”. (Be sure to procure the right size add-a-fuse
for your fuse bank.)
10. Find a solid part of the vehicle’s frame that’s in a discreet locaon, drill a small
hole then connect the ground wire to the frame with a loop connector and an
appropriately sized machine screw.
11. Mount CPU controller in the cabin in an area where it can be accessed directly.
12. Connect negave baery terminal
13. Start the vehicle
CHAPTER 1: Installaon Cont.
Sensors
Ground wire
Power wire
Power
Opon 1
Power
Opon 2
In-line
Fuse
In-line
Fuse
CPU
Controller
Negave
Vehicle Ground
Vehicle Fuse Box
Posive Baery
Terminal
ADD
A-FUSE
6 7

CHAPTER 2: Operaon
Adjusng Volume
Press the + and - side buons to adjust the volume. Press for 1 second to reach the
maximum or minimum volume level. (15 is the maximum).
Receive only Mode
Press the RCV buon to switch to receive only mode. This mode only receives Laser,
and does not jam. Pressing the RCV buon again will enable Auto sleep mode.
Adjustable jamming default is 4 seconds.
Auto/Quiet
Pressing one second enables Auto sleep mode, this stops jamming funcon aer
selected Auto kill by the TMG Defender Lite App, Or a third party App. Auto sleep
mode will take 1 minute to relay back to 4 second jamming from RCV only mode.
Use cauon for 1 minute because laser alerts will be muted unl the CPU announces
“Auto sleep mode o”. Press the SLP/RPT buon for 1 second to report police to the
server. ”Test mode” is recommended only for tesng the jamming capability.
The RDT port is for radar detector integraon, or other accessories. The side PWR
port can be used to power the unit with a 12v barrel connector 1.3 mm.
a-15
Power
Receive only
Algorithm update
For factory use only
System reset
Auto sleep/Report
Switches to determine heads 3 and 4 or rear.
TP (Terminal Ports 1-4 are connecons for Transponders)
(Heads 1 and 2 are always front.)
Align pins on the transponder cable
with the connecon port
AUTO/QUIETRCV UDT
RST
PWR TP1 TP2 TP3
RER
FRT
TP4 RDT
DTA PWR
1 2
ON
Power port (1.35 mm)
TP4 RDT
8 9
CHAPTER 2: Operaon cont.
Algorithm rmware Update - This rmware uploads the Lidar gun algorithms to the
CPU. (Must have strong Internet access) These updates
will come available as more Lidar gun rmwares are captured.
1. Connect to your Android or IOS device by the Starng the TMG Laser Defender
Lite App instrucons menoned above.
2. Once connected, push the UDT buon on the CPU. An audio voice will say “Algo-
rithm update open app and select new algorithm and enable Bluetooth”
3. Press the Alglo update tab on the App, and you will hear an audio voice say “Start
transferring” select OK on the instrucon screen.
4. The Alglo rmware will load up on top, by the loading bar, followed by the green
indicator light ashing on the app, and a blinking UDT CPU buon.
5. The CPU will reset,and announce “Update nished or aborted returning to de-
fender mode” to conrm the upload.
CPU Control Firmware- This rmware uploads changes, or updates in the CPU only.
(This is not a common rmware to update)
1. Power on the TMG a-15 CPU, and pin the RST buon on the side of the CPU for 2
seconds. A small red constant LED will appear on the CPU.
2. Open the TMG Defender Lite App and Connect to your device by Bluetooth.
3. Press the CTRL update tab on the App,and select OK.
4. “Start transferring” audio will announce.
5. The rmware will upload,followed by the small red LED ashing on the CPU,green
indicator ashing on the app
6. An Audio voice will announce “System On” with a power cycle to conrm the
update.

CHAPTER 2: Operaon cont.
App operaon
The TMG a-15 system can be paired with a Android or IOS device. The following apps
are available, TMG Defender Lite App on Android and IOS.
JBV1 Android app, paired with a Valenne One Radar detector, and TMG Remote on
Android. JBV1, and TMG Remote are made by John Boy Soware.
Starng the TMG Laser defender Lite App on Android or IOS
1. Power on the TMG a-15 CPU
2. To begin pairing,press the Bluetooth icon on the far right side of the app.
3. Select scan,and choose the “LD” that appears,and type 1234 as the password.
0000 is also another password to try.
4. The blue Bluetooth light on the CPU will light up. You are now connected.
5. From the App you can have full access to the CPU buons,adjust Auto-kill
seconds,Adjust the sleep me in between alerts.
6. You can now update gun algorithms, and CPU control rmware.
*Note- The rmware servers are only available on the TMG Laser Defender Lite App.
Algorithm update (Must have Internet access)
This rmware uploads the Lidar gun algorithms to the CPU. (Must have strong
Internet access) These updates will come available as more Lidar gun rmwares are
captured.
1. Connect to your Android or IOS device by the Starng the TMG Laser Defender Lite
App instrucons menoned above.
2. Once connected, push the UDT buon on the CPU. An audio voice will say
“Algorithm update open app and select new algorithm and enable Bluetooth”
3. Press the Alglo update tab on the App, and you will hear an audio voice say “Start
transferring” select OK on the instrucon screen.
4. The Alglo rmware will load up on top, by the loading bar, followed by the green
indicator light ashing on the app, and a blinking UDT CPU buon.
5. The CPU will reset,and announce “Update nished or aborted returning to
defender mode” to conrm the upload.
10 11
CHAPTER 3: Troubleshoong
Q: The CPU is not powering on?
A: Make sure the power port is plugged in snug. Make sure all electrical wires have good
connecons,Check for a blown fuse in the hardwire power cable.
Q: Why aren’t my heads receiving a Laser alert when shot by Police?
A: Make sure your Volume is turned up high enough to hear over road noise and loud
music,and is not on zero. The Ocer may have not targeted you specically,or pulled
the trigger. Make sure your sensor cables are all plugged in, and lined up correctly by the
arrows. A laser tester will conrm a Laser alert. A faulty head will not alert to Laser.
Q: Why is my CPU locked up?
A: Try a so reset by a 1 second push on the RST buon. The rmware did not upload
correctly, The CPU case was smashed causing a buon to be stuck. CPU noces a bad head.
Q: How do i know if i have a bad sensor,or the sensor has head failure?
A: The CPU can lock up, The CPU bluetooth light will randomly ash rapid upon start up,
The fuse in the hardwire will keep blowing. The sensor will run hot compared to the others.
Please call Customer support for a replacement.
Q: Why does the CPU keep announcing “Algorithm update” and is frozen?
A: Try to re-upload the Alglo,or CPU control rmware.
Q: Why will the App not load up a rmware?
A: Make sure your device has a 4G service, or a strong WIFI connecon. Make sure you are
not in a third party app.

CHAPTER 5: Appendix
Protecon
Here is a collecon of laser/lidar guns we have tested. Our laser jammer works
for other similar ones. The coverage is increasing and we always keep our
products promptly updated.
CHAPTER 4: Two Year Limited Warranty
For a period of two years from the date of purchase by the consumer Facets will
repair or replace, at Facets discreon, defecve Facets products upon delivery to
Facets or an authorized Service agent. Facets products must include a proof of
purchase with the date it was rst purchased from an authorized dealer, such as
a copy of a sales receipt.
The customer must pay for shipping Facets products to an authorized Facets
Service Agent. If the product is proven to be under warranty, the return charge,
to the customer, will be at our expense.
This limited warranty does not apply:
To any product damaged by accident.
In the event of misuse or abuse of the product.
As a result of unauthorized alteraons or repairs.
If the serial number has been altered, defaced, or removed.
All implied warranes, including warranes of merchantability and tness for a
parcular purpose are limited in duraon to the length of this warranty.
Aenon
When tesng the system at any me, such as on a bench
or a temporary install, unwrap all cables. Tesng with the
cables wrapped up can cause a magnec eld, and the heads
performance may be compromised.
12 13
License Agreement
Facets products are made by Facets Product Design and Development Ltd in Taiwan. Facets and its licensors grant to
the purchaser a non-transferable, non-exclusive license to use the soware and data installed on Facets’ products and
the related documentaon solely for personal use only on such Facets products. The purchaser should not copy, reverse
engineer, translate, port, modify or make derivave works of the soware and data. The purchaser should not loan,
rent, disclose, publish, sell, assign, lease, sublicense, market or otherwise transfer the soware and data or use it in any
manner not expressly authorized by this agreement. By using this product, the purchaser agrees to be bound by the terms
and condions of this license agreement. Facets and its licensors shall retain all copyright, trade secret, patent and other
proprietary ownership rights in the soware and data. The soware and data is copyrighted and may not be copied, even
if modied or merged with other products. The purchaser shall not alter or remove any copyright noce or proprietary
legend contained in or on the soware and data. The purchaser may transfer all of his/her license rights in the soware,
data, the related documentaon and a copy of this License Agreement to another party, provided that the party reads
and agrees to accept the terms and condions of this License Agreement. The soware and data are provided to the
purchaser “AS IS”. Facets and its licensors make and you receive no warranty for the soware and data, whether express or
implied, and all warranes of merchantability and tness for any parcular purpose for the soware and data are expressly
excluded. The soware and data is complex. Facets and its licensors intend to provide their customers the most complete
and accurate informaon available at a reasonable cost from government and private data sources. However, all data
sources have limitaons and some have inaccuracies or are incomplete in some degree. As such, Facets and its licensors do
not make any warranty regarding the accuracy or completeness of data used by this product and shall not be liable to the
user for any incidental, consequenal, special, indirect or exemplary damages including any ne, civil or criminal penales
arising from the use of the product.
Table of contents
Other TMG Car Alarm manuals