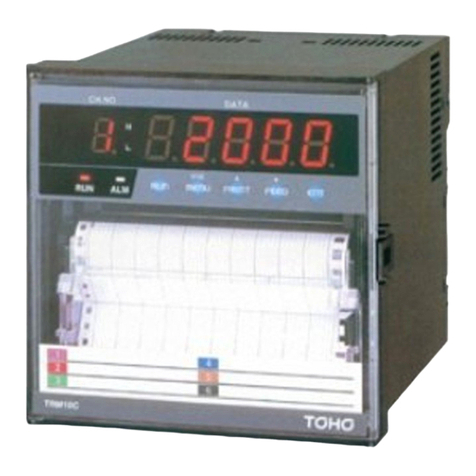
Toho Electronics TRM-10C User manual

TRM-10C
HYBRID RECORDER
(PEN TYPE RECORDER)
INSTRUCTION MANUAL
TOHO ELECTRONICS INC.
HXPRM10mnCT002E
SEP. 2016 (6th Edition)
Copyright © 2000-2016 TOHO ELECTRONICS INC. All Rights Reserved.

―1―HXPRM10mnCT002E
For safety using
Thank you for purchasing our TRM-10C Hybrid Recorder.
In order to this instrument to exhibit all of its functions effectively and correctly, read and understand this
instruction manual thoroughly before using the instrument.
Don't use this product in any method not specification by manufacturer. The protective features of this
product may be impaired if it is used in a method not specified in the operation manual.
The symbols below are used on this instrument for the cautioning information.
Symbols used on the instrument
This shows “Caution for handling”. This symbol is used on the parts need to
reference the instruction manual for saving human body and the instrument.
This shows “Protective grounding”.
Be sure to provide protective grounding prior to operate this instrument.
This shows “Risk of electric shock”.This symbol is used on the parts, which
has a risk of electric shock.
Be sure to observe the following warnings/cautions and those provided in the text
in order to secure safety in handling the instrument.
WARNING
(1) In order to prevent electric shock; be sure to disconnect this instrument from the main
power source when wiring it.
(2) When the effect on the system is expected by the error occurs due to external factors or
failure the instruments, take precautions to ensure the overall safety of your system.
(3) Take precautionsto so that an alien substance does not get into the instruments aperture.
(1) In order to prevent an electric shock; be sure to provide protective grounding prior to
turning on this instrument.
(2) Do not cut a protective grounding conductor or disconnect protective grounding.
(1) Make sure that the supply voltage for this instrument conforms to the voltage of the
supply source.
Rated power voltage range :100-240VAC
Working supply voltage range :85-264VAC
Rated power frequency :50/60Hz
Power consumption :35VAmax
(2)Attach a protective cover prior to turning on this instrument.
(3) Power module that is used in the instruments conform to EN60950
(1)Do not operate this instrument in the environment where it is exposed to a
combustible/explosive/corrosive gas or water/steam.
(2) Please use in an environment that is shown in the following.
Installation features :Indoor
Altitude :2000m or less
Ambient temperature :0-50℃
Ambient humidity :20-80%RH(Non condensing)
Overvoltage category :Category Ⅱ
Allowable pollution degree :Pollution degree 2
Vibration :10~60Hz 0.2m/s2
Impact :The impact is not allowed.
Provide input and output wiring after turning off the power.
電源
Input and Output Wiring
全般
General
保護接地
Protective Grounding
電源
Power Source
電源
Working Environment

―2―HXPRM10mnCT002E
CAUTION
Do not use empty terminals for other purposes such as relaying, etc.
Do not touch the switches, etc. inside this instrument. Also, do not replace
the main unit or printed circuit boards. When this is neglected, we cannot
guarantee functioning of the instrument. Contact our dealer where you
purchased the instrument, or our sales representative.
When transporting this instrument or the equipment with this instrument
incorporated in it, take measures to prevent opening the door and falling
out the inner module.
[Note ]
(1) Deliver this instruction manual to an end user.
(2) Prior to handling this instrument, be sure to read this manual.
(3) If you have any questions on this manual or find any errors or
omissions in this manual, contact our sales representative.
(4) After reading this manual, keep it carefully by the instrument.
(5) When the manual is lost or stained, contact our sales representative.
(6) It is prohibited to copy or reproduce this manual without our
permission.
(1) When installing this instrument, put on a protective gear such as safety
shoes, helmet, etc. for your safety.
(2) Do not put your foot on the installed instrument or get on it, because it
is dangerous.
Only our serviceman or persons authorized by TOHO are allowed to
remove and take the inner module, the main unit and printed circuit
boards apart.
(1) Dispose the replaced batteries in a correct way.
(2) Do not incinerate plastics of maintenance parts and replacement parts.
A harmful gas may be produced.
(1) Use dry cloth to clean the surface of this instrument.
(2) Do not use any organic solvent.
(3) Cleaning the instrument after turning off the power.
This instruction manual is subject to change without prior notice.
Input and Output Wiring
Instruction Manual
Installation
Maintenance
Disposal
Cleaning
Revisions
Inside of Instrument
Transportation

―3―HXPRM10mnCT002E
Using procedure for this manual
1.Using procedure
This instruction manual consists of “For safety using”, “Contents” and “Chapter 1 to Chapter 11” as bellow.
Read the applying sections for your purpose to use this instrument.
Chapter and TITLE
For purchase
and install
For initial
setting and
change
setting
For daily
operation
For using
communication
For
maintenance
and
trouble-shootin
g
For safety using (page 1)
◎
◎
◎
◎
◎
1. INTRODUCTION
◎
2. CONSTRUCTION
○
○
○
○
3. INSTALLATION
◎
○
4. WIRING
◎
○
○
○
○
5.PREPARATIONS FOR
OPERATION
○
◎
6. OPERATION
○
◎
7. DEVICE SETTING
◎
○
○
8.COMMUNICATIONS
◎
9. MAINTENANCE
◎
10. TROUBLESHOOTING
○
◎
11. SPECIFICATIONS
○
○
○
◎:Be absolutely certain to read this.
○:Be certain to read this if you need.
The symbols below are used on the warning and cautioning information in this manual.
Symbols used on this manual
WARNING
Failure to observe this information could result in death or injury.
Be absolutely certain to read this.
CAUTION
Failure to observe this information could damage the instrument.
Be certain to read it.
[Note]
This is cautionary information for correct use of the instrument.
Be certain to read it.
[Reference]
This is information to help you use the functions of this instrument more
effectively.
2.Guide of Instruction manual
The instruction manuals of this instrument are as the table below.
Name
Part No.
Outline
1
TRM-10C Hybrid Recorder
(Pen type) instruction
manual
HXPRM10mnCT002E
Explanation for installing,
wiring, standard operation.
And setting or operation for
using this instrument.
2
TRM-10C Hybrid Recorder
Communication Command
instruction manual
HXPRM10mnCT005E
Explanation for reading and
writing data of the recorder by
communication function.
This
manual

―4―HXPRM10mnCT002E
CONTENTS
1. INTRODUCTION....................................................................6
1.1 CheckingtheAccessories............................................................6
1.2 CheckingtheTypeandSpecifications........................................8
1.3 TemporaryStorage.......................................................................9
1.4 IndicationCard..............................................................................9
2. CONSTRUCTION................................................................ 10
2.1 Appearance................................................................................10
2.2 DisplayScreenandOperationKeys.........................................11
2.2.1 DisplayScreen.....................................................................11
2.2.2 OperationKeys.....................................................................12
3. INSTALLATION................................................................... 13
3.1OutsideDimensionsDrawingand
Panel CuttingDimensions...............................................13
3.2 MountingtothePanel................................................................14
3.2.1 ProcedureforMountingtothePanel..................................14
3.2.2 Mounting tothePanel
incompliancewiththeIP65..........................................15
4. WIRING................................................................................. 16
4.1 TerminalLayoutandPowerWiring...........................................16
4.1.1 Terminal Layout....................................................................16
4.1.2 PowerWiring........................................................................16
4.1.3 WiringProcedure..................................................................17
4.2 InputWiring.................................................................................18
4.2.1 WiringProcedure..................................................................19
4.3 DI/AlarmOutputWiring(Option)................................................21
4.3.1 DI/Alarm OutputWiringExample........................................22
4.3.2 Alarm OutputWiringProcedure..........................................23
4.3.3 DIWiringProcedure.............................................................23
4.4 CommunicationWiring...............................................................24
4.4.1 RS-232CWiring...................................................................24
4.4.2 RS-485Wiring......................................................................24
5. PREPARATIONS FOR OPERATION ............................... 25
5.1 SettingtheChartPaper..............................................................25
5.2 SettingtheCartridgePen...........................................................32
5.3 SettingtheRibbonCassette......................................................34
6. OPERATION........................................................................ 39
6.1 Operation.....................................................................................39
6.1.1 StatusafterInitialScreen......................................................39
6.2 Recording...................................................................................40
6.2.1 RecordingColors..................................................................40
6.2.2 PrintingColor........................................................................40
6.2.3 PenGap................................................................................40
6.2.4 Gaps betweenPensandPrinter.........................................40
6.2.5 Print gapcorrection..............................................................41
6.3 HowtoRecord............................................................................41
6.3.1 Starting/StoppingRecordingOperation...............................41
6.3.2 FeedtheChartPaper..........................................................41
6.3.3 Print Sample.........................................................................42
6.4 DigitalPrint..................................................................................43
6.4.1 ManualPrint..........................................................................43
6.4.2 ListPrint................................................................................44
6.4.3 EngineeringListPrint...........................................................46
6.4.4 RecordStart/EndPrint.........................................................48
6.4.5 DI ManualPrint(option)........................................................48
6.4.6 DI Date/TimePrint(option)................................................... 48
6.4.7 DI CommentPrint(option)....................................................49
6.5 Changingthe Display.................................................................50
6.5.1 AutoDisplay .................................................50
6.5.2 ManualDisplay ................................................50
6.5.3 DateDisplay ................................................50
6.5.4 TimeDisplay ................................................ 50
6.5.5 DisplayOff ....................................................... 50
7. DEVICE SETTING................................................................51
7.1 SettingtheSetup Mode............................................................. 51
7.1.1 SettingtheRange................................................................54
(1) Settingmethod.....................................................................54
(2) (Current/Voltage) (Thermocouple),
(ResistanceTemperatureDetector)...........................55
(3) (Scaling)............................................................57
(4) (SquareRoot).......................................................59
(5) (Decade)...........................................................61
(6) (Difference) (Sum),
(Average)...............................................63
(7) (Skip).....................................................................64
7.1.2 SettingtheAlarm..................................................................65
7.1.3 SettingtheUnit.....................................................................67
(1) CharacterCodeTable..........................................................68
7.1.4 SettingtheChartSpeed......................................................69
7.1.5 SettingtheDateandTime...................................................70
7.1.6 CopyingtheSettingData.....................................................71
7.1.7 SettingOtherFunctions.......................................................72
(1) (ZoneRecording)................................................. 73
(2) PartialCompression/Expansion)......................74
(3) DigitalPrint)....................................................75
(4) Tag)........................................................................76
(5) CommentWords)..............................................77
7.2 SettingtheEngineeringMode................................................... 78
7.2.1 Alarm Hysteresis..................................................................81
7.2.2 BurnoutON/OFF.................................................................81
7.2.3 ChannelOffset.....................................................................82
7.2.4 ReferenceJunctionCompensation....................................82
7.2.5 DigitalFilter........................................................................... 84
7.2.6 Settings RelatedtoRecording............................................84
(1) Recordingstart/stoptriggersetting......................................84
(2) Tag/channelprintselection..................................................85
(3) Alarmprint ON/OFF.............................................................85
(4) Loggingprint ON/OFF......................................................... 86
(5) PrintgapcorrectionON/OFF.............................................. 87
(6) Record Start/EndPrintOFF/SYNC/ASYNC......................87
7.2.7 SettingtheCommunicationFunction..................................88
7.2.8 InitializingtheSetupData....................................................89
7.2.9 DIFunctions.........................................................................89
7.2.10 TempertureUnit.................................................................90
7.2.11 Point Calibration.................................................................90
7.2.12 DataCalibration.................................................................91
7.3 Terminating theEngineeringMode..........................................94

―5―HXPRM10mnCT002E
8.COMMUNICATIONS............................................................ 95
8.1General Description.....................................................................95
8.1.1GeneralDescriptionofFunctions..........................................95
8.1.2TransmissionSpecifications..................................................95
8.2OriginalProtocol............................................................................96
8.2.1 DataConstruction...............................................................96
8.2.2 Opening/ClosingtheLink...................................................96
8.2.3 OutputtingtheProcessVariableData................................97
8.2.4 OutputtingtheUnitandDecimalPointPositionData.....100
8.2.5 OutputtingtheStatus........................................................101
8.2.6 DataReceptionExample.................................................102
8.3ModbusRTUProtocol................................................................103
8.3.1 DataConstruction.............................................................103
8.3.2 Function Codes.................................................................103
8.3.3 ErrorResponse.................................................................103
8.3.4 Reading from theInputRegisterArea.............................104
8.3.5 Reading from orWritingtotheHoldingRegisterArea....107
9. MAINTENANCE................................................................108
9.1 Inspection..................................................................................108
9.2 Cleaning....................................................................................108
9.3 ReplacingConsumables..........................................................109
9.4 AdjustingthePen RecordingPosition
(PointCalibration)...........................................................109
9.5 Calibration(DataCalibration)...................................................109
(1) Calibration ofVoltage.........................................................110
(2) Calibrationof ResistanceTemperature Detector..............110
(3) Calibrationof ReferenceJunctionCompensation............111
10. TROUBLESHOOTING....................................................112
10.1 Troubleshooting......................................................................112
10.1.1 TroubleItems....................................................................112
10.1.2 WhentheRecorderDoes
notWorkatAll...............................................................112
10.1.3 WhenThereisaBigError................................................113
10.1.4 WhenthePenRecordingDeflected................................113
10.1.5 WhenPrintsNothing.........................................................114
10.1.6 WhenPrintingisFaint.......................................................114
10.1.7 WhentheChartPaperisnotFedatAll...........................115
10.1.8 WhentheChartPaperisnotFedProperly.....................115
10.2 SelfDiagnosticsFunction(ERROR).....................................116
10.2.1 Self DiagnosticItems........................................................116
10.2.2 ErrorDisplay......................................................................117
11. SPECIFICATIONS............................................................118
11.1 CommonSpecifications..........................................................118
11.1.1 InputSignal........................................................................118
11.1.2 PerformanceandCharacteristics.....................................118
11.1.3 Structure............................................................................119
11.1.4 PowerSource....................................................................119
11.1.5 NormalOperatingConditions...........................................119
11.1.6 Alarm(RelayOutputisOptional).....................................120
11.1.7 SafetyStandard andEMIStandard................................120
11.1.8 DIFunction(Option).........................................................120
11.1.9 Paper-emptyDetectingFunction(Option)......................120
11.2 StandardSettingSpecifications.............................................121
11.2.1 MeasurementRange.......................................................121
11.2.2 TheAccuracy attheComputation...................................124
(1)Scaling..................................................................................124
(2)Squarerootcomputation.....................................................124
(3) Decade...............................................................................125
(4) Difference,Sum,andAverage..........................................125
11.2.3 IndividualSpecifications...................................................126
11.2.4 StandardFunctions..........................................................127
11.3 StandardSettingFunctions...................................................128
11.3.1 StandardSettingFunctions.............................................128
11.4 OptionalFunctions............................................................128
11.4.1 RemoteFunctionofDI.....................................................128
11.4.2 AlarmBoard.....................................................................128
11.4.3 CommunicationUnit........................................................128

―6―HXPRM10mnCT002E
1.INTRODUCTION
1.1 Checking theAccessories
Upon deliveryof this instrument, unpack and check its accessoriesandappearance.
If there are any missing accessories or damages on the appearance, contact our dealer where you
purchased the instrument, or oursales representative.
Following accessories should be attached.
①Chart paper ②Ribboncassette ③Cartridge Pen
④Mountingbracket ⑤Instructionmanual ⑥Packing
Fig. 1.1 Accessories
Table 1.1 List of Accessories
No.
Part Name
Type
Quantity
Remarks
1 pen
2 pen
1
Chartpaper
HZCGA0105EL001
1
1
50 equaldivisions
2
RibbonCassette
HPSR001H0002C
1
1
3
CartridgePen
WPSR196A000001A
1
1
For1pen(Red)
WPSR196A000002A
―――
1
For2pen(Green)
4
Mountingbracket
H4A14175
2
2
Panelmountingbracket
5
Instructionmanual
HXPRM10mnCT002E
1
1
This manual
6
Packing
H4H14900
1
1
ForIP65
[Note]
The ribbon cassette has been set in the instrument upon shipment.

―7―HXPRM10mnCT002E
Take the chart holder out to check its accessories.
See Section 5.1 “Setting the Chart Paper” for taking out the chart holder.
Fig. 1.2 Position of the Ribbon Cassette
Fig. 1.3 Position of the Chart Paper and the Cartridge Pen
Thechartpaperis
contained in the chart
holder.
Open the Chart Guide to
check it.
The cartridge pen is contained
in thestoragechamber.
Open the chart cover to check
it.
This instrument is shipped
withtheribboncassette
back of the chartholder.
ChartGuide
ChartCover
[Note]
①This instrumentisequipped withthe ribbon cassette back of the chart holder. Open thedoor andtake
outthe chart holder to check it.(See Section 5.1 about taking out the chartholder.)
②Thechartpaper andthecartridgepen arecontained inthe chartholder. Takethechartholder outand
open thechartcover to check it.
③Maximum angle of the door in opened-state is 135 degree. Do not further open the door otherwise
hinge will be broken.

―8―HXPRM10mnCT002E
1.2 Checking the Type and Specifications
A nameplate is affixed to the inside of the instrument. Remove the chart holder and make sure that the
nameplate is affixed to the middle far side of the instrument.
Make sure thatthisinstrument meets your requestedspecification, seeing thefollowing tables.
Table 1.2 Type
01 1pentype
①Model
02 2pentype
0RS-232C(Standard)
②Communication
1RS-485 (Option)
0 None
③DI/DO (Option)
13Relayoutput
2 3DI
33 DI + 3 Relayoutput
1
2
3
9
7
4
5
6
11
8
10
T
R
M
-
1
0
C
①
②
③
④
12
13
T
0None
1Yes
④Paper-emptySensor(Option)

―9―HXPRM10mnCT002E
1.3 Temporary Storage
Store the instrumentin the following environment.
When incorporated in the equipment, store it in the following environmentas well.
1.4 Indication Card
An indicationcard has been affixedto the door upon delivery. Enter a name as required.
CAUTION
Note that if a non-originalnameplate is attached, it maydamage the door or mountingpart.
CAUTION
Storagein a poor environmentmaydamage the appearance, functions, and service lifeof theinstrument.
StorageEnvironment
・Aplace with little dust.
・Aplace free from combustible, explosive, or corrosive gases ( SO2, H2S,etc.).
・Aplace free from vibrations or shocks.
・Aplace free from water or steam or highhumidity( 95% RH max.).
・Aplace free from directsunshine or high temperature (50℃max. ).
・Aplace freefrom an extremely low temperature ( -20℃min. ).

―10―HXPRM10mnCT002E
2.CONSTRUCTION
2.1 Appearance
Fig. 2.1 Appearance
Cartridgepen
Door
ChartHolder
Display
keyboard
Terminal block
Case
Mountingbracket
Indicationcard

―11―HXPRM10mnCT002E
2.2 Display Screen and Operation Keys
2.2.1 Display Screen
The following describes the display screen. Since the channel numbers and data are indicated by a
7-segment LED, alphabets are symbolized to represent them.
For the LED display, see " SymbolizedAlphabets for Display" at [Reference] below.
Fig. 2.2 Display
[Reference]SymbolizedAlphabets for Display
Display
Alphabet
A
B
C
D
E
F
G
H
h
I
J
K
L
l
Display
Alphabet
M
N
O
P
Q
R
S
T
U
V
W
X
Y
Z
RUN ALM
CH.No DATA
Alarm Type Display
Indicates an alarm type inred.
"H"isilluminatedwhenthe alarmisHigh.
And “L” is illuminated when the alarm is
Low. Neitherofthemisilluminatedwhen
there is no alarm.
Channel No. Display
Indicates a channel
numberin orange.
Data Display
Indicates the process
variable, time, setting
screen, etc.inorange.
Operation Keys
Use these keys for setting and
other operations.
Status Display
The "RUN" lamp (orange) is illuminated when
recording. The"ALM"lamp(red)is illuminatedwhen
the alarm is being activated. denotes that the
lamp goes out and denotes that it is illuminated.
ESC ▲
▲
RUN
MENU
PRINT
FEED
ENT
H
L

―12―HXPRM10mnCT002E
2.2.2 Operation Keys
The following describes each operation key.
This manualrepresents the actual operation keys as shown in the figurebelow.
Fig. 2.3 Operation Keys in ThisManual
Table 2.1 Names of Operation Keys and Their Functions
Key
Name
Function
“RUN”key
Starts/stops recording. To stop, hold down the “RUN” key for 3
seconds or more. (Gone out the “RUN” lamp.) To start, press
the “RUN” key. (Illuminates the “RUN” lamp.)
“MENU”key
MENU
function
Selectsengineeringlistprintandchangeto
thesetting mode.
“ESC”key
ESC
function
Exits that menu halfway selecting a
function.
“PRINT”key
PRINT
function
Used to perform manualprint or list print.
“△” key
△function
Used to select a setting parameter
(numeral or built-in command)(ascending
direction).
“FEED”key
FEED
function
The chart paper is fed while the key is
pressed, and stopped when released.
key
function
Used to shift a digit insetting a numeral.
“ENT”key
Used for registering a setting parameter (numeral or built-in
command) after selecting it, or executing a function. Pressing
thiskeyexecutesthe setting.
RUN
ENT
ESC
MENU
PRINT
FEED
RUN ALM
CH.No. DATA
ESC ▲
▲
RUN
PRINT
FEED
ENT
ESC
MENU
RUN MENU PRINT FEED ENT
H
L

―13―HXPRM10mnCT002E
3.INSTALLATION
3.1 Outside Dimensions Drawing and Panel Cutting Dimensions
Fig. 3.1 Outside Dimensions and Panel Cutting Dimensions
CAUTION
For maintenance and safetyof theinstrument, it is recommended tosecure thespacing larger than the
parenthesized dimensions per unit.
Unit: mm
<Front>
<Rear>
<Side>
<PanelCutting>
(56)
144
144
3.5
2.5
(100)
RUN
ALM
RUN
MENU
PRINT
FEED
ESC
CH, NO.
ENT
DATA
137
137
200 min
1
3
8
+
1
-
0
138+1
-0
(128)
7 MAX
(Panel thickness)
2
5
1
5
0
200 min
(128)
Dimension required
when the door is fully
opened(135゜).
(Wallon the leftside).

―14―HXPRM10mnCT002E
3.2 Mounting to the Panel
3.2.1 Procedure for Mounting to the Panel
1) Assemble the mounting bracket refer to Fig.3.2.
2) Fitin this instrument throughthefront of the panel.
3) Fit the claws of the mounting bracket into the square holes in the top and bottom surfaces of the
case.
4) Tighten the screw of the mounting bracket with a screwdriver to attach it to the panel. When the
mounting unit does not move back andforth anymore, tighten a screwby180゜.
Fig. 3.2 Mounting bracket
Assembleinsuchamannerthat
the screw nose will be almost
aligned with theplate surface.
MountingClaw
Body
MountingClaw
[Note]
If itis tightened with an excessive force, the case maybe distortedandthe mounting bracketmaybe
deformed. An adequatetighteningtorque isabout 0.2to 0.3N・m (2~3㎏f・㎝).
WARNING
Do not install the instrument in a place exposed to a combustible, explosive, or corrosivegas (SO2, H2S,
etc.).
CAUTION
Installthe instrumentin the followingplaces
・Aplacefree from wherehumidityoften changes.
・Aplace of normal temperature (25℃orso).
・Aplace exposed to as little mechanical vibrations as possible.
・Aplace with as little dusts as possible.
・Aplace affected by theelectromagnetic field as little as possible.
・Aplace not directlyexposed to high radiant heat.
・Aplace where the altitude is up to 2000m.
・Humidity hasan effect on the chart paper and ink. Use theinstrumentin a humidity range of 20 to
80%RH(60%RHis optimum).
・This instrument needs the inside installation.
Mountingto the Panel
・Asteel plate notthinner than 1.2mm is recommended as a mountingpanel.
・Themaximum thickness of the mounting panel is 7mm.
Inclination
・Install the instrument horizontally.
The instrument should be installed so that its inclinationshould be 0゜at the frontand within30゜at the rear.

―15―HXPRM10mnCT002E
Fig. 3.3 Mounting to the Panel
3.2.2 Mounting tothe Panel in compliance with the IP65
Prior to mounting the instrumentto the panel, attachpacking to theposition shown in the figure.
The rest of the procedure is the same.
Fig. 3.4 Mounting to the Panel(in compliance with the IP65)
Panel
Mountingbracket
Screw
Mountingof Packing
Packing
Panel
Mountingbracket
Packing
Panel
Screw

―16―HXPRM10mnCT002E
4. WIRING
4.1 Terminal Layout and Power Wiring
4.1.1 Terminal Layout
Fig. 4.1 Terminal Layout (Rear view)
4.1.2 Power Wiring
WARNING
①In order topreventan electric shock, be sure to provide protectivegrounding prior to turning on the
instrument.
②Do not cut a protective grounding conductor ordisconnect protective grounding.
③Make sure thatthe supply voltagefor the instrument conforms to thevoltage of thesupplysource.
④Attach a transparent protective cover priorto turning on the POWERof theinstrument.
⑤Any interruption of the protective conductor inside or outside the apparatus or disconnection of the
protective grounding terminal is likely to make the apparatus dangerous under some fault conditions.
Intentional interruption is prohibited.
L N
1C1A 2A 3 C3A2C
1+
B
1-
B
1
A
2+
B
2-
B
2
A
SG
RDTD
+
-
DI
COM DI
3DI
2
DI
1
Power source
terminal block
Communication
terminal block(RS-232C)
Input terminalblock
3Relayoutputs
Communication
terminal block (RS-485)
3DIterminal block

―17―HXPRM10mnCT002E
4.1.3 Wiring Procedure
1) Put your fingers on the left and right (both sides) hooks of the transparent protective cover on the
power source terminalblock. Pushing them inside, take out the cover to this side.
2) Connect the power sourceelectric wire refer to Fig. 4.2. Connect theprotective groundingto the
terminal. Connect the non-grounding side of the power source to "L" terminal. Connect the
grounding side tothe "N" terminal.
3) Put back thetransparent protectivecover.
4) Make sure thatprotective grounding is properly provided.
Fig. 4.2 Power source Terminal block
CAUTION
①As an electric wire for the power source, use a 600 V vinyl insulated wire (IEC60227-3) or its
equivalentorabove.
②Attach a round press-fitting terminal with insulated sleeve(for M3.5) to the end of theelectric wire.
③Connect a protective grounding (resistance:100Ωor lower, a minimum diameter of a grounding
conductor:1.6mm) totheprotectivegrounding terminal.
④If other instrument shares the protective grounding conductor, there may be an effect caused by
noise coming from thegroundingconductor. It is recommended not to shareit withother instrument.
⑤In order to comply with the requirements of safetystandard EN61010-1, the recorder shall have one
of the following as a disconnecting device, fitted within easy reachof the operator, andlabeledas the
disconnecting device.
a.Aswitch or circuit breakerwhich complies withtherequirements of IEC60947-1,IEC60947-3.
b.Aseparable coupler whichcanbe disconnected without the use of a tool.
c.Aseparable plug, without a lockingdevice, to mate with a socket outlet in the building.
⑥This product has been designed to conform to EN61010-1 installation category Ⅱand pollution
degree 2.
⑦Please use themain power supplyby the change within 10% of the rated voltage.
⑧Transitional current might flow to the main power supplywhen the power supply is turned on.
LN
CAUTION
The transparent protective cover shouldsurely remove the left andright (both sides) hooks simultaneously.
If itremoves byturns, there is apossibility that it may damage.
Powersupplyvoltage
Rated powervoltagerange :100-240VAC
Workingsupplyvoltagerange :85-264VAC
Rated powerfrequency :50/60Hz

―18―HXPRM10mnCT002E
4.2 Input Wiring
CAUTION
①Precautions for theinput electric wire
・See that no noise is mixed in input wiring. For input wiring, it is recommended to use a shielding wire or
twisted wire effective for noise.
・Incase of thermocouple input, connect a thermocouple wire directlyor use a compensating lead
wire. It is recommended to useashielded input line.
・Incase of resistance temperature detector input, dispersion of 3-wire line resistance should be less
than the below mentioned values. It is recommendedto use a shielded input line.
ForPt100,JPt 100 ;50mΩmax.
・Whenit is likelyto be affectedbyinduction noise, particularly when wiring near the high-frequency
powersource, it is recommended to use ashielded twisted wire.
・Attach a round press-fitting terminal with insulated sleeve (for M3.5) to theendof the electric wire.
②Precautions forwiring
・The wiring between the instrumentand measurement point should be keptaway from the power circuit
(25V or higher circuit or DO circuit).
・Short-circuit unused input terminals.(Short-circuit between "+" and "-" in case of mV,V, or
thermocouple input, and short-circuitamongA, B, and B in case of resistance temperature detector
input.)
・Groundtheshield of connecting wire.

―19―HXPRM10mnCT002E
4.2.1 Wiring Procedure
Fig. 4.3 Input Wiring
1) Put your fingers on the left and right (both sides) hooks of the transparent protective cover on the
input terminalblock. Pushing them inside,take out thecover to this side.
2) Wire the input lines refer toFig. 4.3(Page 19), Fig. 4.4 and Fig. 4.5(Page 20).
3) Put back thetransparent protectivecover.
Fig. 4.4 Input Wiring (mV, V,TC)
CAUTION
The transparent protective cover shouldsurely remove the left andright (both sides) hooks simultaneously.
If itremoves byturns, there is apossibility that it may damage.
DC Voltage
Thermocouple
RTD
DI
COM
DI
3
DI
2
DI
1
TD
RD
SG
1 +
B
1 -
B
1
A
2 +
B
2 -
B
2
A
1channel
2channel
A
B
B
+
-
+
-
A
B
B
+
-
+
-
+
-
DC Current
+
-
+
-
B
B
A
+
-
B
B
A
+
-
+
-
①mV,Vinput
②TCinput
Other manuals for TRM-10C
2
Table of contents
Other Toho Electronics Measuring Instrument manuals
