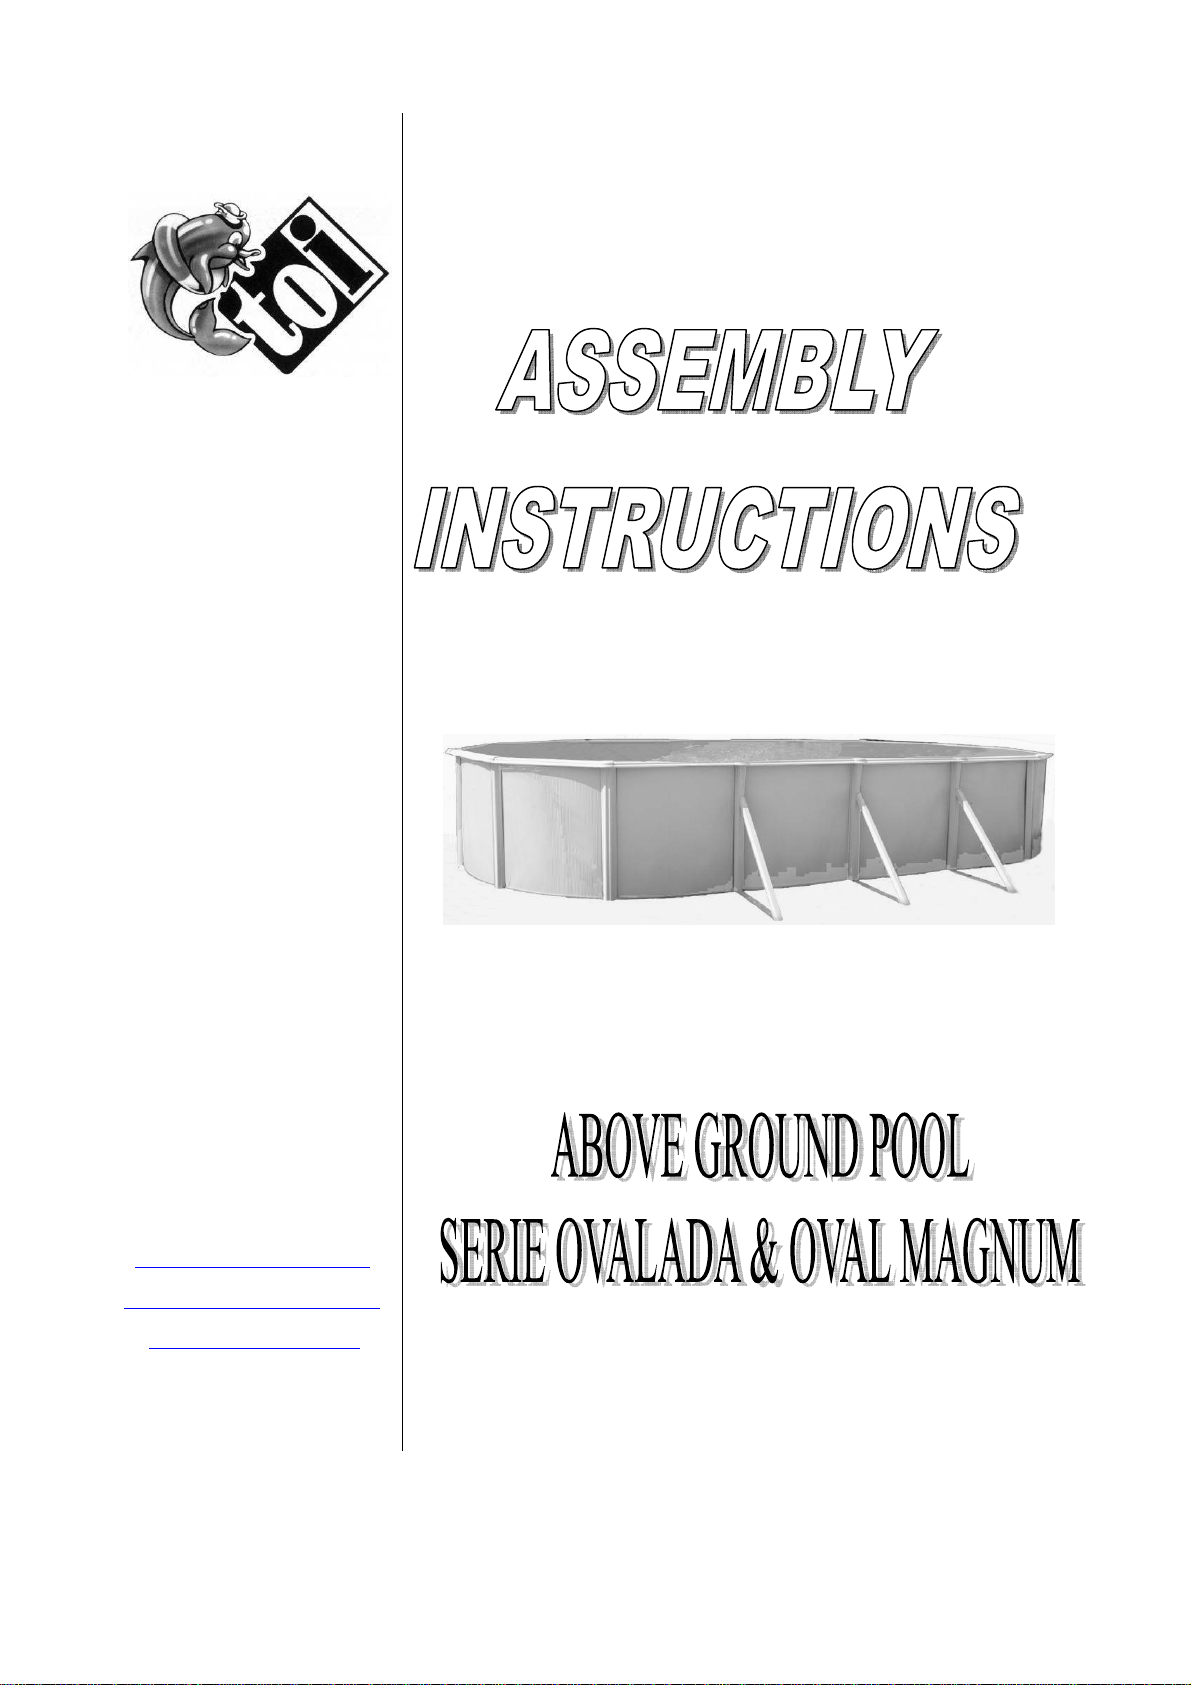
TOI OVAL Series User manual

Desde/Since 1962
Pol. Ind. c/ Buitrera, s/n
Apdo. de correos, 10
46180 Benaguacil/Valencia
Tel. atención al cliente:
902 36 47 17
e
-mail:
S.P.V.:
www.torrenteindustrial.com

2
INDEX
1. SAFETY GUIDELINES -------------------------------------------------------------------------- p.3
2. DETERMINING THE INSTALLATION SITE FOR THE SWIMMING POOL ------- p.5
3. TOOLS ---------------------------------------------------------------------------------------------- p.6
4. COMPONENTS (ALSO, COLUMNS & BUTTRESSES PART LIST) --------------- p.7
5. PREPARE THE AREA BEFORE THE INSTALLATION -------------------------------- p.8
6. PREPARE THE STRAPS FOR THE BRACES -------------------------------------------- p.8
7. INSTALLATION OF THE BASE AND LOWER PLATE --------------------------------- p.9
8. INSTALLATION OF THE VERTICALS ------------------------------------------------------ p.9
9. INSTALLATION OF THE COLUMN STIFFENER --------------------------------------- p.10
10. ASSEMBLY OF THE POOL BASE (PCM)------------------------------------------------- p.10
11. ASSEMBLY OF THE STEEL WALL (CH) ------------------------------------------------ p.12
12. INSTALLATION OF THE LINER (L) ------------------------------------------------------- p.13
13. INSTALLATION OF THE UPPER PROTECTIVE SECTION (PL)------------------- p.14
14. INSTALLATION OF THE UPPER SECTION (PBS) ----------------------------------- p.14
15. ASSEMBLY OF THE VERTICAL SECTIONS (VER) ---------------------------------- p.14
16. ASSEMBLY OF THE HORIZONTAL PROFILES (HOR) ----------------------------- p.15
17. INSTALLING THE HUB CAPS (EMB / EMR) ------------------------------------------- p.16
18. INSTALLING THE RETURN VALVE ------------------------------------------------------ p.16
19. INSTALLING THE SKIMMER ---------------------------------------------------------------- p.17
20. LAST DETAILS ---------------------------------------------------------------------------------- p.18
21. SWIMMING POOL’S MAINTENANCE ----------------------------------------------------- p.18
22. CARE DURING WINTER MONTHS --------------------------------------------------------- p.20
23. TO EMPTY, DISASSEMBLE AND STORE YOUR POOL ---------------------------- p.20
24. GUARANTEE & CONDITIONS--------------------------------------------------------------- p.22
Thank you for selecting a TOI swimming pool. You have chosen a high quality swimming pool, produced according
to the most up to date technologies and the most strict norms of security.

3
ATTENTION: READ THESES INSTRUCTIONS CAREFULLY BEFORE PROCEEDING TO ASSEMBLE YOUR SWIMMING POOL.
REMIND ALL POOL USERS THAT THESE SAFETY INSTRUCTIONS MUST ALWAYS BE FOLLOWED-UP. KEEP THESE
INSTRUCTIONS FOR FUTURE CONSULTATIONS. ¡YOUR CHILDREN’S SAFETY DEPEND ON YOU! RISK IS HIGHER WHEN
CHILDREN ARE UNDER 5 YEARS OLD. ACCIDENTS CAN HAPPEN TO EVERYBODY SO IF INSTRUCTIONS ARE NOT FOLLOWED
MAY CAUSE HEALTH RISKS AND SPECIALLY IN CHILDREN!
1. SAFETY GUIDELINES
Remember that safety is the most important factor when installing the swimming pool. Safety must be given priority over any
decorative aspect. Do not lean, jump, sit, stand or walk on profiles. They have not been designed to that effect.
Do not dive or jump headfirst in your swimming pool, do not jump from a ladder or elsewhere. This pool is not deep enough to
dive without risk of accident. The self-adhesive sign “Unsupervised, your child in danger” must be placed close to or on your
pool. For replacement adhesives, please contact our factory.
Do not use your swimming pool when being under the effects of alcohol, medicines or drugs.
To avoid drowning and injuries, do not leave tables, chairs or other objects near the pool to prevent children from climbing into
the pool.
Do not install a slide on your swimming pool.
To avoid electrocution risk, do not manipulate electrical equipment near to your swimming pool or with a wet body. Make sure
that all electrical equipments are protected by a grounded switch.
When bathing, never use metallic or punching foot wear.
If your pool has a cover on, do not allow anybody, and specially small children, to walk or play on it.
Assign one entrance and exit for our swimming pool. This area must be kept totally clean. Remove all object that could hurt
barefooted people.
Do not make holes in your swimming pool wall to install lights or any other devices. It could result in serious injuries, inundation,
electrocution or property damage.
For more security, we recommend to install a 122 cms high fence or wall around your swimming pool made of a resistant
material. All access doors/gates should have a lock installed at least at 122 cms high in order to prevent small children from
opening them. If doors, windows and garden gates make part of the fence, make sure that they can be closed with a key or
bolt.
Do not use your swimming pool at night or when visibility is not good. The water of your swimming pool shoud be always kept
clean in order to see the bottom and appreciate its depth. Users should be capable to see that the pool is not deep enough to
dive. If you decide not to take into account this safety instruction, then it’s your responsibility to provide users the appropriate
instructions on the correct use of this product and supply sufficient light. For lighting recommendations, consult your local
licensed electrical contractor on the appropriate light so as to fulfil all local and national norms of electricity and other security
requirements.
If your pool is equipped with a ladder, then follow-up all safety guidelines and assembly instructions indicated in the manual.
A ladder must be used to get in and out of the swimming pool. When not in use, the ladder should always be removed and kept
in an inaccessible place.
In order to maintain its stability, the ladder should be placed on a solid, levelled base at all times. Only one person at the time
should be on the ladder.
Install the ladder where the entrance/exit of your swimming pool will be.
Never use your ladder for other aims. The pool ladder has not been developed for other applications.
If your swimming pool is equipped with a filter, make sure that the swimming pool is filled with water and your filter correctly
connected as indicated in the manual.
During the bathing season, the filter must work every day, long enough to renew all the water at least one time.
Attention: All filter systems fulfill normative of installation NF C 15-100. It stipulates that all electrical item that is to less than
3,50 mts from the swimming pool and freely accessible, must be fed on very low tension.12 volts.
All electrical item fed on 220 V must be place at least, at 3,50 mts from the pool’s edge. A permission of the manufacturer is
needed to modify any of the components of the filtration system.
Verify all parts of your pool on a frequent basis in order to detect possible failures and make sure all components are installed
correctly. Always replace components with original TOI spare parts.
This swimming pool has been designed for private use only. Do not use for commercial activities.
Avoid accidents and be prepared to react in case they occur!

4
SUPERVISE AND ACT
-Never leave a child alone and unsupervised.
-Assign one person to be responsible for the user’s safety.
-Increase supervision according to the number of pool users.
-Supply inflatable to those who do not know how to swim.
-Teach your children how to swim as early as possible.
-Wet your neck, arms and legs before going inside the water.
-Learn first aid techniques, specially those of application to children.
-Do not allow diving and jumping.
-Do not allow sprints or violent games near or inside your swimming pool.
-Children that cannot swim should not be allowed to enter the swimming pool without life jacket and without the company of an
expert swimmer.
-Do not leave toys inside or near the swimming pool.
-Keep water clean and healthy permanently.
-Store chemicals for water treatment our of children’s reach.
KEEP:
-Your telephone closes to the swimming pool in order not to interrupt supervision.
-Inflatables and pole near the pool.
IN ADDITION, WE RECOMMEND FOLLOWING A EQUIPMENT:
-Manual or automatic cover, correctly installed.
-Electronic device detecting passers-by and persons falling in the swimming pool. (This additional equipment won’t substitute
constant supervision, under no circumstances.
IN CASE OF ACCIDENT:
-Take child out of the water as quickly as possible.
-Call for help immediately and follow te instructions given.
-Replace wet garments by hot and dry ones.
MEMORIZE AND KEEP FIRST AID TELEPHONE NUMBER CLOSE TO THE POOL:
-Fire brigade.
-Ambulance, doctor…
RECOMMENDATIONS FOR THE ASSEMBLY OF YOUR SWIMMING POOL
1) Take your time and read the instructions carefully before starting to install the swimming pool. Follow all
the instructions.
2) This swimming pool has been designed to be easily installed. Final results will depend on your care and
attention while installing the pool. The effort and care that you put into the preparation of the foundations
can make a great difference in the life span of your swimming pool and its liner.
3) Check local laws and, if necessary, obtain the construction permits. Check local electrical and construction
laws concerning the installation of swimming pools above ground level.
4) Do not forget that your swimming pool is like a big tank. If the pool is too full, pressure may originate a
breach in the wall and cause inundation and important damages and injuries to people near the pool.
5) Check local laws and, if necessary, obtain the construction permits. Check local electrical and construction
laws concerning the installation of swimming pools above ground levelThis swimming pool contains a large
amount of water and a big weight. Take special care to avoid accidents. To calculate the approximate
weight of your pool, convert the capacity of liters of water, based on the equivalent of 1 kilo=1 liter.
6) Gather and check the tools and materials you will need to install the swimming pool.
7) We recommend that at least two adults assemble the pool.
8) Approximate time for assembly of the pool (ground leveling and filling with water excluded) is 3 hours.

5
2. DETERMINING THE INSTALLATION SITE FOR THE SWIMMING POOL
Take a look at your property to decide the ideal and the best site for the swimming pool.
The ground:
A large area is ideal. However, if a flat area, large enough for the swimming pool is not available, then choose an
area where minimum digging is required.
Under no circumstances, the swimming pool must be installed below ground level. This swimming pool must only
be installed above ground and on a hard, solid ground. The swimming pool must be installed near a drain or
sewage system to avoid flooding in case of breakage / leakage.
The swimming pool must be installed on a 100% plain and flat surface. Failure to observe this important safety
measure can cause damage and deformation to the liner and / or the metal sheet, resulting in injuries to those who
are near the swimming pool.
Never install this swimming pool inside a garage, or on a balcony, roof, terrace or any other surface that is not
completely flat and solid. The maximum weight that the installation site can support must be taken into
consideration.
Remove roots, grass and stones in the selected area, including those under the ground. The weight of the water
will compress these elements between the liner and the earth under the swimming pool, resulting in damages.
Grass left underneath the pool liner will rot and give of an unpleasant odor and stones and roots will damage the
pool liner.
Avoid installing your swimming pool on fertilized ground or on any ground that has recently been treated with oil-
based weed killers, chemicals or fertilizers. Avoid those areas where grass grows; it could go through the liner of
your swimming pool.
Do not install your swimming pool on: marshland, tar, gravel and wood.
A foundation made of leveled, solid and
very compact soil / earth is the best base for your swimming pool. Do not install your swimming pool on a fragile
earth or on a site that will not support the weight of the pool
Do not install your pool to close to your house, but in order to ensure maximum safety, install it where it can be
readily seen and watched from the house.
Yes

6
Electric wires:
The swimming pool must be installed at a minimum distance of 6 meters from any electrical socket. To ensure
maximum safety, it should never be installed directly below high voltage or medium voltage overhead electricity
wires. In some communities, it is illegal to do so.
Underground cables:
Check for any buried electrical, telephone cables, or gas pipes at the site before you start digging to level the
surface.
Trees:
Overhanging trees and their tenants (birds, insects, …) are not the swimming pools’ best friends. The resin and
falling leaves and twigs can cause problems in maintaining your swimming pool’s water clean. If there is a filtering
system, it will have to be used more often. Install the swimming pool away from the trees.
Grounded sockets:
In the case where the swimming pool has or uses a water filter or any other electrical device, and there is no
grounded socket nearby, you must have one installed by an authorized electrical technician.
3. NECESSARY TOOLS (not included)
1.- A measuring tape .
2.- A spirit level.
3.- A marker (felt pen).
4.- Adhesive tap.
5.- Cutter.
6.- Gloves
7.- Clothespins.
8.- Scissors
9.- A metal saw.
10.- A wrench.
11.- A flat screwdriver.
12,- A “star” screwdriver.
13.- File.

7
4. PART LIST
550x365x
120/132
640X365x
120/132
735X365x
120/132
914X457x
120/132 1200X457
L 1 1 1 1 1
CH 1 1 1 1 1
TO 31/33 31/33 31/33 31/33 31
AR 31/33 31/33 31/33 31/33 31
TU 31/33 31/33 31/33 31/33 31
T1 10 10 10 10 10
T2 10 10 10 10 10
VER 10 10 10 10 10
PCM 8 8 8 8 8
EMB 10 10 10 10 10
EMR 2 4 6 6 10
HOR1 0 2 4 4 8
HOR2 4 4 4 4 4
HOR3 8 8 8 8 8
PBS 11 12 13 17 21
PL 15 17 19 24 29
TO2 90 90 90 90 90
BU 20 20 20 20 20
SK
VR
1
1
1
1
1
1
1
1
1
1

8
5. PREPARATION OF THE SITE
For this type of pool, we recommend making a “platform” style plinth out of concrete, 30cm
larger than your pool, which must be COMPLETELY HORIZONTAL AND LEVEL.
6. PREPARE THE STRAPS FOR THE BRACES
Very important: Always wear gloves when working. Carry out the
installation between two or more people.
a. Extend the brace (9) or braces (depending on model of pool) across the
leveled area of the pool as shown in figure 1.
b. Gently smooth out any folds that there may be in the braces.
c. Join the angle plate (3) to tens (9) using screws M5x15 (10) and
nuts (11). Make sure that the angled part of the angle plate (3) is facing in
the right direction (3), as illustrated in photos 1, 2 and 3. The angle plate
(3) must be joined to the strip at its upper part, tighten the nuts in random order.
d. Repeat this process on each side of the strap and for each strap.
Ref.
Key part name
Quan
t.
of
pieces
550x366
Quant. of
pieces
640x366
Quant. of
pieces
731x366
Quant. of
pieces
914x457
Quan
t. of
pieces
1200x457
1 Upright “A” 2 4 6 6 10
2 Diagonal “F” 2 4 6 6 10
3 Diagonal Bracket “H” 2 4 6 6 10
4 Base plate “G” 2 4 6 6 10
5 Top plate “E” 2 4 6 6 10
6 Hold down plate 2 4 6 6 10
7 Transition rail “A” 2 2 2 2 2
8 Transition rail “B” 0 2 4 4 8
9
Strap
1
2
3
3
5
10 Screw M5x15 22 44 66 66 110
11 Nut M 5 26 52 78 78 130
12
Screw
M 5x55
4
8
12
12
20
13 Screw for the wall 5,5x13 14 28 42 42 70
MODEL
PLATFORM SURFACE
M2
550x366
37,21 m²
640x366
42,700 m²
731x366
48,250 m²
914x457
68,250 m²
1200x457
88,900 m²
fig. 1

9
7. INSTALLATION OF BASE PLATE AND LOWER PLATE
a. Gently lift strap (9) and insert four screws M5x15 (10) into the holes nearest the centre of
the pool. Make sure that the screw heads are pointing towards the ground. Place the strap back
on the ground and place the base plate (6) and then the lower plate (4) (as shown in photos 4, 5
and 6) onto the screws protruding through the strap. Place the nuts (11) onto the screws and
tighten in a random order. Before tightening, check that the base plate is not at an
angle.
b. Repeat this process on each side of the strap and for each strap.
8. INSTALLATION OF THE VERTICALS
a. Situate one of the vertical columns (1) on the lower plate (4), fix the column (1) to
plate “G” with screws M5x15 (10) and corresponding nuts (11). Tighten the nuts in random
order (photos 7, 8, 9 and 10).
b. Check that there is a gap of approximately 2 mm underneath the flange at the lower end of each
vertical section, so that the lower “C” sections can slide in easily.
c. Repeat steps (a) to (b) for the other side of the pool.
photo 1 photo 2 photo 3
photo 4 photo 5 photo 6
photo
7
photo
8
photo
9
photo
10

10
9. INSTALLATION OF THE COLUMN STIFFENER
a. Place the stiffener (2) in an almost horizontal position and insert the four flanges on the end of
the stiffener into the grooves in the vertical column (1), photos 11, 12, 13 and 14.
b. Push the stiffener (2) forward until you can see the four flanges inside the vertical column (1), whilst
at the same time moving the lower end of the stiffener towards the angle plate (3) in the base strap,
fit the angle plate (3) into the stiffener (2), photos 15 and 16.
b. Screw the stiffener (2) to the lower plate (3) with two screws (12) and the corresponding nuts
(11). Do not tighten excessively, just enough to ensure secure anchoring, photos 17 and 18.
c. Repeat steps (a) to (c) on the other side of the strap and for each strap.
10. ASSEMBLY OF POOL BASE (PCM)
Install the curved transition sections
- Each pool model has two, three or four different types
of curved lower sections. The sections are given a
number depending on their position, fig. 2. Consult the
table below to choose the type and quantity of lower
sections suitable for your pool.
Fig. 2
Transition sections table
Transition section A Transition section B Measurement
549x366 cm.
850.015 x 4
not applicable
± 1.420 mm x 4
640x366 cm.
850.021 x 4
850.019 x 2
± 1.130 mm x 4
± 1.430 mm x 2
731x366 cm.
850.021 x 4
850.017 x 4
± 1.132 mm x 4
± 1.130 mm x 4
914x457cm.
850.019 x 4
850.019 x 4
± 1.430 mm x 8
12x457cm.
850.019 x 4
850.019 x 8
± 1.430 mm x 12
photo
11
photo
12
photo
13
photo
14
photo
15
photo
16
photo
17
photo
18

11
a. If your pool is the 550x120 model, insert the transition sections A on each side of the notches in
the vertical columns (1). For other models, first insert transition sections B, fig. 2, photo 19,
between the vertical columns (1) so that they fit into the notch of the vertical column (1). Make
sure that the transition section groove is facing upwards, photo 20.
b. Insert transition sections A. Slide each end of the section until it fits into the
notch in the vertical column (photo 21).
c. Repeat steps a, b, on the other side of the pool.
Important: Ensure that transition sections A and B are correctly placed and adjusted in the
grooves of vertical columns 1.
Install the PCM lower curved sections
(PCM are shown in pictures as PCA)
a. After transition sections A, put in place plate T1, then the PCM lower section, until completing
a semi-circle, photo 22. The PCM transition sections must go into plate T1, photos 23 and 24.
Leave a gap of 5 mm between sections, photo 25
b. Repeat this process for the other side of the pool.
Important: Leave a space of +/- 5 mm between sections.
photo 22
photo 23
photo 24
photo 25
photo
19
photo
20
photo
21

12
11. ASSEMBLY OF STEEL WALL (CH)
We recommend that two or more people do the installation, and on a still day with no wind. For
safety reasons, wear gloves to protect your hands from the metal edges. During installation, do
not fold the wall and unroll it with care.
a) Place the pool wall vertically (label upwards) on a piece of cardboard in the centre of the circle,
this will make it easier to unroll and prevent scratching the bottom of the wall, photo 26.
b) Without unfolding completely, place the wall into the grooves in the lower sections, photo 28. The
beginning of the wall should be on a base plate (T1), photo 27, generally the central plate of the
semi-circle so that the skimmer opening is on the same side.
Important: Insert the wall into the sections, checking that they are securely inserted into the PCM
section grooves, photo 29. Check that the transition sections are correctly positioned, photo 30. To
prevent the pool wall from falling inwards, attach with tape to the vertical columns (1), photo 31. You
can also position the upper plate (5) fixing the strip, photo 32.
c) Complete the circle of the wall and make sure the holes are aligned then fix with screws,
remembering that the screw heads must be on the inner side of the wall and the washers and
nuts on the outside, photos 33 to 37.
photo 26 photo 27 photo 28
photo 29 photo 30 photo 31 photo 32
photo 33 photo 34 photo 35 photo 36 photo 37

13
Very important:Place all the screws in the metal strip with the pointed end of the
screw upwards, leaving the last hole free.
Tighten all the screws using a screwdriver
and a spanner.
a) Using a strip of PVC, cover the bolt heads on the inside of the pool wall to
protect the liner from rubbing against objects, which is the main cause of
tears in the liner (fig. 3). Stick the strip with glue for PVC.
b) Cover the inside border of the circle using clean sand that is
free of any stones or foreign objects. Press the sand into a
vertical triangular shaped layer that covers the sections and
the inside part of the metal wall. The height of this triangular
layer must not exceed 7 cm. (fig. 4). In this way, you will
prevent the liner from sliding under the metal wall and being
damaged due to the pressure and the weight of the water.
Along the sides of the pool, each of the buttresses makes the
wall scallop inward slightly. The cove at the bottom of the wall
will be a little narrower and shorter at these points. Make sure
the dimensions of the cove where it passes the buttresses
match diagram 17 for a correctly shaped cove.
12. INSTALLING THE LINER (L)
Important: The liner is best installed by two or more people. The PVC used for our liners has
been designed to withstand long periods of exposure to sunlight and UV rays. Under some climate
and use conditions, its characteristics may vary slightly.
Do not walk on the liner wearing shoes, do not throw tools onto the liner, and do not place any
sharp objects on the liner.
The liner is the most important and fragile component of the pool. Unpack it without using a
knife or any other sharp tool and separate the liner from the rest of the components. Store it in a
safe place where it is not likely to be punctured or damaged by tools.
Choose a sunny day to install the liner, when the temperature is at least 20º. The liner is
manufactured from a vinyl based, highly flexible material and is designed to stretch during
installation; this is why it must be warmed through when installed into your pool.
a) Place the liner in the centre of the pool, photo 43, and unfold it lengthwise along the pool. The
central seam that joins the base (floor) of the pool must be perfectly centered. Important: As you
unfold the liner, flip it so that the rough part faces upwards and the shiny part downwards.
b) Lift the sides of the liner to cover the top edge of the pool and hold it in place with pegs, photos
45 and 46.Then remove the surplus part of the liner, pulling it down towards the base of the pool
gently, avoiding sharp tugs.
c) Whilst the pool is filling, continue removing liner surplus with your hands, photo 47. This will
make the liner fit flush to the pool walls, smooth out any surplus again by pulling gently.
photo 43 photo 44 photo 45 photo 46 photo 47
Fig. 3
Fig. 4
f
oto 38 foto 39 foto 40 foto 41 foto 42

14
It is important that the liner is properly centered, taut and with as few folds as possible. To
remove folds from the liner on the base of the pool, take off your shoes and smooth the liner out
towards the sides with your feet. Check that the water is evenly distributed, without forming pools
which indicate that the ground underneath has dips. If the water is higher at one side, this means
that the ground is not level. If this occurs, you must empty the pool, disassemble all the components
and start the assembly over after levelling the ground. It is extremely important that the pool is
perfectly level.
13. INSTALLATION OF THE UPPER PROTECTIVE SECTION (PL)
a) Remove the pegs as you install the protective section (PL) on top of the liner and around the
perimeter of the pool, photos 48 and 49. Leave +/- 5 cm of liner on the outside of the strip, avoid
wrinkles, do not pull tight.
b) Mark and cut off the protector surplus, photos 50 and 51.
14. INSTALLATION OF THE UPPER SECTION (PBS)
(PBS are shown in pictures as PCS)
Important: If your pool has included the decorated band, place it as per the decoration’s manual,
before installing the upper profiles PBS.
a) Position the upper section (PBS) on top of the protective section (PL) around the entire pool
perimeter, photo 52.
b) Mark and cut off the protector surplus, photos 53 and 54. To prevent the pool wall from falling
inwards, place the upper plate (5) on the central columns (1), photo 55.
15. ASSEMBLY OF THE VERTICAL SECTIONS (VER)
Distribute the vertical sections around the pool and place plate T2 onto the upper part of the pool,
centre photo.
a. Align the lower part of one of the vertical sections (VER) with the two small tabs on the base
plates (T1). The tabs must be on the inside of the vertical section.
b. Align the openings for positioning screws TO2, on either side of
the vertical section, making sure that they attach to the holes in
the T1 plate tabs, photos 56 and 57.
c. Place an upper section (T2) onto the top edge of the pool
and on a vertical column (VER), with the tabs on the inside of the
section, photo 58.
d. Align the openings for positioning screws TO2 in the three
holes in the vertical section, making sure they fit into the T2 tab
holes, photo 59.
e. Repeat steps a, b, c, d in the other sections around the pool.
photo 52 photo 53 photo 54 photo 55
photo 48 photo 49 photo 50 photo 51

15
16. ASSEMBLY OF THE HORIZONTAL PROFILES (HOR)
a. Install the upper sections HOR1, (straight cut) above columns 1, placing their ends on the
upper plate (5) and using hole A (photo 64), photos 60, 61. Insert and tighten, but not much, screws
13. Pool models 550x366 do not have this upper section, so in this case you start with section
HOR2, (with a point) section b.
b. Position all the upper sections HOR2, (with a point) above columns 1 and the other end on
plate T2, photos 62, 63. Align the holes, insert and tighten, but not too much, screws TO2.
c. Place all the upper sections HOR3 onto T2 plates, photo 65. Align the holes, insert and
tighten, but not too much, screws TO2.
d. Adjust the upper sections until they are together but not on top of each other. Tighten the
screws, photo 66.
Important: If any of the vertical columns (VER) is not straight, adjust by gently tapping the base
plate using a hammer on a piece of wood.
photo 60
photo 61
photo 62
photo 63
photo 64
photo 65
photo 66
photo 56 photo 57 photo 58 photo 59

16
17. ASSEMBLY OF THE TOP HUB CAPS (EMB / EMR)
Align a top connectos with the ends of the upper sections. Hook the trim underneath the
internal edges of the upper sections (photo 67) and pull towards you (photo 68), hooking the trim
onto the external part, photo 69.
18. INSTALLING THE RETURN VALVE
1) Mark the holes on the liner (L) with a felt pen. By using a sharp blade, cut an “X” on the
liner covering the holes, while holding the liner against the wall. The “X” should not
exceed the size of the holes.
2) Cover the connection threading with teflon.
3) Place the rubber washer (B) on the steerable grid (A) and place it into the hole on the
inside of the pool. From the inside to the outside, cut the piece of liner that exceeds on
the outside.
4) Place the carton washer © on the outside of the pool and while holding the connection
from the inside, tighten the threading (D) of the large nut. Introduce the filter hose (E)
and fix it with a clamp (H). Repeat this operation for the second connection. Make sure
that the liner is free of wrinkles.
For a more efficient filtration, we advise to direct the water jet. For this purpose, loosen the clamp.
Move the directionable ball towards one of the sides of the swimming pool and slightly to the top
and tighten the clamp again. In this way, the impurities will be directed towards the skimmer.
IMPORTANT: To avoid leaks, re-tighten the nuts after 48 hours.
STEERABLE
GRID (A)
LINER (L)
RUBBER
WASHER (B)
FILTER
HOSE (E)
THREADING (D)
CLAMP (H)
OUTSIDE OF
THE POOL
INSIDE OF
THE POOL
CARTON
WASHER ©
WALL (CH)
photo 67 photo 68 photo 69

17
19. INSTALLING THE SKIMMER
Keep on filling the swimming pool with water
until 5 cm below the cutted skimmer hole
die. With a felt pen mark on the liner the
square hole for the installation of the
skimmer and cut with a sharp blade the
piece of liner marked. Place the double
rubber washer (Z) on the steel wall. The
steel wall and liner must go inside the
grooves (K) of the washer. Consecutively,
install the skimmer frame with the screws.
Make sure that all the holes are lined up
(washer, die and skimmer). Fix the holes
with the screws one after the other, but do
not screw them up too much until a perfect
matching is assured. Start screwing and
finally tighten the screws firmly following the
same order.
Cover the coupling (M) threading with teflon
and screw up firmly into the skimmer. Fix
one hose end on the coupling (M) with a
clamp (H). Connect the other hose end to
the filter water inlet and tighten with a clamp.
It is important to use teflon for all threadings
so as to assure total waterproofness. Install
the floodgate (P) with a screwdriver.
Finally, place the basket (S) inside the
skimmer and the lid (V) on it.
CONNECTING A VACUUM CLEANER TO YOUR SKIMMER
For filters with a capacity of 6m3/h minimum. Install the vac plate (XM) on the basket (S) inside the
skimmer (Q). Connect one hose end to this adapter and the other end to the vacuum cleaner (or
robot, if you filter capacity allows this). Connect the vacuum cleaner to a stick or a pole.
Fill the swimming pool until half the floodgate of the skimmer. So, the water will go inside the
skimmer and fill the filtering system.
COVER (V)
VAC PLATE (XM)
BASKET (S)
HOSE ADAPTOR (M)
FLOODGATE (P)
DOUBLE
RUBBER
WASHER (Z)

18
20. LAST DETAILS
- You must place the Warning Sticker in a visible place (i.e. near the ladder).
- Put the protective taps (BU) on the end of the screws.
Assembly the ladder following the instructions and place it in a visible place, in the entry/exit way of
the pool. Remove it after using it.
Assembly the filter equipment following the instructions of its manual. It must be placed (as min.)
3,5 meters far from the pool, once plugged and connected to it by the hoses.
21. SWIMMING POOL MAINTENANCE
Water maintenance
All swimming pools need chemical treatment to maintain the water disinfected and crystal clear.
Consult your chemical products supplier to determine those that are best for your needs. Water
treatment procedure is not the same in all regions, because it depends on the water quality in each
region.
The best water quality is obtained by using the right preventive treatment. To prevent the growth of
algae and bacteria, use bactericide, algaecide,water pH correctors and flocculants (except for
cartridge filters). Apply the first chlorine treatment within 24 hours of filling the pool.
Never add chemical products directly to the water. Chemicals must be diluted before being
introduced into the water. Otherwise, the liner could be damaged.
However, it is easier to keep the water clean than to clean contaminated water. Use your filter
frequently.
Water maintenance is the most important factor in making your pool liner look excellent and last for
a long time. Therefore, follow the instructions in the filter manual. The filter capacity must be high
enough to filter the water of the pool 3 times in every 24 hours. The filter must be connected when
there is nobody in the pool.
Make sure to check the water at least once a week, to keep the pool in optimum conditions.

19
Make sure that you do the following on frequent basis:
a) Analyze the water pH and make sure it is between 7.2 and 7.6.
b) Analyze the chlorine level and make sure it is between 0.5 and 2 grams per cubic meter.
c) Remove any leaves and insects from the water.
Make sure that you do the following on weekly basis:
a) Add the correct ‘maintenance quantity’ of algaecide.
b) Add anticalcareous if lime is formed or the water is hard.
c) Use flocculants to improve filtering (except when using a cartridge filter).
Handling chemical products and safety measures.
The following precautions must be taken when handling chemical products:
1) Use gloves to protect your hands and masks or goggles for eye protection.
2) No smoking where the products are stored or used. Many products are
flammable.
3) Wash your hands and face after using the products.
4) Store the products in a dark and dry place. Do not leave the products in the
sun.
5) Make sure that the containers are closed. Tighten their caps or lids.
6) Do not leave the products within the reach of children. Make sure that the
products are stored in a high and safe place.
7) Do not reuse the empty containers.
8) Keep the products in their original containers.
9) Do not remove the labels from the containers.
10) Make sure that the storage area for chemical products has proper ventilation.
11) When raining, increase the level of chlor and antialgae-bactericide
12) When adding water in the pool, check again the chlor and antialgae-bactericide
level.
13) Well ventilate the place where the chemical products are stored.
Pool maintenance
After your pool has been completely installed, follow these instructions to keep it clean and in good
condition.
1. Liner a. Regularly check for leaks in the liner.
b. Use the repair kit for small repairs on the liner.
2. Pool wall a. Keep the pool wall clean. Clean the wall with a neutral soap. Do not use abrasives,
chemicals or cleaning solutions.
b. Clean up spilt chemical product, used for water treatment, right away.
c. Coat all showing screw heads with clear outdoor varnish.
d. Check the metal parts for rust, at least once a year.
e. Coat all scratches and rusted areas with an anti-rust paint. Follow the instructions
for paint application.
f. At the end of the season, drain the water until the water level is 30 cm. Remove the
upper part of the liner and check for possible rust on the inner side of the pool wall.
g. Pay special attention to leaks in the filter and outlet holes. Leaks must be repaired
right away.

20
22. CARE DURING WINTER MONTHS
If the pool is not disassembled during the winter, compliment following instructions at the end of
the season to prepare your swimming pool for the winter. During wintering, do not drain all the
water. Never leave a swimming pool dry outside. Decrease the water level just below the skimmer
opening. Cover the pool with a cover. To keep the cover flat, place an inflatable object or floater
between the water and the cover. This way, the liner is not damaged by rain and / or freezing. You
can also add a chemical product to the water in order to protect the liner against freezing. This
product also facilitates the cleaning of the liner after the winter time.
To avoid that the water starts freezing, let several empty plastic bottles (or balls made of Porespan)
float on the water. In case of snow, remove the snow of the cover regularly so as to avoid extra
weight on the cover.
1. Check all joints and screws.
a. Check that all joints are correctly adjusted. Check that the pool wall has not come
out of the lower profiles.
b. Check that the screws are tight.
2. Check rusted areas
a. Paint all scratches or rusted areas using anti-rust paint.
3. Check liner
a. Check that the upper part of the liner is still joined to the pool wall with plastic
copings. DO NOT remove the pool liner. Removal of the liner shall void the product
warrantee and/or guaranty.
4. Find any leaks
a. Check that there are no leaks in the liner. Leaks can cause great damage to your
pool during the winter.
5. Pool accessories
a. Remove all accessories, including the ladder, from the pool.
b. Wash the ladder with water and neutral soap.
c. Wash the rest of the accessories with water and neutral soap.
6. Filter
a. Remove the filter from the pool.
b. Wash the whole filter with water and neutral soap.
d. Read the filter installation and maintenance manual.
23. TO EMPTY, DISASSEMBLE AND STORE YOUR POOL
First check the filter instructions to make sure that your filter has the ‘option for emptying’.
Use ‘the communicating vessels principle’: first, completely submerge a hose in the pool until it is
full of water, then, cover one end with your finger and take it out of the pool. Water will start to come
out. Make sure to keep the other end of the hose submerged to empty the pool.
drain
water
Inflatable
This manual suits for next models
1
Table of contents
Other TOI Swimming Pool manuals
Popular Swimming Pool manuals by other brands

Bestway
Bestway 56248 owner's manual

Banzai
Banzai Aqua Sports Water Park manual

UWE
UWE JetStream VIVA TRANSLATION OF INSTALLATION AND OPERATING INSTRUCTIONS

Intex
Intex CLEARVIEW PRISM FRAME 126730GN owner's manual

C.P.A.
C.P.A. DIAMANTE 814 Assembly instructions

Bestway
Bestway Power Steel Swim Vista Series Ogrodosfera.pl quick start guide