Tomahawk eTMD14 User manual

FIND THE HOW TO GUIDE HERE
eTMD14
BATTERY POWERED FOGGER Operation Manual

TABLE OF CONTENTS
2
1. SAFETY INFORMATION
2. OPERATING SAFETY
2.1 General Notes
2.2 Usage Safety
2.3 Chemical Handling
2.4 Battery Safety
2.5 Service Safety
3. EQUIPMENT PERFORMANCE
3.1 Backpack Fogger Design
3.2 TOMAHAWK® Battery
3.3 Specifications
3.4 Battery Fogger Parts
3.5 Unpacking the Unit
3.6 Spraying Accessories
4. EQUIPMENT ASSEMBLY
4.1 Warnings
4.2 Assembly Guide
5. CHARGING THE BATTERY
5.1 Warnings
5.2 How to Charge
5.3 While Charging
5.4 Installing the Battery
6. BACKPACK STRAPS ADJUSTMENT
7. OPERATION
7.1 Holding the Tool
7.2 Starting and Stopping the Machine
7.3 Cruise Control Setting
7.4 Filling the Tank
7.5 Mist Blowing Tips
7.6 Adjusting the Discharge Rate
7.7 When Spraying is Complete
7.8 Leaf Blowing Tips
8. STORAGE
9. REPLACEMENT PARTS
10. TROUBLESHOOTING
11. EQUIPMENT WARRANTY
12. PARTS MANUAL
13. TOMAHAWK CATALOG & COUPON
4
5
5
5
6
6
6
7
7
7
7
8
8
8
9
9
9
12
12
12
12
12
13
14
14
14
15
15
16
16
16
17
17
18
18
19
20
22

Equipment Resources
TOMAHAWK® Customer Service doesn’t stop at checkout. We understand to keep a job-site
running smoothly - the proper equipment, spare parts, instruction manuals, and more are
needed at the drop of a hat. Visit www.tomahawk-power.com to gain access to the incredible
resources below.
How To Video Library
More of a visual person? Visit our Video Library for equipment
assembly instructions, troubleshooting tips, and more!
Found on each product listing or the Service Videos Page
Manual and Assembly Guide Library
Visit our Manual Library if you are looking for a lost
operations manual or a particular spare part?
Found on each product listing or the Tomahawk Manuals Page
Service Requests
In need of a quick fix or a service center referral? Submit a
Service Request and a Tomahawk Technician will respond
shortly to get you the help you need.
Choose “Service Request” at the bottom of www.tomahawk-power.com
3
Register Your Equipment
Thank you for purchasing TOMAHAWK® equipment! Your product is covered by the
TOMAHAWK® Warranty Policy, but in order to activate your warranty, we need you to register
your product. In addition to activating your equipment warranty, product registration will
grant you access to important product updates, streamlined customer service, and more.
INCLUDED WITH YOUR REGISTRATION
ە,0$+( )/--)/4/$1/$*)
ە-*0/+/ .
ە/- ('$) 0./*( - -1$
ە30.$1 $.*0)/.)' .
STEPS TO REGISTER YOUR EQUIPMENT
1. Visit www.tomahawk-power.com
2. Choose “Product Registration” at the bottom of the page
3. )/ -4*0- ,0$+( )/њ.. -$')0( -/*" /./-/
4. Provide all required information
5. Submit Registration

4
This manual provides information and procedures to safely operate and maintain this
equipment. For your own safety and protection from injury, carefully read, understand, and
observe the safety instructions described in this manual.
Keep this manual or a copy of it with the equipment. If you lose this manual or need an
additional copy, please contact Tomahawk Power, LLC or visit www.tomahawk-power.com
This equipment is built with user safety in mind; however, it can present hazards if
improperly operated or serviced. Follow operating instructions carefully. If you have
questions about operating or servicing this equipment, contact TOMAHAWK® .
The information contained in this manual is based on equipment’s production at the time of
publication. TOMAHAWK® reserves the right to change any portion of this information
without notice.
No part of this publication may be reproduced in any form or by any means, electronic or
mechanical, including photocopying, without express written permission from
TOMAHAWK® .
Any type of reproduction or distribution not authorized by TOMAHAWK® represents an
infringement of valid copyrights and will be prosecuted. We expressly reserve the right to
make technical modifications, even without due notice, which aim at improving our
machines or their safety standards.
1. SAFETY INFORMATION
#$. ()0' *)/$). я я я ) ''*0/. 2#$# (0./
followed to reduce the possibility of personal injury, damage to the equipment, or improper
service.
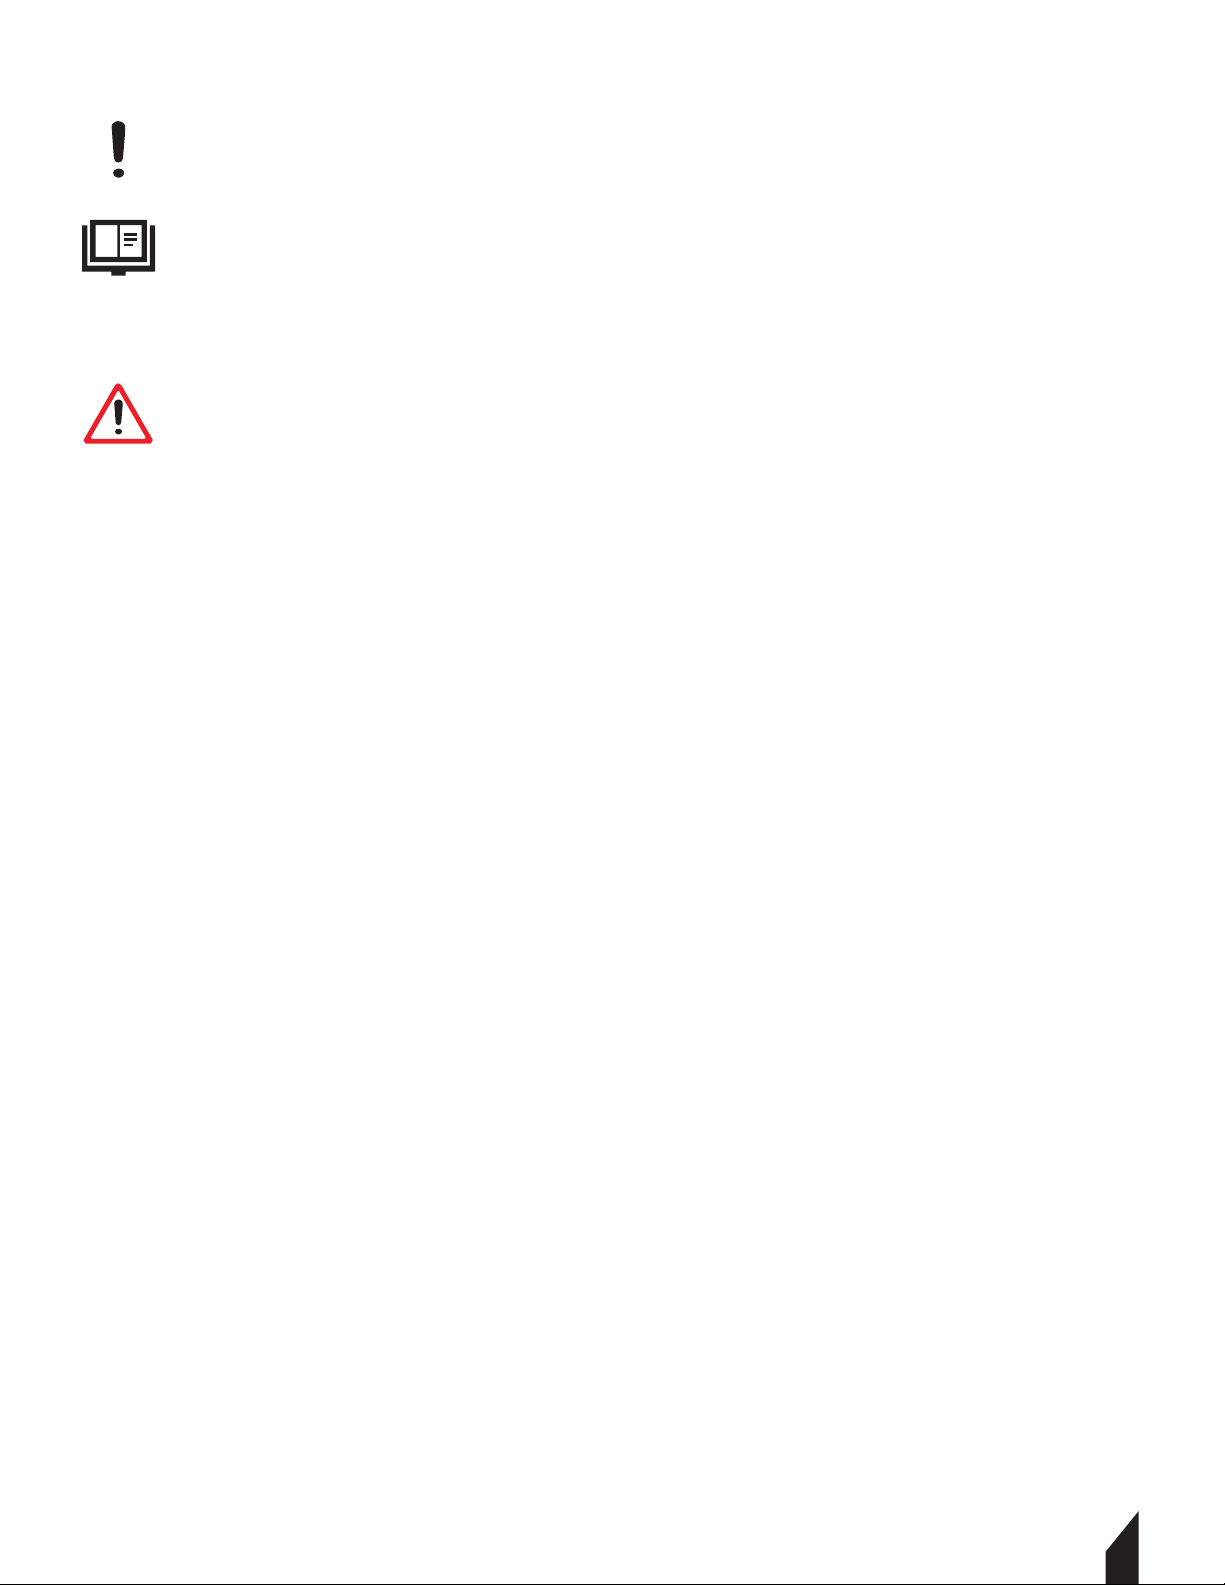
This is the safety alert symbol. It is used to alert you to potential personal injury
hazards. Obey all safety messages that follow this symbol to avoid possible injury
or death.
DANGER indicates an imminently hazardous situation which, if not avoided, will
result in death or serious injury.
WARNING indicates a potentially hazardous situation which, if not avoided, could
result in death or serious injury.
CAUTION indicates a potentially hazardous situation which, if not avoided, may
result in minor or moderate injury.
DANGER
WARNING
CAUTION

5
2. OPERATING SAFETY
Familiarity and proper training are required for the safe operation of equipment!
,0$+( )/*+ -/ $(+-*+ -'4*-40)/-$) + -.*)) ') )" -*0.ѓ
the operating instructions contained in both this manual and the engine manual and
familiarize yourself with the location and proper use of all controls. Inexperienced operators
should receive instruction from someone familiar with the equipment before being allowed
to operate the machine.
2.1 General Notes
2.1.1 Individuals who operate this machine must be informed about the dangers related to
use of the machine.
2.1.2 Keep bystanders, especially children and animals, away from the work area.
2.1.3 The user is responsible for avoiding injury to third parties or damage to their
property.
2.1.4 If you have any condition that might be aggravated by strenuous work, check with
your doctor before operating this power tool.
2.1.5 Minors should never be allowed to use this product.
2.2 Usage Safety
2.2.1 NEVER lend or rent your power tool without the instruction manual. Be sure that
anyone using it understands the information contained in this manual.
2.2.2 NEVER operate the machine if you are under the influence of any substance (drugs,
alcohol) which might impair vision, dexterity, or judgment.
2.2.3 NEVER operate the machine near open flame or explosive areas.
2.2.4 NEVER expose machine to wet conditions.
2.2.5 NEVER handle machine with wet hands.
2.2.6 ALWAYS wear ear protection.
2.2.7 OBSERVE all applicable local safety regulations, standards, and ordinances.
WARNING
Indicates a possibly dangerous situation. Where there is a risk of damaging the
machine or its individual components.
Indicates to read the Operation Manual. It is important that you read the operation
manual before first use and keep it in a safe place for future reference.

2.3 Chemical Handling
2.3.1 ALWAYS wear eye protection when handling chemicals.
2.3.2 ALWAYS wear the proper protective equipment/clothing when handling chemicals.
Proper protective equipment includes safety goggles or glasses, mask/respirator, and a
long-sleeved shirt and long pants.
2.3.3 ALWAYS use mask to protect mouth and face from dust and/or pesticide when
handling chemicals.
2.3.4 ALWAYS ȅ -.+-4$)"я2.##).)'*/#$)"$(( $/ '4ю
2.4 Battery Safety
2.4.1 NEVER store or charge battery in wet conditions.
2.4.2 NEVER make any adjustments to the tool if battery is connected.
2.4.3 NEVER interfere with the batteries integrity as this can cause injury and void warranty.
2.4.4 NEVER use or dispose battery in fire as this can cause it to explode. Check local codes
for more information on proper battery disposal.
2.4.5 NEVER use equipment if it has been damaged or modified as this can cause injury.
2.4.6 When not in use, ensure battery is stored in a dry place away from any flammable objects.
2.4.7 ''*2// -4/***'*2)ȅ - #0. /*1*$0-)$)%0-$ .ю
2.4.8 Only use the manufacturer’s designated battery with this machine. Use of any other
battery can damage unit and will void warranty.
2.4.9 Battery leakage may occur when operated in extreme temperature conditions. If
battery liquid contacts skin, wash immediately with water and soap, following with white
distilled vinegar or lemon juice to neutralize. If the liquid comes in contact with eyes, flush
out eyes with water for 10 minutes and seek medical attention immediately.
2.4.10 Have all servicing done by an approved TOMAHAWK® Technician or Service Center
with original replacement parts.
2.5 Service Safety
Poorly maintained equipment can become a safety hazard! In order for the
equipment to operate safely and properly over a long period of time, periodic
maintenance and occasional repairs are necessary.
WARNING
6
WARNING Always follow the chemical manufacturer’s instructions, safety guidelines, and
recommendations when using any chemicals/solutions with this machine.
WARNING

3. EQUIPMENT PERFORMANCE
3.1 Backpack Fogger Design
TOMAHAWK® Battery Powered Mosquito Foggers are your best solution for fighting annoying
mosquitoes. Powered by a 36V/9Ah Lithium-Ion battery, spray 1 acre of land in less than 30
minutes to stop pests fast! Great for year-round use, this machine is perfect for applying
pesticides up to 25ȅin the Spring and Summer, and an excellent leaf blowing solution at
310CFM/150MPH in the Autumn and Winter.
3.2 TOMAHAWK® Battery
TOMAHAWK® 36V Lithium-Ion 9Ah batteries charge faster and work longer than standard
batteries, giving you superior performance. With a fast - charge time, spend ' .. /$(
2$/$)" ) more time working on the things that matterю
3.3 Specifications
7
Tank Size 4 Gallon
Power 0.7 kW, 9 Ah
Voltage 36V
Spray Reach 25 - 30ft
Flow .25 - .50 GPM
Air Speed 150 MPH
Air Volume 310 CFM
Droplet Size 100-300 Microns
Fan Speed 6500 RPM
Sound @ 5 Yards 76.9 db
Sprayer Weight 18 lbs
Dimensions 15” x 13” x 22”
eTMD14 BATTERY POWERED FOGGER

3.4 Backpack Fogger Parts
3.5 Unpacking the Unit
& .0- /*- !0''4- (*1 ''+-/.) ..*-$ .!-*(/# *3ю).0- ''+-/.'$./
in the manual are in the box. Do not throw away the packaging or packing material until
you have inspected all parts and successfully operated the machine. Do not discard this
operations manual.
If any parts are missing or damaged, please contact TOMAHAWK® customer support by
email at support@tomahawk-power.com or call (866) 577-4476.
3.6 Spraying Accessories
Visit www.tomahawk-power.com for a wide assortment of accessories, attachments, and
spraying nozzles.
1. 36V Lithium-Ion Battery
2. Battery Charger
3. Chemical Tank
4. Backpack Straps
5. Throttle Control
6. Feeder Tube
7. Accordion Pipe
8. Water Valve
9. Connecting Pipe
10. Blower Pipe
11. Fan Nozzle
12. Discharge Knob
13. Protective Frame
8

4. EQUIPMENT ASSEMBLY
4.1 Warnings
4.2 Assembly Guide
4.2.1 Connect the accordion tube to
the fogger’s blower elbow. Fasten in
place using a phillips head
screwdriver with the hose clamp.
FIGURE 1.
NOTE: If the elbow is detached,
connect the blower elbow to the unit
first.
4.2.2 Attach the connecting tube to
the other end of the accordion tube.
Fasten in place using a phillips head
screwdriver and the hose clamp.
FIGURE 2.
WARNING To avoid injury or damage to this machine, the blower tube must be
used when operating this backpack fogger. NOTE: The blower tube is not assembled
on this unit.
WARNING
WARNING If any parts are missing or damaged, do not operate this backpack
fogger. Failure to do so may result in personal injury or damage to this machine.
WARNING
WARNING Never make modifications or fabricate accessories to be used with this
machine. Modifications or alterations may result in personal injury or damage to this
machine.
WARNING
WARNING Do not connect the battery before the machine is fully assembled. Failure
to comply may cause accidental starting and may result in personal injury or damage
to this machine.
WARNING
WARNING To prevent personal injury or damage to this machine, ensure the machine is
OFF, the battery is removed, and the impellers have stopped before removing any parts.
WARNING
FIGURE 2
FIGURE 1
9

4.2.3 Slide the throttle control handle over
the connecting pipe and secure in place
with the screw and a phillips head
screwdriver. FIGURE 3.
4.2.4 Connect the blower pipe to the other
end of the connecting pipe. Twist to lock in
place. FIGURE 4.
4.2.4 Attach the fan nozzle to the other end
of the blower pipe. FIGURE 4.
4.2.5 Attach a clear feeder tube to the base
of the chemical tank. FIGURE 5.
NOTE: To secure in place, use a hose clamp.
10
FIGURE 3
FIGURE 4
FIGURE 5

FIGURE 6
FIGURE 7
FIGURE 8
FIGURE 9
11
4.2.6 Slide the metal base of the water valve
underneath the hose clamp of the accordion tube.
Loosen and tighten the clamp if necessary. FIGURE 6.
4.2.7 Attach the other end of the clear feeder tube to
the back of the water valve. Add the second clear
feeder tube to the other side of the water valve.
FIGURE 6.
NOTE: To secure in place, use hose clamps at the
ends of the clear tubes.
4.2.8 Attach the other end of the clear feeder tube to
the back of the fan nozzle. FIGURE 7.
NOTE: Wrap the second clear feeder tube around the
blower pipe to keep it tight and ensure it does not
catch on anything when working outside. FIGURE 8.
NOTE: To secure in place, use a hose clamps at the
ends of the clear tube. FIGURE 7.
4.2.9 The eTMD14 Backpack Mosquito Fogger is fully
assembled. FIGURE 9.

5. CHARGING THE BATTERY
5.1 Warnings
5.2 How to Charge
5.2.1 Remove the battery from the machine.
5.2.2 Plug the charger into a power outlet in
a dry location. FIGURE 10A.
5.2.3 Align the tongue of the battery (A) with
the guides in the charging dock (B).
5.2.4 Slide the battery into the charger
docking station using the guides on the
battery and charger docking station.
FIGURE 10A.
5.3 While Charging
5.3.1 # $)$/*-*)/# #-" -'$"#/.
0+0-$)"#-"$)"ю
5.3.2 The charging of the battery takes
approximately 2 hours.
5.3.3 # $)$/*-*)/# #-" -'$"#/.
up green when finished charging.
5.4 Installing the Battery
5.4.1 Open the door of the machine’s battery
compartment. FIGURE 10B.
5.4.2 Align the tongue of the battery with the guides in the battery compartment.
5.4.3 Grasp the machine firmly and slide the battery into the compartment until the battery
release button locks into place. Close the compartment door.
NOTE: Never force the battery pack. It should slide and click into place.
12
WARNING Do not insert any electrically conductive objects in the charging socket
or the battery may be damaged by a short circuit.
WARNING
WARNING - DANGER OF FIRE - A short circuit in the charging socket can lead to a
cable fire in the battery.
WARNING
The charger has a fully electronic voltage and current limitation function. This ensures
that a connected battery is always kept at the optimum state of charge. This prevents
overcharging of the battery. The battery is not fully charged on delivery. It is
recommended to fully charge the battery before operating the machine for the first time.
FIGURE 10
FIGURE 10B
FIGURE 10A

6. BACKPACK STRAPS ADJUSTMENT
Make sure your backpack straps and harness are well adjusted for
proper operation. Adjust the straps for comfortable machine
placement. Adjust the cross-body harness so the machine weight
is equally distributed across the operator’s shoulders.
6.1 Once the machine is comfortable on your back, connect the
top horizontal chest buckle FIGURE 11 and then tighten by pulling
on the end of the strap. FIGURE 12.
6.2 Pull the ends of the backpack straps downward to tighten. FIGURE 13.
6.3 $ȅ/# &/.*!/# 0&' ./*'**. )/# &+&./-+.юFIGURE 14. FIGURE 15.
FIGURE 11 FIGURE 13
13
FIGURE 12
FIGURE 14 FIGURE 15
WARNING In the event of imminent danger, the machine must be removed quickly. The
horizontal chest strap must be released first before setting the machine on the ground.
WARNING

14
7. OPERATION
7.1 Holding the Tool
7.1.1 # *+ -/*-.#*0''24.2 -/# + -.*)'+-*/ /$1 ,0$+( )/Ѷ'*/#$)"Ѱѱ
2# )#)'$)"/#$./**'ю$)'0 .(.&Ѷ- .+$-/*-я.! /4"*""' .я -+-*/ /$*)я**/.я
gloves, and a long-sleeved shirt and long pants to cover as much exposed skin as possible.
7.1.2 $ȅ$)"/# 0)$/2$/#!0''/)&(4 $Ȃ$0'/ю'24.+0/*)/# 0)$/4+'$)"$/*)
a level wall or the back of a truck and then putting on the straps.
7.1.3 This tool is design to be operated with one hand.
7.1.4 This tool operates with a gravity fed tank. The nozzle should always be angled
downward or parallel with the ground. FIGURE 16.
NOTE: Pointing the nozzle up will disrupt the gravity feed, causing issues with the droplet
spray pattern and proper machine operation.
7.2 Starting and Stopping the Machine
7.2.1 Before starting the machine, ensure that the machine is in
perfect condition to ensure safe operation.
7.2.2 Install the battery into the machine’s battery compartment.
7.2.3 To start, squeeze the red trigger on the throttle control lever.
7.2.4 Squeeze the trigger more or less to change the blowing speed.
7.2.5 Release the trigger to stop the machine.
FIGURE 16
FIGURE 17

15
7.3 Cruise Control Setting
This tool’s throttle control handle includes a cruise
control function to set and lock your ideal blowing speed.
7.3.1 Start the machine’s blowing by squeezing the red
trigger (A) on the throttle control handle.
7.3.2 Once you have found your ideal blowing speed, pull
the red lever (B) back clockwise to lock the speed at the
desired setting.
7.3.2 To increase or decrease the blowing speed, push
the red lever (B) counter-clockwise to disengage the
Cruise Control Setting, then squeeze the red trigger (A) to
find your new desired blow setting. Pull the red lever (B)
back clockwise again to lock in place.
NOTE: Always disengage the Cruise Control Setting before removing the battery from your
machine. Failure to comply will cause the machine to start immediately when reinstalling
the battery, which may result in personal injury or damage to this machine.
7.4 Filling the Tank
7.4.1 Make sure the rubber gasket within the lid is clean and in good condition.
7.4.2 Place the machine on an even, level surface.
7.4.3 Close the water valve at the base of the throttle control.
7.4.4 Remove the lid and pour evenly mixed chemical solutions in the tank through the
strainer. DO NOT exceed the maximum fluid level of 14 liters (3.7 gallons).
7.4.5 Replace the lid and tighten it firmly.
FIGURE 18
WARNING Always follow the chemical manufacturer’s instructions, safety guidelines,
and recommendations when using any chemicals/solutions with this machine.
WARNING

16
7.5 Mist Blowing Tips
7.5.1 During your first use of this machine, before using any chemicals, perform a trial run
with the tank filled with clean water only. During the trial run, understand the machine’s
fluid flow rate and working width. The recommended working width for low-growing foliage
$. /2 )УТѣУЧȅю
7.5.2 Make sure that the nozzle is not directed at anybody or any loose debris before starting
the machine.
7.5.3 Hold the throttle control handle firmly. Sweep the nozzle from side to side, while
keeping the nozzle several inches above/around the ground or any foliage.
7.5.4 ).0- /#//# (#$) $.$)+ -! /*)$/$*)/* ).0- .! *+ -/$*)ю& .0- ''
pipes, tubes, and other parts are in place and secure.
7.5.5 Keep clear of open windows, children, pets, and blow leaves and debris safely away.
7.5.6 '*. /# 2/ -1'1 ȅ - 1 -40. *!/# (#$) /*+- 1 )/' &" ю
7.6 Adjusting the Discharge Rate
7.6.1 Rotate the discharge knob on top of the fan nozzle to adjust the fluid disharge rate.
7.6.2 The numbers on the discharge knob must be aligned with the marker pointing toward
the clear feeder tube attached to the fan nozzle.
Position 1 = Minimum Flow Rate
Position 4 = Maximum Flow Rate
7.7.1 Close the water valve completely to prevent leakage.
7.7.2 #0/*Ȃ/# (#$) ю “Starting and Stopping the Machine”
7.7.3 Turn the fan nozzle’s discharge rate to Position 1 and collect any remaining
chemical/solution in a proper container.
7.7.3 Drain the tank in a well ventilated area. Clean and rinse the tank, tubes, and pipes with
clean water.
7.7.3 Safely dispose of any remaining chemical/spray solution by
following the the chemical
manufacturer’s instructions, safety guidelines, recommendations, and local environmental
requirements.
FIGURE 19
WARNING Always spray solutions downwind and be mindful or your surroundings.
Failure to do so may result in death or serious injury to yourself or others.
WARNING

17
7.7 When Spraying is Complete Continued
7.7.3 With the lid removed, allow the machine to dry completely.
7.7.3 If the strainer is dirty, pull it upward and out of the tank and clean completely.
7.7.3 Place the machine in a dry area - out of reach of children, pets, and unauthorized persons.
7.7 Leaf Blowing Tips
7.7.1 Use brooms and/or rakes to loosen leaves and debris before blowing.
7.7.2 Hold the throttle control handle firmly. Sweep the blower nozzle from side to side,
while keeping the nozzle several inches above/around the ground or any foliage.
7.7.3 Walk slowing, while keeping the collected pile of leaves and debris in front of you.
7.7.4 Low speeds are recommended for blowing dry leaves and debris.
7.7.5 Operate a high speed for moving large debris or gravel.
7.7.6 Make sure that the nozzle is not directed at anybody or any loose debris before starting
the machine.
7.7.7 ).0- /#//# (#$) $.$)+ -! /*)$/$*)/* ).0- .! *+ -/$*)ю& .0- ''
pipes, tubes, and other parts are in place and secure.
7.7.8 Keep clear of open windows, children, pets, and blow leaves and debris safely away.
8. STORAGE
8.1 For periods of non-use longer than 2 months this machine must be prepared for proper storage.
8.2 -$) ) ' ) /# /)& $) 2 ''1 )/$'/ - ю).0- /# /)&я /0 .я +$+ . -
empty and flushed out with clean water to prevent chemical corrosion.
8.3 Wipe down the machine and make sure all parts including the strainer are clean.
8.4 Remove the battery pack and store it in a safe dry place, out of reach of children, pets,
unauthorized persons, and away from any sunlight. If you do not plan to use the charger for
any other TOMAHAWK® equipment, place it with the battery pack as well.
8.5 Place the machine in a dry area on an even, level surface - away from any sunlight. Secure
the machine to prevent it from tipping over or being damaged.

9. REPLACEMENT PARTS
9.1 For replacement parts and technical questions visit www.tomahawk-power.com or scan
the QR code on the front of this manual.
9.2 Not all equipment components are available for replacement. The illustrations within
this manual are a convenient reference to the location and position of parts in the assembly
sequence.
9.3 When ordering parts, the following may be required: equipment model number, serial
number/lot, date code, and description. The macufacturuer reserves the right to make
design changes and/or improvements to equipment, parts, accessories, and manuals
without notice.
10. TROUBLESHOOTING
18
PROBLEM POSSIBLE CAUSES SOLUTION
Battery is not charged Charge battery
Battery is not securely attached Install battery correctly
Issue with power switch Ensure power switch is positioned
correctly and not defective
Clogged nozzle Remove nozzle and clean
Battery is low on charge Charge battery
Trapped air in water valve Open escape valve and release
liquids
Battery is low on charge Charge battery
Tubing is blocked Clean tubing
Charger is not functioning
Ensure wires are connected
properly. Check that LED is
displaying green light
Battery is damaged Replace battery
Tank is leaking Replace tank
Leak between tank and lid Secure lid. If issue persists, replace
lid/tank
Tubes are leaking Secure tubes. If issue persists,
replace tubing
Unit will not start
Unit will not spray or
pressure is low
Unit is not charging
Battery is not charging
Unit is leaking

19
11. EQUIPMENT WARRANTY
Your new TOMAHAWK® equipment is warranted to the original purchaser for a period of
one-year (12 months) from the original date of purchase. The TOMAHAWK® warranty is
against defects in design, materials and workmanship.
The following are not covered under the warranty:
11.1 Damage caused by abuse, misuse, dropping or other similar damage caused by or as a
result of failure to follow assembly, operation or user maintenance instructions.
11.2 Alterations, additions or repairs carried out by persons other than TOMAHAWK® or their
recognised agents.
11.3 Transportation or shipment costs to and from TOMAHAWK® or their recognised agents,
for repair or assessment against a warranty claim, on any machine.
11.4 Materials and/or labor costs to renew, repair or replace components due to fair wear
and tear.
11.5 TOMAHAWK® and/or their recognised agents, directors, employees or insurers will not
be held liable for consequential or other damages, losses or expenses in connection with or
by reason of or the inability to use the machine for any purpose.
Warranty Claims
Before submitting any warranty claim, you will need to register
your new TOMAHAWK® equipment through
www.tomahawk-power.com.
Follow the steps on page 3 or scan this QR codes to complete the
,0$+( )/ - "$./-/$*)ю ȅ - - "$./-/$*) $. *(+' / я ''
warranty claims should firstly be directed to TOMAHAWK®
through the online Service Request form found at
www.tomahawk-power.com/pages/service-request.

20
Item #: eTPS18
4.75 GALLON BATTERY
BACKPACK SPRAYER
www.tomahawk-power.com
POWER YOUR WORLD
Powered by a superior 7Ah lithium battery with up to 11 hours of
lifeя .+-4 ШТТТ ȅ $) УТ ($)0/ . *- ' ..ѓ Ȃ -$)" adjustable
pressure from 20 to 70 PSI, Tomahawk Battery Sprayers are
perfect for spraying residential and commercial areas!
Table of contents
Popular Insect Control Equipment manuals by other brands

CATCHMASTER
CATCHMASTER GLOstik instruction manual

Isotronic
Isotronic ISOKAT Insect Pro Instructions for use

Kasanova
Kasanova TNJ000003NOC instruction manual

AFCO
AFCO AF 950001-B Installation & operation instructions

ThermaCell
ThermaCell MR450 Directions for use

Vortice
Vortice VORTGUARD GO Instruction booklet

Synergetic
Synergetic Exocutor EX30 instructions

Pestill
Pestill PSUBRMOSWTA user guide

Abus
Abus Junior Care Jan JC8320 manual

Bonide
Bonide Beetle Bagger Instructions for use

SkeeterVac
SkeeterVac SV3100C manual

The Fountainhead Group
The Fountainhead Group Burgess Portable Propane Insect Fogger use and care manual