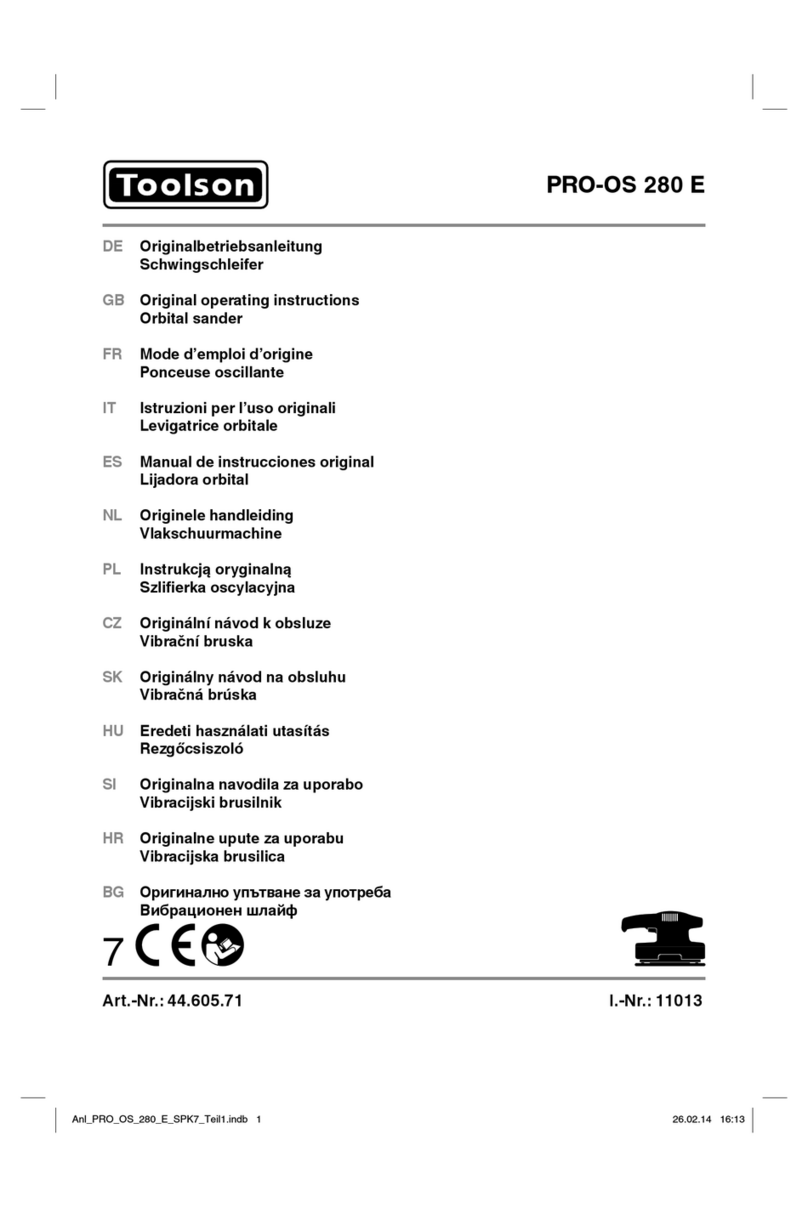
Toolson PRO-BS 850 E User manual

PRO-BS 850 E
Art.-Nr.: 44.662.50 I.-Nr.: 11027
7
DE Originalbetriebsanleitung
Bandschleifer
GB Original operating instructions
Belt Sander
FR Instructions d’origine
Ponceuse à ruban
IT Istruzioni per l’uso originali
Levigatrice a nastro
ES Manual de instrucciones original
Lijadora de banda
NL Originele handleiding
Bandschuurmachine
PL Instrukcjąoryginalną
Szlifierka taśmowa
CZ Originální návod k obsluze
Pásová bruska
SK Originálny návod na obsluhu
Pásová brúska
HU Eredeti használati utasítás
Szalagköszörűgép
SI Originalna navodila za uporabo
Tračni brusilnik
HR Originalne upute za uporabu
Tračna brusilica
BG Оригинално упътване за употреба
Лентов шлайф
BA Originalne upute za uporabu
Tračna brusilica
RS Originalna uputstva za upotrebu
Trakasta brusilica
TR Orijinal Kullanma Talimatı
Tank Zımpara
RU Оригинальное руководство по
эксплуатации
Ленточная шлифовальная
машина
DK Original betjeningsvejledning
Båndpudser
NO Original-driftsveiledning
Båndsliper
IS Upprunalegar
notandaleiðbeiningar
Bandslípivél
SE Original-bruksanvisning
Bandslip
FI Alkuperäiskäyttöohje
Nauhahiomakone
EE Originaalkasutusjuhend
Lintlihvija
LV Oriģinālālietošanas instrukcija
Lentes slīpmašīna
LT Originali naudojimo instrukcija
Juostinis šlifuoklis
Anl_PRO_BS_850_E_SPK7.indb 1Anl_PRO_BS_850_E_SPK7.indb 1 10.08.2017 15:21:3510.08.2017 15:21:35

- 2 -
1
2 3
2
9
3 4 56
7
10 13 11 10
15
2.
1
16
8
14
12
15 a6 1.
Anl_PRO_BS_850_E_SPK7.indb 2Anl_PRO_BS_850_E_SPK7.indb 2 10.08.2017 15:21:4010.08.2017 15:21:40

- 3 -
4 5
6 7
2
8
8
9
14
6
1
12 1010
13
13
9
7
Anl_PRO_BS_850_E_SPK7.indb 3Anl_PRO_BS_850_E_SPK7.indb 3 10.08.2017 15:21:4510.08.2017 15:21:45

- 4 -
10
12
11
9
4
5
3
-
+
Anl_PRO_BS_850_E_SPK7.indb 4Anl_PRO_BS_850_E_SPK7.indb 4 10.08.2017 15:22:0210.08.2017 15:22:02

DE
- 5 -
Gefahr! - Zur Verringerung des Verletzungsrisikos Bedienungsanleitung lesen
Vorsicht! Tragen Sie einen Gehörschutz. Die Einwirkung von Lärm kann Gehörverlust bewirken.
Vorsicht! Tragen Sie eine Schutzbrille. Während der Arbeit entstehende Funken oder aus dem Gerät
heraustretende Splitter, Späne und Stäube können Sichtverlust bewirken.
Vorsicht! Tragen Sie eine Staubschutzmaske. Beim Bearbeiten von Holz und anderer Materialien
kann gesundheitsschädlicher Staub entstehen. Asbesthaltiges Material darf nicht bearbeitet werden!
Anl_PRO_BS_850_E_SPK7.indb 5Anl_PRO_BS_850_E_SPK7.indb 5 10.08.2017 15:22:1110.08.2017 15:22:11

DE
- 6 -
Gefahr!
Beim Benutzen von Geräten müssen einige Si-
cherheitsvorkehrungen eingehalten werden, um
Verletzungen und Schäden zu verhindern. Lesen
Sie diese Bedienungsanleitung / Sicherheitshin-
weise deshalb sorgfältig durch. Bewahren Sie die-
se gut auf, damit Ihnen die Informationen jederzeit
zur Verfügung stehen. Falls Sie das Gerät an an-
dere Personen übergeben sollten, händigen Sie
diese Bedienungsanleitung / Sicherheitshinweise
bitte mit aus.Wir übernehmen keine Haftung für
Unfälle oder Schäden, die durch Nichtbeachten
dieser Anleitung und den Sicherheitshinweisen
entstehen.
1. Sicherheitshinweise
Die entsprechenden Sicherheitshinweise finden
Sie im beiliegenden Heftchen!
Gefahr!
Lesen Sie alle Sicherheitshinweise und An-
weisungen. Versäumnisse bei der Einhaltung der
Sicherheitshinweise und Anweisungen können
elektrischen Schlag, Brand und/oder schwere
Verletzungen verursachen. Bewahren Sie alle
Sicherheitshinweise und Anweisungen für
die Zukunft auf.
2. Gerätebeschreibung und
Lieferumfang
2.1 Gerätebeschreibung (Bild 1/2)
1. Schraube zum Einstellen des Zusatzhand-
griffes
2. Zusatzhandgriff
3. Einstellrad für Bandgeschwindigkeit
4. Feststellknopf
5. Ein-/Ausschalter
6. Anschluss für Staubfangsack
7. Druckknopf für bewegliche Schleifbandabde-
ckung
8. Einstellung für Schleifband-Justierung
9. Bewegliche Schleifbandabdeckung
10. Antriebsrollen
11. Schleifplatte
12. Spannhebel für Schleifband
13. Schleifband
14. Staubfangsack
15. Staubsaugeradapter
16. Handgriff
2.2 Lieferumfang
Bitte überprüfen Sie die Vollständigkeit des Arti-
kels anhand des beschriebenen Lieferumfangs.
Bei Fehlteilen wenden Sie sich bitte spätestens
innerhalb von 5 Arbeitstagen nach Kauf des Arti-
kels unter Vorlage eines gültigen Kaufbeleges an
unser Service Center oder an die Verkaufstelle,
bei der Sie das Gerät erworben haben. Bitte
beachten Sie hierzu die Gewährleistungstabelle
in den Service-Informationen am Ende der An-
leitung.
• Öffnen Sie die Verpackung und nehmen Sie
das Gerät vorsichtig aus der Verpackung.
• Entfernen Sie das Verpackungsmaterial so-
wie Verpackungs-/ und Transportsicherungen
(falls vorhanden).
• Überprüfen Sie, ob der Lieferumfang vollstän-
dig ist.
• Kontrollieren Sie das Gerät und die Zubehör-
teile auf Transportschäden.
• Bewahren Sie die Verpackung nach Möglich-
keit bis zum Ablauf der Garantiezeit auf.
Gefahr!
Gerät und Verpackungsmaterial sind kein
Kinderspielzeug! Kinder dürfen nicht mit
Kunststoffbeuteln, Folien und Kleinteilen
spielen! Es besteht Verschluckungs- und Er-
stickungsgefahr!
• Bandschleifer
• 1 x Schleifband
• 1 x Staubfangsack
• Originalbetriebsanleitung
• Sicherheitshinweise
3. Bestimmungsgemäße
Verwendung
Der Bandschleifer ist zum Schleifen von Holz, Ei-
sen, Kunststoffund ähnlichen Werkstoffen unter
Verwendung des entsprechenden Schleifbandes
geeignet.
Die Maschine darf nur nach ihrer Bestimmung
verwendet werden. Jede weitere darüber hinaus-
gehende Verwendung ist nicht bestimmungsge-
mäß. Für daraus hervorgerufene Schäden oder
Verletzungen aller Art haftet der Benutzer/Bedie-
ner und nicht der Hersteller.
Bitte beachten Sie, dass unsere Geräte bestim-
mungsgemäß nicht für den gewerblichen, hand-
werklichen oder industriellen Einsatz konstruiert
Anl_PRO_BS_850_E_SPK7.indb 6Anl_PRO_BS_850_E_SPK7.indb 6 10.08.2017 15:22:1210.08.2017 15:22:12

DE
- 7 -
wurden.Wir übernehmen keine Gewährleistung,
wenn das Gerät in Gewerbe-, Handwerks- oder
Industriebetrieben sowie bei gleichzusetzenden
Tätigkeiten eingesetzt wird.
4. Technische Daten
Netzspannung:................................230 V~ 50 Hz
Leistungsaufnahme:................................... 850 W
Bandgeschwindigkeit:.................. 300-400 m/min
Schleifband Größe:..........................75 x 533 mm
Schutzklasse: ................................................ II/
Gewicht:......................................................3,3 kg
Gefahr!
Geräusch und Vibration
Die Geräusch- und Vibrationswerte wurden ent-
sprechend EN 60745 ermittelt.
Schalldruckpegel LpA.............................. 88 dB(A)
Unsicherheit KpA............................................3 dB
Schallleistungspegel LWA ........................ 99 dB(A)
Unsicherheit KWA ...........................................3 dB
Tragen Sie einen Gehörschutz.
Die Einwirkung von Lärm kann Gehörverlust be-
wirken.
Schwingungsgesamtwerte (Vektorsumme dreier
Richtungen) ermittelt entsprechend EN 60745.
Handgriff
Schwingungsemissionswert ah≤2,5 m/s2
Unsicherheit K = 1,5 m/s2
Zusatzhandgriff
Schwingungsemissionswert ah ≤2,5 m/s2
Unsicherheit K = 1,5 m/s2
Der angegebene Schwingungsemissionswert ist
nach einem genormten Prüfverfahren gemessen
worden und kann sich, abhängig von der Art und
Weise, in der das Elektrowerkzeug verwendet
wird, ändern und in Ausnahmefällen über dem
angegebenen Wert liegen.
Der angegebene Schwingungsemissionswert
kann zum Vergleich eines Elektrowerkzeuges mit
einem anderen verwendet werden.
Der angegebene Schwingungsemissionswert
kann auch zu einer einleitenden Einschätzung der
Beeinträchtigung verwendet werden.
Beschränken Sie die Geräuschentwicklung
und Vibration auf ein Minimum!
• Verwenden Sie nur einwandfreie Geräte.
• Warten und reinigen Sie das Gerät regelmä-
ßig.
• Passen Sie Ihre Arbeitsweise dem Gerät an.
• Überlasten Sie das Gerät nicht.
• Lassen Sie das Gerät gegebenenfalls über-
prüfen.
• Schalten Sie das Gerät aus, wenn es nicht
benutzt wird.
• Tragen Sie Handschuhe.
Vorsicht!
Restrisiken
Auch wenn Sie dieses Elektrowerkzeug
vorschriftsmäßig bedienen, bleiben immer
Restrisiken bestehen. Folgende Gefahren
können im Zusammenhang mit der Bauweise
und Ausführung dieses Elektrowerkzeuges
auftreten:
1. Lungenschäden, falls keine geeignete Staub-
schutzmaske getragen wird.
2. Gehörschäden, falls kein geeigneter Gehör-
schutz getragen wird.
3. Gesundheitsschäden, die aus Hand-Arm-
Schwingungen resultieren, falls das Gerät
über einen längeren Zeitraum verwendet wird
oder nicht ordnungsgemäß geführt und ge-
wartet wird.
5. Vor Inbetriebnahme
Überzeugen Sie sich vor dem Anschließen, dass
die Daten auf dem Typenschild mit den Netzdaten
übereinstimmen.
Warnung!
Ziehen Sie immer den Netzstecker, bevor Sie
Einstellungen am Gerät vornehmen.
5.1 Staubabsaugung
5.1.1 Montage des Staubsaugeradapters
(Bild 3 / Pos. 15)
Schieben Sie den Staubsaugeradpater (15) auf
den Anschluss für Staubabsaugung (6).
An den Staubsaugeradapter (15) können Sie
dann einen geeigneten Staubsauger
(a) anschließen (Staubsauger nicht im Lieferum-
fang). Sie erreichen damit eine optimale Staubab-
Anl_PRO_BS_850_E_SPK7.indb 7Anl_PRO_BS_850_E_SPK7.indb 7 10.08.2017 15:22:1310.08.2017 15:22:13

DE
- 8 -
saugung vom Werkstück.
Prüfen Sie, ob alle Teile gut miteinander verbun-
den sind.
Hinweis: Der für das Absaugen verwendete
Staubsauger muss für das zu bearbeitende Mate-
rial geeignet sein.
5.1.2 Montage des Staubfangsackes
(Bild 4/Pos. 14)
Schieben Sie den Staubfangsack (14) auf den
Anschluss für Staubabsaugung (6). Das Entfer-
nen des Staubfangsacks erfolgt in umgekehrter
Reihenfolge.
Die Staubabsaugung erfolgt direkt über das
Schleifband in den Staubfangsack.
Achtung!
Die Benutzung des Staubfangsackes oder die
Staubabsaugung über den Staubsaugeradapter
ist aus Gesundheitsgründen unbedingt erforder-
lich!
5.2 Verstellung des Zusatzhandgriffes
(Bild 5/Pos. 2)
Lockern Sie die Schraube (1) 2 bis 3 Umdrehun-
gen und stellen Sie sich die optimale Stellung des
Zusatzhandgriffes (2) ein. Durch das Festziehen
der Schraube (1) wird der Zusatzhandgriff(2)
fixiert.
5.3 Schleifbandwechsel (Bild 6-7/Pos .13)
• Ziehen Sie den Spannhebel (12) nach außen,
um das Schleifband zu entlasten.
• Ziehen Sie das verbrauchte Schleifband von
den Antriebsrollen.
• Schieben Sie das neue Schleifband auf die
Antriebsrollen.
• Achten Sie darauf, dass die Laufrichtung
des Schleifbandes (Pfeile auf der Innenseite
des Schleifbandes) mit der Laufrichtung des
Bandschleifers (Pfeil über der hinteren An-
triebsrolle) übereinstimmt.
• Drücken Sie den Spannhebel (12) nach hin-
ten, um das Schleifband zu spannen.
5.4 Bandlauf Einstellen (Bild 8/ Pos. 8)
• Halten Sie den Bandschleifer mit Schleifplatte
nach oben fest.
• Schalten Sie den Bandschleifer ein.
• Durch Drehen der Einstellschraube (8) ist der
Bandlauf so einzustellen, dass das Schleif-
band mittig auf den beiden Antriebsrollen
läuft.
5.5 Bewegliche Schleifbandabdeckung
(Bild 9-10/Pos. 9)
Die bewegliche Schleifbandabdeckung darf nur
nach oben geschwenkt werden, wenn der Druck-
knopf (7) gedrückt ist.
• Drücken Sie den Druckknopf (7) ein und
schwenken Sie gleichzeitig die Abdeckung
(9) nach oben.
• Lassen den Druckknopf los.
• Die Abdeckung rastet in der Endposition ein.
• Um die Abdeckung wieder nach unten zu
schwenken, drücken Sie den Druckknopf (7)
erneut. Die Abdeckung kann nach unten ge-
schwenkt werden.
6. Inbetriebnahme
6.1 Ein/Ausschalten (Bild 11)
Einschalten:
Betriebschalter (5) eindrücken.
Dauerbetrieb:
mit Feststellknopf (4) Schalter (5) sichern.
Ausschalten:
Betriebsschalter (5) kurz eindrücken.
Die Maschine kann in Moment- oder Dauerschal-
tung betrieben werden.
6.2 Einstellung der Bandgeschwindigkeit
(Bild 12/Pos.3)
Durch Drehen des Einstellrades (3) können Sie
die Bandgeschwindigkeit vorwählen.
PLUS-Richtung:
Bandgeschwindigkeit erhöhen
MINUS-Richtung:
Bandgeschwindigkeit verringern
6.3 Anwendungshinweise
Warnung! Halten Sie das zu bearbeitende
Werkstück niemals mit der Hand. Sichern Sie das
Werkstück an einer stabilen Unterlage oder mit
einem Schraubstock.
• Lassen Sie den Bandschleifer anlaufen, be-
vor Sie ihn auf das Werkstück aufsetzen.
• Schalten Sie den Bandschleifer nicht aus,
solange das Schleifband das Werkstück
berührt.
• Halten Sie den Bandschleifer, während des
Anl_PRO_BS_850_E_SPK7.indb 8Anl_PRO_BS_850_E_SPK7.indb 8 10.08.2017 15:22:1310.08.2017 15:22:13

DE
- 9 -
Betriebes immer mit beiden Händen.
• Schleifen Sie Holz immer in Richtung der
Maserung.
7. Austausch der
Netzanschlussleitung
Gefahr!
Wenn die Netzanschlussleitung dieses Gerätes
beschädigt wird, muss sie durch den Hersteller
oder seinen Kundendienst oder eine ähnlich qua-
lifizierte Person ersetzt werden, um Gefährdun-
gen zu vermeiden.
8. Reinigung, Wartung und
Ersatzteilbestellung
Gefahr!
Ziehen Sie vor allen Reinigungsarbeiten den
Netzstecker.
8.1 Reinigung
• Halten Sie Schutzvorrichtungen, Luftschlitze
und Motorengehäuse so staub- und schmutz-
frei wie möglich. Reiben Sie das Gerät mit
einem sauberen Tuch ab oder blasen Sie es
mit Druckluft bei niedrigem Druck aus.
• Wir empfehlen, dass Sie das Gerät direkt
nach jeder Benutzung reinigen.
• Reinigen Sie das Gerät regelmäßig mit einem
feuchten Tuch und etwas Schmierseife.Ver-
wenden Sie keine Reinigungs- oder Lösungs-
mittel; diese könnten die Kunststoffteile des
Gerätes angreifen. Achten Sie darauf, dass
kein Wasser in das Geräteinnere gelangen
kann. Das Eindringen von Wasser in ein Elek-
trogerät erhöht das Risiko eines elektrischen
Schlages.
8.2 Kohlebürsten
Bei übermäßiger Funkenbildung lassen Sie die
Kohlebürsten durch eine Elektrofachkraft über-
prüfen.
Gefahr! Die Kohlebürsten dürfen nur von einer
Elektrofachkraft ausgewechselt werden.
8.3 Wartung
Im Geräteinneren befinden sich keine weiteren zu
wartenden Teile.
8.4 Ersatzteilbestellung:
Bei der Ersatzteilbestellung sollten folgende An-
gaben gemacht werden;
• Typ des Gerätes
• Artikelnummer des Gerätes
• Ident-Nummer des Gerätes
• Ersatzteilnummer des erforderlichen Ersatz-
teils
Aktuelle Preise und Infos finden Sie unter
www.isc-gmbh.info
9. Entsorgung und
Wiederverwertung
Das Gerät befindet sich in einer Verpackung um
Transportschäden zu verhindern. Diese Verpa-
ckung ist Rohstoffund ist somit wieder verwend-
bar oder kann dem Rohstoffkreislauf zurückge-
führt werden. Das Gerät und dessen Zubehör
bestehen aus verschiedenen Materialien, wie
z.B. Metall und Kunststoffe. Defekte Geräte ge-
hören nicht in den Hausmüll. Zur fachgerechten
Entsorgung sollte das Gerät an einer geeigneten
Sammelstellen abgegeben werden.Wenn Ihnen
keine Sammelstelle bekannt ist, sollten Sie bei
der Gemeindeverwaltung nachfragen.
10. Lagerung
Lagern Sie das Gerät und dessen Zubehör an
einem dunklen, trockenen und frostfreiem Ort. Die
optimale Lagertemperatur liegt zwischen 5 und
30 ˚C. Bewahren Sie das Elektrowerkzeug in der
Originalverpackung auf.
Anl_PRO_BS_850_E_SPK7.indb 9Anl_PRO_BS_850_E_SPK7.indb 9 10.08.2017 15:22:1310.08.2017 15:22:13

DE
- 10 -
Nur für EU-Länder
Werfen Sie Elektrowerkzeuge nicht in den Hausmüll!
Gemäß europäischer Richtlinie 2012/19/EU über Elektro- und Elektronik-Altgeräte und Umsetzung in
nationales Recht müssen verbrauchte Elektrowerkzeuge getrennt gesammelt werden und einer umwelt-
gerechten Wiederverwertung zugeführt werden.
Recycling-Alternative zur Rücksendeaufforderung:
Der Eigentümer des Elektrogerätes ist alternativ anstelle Rücksendung zur Mitwirkung bei der sachge-
rechten Verwertung im Falle der Eigentumsaufgabe verpflichtet. Das Altgerät kann hierfür auch einer
Rücknahmestelle überlassen werden, die eine Beseitigung im Sinne der nationalen Kreislaufwirt-
schafts- und Abfallgesetze durchführt. Nicht betroffen sind den Altgeräten beigefügte Zubehörteile und
Hilfsmittel ohne Elektrobestandteile.
Der Nachdruck oder sonstige Vervielfältigung von Dokumentation und Begleitpapieren der Produkte,
auch auszugsweise, ist nur mit ausdrücklicher Zustimmung der iSC GmbH zulässig.
Technische Änderungen vorbehalten
Anl_PRO_BS_850_E_SPK7.indb 10Anl_PRO_BS_850_E_SPK7.indb 10 10.08.2017 15:22:1310.08.2017 15:22:13

DE
- 11 -
Service-Informationen
Wir unterhalten in allen Ländern, welche in der Garantieurkunde benannt sind, kompetente Service-
Partner, deren Kontakte Sie der Garantieurkunde entnehmen. Diese stehen Ihnen für alle Service-
Belange wie Reparatur, Ersatzteil- und Verschleißteil-Versorgung oder den Bezug von Verbrauchsmate-
rialien zur Verfügung.
Es ist zu beachten, dass bei diesem Produkt folgende Teile einem gebrauchsgemäßen oder natürlichen
Verschleiß unterliegen bzw. folgende Teile als Verbrauchsmaterialien benötigt werden.
Kategorie Beispiel
Verschleißteile* Keilriemen, Kohlebürsten
Verbrauchsmaterial/ Verbrauchsteile* Schleifpapier
Fehlteile
* nicht zwingend im Lieferumfang enthalten!
Bei Mängel oder Fehlern bitten wir Sie, den Fehlerfall im Internet unter www.isc-gmbh.info anzumelden.
Bitte achten Sie auf eine genaue Fehlerbeschreibung und beantworten Sie dazu in jedem Fall folgende
Fragen:
• Hat das Gerät bereits einmal funktioniert oder war es von Anfang an defekt?
• Ist Ihnen vor dem Auftreten des Defektes etwas aufgefallen (Symptom vor Defekt)?
• Welche Fehlfunktion weist das Gerät Ihrer Meinung nach auf (Hauptsymptom)?
Beschreiben Sie diese Fehlfunktion.
Anl_PRO_BS_850_E_SPK7.indb 11Anl_PRO_BS_850_E_SPK7.indb 11 10.08.2017 15:22:1410.08.2017 15:22:14

DE
- 12 -
Garantieurkunde
Sehr geehrte Kundin, sehr geehrter Kunde,
unsere Produkte unterliegen einer strengen Qualitätskontrolle. Sollte dieses Gerät dennoch einmal nicht
einwandfrei funktionieren, bedauern wir dies sehr und bitten Sie, sich an unseren Servicedienst unter
der auf dieser Garantiekarte angegebenen Adresse, oder an die Verkaufstelle, bei der Sie das Gerät
erworben haben, zu wenden. Für die Geltendmachung von Garantieansprüchen gilt folgendes:
1. Diese Garantiebedingungen richten sich ausschließlich an Verbraucher, d. h. natürliche Personen,
die dieses Produkt weder im Rahmen ihrer gewerblichen noch anderen selbständigen Tätigkeit
nutzen wollen. Diese Garantiebedingungen regeln zusätzliche Garantieleistungen, die der u. g.
Hersteller zusätzlich zur gesetzlichen Gewährleistung Käufern seiner Neugeräte verspricht. Ihre
gesetzlichen Gewährleistungsansprüche werden von dieser Garantie nicht berührt. Unsere Garan-
tieleistung ist für Sie kostenlos.
2. Die Garantieleistung erstreckt sich ausschließlich auf Mängel an einem von Ihnen erworbenen neu-
en Gerät des u. g. Herstellers, die auf einem Material- oder Herstellungsfehler beruhen und ist nach
unserer Wahl auf die Behebung solcher Mängel am Gerät oder den Austausch des Gerätes be-
schränkt. Bitte beachten Sie, dass unsere Geräte bestimmungsgemäß nicht für den gewerblichen,
handwerklichen oder beruflichen Einsatz konstruiert wurden. Ein Garantievertrag kommt daher nicht
zustande, wenn das Gerät innerhalb der Garantiezeit in Gewerbe-, Handwerks- oder Industriebe-
trieben verwendet wurde oder einer gleichzusetzenden Beanspruchung ausgesetzt war.
3. Von unserer Garantie ausgenommen sind:
- Schäden am Gerät, die durch Nichtbeachtung der Montageanleitung oder aufgrund nicht fach-
gerechter Installation, Nichtbeachtung der Gebrauchsanleitung (wie durch z.B. Anschluss an eine
falsche Netzspannung oder Stromart) oder Nichtbeachtung der Wartungs- und Sicherheitsbestim-
mungen oder durch Aussetzen des Geräts an anomale Umweltbedingungen oder durch mangelnde
Pflege und Wartung entstanden sind.
- Schäden am Gerät, die durch missbräuchliche oder unsachgemäße Anwendungen (wie z.B. Über-
lastung des Gerätes oder Verwendung von nicht zugelassenen Einsatzwerkzeugen oder Zubehör),
Eindringen von Fremdkörpern in das Gerät (wie z.B. Sand, Steine oder Staub, Transportschäden),
Gewaltanwendung oder Fremdeinwirkungen (wie z. B. Schäden durch Herunterfallen) entstanden
sind.
- Schäden am Gerät oder an Teilen des Geräts, die auf einen gebrauchsgemäßen, üblichen oder
sonstigen natürlichen Verschleiß zurückzuführen sind.
4. Die Garantiezeit beträgt 5 Jahre und beginnt mit dem Kaufdatum des Gerätes. Garantieansprüche
sind vor Ablauf der Garantiezeit innerhalb von zwei Wochen, nachdem Sie den Defekt erkannt
haben, geltend zu machen. Die Geltendmachung von Garantieansprüchen nach Ablauf der Ga-
rantiezeit ist ausgeschlossen. Die Reparatur oder der Austausch des Gerätes führt weder zu einer
Verlängerung der Garantiezeit noch wird eine neue Garantiezeit durch diese Leistung für das Gerät
oder für etwaige eingebaute Ersatzteile in Gang gesetzt. Dies gilt auch bei Einsatz eines Vor-Ort-
Services.
5. Für die Geltendmachung Ihres Garantieanspruches melden Sie bitte das defekte Gerät an unter:
www.isc-gmbh.info. Halten Sie bitte den Kaufbeleg oder andere Nachweise Ihres Kaufs des Neu-
geräts bereit. Geräte, die ohne entsprechende Nachweise oder ohne Typenschild eingesendet wer-
den, sind von der Garantieleistung aufgrund mangelnder Zuordnungsmöglichkeit ausgeschlossen.
Ist der Defekt des Gerätes von unserer Garantieleistung erfasst, erhalten Sie umgehend ein repa-
riertes oder neues Gerät zurück.
Für Verschleiß-, Verbrauchs- und Fehlteile verweisen wir auf die Einschränkungen dieser Garantie ge-
mäß den Service-Informationen dieser Bedienungsanleitung.
iSC GmbH · Eschenstraße 6 · 94405 Landau/Isar (Deutschland)
Anl_PRO_BS_850_E_SPK7.indb 12Anl_PRO_BS_850_E_SPK7.indb 12 10.08.2017 15:22:1410.08.2017 15:22:14

GB
- 13 -
Danger! - Read the operating instructions to reduce the risk of inquiry
Caution! Wear ear-muffs. The impact of noise can cause damage to hearing.
Caution! Wear safety goggles. Sparks generated during working or splinters, chips and dust emitted
by the device can cause loss of sight.
Caution! Wear a breathing mask. Dust which is injurious to health can be generated when working on
wood and other materials. Never use the device to work on any materials containing asbestos!
Anl_PRO_BS_850_E_SPK7.indb 13Anl_PRO_BS_850_E_SPK7.indb 13 10.08.2017 15:22:1410.08.2017 15:22:14

GB
- 14 -
Danger!
When using the equipment, a few safety pre-
cautions must be observed to avoid injuries and
damage. Please read the complete operating
instructions and safety regulations with due care.
Keep this manual in a safe place, so that the in-
formation is available at all times. If you give the
equipment to any other person, hand over these
operating instructions and safety regulations as
well.We cannot accept any liability for damage
or accidents which arise due to a failure to follow
these instructions and the safety instructions.
1. Safety regulations
The corresponding safety information can be
found in the enclosed booklet.
Danger!
Read all safety regulations and instructions.
Any errors made in following the safety regula-
tions and instructions may result in an electric
shock, fire and/or serious injury.
Keep all safety regulations and instructions
in a safe place for future use.
2. Layout and items supplied
2.1 Layout (Fig. 1/2)
1. Screw to adjust the additional handle
2. Additional handle
3. Setting wheel for belt speed
4. Locking button
5. ON/OFF switch
6. Connection for dust bag
7. Pushbutton for moving sanding/
grinding belt cover
8. Setting for sanding/grinding belt adjustment
9. Moving sanding/grinding belt cover
10. Drive rollers
11. Sanding/grinding plate
12. Clamping lever for sanding/grinding belt
13. Sanding/Grinding belt
14. Dust bag
15. Dust extractor adapter
16. Handle
2.2 Items supplied
Please check that the article is complete as
specified in the scope of delivery. If parts are
missing, please contact our service center or the
sales outlet where you made your purchase at
the latest within 5 working days after purchasing
the product and upon presentation of a valid bill
of purchase. Also, refer to the warranty table in
the service information at the end of the operating
instructions.
• Open the packaging and take out the equip-
ment with care.
• Remove the packaging material and any
packaging and/or transportation braces (if
available).
• Check to see if all items are supplied.
• Inspect the equipment and accessories for
transport damage.
• If possible, please keep the packaging until
the end of the guarantee period.
Danger!
The equipment and packaging material are
not toys. Do not let children play with plastic
bags, foils or small parts. There is a danger of
swallowing or suffocating!
• Belt Grinder/Sander
• 1x Sanding/Grinding belt
• 1x Dust bag
• Original operating instructions
• Safety instructions
3. Proper use
The belt sander/grinder is designed for sanding/
grinding wood, iron, plastic and similar materials
using the appropriate sanding/grinding belt.
The equipment is to be used only for its prescri-
bed purpose. Any other use is deemed to be a
case of misuse.The user / operator and not the
manufacturer will be liable for any damage or inju-
ries of any kind caused as a result of this.
Please note that our equipment has not been de-
signed for use in commercial, trade or industrial
applications. Our warranty will be voided if the
machine is used in commercial, trade or industrial
businesses or for equivalent purposes.
Anl_PRO_BS_850_E_SPK7.indb 14Anl_PRO_BS_850_E_SPK7.indb 14 10.08.2017 15:22:1510.08.2017 15:22:15

GB
- 15 -
4. Technical data
Mains voltage: ................................230 V~ 50 Hz
Power input: .............................................. 850 W
Belt speed: .................................. 300-400 m/min
Sanding/Grinding belt size: .............75 x 533 mm
Protection class: ............................................ II/
Weight: .......................................................3.3 kg
Danger!
Sound and vibration
Sound and vibration values were measured in
accordance with EN 60745.
LpA sound pressure level ........................ 88 dB(A)
KpA uncertainty ............................................. 3 dB
LWA sound power level .......................... 99 dB(A)
KWA uncertainty .............................................3 dB
Wear ear-muffs.
The impact of noise can cause damage to hea-
ring.
Total vibration values (vector sum of three direc-
tions) determined in accordance with EN 60745.
Handle
Vibration emission value ah≤2,5 m/s2
K uncertainty = 1.5 m/s2
Additional handle
Vibration emission value ah≤2,5 m/s2
K uncertainty = 1.5 m/s2
The specified vibration value was established in
accordance with a standardized testing method. It
may change according to how the electric equip-
ment is used and may exceed the specified value
in exceptional circumstances.
The specified vibration value can be used to
compare the equipment with other electric power
tools.
The specified vibration value can be used for initi-
al assessment of a harmful effect.
Keep the noise emissions and vibrations to a
minimum.
• Only use appliances which are in perfect wor-
king order.
• Service and clean the appliance regularly.
• Adapt your working style to suit the appliance.
• Do not overload the appliance.
• Have the appliance serviced whenever ne-
cessary.
• Switch the appliance off when it is not in use.
• Wear protective gloves.
Caution!
Residual risks
Even if you use this electric power tool in
accordance with instructions, certain resi-
dual risks cannot be rules out. The following
hazards may arise in connection with the
equipment’s construction and layout:
1. Lung damage if no suitable protective dust
mask is used.
2. Damage to hearing if no suitable ear protec-
tion is used.
3. Health damage caused by hand-arm vib-
rations if the equipment is used over a pro-
longed period or is not properly guided and
maintained.
5. Before starting the equipment
Before you connect the equipment to the mains
supply make sure that the data on the rating plate
are identical to the mains data.
Warning!
Always pull the power plug before making
adjustments to the equipment.
5.1 Dust extraction
5.1.1 Installing the dust bag
(Figure 3/Item 15)
Slide the dust extractor adapter (15) on to the
connection for the dust extractor (6).
You can then connect a suitable dust extractor (a)
to the dust extractor adapter (15) (dust extractor
not supplied).
This will provide excellent dust extraction on the
workpiece.
Check that all the parts are properly connected.
Notice! The vacuum cleaner you use for the ex-
traction work must be suitable for the workpiece
material.
Anl_PRO_BS_850_E_SPK7.indb 15Anl_PRO_BS_850_E_SPK7.indb 15 10.08.2017 15:22:1510.08.2017 15:22:15

GB
- 16 -
5.1.2 Installing the dust bag (Figure 4/
Item 14)
Slide the dust bag (14) on to the connection for
the dust extractor (6). Follow the instructions abo-
ve in reverse order to remove the dust bag.
The dust is extracted straight from the sanding/
grinding belt into the dust bag.
The use of the dust bag or dust extractor via the
dust extractor adapter is absolutely essential for
health reasons.
5.2 Adjusting the additional handle
(Fig. 5/Item 2)
Slacken the screw (1) by 2 or 3 turns and move
the additional handle (2) to its optimal position.
Lock the additional handle (2) in place by tighte-
ning the screw (1).
5.3 Changing the sanding / grinding belt
(Fig. 6-7/Item 13)
• Pull the clamping lever (12) to the outside to
relieve the tension in the sanding/grinding
belt.
• Pull the used sanding/grinding belt off the
drive rollers.
• Slide the new sanding/grinding belt on to the
drive rollers.
• Ensure that the direction of the sanding/grin-
ding belt (arrows on the inside of the sanding/
grinding belt) is identical to the direction of
the belt sander/grinder (arrow over the rear
drive roller).
• Press the clamping lever (12) to the rear to
tension the sanding/grinding belt.
5.4 Adjusting the position of the belt
(Fig. 8/Item 8)
• Hold the belt sander/grinder with the sanding/
grinding plate at the top.
• Switch on the belt sander/grinder.
• By turning the setting screw (8) the belt positi-
on should be set so that the sanding/grinding
belt is at the center of the two drive rollers.
5.5 Moving sanding/grinding belt cover
(Fig. 9 – 10/Item 9)
The moving sanding/grinding belt cover may only
be swung upwards if the pushbutton (7) has been
pressed.
• Press the pushbutton (7) and at the same
time swing the cover (9) upwards.
• Release the pushbutton.
• The cover will lock in its end position.
• To swing the cover back down again, press
the pushbutton (7) again.The cover can then
be swung downwards.
6. Starting up
6.1 Switching ON/OFF (Fig. 11)
To switch on:
Press the ON/OFF switch (5).
Continuous operation:
Secure the switch (5) with the locking button (4).
To switch off:
Press the ON/OFF switch (5) briefly.
The machine can be operated on a temporary or
permanent setting.
6.2 Setting the belt speed (Fig. 12/Item 3)
You can select the belt speed by turning the set-
ting knob (3).
PLUS direction:
Increase belt speed
MINUS direction:
Reduce belt speed
6.3 Instructions for use
Warning! Never hold the workpiece you wish to
sand/grind in your hands. Secure the workpiece
on a sturdy surface or using a vise.
• Allow the belt sander/grinder to start before
you place it on the workpiece.
• Do not switch off the belt sander/grinder as
long as the sanding/grinding belt is in contact
with the workpiece.
• Always hold the belt sander/grinder with both
hands whilst it is in use.
• Always sand wood in the direction of the
grain.
7. Replacing the power cable
Danger!
If the power cable for this equipment is damaged,
it must be replaced by the manufacturer or its
after-sales service or similarly trained personnel
to avoid danger.
Anl_PRO_BS_850_E_SPK7.indb 16Anl_PRO_BS_850_E_SPK7.indb 16 10.08.2017 15:22:1510.08.2017 15:22:15

GB
- 17 -
8. Cleaning, maintenance and
ordering of spare parts
Danger!
Always pull out the mains power plug before star-
ting any cleaning work.
8.1 Cleaning
• Keep all safety devices, air vents and the
motor housing free of dirt and dust as far as
possible.Wipe the equipment with a clean
cloth or blow it with compressed air at low
pressure.
• We recommend that you clean the device
immediately each time you have finished
using it.
• Clean the equipment regularly with a moist
cloth and some soft soap. Do not use
cleaning agents or solvents; these could at-
tack the plastic parts of the equipment. Ensu-
re that no water can seep into the device.The
ingress of water into an electric tool increases
the risk of an electric shock.
8.2 Carbon brushes
In case of excessive sparking, have the carbon
brushes checked only by a qualified electrician.
Danger! The carbon brushes should not be rep
laced by anyone but a qualified electrician.
8.3 Maintenance
There are no parts inside the equipment which
require additional maintenance.
8.4 Ordering replacement parts:
Please quote the following data when ordering
replacement parts:
• Type of machine
• Article number of the machine
• Identification number of the machine
• Replacement part number of the part required
For our latest prices and information please go to
www.isc-gmbh.info
9. Disposal and recycling
The equipment is supplied in packaging to pre-
vent it from being damaged in transit.The raw
materials in this packaging can be reused or
recycled.The equipment and its accessories are
made of various types of material, such as metal
and plastic. Never place defective equipment in
your household refuse.The equipment should
be taken to a suitable collection center for proper
disposal. If you do not know the whereabouts of
such a collection point, you should ask in your
local council offices.
10. Storage
Store the equipment and accessories in a dark
and dry place at above freezing temperature.The
ideal storage temperature is between 5 and 30
°C. Store the electric tool in its original packaging.
Anl_PRO_BS_850_E_SPK7.indb 17Anl_PRO_BS_850_E_SPK7.indb 17 10.08.2017 15:22:1510.08.2017 15:22:15

GB
- 18 -
For EU countries only
Never place any electric power tools in your household refuse.
To comply with European Directive 2012/19/EC concerning old electric and electronic equipment and
its implementation in national laws, old electric power tools have to be separated from other waste and
disposed of in an environment-friendly fashion, e.g. by taking to a recycling depot.
Recycling alternative to the return request:
As an alternative to returning the equipment to the manufacturer, the owner of the electrical equipment
must make sure that the equipment is properly disposed of if he no longer wants to keep the equipment.
The old equipment can be returned to a suitable collection point that will dispose of the equipment in
accordance with the national recycling and waste disposal regulations.This does not apply to any ac-
cessories or aids without electrical components supplied with the old equipment.
The reprinting or reproduction by any other means, in whole or in part, of documentation and papers
accompanying products is permitted only with the express consent of the iSC GmbH.
Subject to technical changes
Anl_PRO_BS_850_E_SPK7.indb 18Anl_PRO_BS_850_E_SPK7.indb 18 10.08.2017 15:22:1610.08.2017 15:22:16

GB
- 19 -
Service information
We have competent service partners in all countries named on the guarantee certificate whose contact
details can also be found on the guarantee certificate.These partners will help you with all service re-
quests such as repairs, spare and wearing part orders or the purchase of consumables.
Please note that the following parts of this product are subject to normal or natural wear and that the
following parts are therefore also required for use as consumables.
Category Example
Wear parts* V-belt, Carbon brushes
Consumables* Grinding/sanding paper
Missing parts
* Not necessarily included in the scope of delivery!
In the effect of defects or faults, please register the problem on the internet at www.isc-gmbh.info. Ple-
ase ensure that you provide a precise description of the problem and answer the following questions in
all cases:
• Did the equipment work at all or was it defective from the beginning?
• Did you notice anything (symptom or defect) prior to the failure?
• What malfunction does the equipment have in your opinion (main symptom)?
Describe this malfunction.
Anl_PRO_BS_850_E_SPK7.indb 19Anl_PRO_BS_850_E_SPK7.indb 19 10.08.2017 15:22:1610.08.2017 15:22:16

GB
- 20 -
Warranty certificate
Dear Customer,
All of our products undergo strict quality checks to ensure that they reach you in perfect condition. In the
unlikely event that your device develops a fault, please contact our service department at the address
shown on this guarantee card or the sales outlet from where you bought the device. Please note the fol-
lowing terms under which guarantee claims can be made:
1. These guarantee terms apply to consumers only, i.e. natural persons intending to use this product
neither for their commercial activities nor for any other self-employed activities.These warranty
terms regulate additional warranty services, which the manufacturer mentioned below promises to
buyers of its new products in addition to their statutory rights of guarantee.Your statutory guarantee
claims are not affected by this guarantee. Our guarantee is free of charge to you.
2. The warranty services cover only defects due to material or manufacturing faults on a product which
you have bought from the manufacturer mentioned below and are limited to either the rectification of
said defects on the product or the replacement of the product, whichever we prefer.
Please note that our devices are not designed for use in commercial, trade or professional applica-
tions. A guarantee contract will not be created if the device has been used by commercial, trade or
industrial business or has been exposed to similar stresses during the guarantee period.
3. The following are not covered by our guarantee:
- Damage to the device caused by a failure to follow the assembly instructions or due to incorrect
installation, a failure to follow the operating instructions (for example connecting it to an incorrect
mains voltage or current type) or a failure to follow the maintenance and safety instructions or by ex-
posing the device to abnormal environmental conditions or by lack of care and maintenance.
- Damage to the device caused by abuse or incorrect use (for example overloading the device or the
use or unapproved tools or accessories), ingress of foreign bodies into the device (such as sand,
stones or dust, transport damage), the use of force or damage caused by external forces (for ex-
ample by dropping it).
- Damage to the device or parts of the device caused by normal or natural wear or tear or by normal
use of the device.
4. The guarantee is valid for a period of 60 months starting from the purchase date of the device. Gu-
arantee claims should be submitted before the end of the guarantee period within two weeks of the
defect being noticed. No guarantee claims will be accepted after the end of the guarantee period.
The original guarantee period remains applicable to the device even if repairs are carried out or
parts are replaced. In such cases, the work performed or parts fitted will not result in an extension
of the guarantee period, and no new guarantee will become active for the work performed or parts
fitted.This also applies if an on-site service is used.
5. To make a claim under the guarantee, please register the defective device at: www.isc-gmbh.info.
Please keep your bill of purchase or other proof of purchase for the new device. Devices that are
returned without proof of purchase or without a rating plate shall not be covered by the guarantee,
because appropriate identification will not be possible. If the defect is covered by our guarantee,
then the item in question will either be repaired immediately and returned to you or we will send you
a new replacement.
Also refer to the restrictions of this warranty concerning wear parts, consumables and missing parts as
set out in the service information in these operating instructions.
Anl_PRO_BS_850_E_SPK7.indb 20Anl_PRO_BS_850_E_SPK7.indb 20 10.08.2017 15:22:1610.08.2017 15:22:16
This manual suits for next models
1
Table of contents
Languages:
Other Toolson Sander manuals
Popular Sander manuals by other brands

Greenlee
Greenlee 853 instruction manual
Powermatic
Powermatic 31A Instruction manual & parts list
Menzer
Menzer LHS 225 Translation of the original operating manual
Black & Decker
Black & Decker BEW230-QS Original instructions

Alpha tools
Alpha tools DS 180 Original operating instructions

Bodypoint
Bodypoint H-Style Installation and user instructions
