– 3
Dear Customer,
Please read and comply with
these original instructions prior
to the initial operation of your appliance and
store them for later use or subsequent own-
ers.
This appliance has been designed for
use in private households and is not in-
tended for commercial use.
This appliance can be used for polish-
ing parquet, laminate, stone floors, lino-
leum and PVC floors.
The appliance is only meant for sucking
polishing dust.
The appliance is not a vacuum cleaner!
Do not use to draw in dry dust!
Do not use care products containing
solvents.
The appliance should not be used on
carpets and similar surfaces.
Do not load down the appliance with ad-
ditional weights.
The appliance should not be used or
stored in the open or under wet condi-
tions.
The appliance may only be used with
original filter bags, original spare parts,
accessories or special accessories.
Always move the appliance while it is
running. Do not stay in one place for ex-
tended periods, because this could
cause damages to the flooring.
Please observe the notes of the flooring
and care product manufacturers!
The manufacturer is not responsible for any
damages that may occur on account of im-
proper use or wrong operations.
The packaging material can be recy-
cled. Please do not place the pack-
aging into the ordinary refuse for disposal,
but arrange for the proper recycling.
Old appliances contain valuable ma-
terials that can be recycled. Please
arrange for the proper recycling of old
appliances. Please dispose your old appli-
ances using appropriate collection sys-
tems.
Notes about the ingredients (REACH)
You will find current information about the
ingredients at:
www.kaercher.com/REACH
The terms of the guarantee applicable in
each country have been published by our
respective national distributors. We will re-
pair possible faults on your unit free of
charge within the warranty period, insofar
as the faults are caused by material defects
or defective workmanship. Guarantee
claims should be addressed to your dealer
or the nearest authorized customer service
centre, and supported by documentary evi-
dence of purchase.
(See address on the reverse)
Our KÄRCHER branch will be pleased to
help you further in the case of questions or
faults.
(See address on the reverse)
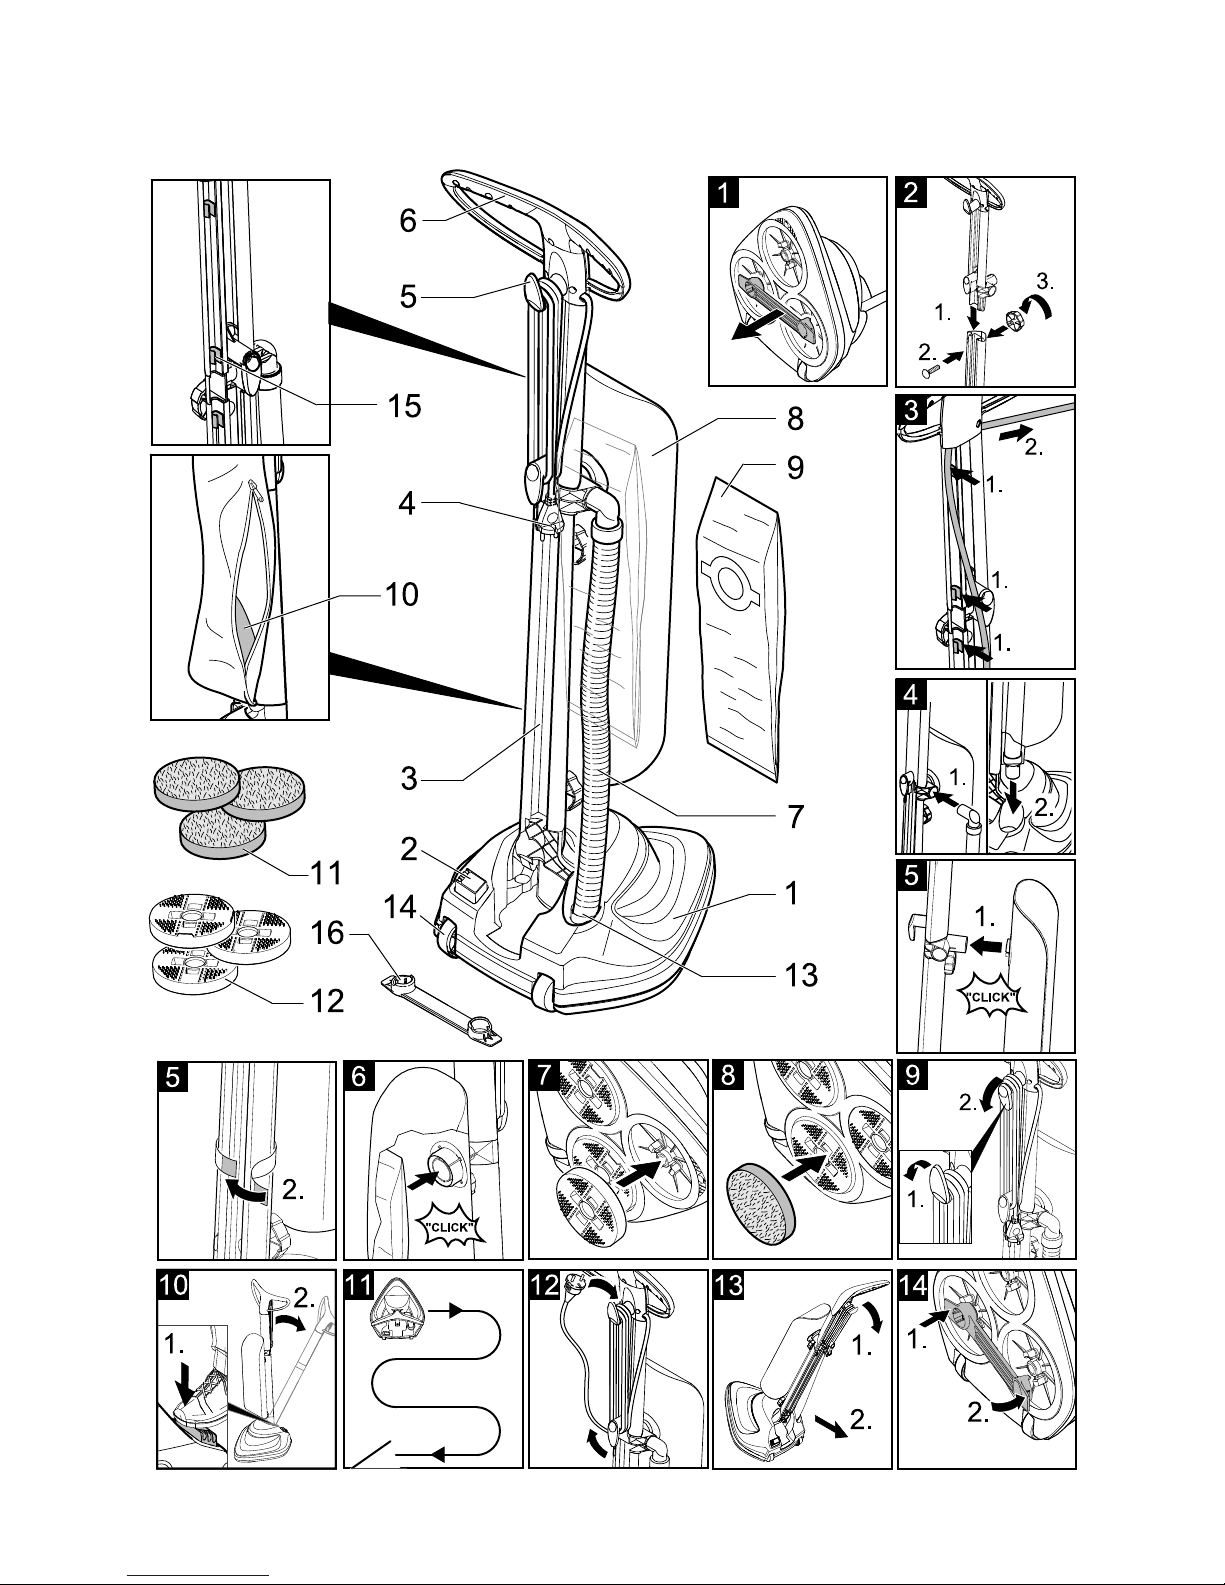
Contents
General notes. . . . . . . . . . . EN . . .3
Safety instructions . . . . . . . EN . . .4
Start up. . . . . . . . . . . . . . . . EN . . .4
Operation . . . . . . . . . . . . . . EN . . .5
Finish operation . . . . . . . . . EN . . .6
Maintenance and care . . . . EN . . .7
Troubleshooting . . . . . . . . . EN . . .7
Technical specifications . . . EN . . .7
Special accessories . . . . . . EN . . .8
General notes
Proper use
Environmental protection
Warranty
Customer Service