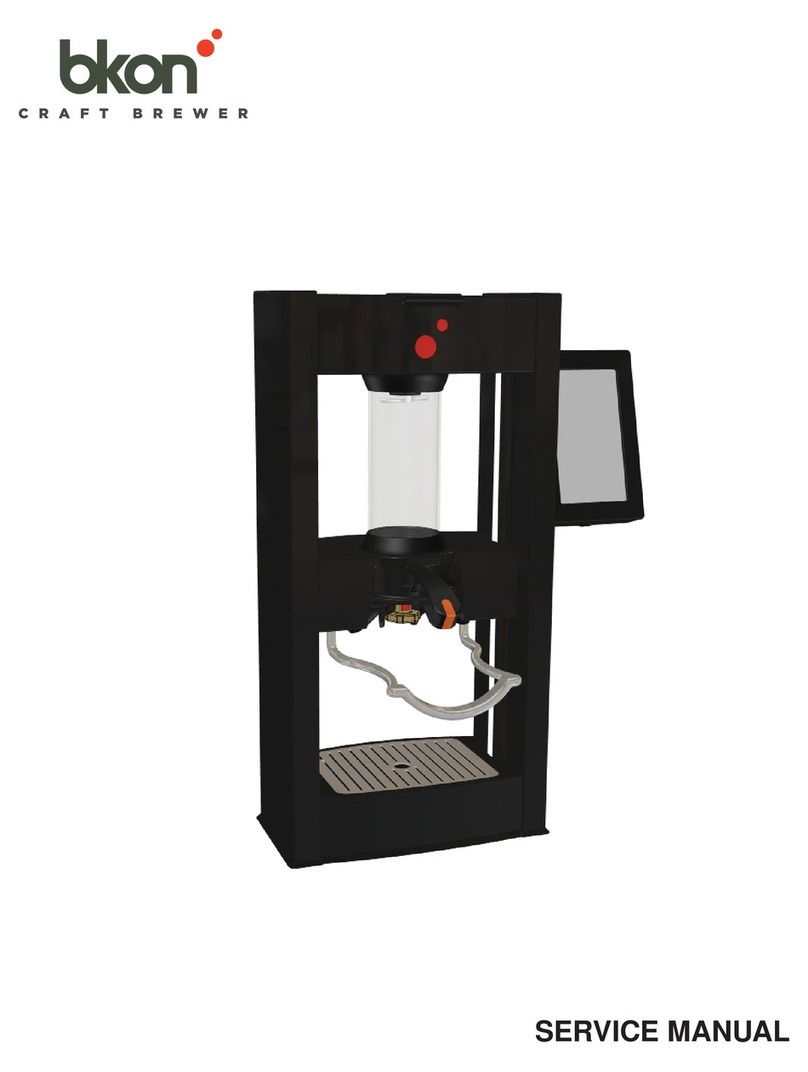
TopBrewer Compact User manual

TopBrewer Compact Installation Guide
Aug 12, 2015 Ver. 1.1

TopBrewer Compact Installation Manual.. Ver 1..0
Installing a TopBrewer can be a fulfilling experience. It’s
like any project, that are taking shape and once done, the
result is mesmerizing.
Still, with the TopBrewer there is a certain degree of unex-
pected pleasure, when you serve the first piping hot cup of
coee out of the graceful swan neck. The sensation when
the liquid flows and the joy brought to those controlling it
from their phone.
IIf you follow this guide carefully, it will fit beautifully into
your space.
We hope you will enjoy your TopBrewer Experience.
#unboxingmytopbrewer

Kind Disclaimer
The TopBrewer is a precision piece of machinery, a fine work of engineering that
has been built to last. Due to the nature of it’s inner workings that are able to
produce a second-to-none drink, installation must be done in line with factory
recommendations in this manual.
We also strongly discourage you from using parts, tubing, fittings and items of
that nature, that are not supplied by TopBrewer.
We also recommend only using TopBrewer certified consumables, such as Cof-
fee (so that we may help you adjust your machine), Water Filters, Co2 bottles
and Cleaning tablets.
Only this way we can ensure that your machine works to the best of it’s ability.

UNIT DETAILS
Installation Dimensions (WxDxH)
Packing Dimensions (WxDxH)
Weight, gross.
Weight, net.
Hopper Capacity
Milk carton size capcitiy (EU/US)
Dreg capacitiy
183 x 510 x 670
7 3/16” x 20 1/16” x 26 3/8”
300 x 630 x 780
11 13/16” x 24 13/16” x 30 11/16”
41.0
90.4
39.0
85.9
1.5
3.3
-
60
TopBrewer
Machine
137 x 130 x 267
5 3/8” x 5 1/8” x 10 1/2”
379 x 284 x 165
14 15/16” x 11 3/16” x 6 1/2”
3.7
8.15
-
-
-
-
Filter Kit
236 x 560 x 430
9 5/16” x 22 1/16” x 16 15/16”
300 x 615 x 490
11 13/16” x 24 3/16” x 19 5/16”
27
59.5
25
55,1
-
2 l.
Half Gallon
-
ICE-bank Fridge
* cm / kg / liter - inches / pounds / gallon
TopBrewer Machine
•
TopBrewer, Faucet, mounting bracket, recessed driptray
with grate, quick start guide, cleaning brush, cleaning
tablets
ICE-bank Fridge
•
ICE-bank Fridge, Milk pump system, connections to
TopBrewer, MilkSpear, Co2 Double manometer
Filter Kit
•
2 x TopBrewer Pure 50 filter, 1 x ActiveCoal 10000,
tubes, all fittings and connections, one way safety valve,
mounting diagram.
WHAT’S IN THE BOX?
ACCESSORIES
• High-Gloss Stainless tap
• Brass tap, polished
• Cobber / Patina tap
• iPad in-counter
• Tabletop
Driptray
• Driptray w/lip
• Active fan kit
* Optional recessed iPad mount
SPACE REQUIREMENTS
Faucet and driptray placement
(per filter, installed)
Plug-
type EU: Local 230V
US: 6-20R / 6-20P
EU: Local 230V
US: Local 110V
Direct Water Connection. Water pressure:
200kPa (2 Bar) - 600 kPa (6 Bar)
Filtra-
tion
TopBrewer Pure Filtration kit provides the best
water quality and easy installation
Ventila-
tion
Machine and fridge produces heat,
which needs to be able to exit as per
installation instructions.
See ventilation requirements page 5
Power
208-240V AC,
10/20 Amp 1 phase,
2,3 / 4,6 kW,
50/60hz
TopBrewer
220/110V AC, 4
Amp,
50/60hz
ICE-bank Fridge
Drain-
age 1 x Waste U-pipe -
INSTALLATION REQUIREMENTS
Water
*Bold marked items are prefered for installation

0% Bypass
Pure 50
Ventilation for air inlet 12 / in (80cm)
25(1”)
10 (3/8”)
60 (2 /” )
Water inlet
Electricity
472(18 /”)
71 (2 /)
0% Bypass
STRONG YES NO MILD CLEAN STOP ON/OFF
COFFEE ESPRESSO CAPPUCCINO COLDMILK HOTWATER
AMERICANO MACCHIATO LATTE WARMMILK STEAMING
WATER
COLDWATER
SPARKLING
WATER
670 (26 3/8")
Ideal 690 (27 3/16")
238 (9 3/8")
Shuto valve
Waste U-Pipe
430
(16 15/16")
AC Power
Hardwired or plugpoint
see specications
560 (22 1/16")
509 (201/16")
Alternative placement of shuto valve next to lters
Filters can be mounted in an adjacent cabinet
Active
Coal
10000
Pure 50
0% Bypass
30% Bypass
ICE-Bank Fridge
AC Power
220V Hardwired/Plugpoint
for machine, see spec.
30% Bypass
Pure 50
Active
Coal
10000

Connection panel
of TopBrewer
Pure
Water
50
0%
2
Pure
Water
50
30%
208-240V AC, 20 amp. (10 amp min.)
1,6 m. / 63" cord length
MAIN
POWER
Compact
3
8
7
9
1
0
12
1
0
4
Hose Connections
1. Flush Water (connected from fridge)
2. Coffee
3. Steam
4. Hot Water
5. Cold / Carbonated Water
6. Milk line (connected from faucet)
7. Steam water out (going to filter)
8. Main Water inlet
9. Steam water in (coming from filter)
10. Water Inlet (for ICE-bank)
11. Co2 connection hose
12. ICE-bank fill
13. Milk Flush Drain Line
Signal Cables
A. Milk Pump
B. Cold Water Valve
C. Sparkling Water Valve
AC
Filter
0%
5
10
Co2
Rear View
Main
Water
⅜" thread
Connection Diagram with ICE-bank Co2 Fridge
Thermostat
Max
position: 6
11
ICE-bank /
Refrigerator
MILK
6
1
B
A
C
Drain
ATTENTION
Fill ICE-Bank
before use
See Filter Diagram
13
Ver. 1.41, 05/10/14
C
S
W
M
D

Connection panel of
TopBrewer
1
0
1
0
Pure50
30%
(for main inlet)
8x8
Angle
Fitting
(optional)
8x6
Angle
Fitting
Pure50
0%
(for steamer)
2x 8x4
Straight
Fitting
Main
Water
Hose with ⅜"
female
connector
(not included)
8mm
hose
Filter Starter Kit. Connection Diagram
2 x Pure50 Filters
1 x ActiveCoal 10.000 Filter
2 x 0% filter heads with brackets
1 x 30% filter heads with bracket
3 meter 6mm hose
2,5 meter 4mm hose
1 meter 8 mm hose
1 x Y-piece (6x6x6)
1 x One-way valve &
1 x T-piece (⅜"x8x8)
2 x 8x8 Angle Fitting
2 x 8x6 Angle Fitting
2 x 8x4 Straight Fitting
2 x 6x4 Angle Fitting
3x 6x6 Angle Fitting
Lock Clips
Contents of package
Active
Coal
10.000
0%
8x6 Angle Fitting
8x8
Angle
Fitting
(optional
8mm
hose
4mm
hose
6x6
Angle
Fitting
4mm
hose
6mm
hose
6mm
hose
6x4
Angle
Fitting
One-way valve
& T-Piece
6x4
Angle
Fitting
Compact
Ver. 1.1, 26/08/14

The Anatomy of the system
ICE-Bank Fridge TopBrewer
Filtration Starter Kit

The top of the connection panel, which
you will find on the back of the Top-
Brewer, is the range of features mod-
ules that can be added to the machine
currently and in the feature. The Top-
Brewer system is clever and expanda-
ble. This manual concentrates only on
the “Milk Pump” coming from the fridge
and the sparkling and cold water valves.
A step further down is the quick-fit con-
nections for the hoses. Three of these
goes directly into the faucet, with “Flush
Water” being the exception, going from
the machine into the fridge. (see dia-
gram on page XXXXX)
Lowest on the panel is the Main “Water
In” (coming from the 30% bypass filter)
as well as two additional connections
going to a dedicated steam filter. This
to ensure a 100% filtration of the water
dedicated to the steamer, preventing
scale build.
Also here main AC Power cable.

On the top left side you have an inlet to
fill the ICE-Bank with water. This must be
done prior to powering it up! The trans-
parent tube reads the fill level.
The dial is a pressure regulator for the
inlet water, which should only be ad-
justed if the water is not flowing at a
speed, that fills the glass to the level
specified in the app.
The two Molex plugs are for Cold and
Sparkling water, plugged into the Top-
Brewer. These signal cables control the
valves inside the fridge individually.
The quick-fit connectors below are for
Main “Water In” from the AC Filter, Wa-
ter out and CO2.
The main power switch (Green) as well
as the AC power.
The recirculation switch is to remain on
always, controlling the pump that cir-
culates the cooling water that cools the
Fridge-space.

Preparing your space

CARPENTER

CARPENTER
You will need:
- Cut out template
- Bosch PDF 1200 AE Router or similar
- Clamps
Readying your tabletop


When the hole for the faucet is done,
the threaded sleeve is inserted from
the bottom, and using the accompa-
nied guide, it’s cut to length to allow for
enough thread to pass through to reach
the bracket that holds the faucet.
Use a silicone adhesive to
make a proper seal. It’s rec-
ommend also to silicone open
pours in the wood.
The sleeve is now inserted
from the top as shown and
the bracket is fitted from
below. Make sure to tighten it
properly.

Use a silicone adhesive to make a
proper seal. It’s recommend also to
silicone open pours in the wood.
Insert the drip tray so that the drain
outlet is aligned with the faucet
sleeve.

0% Bypass
Pure 50
Ventilation for air inlet 12 /in(80cm)
25(1”)
10 (3/8”)
60 (2 /” )
Water inlet
Electricity
472(18 /”)
71 (2 /)
0% Bypass
STRONG YES NO MILD CLEAN STOP ON/OFF
COFFEE ESPRESSO CAPPUCCINO COLD MILK HOT WATER
AMERICANO MACCHIATO LATTE WARM MILK STEAMING
WATER
COLD WATER
SPARKLING
WATER
670 (26 3/8")
Ideal 690 (27 3/16")
238 (9 3/8")
Shutovalve
Waste U-Pipe
430
(16 15/16")
AC Power
Hardwired or plugpoint
see specications
560 (22 1/16")Alternative placement of shutovalve next to lters
Filters can be mounted in an adjacent cabinet
Active
Coal
10000
Pure 50
0% Bypass
30% Bypass
ICE-Bank Fridge
AC Power
220V Hardwired/Plugpoint
for machine, see spec.
30% Bypass
Pure 50
Active
Coal
10000
509 (20 1/16") Total width
iPad
SPACE REQUIREMENTS

Table of contents
Popular Brewing System manuals by other brands
Curtis
Curtis GEM-120A-10 user guide

Ss Brewtech
Ss Brewtech The Brew Bucket Quick reference guide

PicoBrew
PicoBrew Z Series user manual

Blichmann Engineering
Blichmann Engineering BEPS-MLT-5BBL-SW Assembly operation maintenance

Curtis
Curtis G4GEMS63A1000 user guide

Klarstein
Klarstein Brauheld Pro 30 manual

BREWFERM
BREWFERM Malt mill with adjustable stainless steel... user guide

Hamilton Beach
Hamilton Beach The Scoop manual

Curtis
Curtis G4TP2T Service manual

Newco
Newco KB Series Installation, operation and service manual

Brew Monk
Brew Monk 057.700.70 instruction manual

Blichmann Engineering
Blichmann Engineering 7 BBL Assembly operation maintenance