Cleanliness
Freshness
First to Enjoy By...First Out!
WHY IT’S IMPORTANT
Remember, great taste is why your
customer orders iced tea. Your
customers expect to experience
great tasting, fresh brewed iced
tea! Fresh tea bags are essential to
producing quality brewed iced tea.
WHAT TO CHECK
Tea Bags produced by The Coca-Cola
Company for your fresh brewed tea are
packaged by the case. To make certain
you always serve only fresh tea bags,
pay attention to these conditions:
1. Check the date code on the case:
Each case of tea bags is stamped
with a date code indicating the
“Enjoy By” date. The date code is
on a label affixed to the box.
2. Rotate your tea bag stock. Always
use the oldest tea bags first to
maintain freshness. Remember
First to Enjoy By… First Out!
3. Avoid using tea bags that are too
old. Tea bags should be used before
“Enjoy By” date. The shelf life for
each product from the date of each
manufacturer is:
Gold Peak Black Tea = 18 months
4. Discard the tea bags from the
brew basket immediately after the
brew cycle is finished. NEVER RE-
USE TEA BAGS.
5. The maximum hold time is 6 (six)
hours. To help ensure the tea you
serve is always fresh, a brew date
sticker is available via the Coke
Catalog for use with your dispenser
urns. Place the sticker on the side
of the urn and simply write in the
date and time the tea was placed
in the urn. Contact
your Coca-Cola Sales
representative should
you want these stickers.
6. Store tea at room temperature
away from items that could
impact taste (e.g. onions).
7. Keep boxes closed when not
in use to avoid moisture getting
into the box which can cause
mold.
Brew date sticker
SLIMLINE URN DAILY CLEANING INSTRUCTIONS
1 Once a day, turn the faucet in a
counterclockwise direction and
remove the faucet from the dis-
penser. Unscrew the faucet cap
from the faucet body and disas-
semble all faucet parts.
2 Transfer these parts to a three
compartment sink for cleaning. Fill
the first sink with a soap solution
using a mild detergent, the second
sink is used for clean rinse, and the
third sink with a sanitizer solution
(75°F warm chlorine solution of at
least 50-100 ppm).
3 Use a bristle brush (CCP #18616/
BUNN #00674.0000) to thoroughly
scrub the faucet body.
4 Allow the parts to soak in a
sanitizer solution for a minimum of
ten minutes.
5 Remove the faucet parts from
the sanitizer solution and rinse
thoroughly. Allow parts to air dry
over night.
TROUBLESHOOTING
PROBLEM PROBABLE CAUSE REMEDY
Brew cycle will not start No water or no power • Make sure the water lines and
valves are open
• Make sure the brewer is plugged
in, or check the circuit breaker
• Make sure the ON/OFF switch is working
• Could be front enable/on-off switch
Weak or bitter tasting beverage Missing sprayhead or brew funnel tip • Replace sprayhead or brew funnel
Dirty sprayhead or brew basket • Clean and sanitize the sprayhead and
brew basket
Dirty dispenser faucet • If dirty dispenser faucet: disassemble,
clean and sanitize the dispenser faucet
Your customers
associate a
clean, tidy area
with quality.
WHY IT’S IMPORTANT
Keeping your dispensing system clean
helps keep it operating properly. A clean,
sanitary appearance communicates quality
to your customers.
WHAT TO DO
It’s easy to keep your dispensing area clean
and orderly when you follow this regular
schedule of activities.
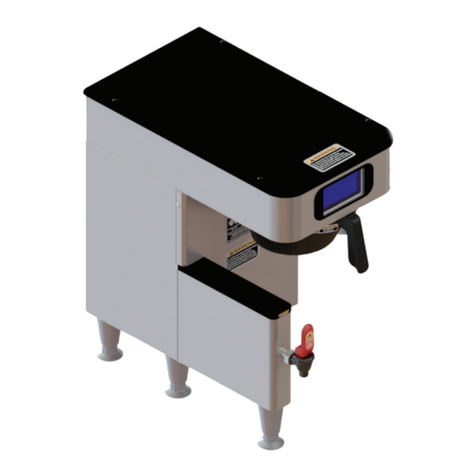
BREWER
CLEANING INSTRUCTIONS
1. Place the ON/OFF switch in the “OFF” position.
2. Wipe the exterior of the machine daily.
3. Remove the sprayhead daily.
• Wash in hot water and dish detergent, rinse, sanitize,
and air-dry.
• Ensure sprayhead holes are not blocked.
• Wipe the sprayhead area of the brewer.
4. Thoroughly clean the brew basket after each use.
• The funnel tip and screen must be free of any tea
particles or residue.
• Wash with dish detergent, rinse, sanitize, and air-dry.
WEEKLY CLEANING
1 Once a week, fill the dispenser
with a chlorine solution (75°F
warm chlorine solution of at least
50-100 ppm).
2 Draw a small amount (2 oz.) of
presoak through the faucet mak-
ing contact with the faucet compo-
nents. Allow the dispenser to soak
over night. The next morning, per-
form the daily cleaning procedures
on the faucet and dispenser.
6 Thoroughly clean the entire
inside surface of the dispenser
using a large plastic bristle brush
(CCP #28884) and the faucet shank
using a small brush, (CCP #18616/
BUNN #00674.0000) mild detergent
and water solution. Thoroughly
rinse the dispenser with clean water.
7 Using a clean plastic pail, pre-
pare 2.5 gallons 100 ppm sanitizing
solution in lukewarm water (85
– 105° F), using 1 pack of Kay-5™
sanitizer (CCP #25823). Make sure
all of the Kay-5™ crystals have dis-
solved completely.
8 Pour a small amount of sanitizer
solution into the dispenser. Use a
bristle brush, (CCP #18616/BUNN
#00674.0000) to clean all the way
through the faucet shank. Repeat
3 times.
9 Thoroughly rinse the dispenser
with clean water. Allow the dis-
penser to air dry over night
10 Assemble the faucet compo-
nents and attach the faucet to the
dispenser turning clockwise.
6 MONTH CLEANING
1 It is recommended to replace the
faucet seat cup every 6 months (CCP
#118348/BUNN #00600.0000).
2 Discard the old seat cup and
reassemble. Alternatively, the
faucet Assembly, (CCP #122334/
BUNN #03260.0003), can be
ordered for replacement.
