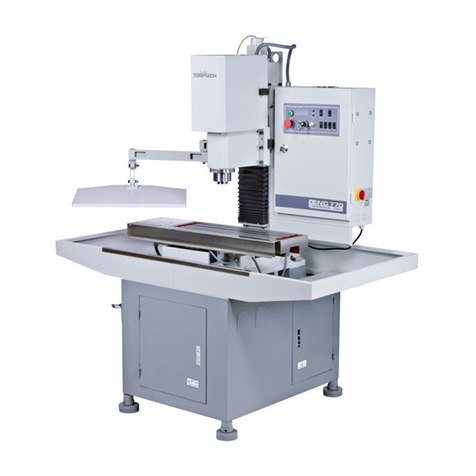
Tormach PCNC1100 User manual

Cold Metals Lab
V1.0 11/7/2017
Machine Purpose: CNC machine used for precision cutting, drilling & forming
Safety: Must wear safety glasses while operating machine. Keep. Beware of objects that dangle
and could get caught in cutting tool. Beware of flying metal chips. KEEP DOORS CLOSED WHILE
OPERATING.
Materials: Metals, Plastics, Synthetic
Machine Specs: 18”x9” bed size, 1.5 hp motor, .5” tooling, 110 IPM, 5100 rpm spindle
Tooling: Located in red tool check next to machine, lista cabinets on wall in front of machine
Accessories: Smartcool Coolant system, Floor/Air/Mist Coolant, 10 ATC, TTS tool setter, 4” vice with soft
jaw capability, sacrificial mounting plates
CAM Post: tormach.cps –Tormach Path Pilot
Interface software: Path Pilot
Instruction Required: 2 Class Checkout, Group Class Followed by Individual Instruction
Tormach CNC Mill
PCNC1100

Cold Metals Lab
V1.0 11/7/2017
TORMACH MACHINE INSTRUCTIONS
Start Up Procedure
1. Make sure estop (big red button) is depressed
2. Turn on Mains power
3. After software loads, release e stop button
4. Press green button (should hear a cachunk)
5. Click reset on screen (should be flashing)
Machine Reference Procedure
1. Make sure there is no tooling in the way of the bed and spindle door is closed.
2. On Screen Click “REF Z”
3. On Screen Click “REF X”
4. On Screen Click “REF Y”.
Work Offset Set up With Tool Setter
1. Physical Fixture your work surface on the
bed, vice or sacrificial surface
2. Position Tool Setter on Zero Plane of work
surface, Plug in tool setter
3. Double check Tool setter is stable on work
surface
4. Double check tool setter is fully connected
by depressing top and making sure the red
light (both on screen and on the unit ignites)
5. Navigate to Offsets > Work
6. Make Sure Spindle is Empty, Collet is closed
and Tool 0 listed as in spindle
7. Press Move & Set Work Offset. Now you Z
offset has been set relative to your zero
plane
8. Insert Heimer probe into the spindle.
9. Enter "50" into the tool in spindle box
10. Make sure step increments are set to .0001
11. Using the keyboard/jog controller Jog/dial the probe tip near your x zero line.
12. Slowly move the probe until the dial reads both 0 at the top dial and bottom smaller dial.
13. Click Zero X to zero your X position
14. Repeat steps 11-13 for your Y zero position
15. Now your work is set in the X/Y/Z

Cold Metals Lab
V1.0 11/7/2017
Loading Tools into the ATC - Skip if only using 1 tool
1. Navigate to ATC Menu
2. Delete all tools in ATC menu
3. Physically Remove any tools from spindle
4. Make sure Tool in Spindle is listed as 0
5. Click Go To Load position
6. Physically Insert Tool into ATC Fork
7. Assign tool numbers as tools are placed in ATC - Click insert
8. Tray Rev/Fwd to turn ATC and load up to 10 tools, remember to click insert and assign tool numbers as you
load
9. Click Retract to Move ATC to home position and clear the spindle
10. Position Tool Setter on Zero Plane & Plug into control box
11. Test Tool Setter Connection by depressing top and making the red light both physically and digitally comes
on.
12. Once Tool Setter is tested and in position under spindle center click touch off entire tray. This will grab all
tools loaded in order and touch them off to the setter.

Cold Metals Lab
V1.0 11/7/2017
Tool Offset Setup Option 2 - Single Tool Program/Manual Tool Change
1. Load tool into spindle using the lock/release buttons on the spindle head
2. Enter tool number in Current tool window in PathPilot
3. Connect tool setter, making sure secure connection (step 11^) place on zero plane
4. Setting Tool Length
a. Tool Setter: Plug in the tool setter, place below the spindle
i. Machine Offset: With spindle empty and collet locked, go to WorkOffset Screen -> Move and
set work offset
ii. Tool Length Offset: Tool in spindle, Offsets-> Tool window press "Move & Tool offset" to use
the tool setter
b. Manually Enter Length: Measure the length from the face of the holder to the tip of the tool using the
granite block, enter length in tool offset sheet for tool number
c. Manually Touch Off: Using a touch off block/shim/gauge block, use the jog/increment wheel to touch
off with tool in spindle. Enter the block/shim/gauge thickness in the window and click touch z

Cold Metals Lab
V1.0 11/7/2017
Loading Your Program
1. Put usb drive into slot on left side of screen
2. Goto File tab in path pilot
3. Click on “USB” on the desktop screen (the Center of the screen).
4. Find your file.
5. Click "copy from USB"
6. Find your G-code in the left side of the screen
7. Click “Load G-Code” (on the top of the screen).
8. Your code and 3D model of your part should automatically load in Main Tab. Review accordingly.
9. Confirm the tools you are using are noted appropriately in the G-Code. (Scroll until you see a “T_” for
example “T5” and your tool is in the “T5” slot.) If the G-Code is noted as the incorrect tool, adjust in the
code accordingly.
10. Confirm the Heimer indicator is no longer in the machine.
11. Using the sliders (on the bottom, left of the desktop screen), adjust the “MAXVEL” from 100% to 20%. This
allows the process to slow down enough for you to clearly see it.
12. Make sure doors are closed.
13. Click “Cycle Start”. (on the left side of the screen).
14. Use "M01 break" if you want to automatically pause the run cycle between tool changes. If selected you will
need to manually click "cycle start" before each tool change.

Cold Metals Lab
V1.0 11/7/2017

Cold Metals Lab
V1.0 11/7/2017
Turn Off Procedure:
1. Unload your tools from the tool tray
2. Make sure no tools are in the spindle.
3. Press E-stop button
4. Click Exit in PathPilot
5. Click ok to power off
6. Turn off Mains Power

Cold Metals Lab
V1.0 11/7/2017
Main Controls
Cycle Start: Starts any code loaded on the main screen
Single Block: Runs your code line by line
Feed Hold: Stops movement in the XYZ while a program is running but does not stop the spindle, and
pauses location in the code. Click cycle start to resume.
Coolant: Turns flood coolant on and off. Typing M08 into the MDI will turn on flood coolant. Typing M07
will turn on the Mist (or air if knob is adjusted)
M01 Break: Pauses a running program between tool changes. You will need to click cycle start after
pauses.
Stop: Stops the program and movement entirely. You will loose your position in the code if you need to
restart.
Reset: Used to reset digital communication after a power off
Estop Button (physical): Kills all power and air to the machine. You will lose all position data and have to
restart from beginning of tool path.

Cold Metals Lab
V1.0 11/7/2017
Zero X/Y/Z/A: used to zero the current G home to the location of the offset point. A is not currently used
on our machine (for turning)
Ref X/Y/Z/A: Sends the bed and spindle to their home positions. Used when referencing after powering
down or E stopping.
Work #: Tool Tip position relative to work offset position.
DTG #: Distance to go to end of current movement from tool path or MDI entry.
Step (.0001, .0010, .0100, .1000): Step size increment used with incremental movement. Click to change.
Recommended to leave on .0001
Slider %: Percent of max jog speed when using continuous movement.
Job Con/Step: Changes keyboard arrow movement type. Increment: movement length based on step
per click, 1 arrow press=movement of step distance
Rev/Stop/Fwd: Turns the spindle on CCW/Stops/CW
#RPM: spindle speed you want the spindle to run manually
Spindle Hi/Low: Current physical set up (our machine is default to HI)
Feedrate #: Inchs per minute for manual gcode movement
Go to g30: Goes to the work offset home position (x:0, y:0, z:0) specific to tool length currently
programmed in.
T# (bottom right corner) - Identifies the tool currently in the spindle, also used to fetch and store tools
•Tool 0 is an empty spindle
•If you change from a 0 to a number in the ATC it will fetch that tool
•If you change from a 0 to a number not in the ATC it will think it's holding that tool
•If you change from a tool number stored in the ATC to a number stored in the ATC it will put away
the current tool in the ATC and Fetch the new tool number entered. Entering zero will put away
the current tool and leave an empty spindle.
•If you change from a tool number stored in the ATC to a number not stored in the ATC it will put
away the current tool in the ATC and allow you to load the new tool

Cold Metals Lab
V1.0 11/7/2017
ATC Menu
Insert Number Box - Assigning a tool being inserted into the 3 o'clock position in the ATC
Delete All - Deletes all saved saved tools in the digital ATC (careful as path pilot no longer knows where
tools are stored
Delete - Deletes just the tool in the 3 o'clock position from the digital ATC, or current tool in spindle
from software.
Tray Rev/Tray FWD - Turns the ATC clockwise/CCW so you can load the forks.
Go to tray load position - Moves the spindle head out of way and ATC under the spindle, opening the
ATC gate.
Retract - Moves the spindle head up, and ATC to the home position, Closing the ATC Gate
Draw Bar On/Off - Opens the drawbar. (careful if a tool is loaded it will drop)
Blast- Shoots air down the collet
Ref Tool Tray - References the ATC turned position upon initiation after start up
SET TC Pos - Used for calibrating the ATC rotation position
--/++ - Used in calibration of the ATC rotation position

Cold Metals Lab
V1.0 11/7/2017
Remove/Number Box - Used to delete ATC stored tool number entered, The ATC will fetch tool entered
and remove digital home from carousel, you must remove tool from spindle/machine manually
following this button.
ATC Rev/ATC FWD - Will fetch the next tool stored in the spindle in fwd or rev
Touch off Entire Tray - used in conjunction with the tool setter, will cycle through the entire tray to
measure each tools
Store Current Tool - Will use the ATC to store the tool currently in the spindle to its home in the ATC
T# (bottom right corner) - Identifies the tool currently in the spindle, also used to fetch and store tools
•Tool 0 is an empty spindle
•If you change from a 0 to a number in the ATC it will fetch that tool
•If you change from a 0 to a number not in the ATC it will think it's holding that tool
•If you change from a tool number stored in the ATC to a number stored in the ATC it will put away
the current tool in the ATC and Fetch the new tool number entered. Entering zero will put away
the current tool and leave an empty spindle.
•If you change from a tool number stored in the ATC to a number not stored in the ATC it will put
away the current tool in the ATC and allow you to load the new tool
Other Tormach Control System manuals
Popular Control System manuals by other brands
Kemper
Kemper KHS Mini Control System MASTER 2.0 Installation and operating instructions
Terra Universal
Terra Universal IsoDry Supplemental manual
Scarecrow
Scarecrow B.I.R.D. SYSTEM User instruction manual

Salus
Salus CO10RF installation manual
Cardin Elettronica
Cardin Elettronica CDR Series manual
heat-timer
heat-timer DiGi-SPAN Elite Series Installation and operation instruction

Sony
Sony Dream Machine ICF-C900HS operating instructions
Honeywell
Honeywell Experion LX Client guide
Entity
Entity EN0546 instruction manual
Kemper
Kemper KHS MASTER 2.1 I SLAVE Installation and operating instructions

SILENT KNIGHT
SILENT KNIGHT INTELLIKNIGHT 5820XL Sales guide
Ltech
Ltech Artnet-DMX-8 manual
