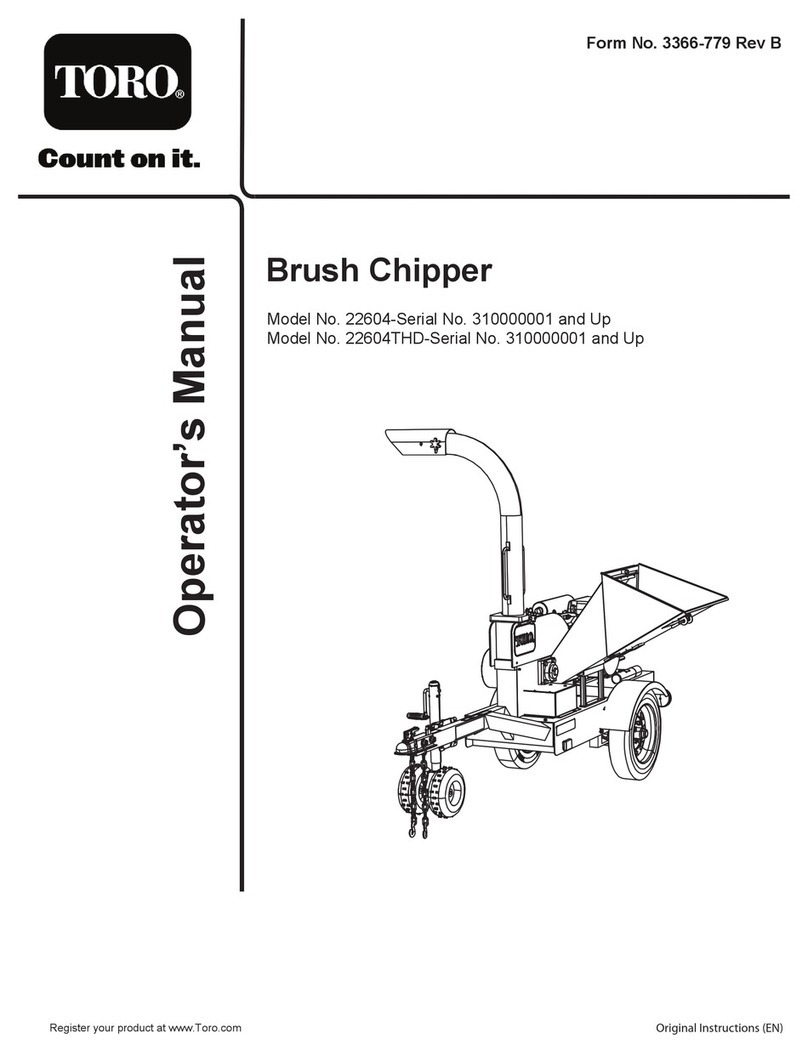
Toro BC-25 User manual

FormNo.3373-142RevB
BC-25BrushChipper
ModelNo.22614—SerialNo.311000001andUp
ModelNo.22614G—SerialNo.311000001andUp
ModelNo.32614—SerialNo.312000001andUp
G017901
Registeratwww.Toro.com.
OriginalInstructions(EN)*3373-142*B

WARNING
CALIFORNIA
Proposition65Warning
Theengineexhaustfromthisproduct
containschemicalsknowntotheStateof
Californiatocausecancer,birthdefects,
orotherreproductiveharm.
DANGER
Watchforoverheadpowerlinesintheworkarea.
Shockorexplosionmayoccurifyoucomeinto
contactwiththem.
ThissparkignitionsystemcomplieswithCanadianICES-002.
Becauseinsomeareastherearelocal,state,orfederal
regulationsrequiringthatasparkarresterbeusedonthe
engineofthismachine,asparkarresterisavailableas
anoption.Ifyourequireasparkarrestor,contactyour
AuthorizedToroServiceDealer.
GenuineTorosparkarrestersareapprovedbytheUSDA
ForestryService.
Important:ItisaviolationofCaliforniaPublic
ResourceCodeSection4442touseoroperatetheengine
onanyforest-covered,brush-covered,orgrass-covered
landwithoutasparkarrestermufermaintainedin
workingorder,ortheengineconstricted,equipped,and
maintainedforthepreventionofre.Otherstatesor
federalareasmayhavesimilarlaws.
Theenclosed
Engine Owner's Man ual
issuppliedfor
informationregardingtheUSEnvironmentalProtection
Agency(EPA)andtheCaliforniaEmissionControl
Regulationofemissionsystems,maintenance,and
warranty.Replacementsmaybeorderedthroughthe
enginemanufacturer.
Introduction
Thisbrushchipperisdesignedtochipbranches,vines,leaves,
andsmalltreelimbsupto6in.(15.24cm)indiameter.Itis
notintendedtochiprocks,wire,metal,oranymaterialsother
thanwood.Thebrushchippercanbetowedbehindavehicle
equippedwithanappropriateballhitch.
Readthisinformationcarefullytolearnhowtooperateand
maintainyourproductproperlyandtoavoidinjuryand
productdamage.Youareresponsibleforoperatingthe
productproperlyandsafely.
YoumaycontactTorodirectlyatwww .Toro.comforproduct
andaccessoryinformation,helpndingadealer,ortoregister
yourproduct.
Wheneveryouneedservice,genuineToroparts,oradditional
information,contactanAuthorizedServiceDealerorToro
CustomerServiceandhavethemodelandserialnumbersof
yourproductready.Writethenumbersinthespaceprovided.
ModelNo.
SerialNo.
Thismanualidentiespotentialhazardsandhassafety
messagesidentiedbythesafetyalertsymbol(Figure1),
whichsignalsahazardthatmaycauseseriousinjuryordeath
ifyoudonotfollowtherecommendedprecautions.
Figure1
1.Safetyalertsymbol
Thismanualuses2otherwordstohighlightinformation.
Importantcallsattentiontospecialmechanicalinformation
andNoteemphasizesgeneralinformationworthyofspecial
attention.
TireInformation
TheDOTtireidenticationnumber(TIN)isbrandedinto
thesidewallofallstreetlegaltires(Figure2).
Figure2
©2012—TheToro®Company
8111LyndaleAvenueSouth
Bloomington,MN554202
Contactusatwww.Toro.com.
PrintedintheUSA.
AllRightsReserved

Contents
Introduction..................................................................2
Safety...........................................................................3
SafeOperatingPractices...........................................3
SafetyandInstructionalDecals.................................6
ProductOverview..........................................................8
Controls................................................................8
Specications.........................................................9
Operation.....................................................................9
Towing...................................................................9
TiresandWheels....................................................10
BeforeyouStart.....................................................10
AddingFuel...........................................................11
HourMeter...........................................................11
CheckingtheEngineOilLevel.................................12
ChangingtheChutePosition....................................12
ChangingtheDeectorPosition...............................12
StartingandStoppingtheEngine..............................13
UsingtheBrushChipper.........................................13
Maintenance.................................................................15
RecommendedMaintenanceSchedule(s)......................15
Lubrication...............................................................15
LubricatetheCutterWheelBearings.........................15
LubricatetheWheelBearings...................................16
EngineMaintenance..................................................16
ServicingtheAirCleaner.........................................16
ServicingtheEngineOil..........................................17
ServicingtheSparkPlug..........................................18
FuelSystemMaintenance...........................................19
ChangingtheFuelFilter..........................................19
BeltMaintenance......................................................19
AdjustingtheDriveBeltTension..............................19
ReplacingtheDriveBelt..........................................20
CutterMaintenance....................................................20
InspectingtheCutterBlock......................................20
ReplacingtheCutterBlades.....................................20
ChargingtheBattery...................................................21
............................................................................21
InspectingtheTires....................................................22
............................................................................22
Storage........................................................................22
............................................................................22
Troubleshooting...........................................................23
Safety
Improperuseormaintenancebytheoperatororowner
canresultininjury.Toreducethepotentialforinjury,
complywiththesesafetyinstructionsandalways
payattentiontothesafetyalertsymbol,which
means:
Caution
,
W ar ning
,or
Danger
—personalsafety
instruction.Failuretocomplywiththeinstructionmay
resultinpersonalinjuryordeath.
SafeOperatingPractices
Thisproductiscapableofamputatinghandsandfeet.Always
followallsafetyinstructionstoavoidseriousinjuryordeath.
WARNING
Engineexhaustcontainscarbonmonoxide,an
odorless,deadlypoisonthatcankillyou.
Donotruntheengineindoorsorinanenclosed
area.
Ifyoubelievethatyourvehicle*hasadefectwhichcould
causeacrashorcouldcauseinjuryordeath,youshould
immediatelyinformtheNationalHighwayTrafcSafety
Administration(NHTSA)inadditiontonotifyingTheToro
Company.
IfNHTSAreceivessimilarcomplaints,itmayopenan
investigation,andifitndsthatasafetydefectexistsina
groupofvehicles*,itmayorderarecallandremedycampaign.
However,NHTSAcannotbecomeinvolvedinindividual
problemsbetweenyou,yourdealer,orTheToroCompany.
TocontactNHTSA,youmaycalltheVehicleSafetyHotline
toll-freeat1–888–327–4236(TTY:1–800–424–9153);go
tohttp://www.safercar.gov;orwriteto:Administrator,
NHTSA,400SeventhStreet,SW .,Washington,DC20590.
Youcanalsoobtainotherinformationaboutmotorvehicle
safetyfromhttp://www.safercar.gov.
*Brushchippertrailer
Training
•ReadtheOperator'sManualandothertrainingmaterial.If
theoperator(s)ormechanic(s)cannotreadEnglish,itis
theowner'sresponsibilitytoexplainthismaterialtothem.
•Becomefamiliarwiththesafeoperationoftheequipment,
operatorcontrols,andsafetysigns.
•Alloperatorsandmechanicsshouldbetrained.The
ownerisresponsiblefortrainingtheusers.
•Neverletchildrenoruntrainedpeopleoperateorservice
theequipment.Localregulationsmayrestricttheageof
theoperator.
•Theowner/usercanpreventandisresponsiblefor
accidentsorinjuriesoccurringtohimselforherself,other
peopleorproperty.
3

Towing
Checkwithyourlocalcountyorstatesafetytowing
regulations,inadditiontomeetingDepartmentof
Transportation(DOT)SafetyTowingRegulations,before
towingthemachine.
•Inordertoreducethepossibilityofanaccidentwhile
transportingthemachineonpublicroads,makesure
thetowingvehicleismechanicallysoundandingood
operatingcondition.
•Shutdowntheenginebeforetransportingthemachine.
•Inspectthehitchandcouplingforwear.NEVERtowthe
machinewithdefectivehitches,couplings,chains,etc.
•Checkthetireairpressureonbothofthetowingvehicle
andthemachine.Thechippertiresshouldbeinatedto
60psi(410kpa)cold.
•Checkthetiretreadforwear.
•Properlyattachthesafetychainstothetowingvehicle.
•Ensurethatthetowingvehicle’sdirectional,backup,and
brakelightsareworkingproperly.
•Avoidsuddenstopsandstarts.Thiscancauseskidding,
orjackkning.Smooth,gradualstartsandstopswill
improvetowing.
•Avoidsharpturnstopreventrolling.Towonlywitha
vehiclethathasahitchdesignedfortowing.Donot
attachtowedequipmentexceptatthehitchpoint.
Beforetowingchecktomakecertainyourmachineiscorrectly
andsecurelyattachedtothetowingvehicle.
•Ensurethattheballhitchyouareusingisthepropersize
forthehitchcoupleronthemachine.
•Ensurethatthesafetychainsareproperlyhookedtothe
vehicle,leavingenoughslackforturning.
•EnsurethatthejackstandissecuredintheUpposition.
•Donottowthemachinefasterthan45mph(75km/h).
•Usecautionwhenbackingup;useaspotteroutsidethe
vehicletoguideyou.
•Donotallowanyonetositorrideontheunit.
•Donotcarryanycargoorwoodontheunitwhentowing.
•Disconnecttheunitfromthetowvehiclebeforeusingit.
•Placechockblocksunderneaththewheeltoprevent
rollingwhiletheunitisparked.
Preparation
Becomefamiliarwiththesafeoperationoftheequipment,
operatorcontrols,andsafetysigns.
•Evaluatetheterraintodeterminewhataccessoriesand
attachmentsareneededtoproperlyandsafelyperform
thejob.Onlyuseaccessoriesandattachmentsapproved
bythemanufacturer.
•Wearappropriateclothingincludinghardhat,faceshield,
safetyglasses,longpants,safetyshoes,andhearing
protection.Longhair,looseclothingorjewelrymayget
tangledinmovingparts.Weartightttinggloveswithout
drawstringsorloosecuffs.
•Useextracarewhenhandlinggasolineandotherfuels.
Theyareammableandvaporsareexplosive.
–Useonlyanapprovedcontainer
–Neverremovethegascaporaddfuelwiththeengine
running.Allowtheenginetocoolbeforerefueling.
Donotsmoke.
–Neverrefuelordrainthemachineindoors.
–Replacethegasolinecapandtightenitsecurely.
–Keepthecontainernozzleincontactwiththetank
duringlling.
–Ifgasolineisspilled,wipeitofftheengineand
equipment.
•Ensurethatthemachineisonalevelsurfacebefore
operating.
•Alwaysoperatethemachinefromthesideofthehopper.
•Blockthewheelsofthemachinetopreventunintended
movement.
Operation
•Beforestartingthismachine,reviewthe
Safety(page3)section.Failuretofollowthese
rulesmayresultinseriousinjurytotheoperatoror
bystanders.
•Neverrunanengineinanenclosedarea.
•Onlyoperatethemachineingoodlight,keepingaway
fromholesandhiddenhazards.
•Onlystarttheenginefromtheoperator'sposition.
•Donotpassorstandonthedischargesideofthemachine
whentheengineisrunningorwhentheywheelis
turning.
•Ensurethatalltheguardsandshieldsaresecurelyinplace
beforeoperating.
•Ensurethatallinterlocksareattached,adjustedproperly,
andfunctioningproperly.
•Donotchangetheenginegovernorsettingoroverspeed
theengine.
•Stoponlevelground,andshutofftheenginebefore
leavingtheoperator'spositionforanyreason.
•Chockthemachineorkeepitattachedtothetowing
vehiclewhennotinusetopreventtheunitfromrolling.
•Keephandsandfeetawayfromanymovingparts.
•Nevercarrypassengers,andkeeppetsandbystanders
away.
•Donotoperatethemachineundertheinuenceof
alcoholordrugs.
4

•Ensurethattheareaisclearofotherpeoplebefore
operatingthemachine.Stopthemachineifanyoneenters
thearea.
•Neverleavearunningmachineunattended.Alwaysstop
theengineandverifythechipperywheelhasstopped
rotating.
•Donottouchpartswhichmaybehotfromoperation.
Allowthemtocoolbeforeattemptingtomaintain,adjust,
orservicethemachine.
•Lightningcancausesevereinjuryordeath.Iflightning
isseenorthunderisheardinthearea,donotoperate
themachine;seekshelter.
•Donotallowanyonetooperatethismachinewithout
properinstruction.
•Keepareaofdischargeclearofpeople,animals,buildings,
glass,oranythingelsethatwillobstructcleardischarge,
causeinjury,ordamage.Windcanalsochangedischarge
direction.Ifitbecomesnecessarytopushmaterialinto
thehopper,useasmalldiameterwoodstick,notyour
hands.
•Donotusethemachinewiththehopperordischarge
chuteremoved.
•Cleartheareaofobjectssuchaswire,rope,etc.Inserting
theseobjectsintothehoppercoulddamagetheywheel
and/orcauseinjury.
•Keepyourfaceandbodyawayfromthehoppertoavoid
accidentalbouncebackofanymaterial.
•Ifyouhearorseematerialbeingkickedbackagainstthe
rubberap,shutthefeederchutedooruntilthematerial
haspassed.
•Whenfeedingmaterialintothehopper,beextremely
carefulthatpiecesofmetal,rocks,orotherforeign
objectsarenotincluded.Personalinjuryordamageto
themachinecouldresult.
•Shutofftheengineandwaitforthemovingpartstocome
toacompletestopbeforeremovingprocessedmaterial,
leaves,ordebrisfromthemachine.
•Removethekey,disconnectthesparkplugwiresandkeep
thewireawayfromthesparkplugtopreventaccidental
startingwhileadjustingthemachine.
•Ifthecuttingmechanismstrikesaforeignobjectorif
yourmachineshouldstartmakinganunusualnoiseor
vibration,stoptheengineandwaitveminutesforall
movingpartstocometoacompletestopandcool.
Vibrationisgenerallyawarningoftrouble.Disconnect
thesparkplugwiresandinspectforcloggingordamage.
Cleanandrepairand/orreplacedamagedparts.
•Donottouchpartsthatmaybehotfromoperation.
Allowthemtocoolbeforeattemptingtomaintain,adjust,
orservicethemachine.
•Nevermovethismachinewhiletheengineisrunning.
•Beforeeveryuse:
–Inspectthecoupler,ballandhitch.
–Ensurethatalllightsarefunctioningproperly.
–Ensurethatthetiresareproperlyinatedas
recommended.
–Ensurethatthelugnutsaretightandtorqued
properly.
–Ensurethatthemachineisproperlysecured.
MaintenanceandStorage
•Stoptheengine.Waitforallmovementtostopbefore
adjusting,cleaning,orrepairing.
•Cleandebrisfromthemufersandenginetohelpprevent
res.Cleanupanyoilorfuelspillage.
•Lettheenginecoolbeforestoring.
•Donotstorefuelnearamesordrainindoors.
•Parkthemachineonlevelground.Neverallowuntrained
personneltoservicethemachine.
•Removethesparkplugwirebeforemakinganyrepairs.
•Keephandsandfeetawayfrommovingparts.Ifpossible,
donotmakeadjustmentswiththeenginerunning.
•Keepallpartsingoodworkingconditionandallhardware
tightened.Replaceallwornordamageddecals.
•Keepallnuts,bolts,screws,hydraulicttings,andhose
clampssecurelytightened.Keepequipmentingood
condition.
•Donottamperwithsafetydevices.
•Useextracarewhenhandlinggasolineandotherfuels.
Theyareammableandvaporsareexplosive.
–Useonlyanapprovedcontainer.
–Neverremovethegascaporaddfuelwhenthe
engineisrunning.Allowtheenginetocoolbefore
refueling.Donotsmoke.
–Neverrefuelthemachineindoors.
–Neverstorethemachineorfuelcontainerinside
wherethereisanopename,suchasnearawater
heaterorfurnace.
–Neverllacontainerwhileitisinsideavehicle,trunk,
pick-upbed,oranysurfaceotherthantheground.
–Keepcontainernozzleincontactwiththetankduring
lling.
•Stopandinspectthemachineifyoustrikeanobject.
Makeanynecessaryrepairsbeforerestarting.
•UseonlygenuineTororeplacementpartstoensurethat
theoriginalstandardsaremaintained.
5

SafetyandInstructionalDecals
Safetydecalsandinstructionsareeasilyvisibletotheoperatorandarelocatednearanyareaofpotential
danger.Replaceanydecalthatisdamagedorlost.
117–2718
119-4696
1.Warning—donotexceed45mph(72kmh)when
transportingthemachine.
119-4720
1.Cutting/dismembermenthazardofhand;thrownobject
hazard,face—stoptheengine,removethekeyandwaitfor
allmovingpartstostopbeforeopeningtheguard.
119-4698
1.Warning—readtheOperator'sManual.
2.Warning—readtheOperator'sManual,donotoperatethis
machineunlessyouaretrained.
3.Thrownobjecthazard,face—weareyeprotection.
4.Thrownobjecthazard—keepbystandersasafedistance
fromthemachine.
5.Cutting/dismembermenthazardofhand,blade—stayaway
frommovingparts,keepallguardsandshieldsinplace.
119-4699
1.Warning—donotoperatewearinggloveswithloose
gauntlets,usegloveswithoutloosematerial.
2.Warning—donotentanglebodywithmaterialwhenusing
machine.
3.Cutting/dismembermenthazardarm—donotplacearmin
hopper;stayawayfrommovingparts,keepallguardsand
shieldsinplace.
4.Thrownobjecthazard,faceandbody—donotletloose
materialtoescapefromhopper,putshroudinplace.
117-1754
1.Rotationaldirectionandspinindicator
6

117–4979
1.Rotatingbelt—Keepguardinplace
120-3738
1.Whenchippingbrancheswithwidthsof4to6inches,cut
thebranchestolengthsof36inchesorlesstoprevent
cloggingofthechipper.
7

ProductOverview
1
2
3
45
67
8
9
10 11 12
13
14
15
16
17
18
G017902
Figure3
1.Safetychains10.Choke
2.Coupler11.Throttle
3.Jackstand12.Airlter
4.Deectorlockingknob13.Keyswitch
5.Deector14.Fuellevelgauge
6.Chutelockingpin15.Fuelcap
7.Chutelockingknob16.Fuellter
8.Hopper17.Battery
9.Dischargechute18.Flywheelbearing
Controls
Becomefamiliarwithallthecontrolsbeforeyoustartthe
engineandoperatethemachine.
HopperLatch
Thehopper,mountedonthesideofthemachine,swings
downformachineoperation.Therevolvingbladesmounted
onaywheelbehindthehopperturnbranchesfedintothe
hopperintochips.Thechippercanchipbranchesandvines
ranginginsizeupto6inches(15cm)indiameterandup
to3feet(1meter)inlength.
Toreleasethehopperorhopperlatch(Figure4),pullon
thehandleandrotateitupordowntoengagethelatchpin
behindthestop.
Pullhopperdowntoopen.
G016603
Figure4
1.Hopperlatch
8

Specications
Note:Specicationsanddesignaresubjecttochange
withoutnotice.
HopperOpening6inches(15cm)maximum
diameter
Length111inches(282cm)
Width35inches(89cm)
Height81inches(206cm)
Weight1056lbs(478Kg)
EngineKohler725cc,V-Twin,gas
TirePressure60psi(413.5kPa)
FuelT ankCapacity5.5Gal(20.8L)
Operation
Note:Determinetheleftandrightsidesofthemachine
fromthenormaloperatingposition.
Important:Beforeoperating,checkthefuelandoil
level,andremovedebrisfromthemachine.Ensurethat
theareaisclearofpeople.
Towing
Donottowover45mph(72km/h)
1.Raisehopperandlockintotheupposition.Rotatethe
chutetowardtherearofthemachine,lockinposition
withthechutelockingpinandtightenchutelocking
knob(Figure3).
2.Crankthehandleoftheliftjacktoalignthecoupler
withtheballofthetowvehicle.
3.Removethelockingpinfromthelever,squeezethe
latchlockandlifttheleveruptoopenthecoupler
(Figure5).
34
G016604
Figure5
1.Tongue4.Coupler
2.Leverinlockedposition5.Safetychain
3.Lockingpin
4.AttachcouplertoaclassIorhigher2inch(50.8mm)
ballonatowingvehicleandlatchsecurely.
••Ifcouplerdoesnottovertheball,turn
adjustmentnutoneturncounter-clockwise.
••Ifcouplerhitchistoolooseontheball,turn
adjustmentnutoneturnclockwise.
WARNING
Failuretoproperlyengagethehitchballin
thecouplerballsocketandsecurelylockthe
couplerlatchmechanismcancausetheunitto
becomedetachedfromthetowvehiclewhile
traveling,whichmaycauseseriousinjuryand
propertydamage.
9

5.Installthelockingpintosecurethelever(Figure5).
6.Crossor“X”thesafetychainsandattachthemtothe
holesonthehitch.
7.Plugtaillightwireharnessconnectortothetow
vehicleconnector.Checktomakesurethebrakelights
illuminateproperlywiththebrakepedalappliedand
thetaillightsashwhentheturningsignalsareuse.
8.Raisejackstandsocasterwheelsarefreeoftheground,
pullthereleasepinandrotatewheelsrearwardandlock
inthehorizontalposition(Figure6).
G016605
Figure6
1.Releasepin2.Jackstand
TiresandWheels
Themostcommoncauseoftiretroubleisunder-ination.It
isimportantthatyoumaintainfullairpressure.
Inatemainaxletiresto60psi(410kpa)
Checkthetorqueofthewheellugnutsinitiallyandafterthe
rst10hoursofoperation.
Torquewheellugnutsto80-90ft.-lbs(108-122Nm)
BeforeyouStart
•Reviewallthemachine’ssafetydecals.
•Useahard-hat,hearingprotection,tightttinggloves
withoutdrawstringsorloosecuffs,andeyeprotection.
Ameshvisoralonedoesnotprovidesufcienteye
protection;supplementwithprotectiveglasses.
•Ensurethatyouarefamiliarwithsafetyregulationsand
shutdownproceduresdescribedinthisunit’sOperator’s
ManualandEngineOwner’sManual.
•Ensurethatallguardsareinplaceandingoodcondition.
•Ensurethatthebladesareinplaceandingoodcondition.
•Ensurethattheworkareasandbladesarefreefrom
metallicobjectssuchaswire,nails,etc.thatcouldbe
thrownoutandinjurepersonsinthevicinityanddamage
theequipment.
•Ensurethateveryone,includingchildrenandanimals,
maintainadistanceofatleast50feet(15m)fromthe
machine.Debriscanbethrownoutandinjurepeople
andanimals.
•Disconnecttheunitfromthetowvehicle,positioniton
alevellocationandblockthewheelsfrontandbackto
preventitfrommoving.
•Checkthefuelandoilleveloftheengine.
10

AddingFuel
Useunleadedgasoline(87pumpoctaneminimum).Leaded,
regulargasolinemaybeusedifunleadedisnotavailable.
DANGER
Incertainconditions,gasolineisextremely
ammableandhighlyexplosive.Areorexplosion
fromgasolinecanburnyouandothersandcan
damageproperty.
•Fillthefueltankoutdoors,inanopenarea,
whentheengineiscold.Wipeupanygasoline
thatspills.
•Neverllthefueltankinsideanenclosedtrailer.
•Donotllthefueltankcompletelyfull.Add
gasolinetothefueltankuntilthelevelis1/4to
1/2inch(6to13mm)belowthebottomofthe
llerneck.Thisemptyspaceinthetankallows
gasolinetoexpand.
•Neversmokewhenhandlinggasoline,andstay
awayfromanopenameorwheregasoline
fumesmaybeignitedbyaspark.
•Storegasolineinanapprovedcontainerand
keepitoutofthereachofchildren.Neverbuy
morethana30-daysupplyofgasoline.
•Donotoperatewithoutentireexhaustsystemin
placeandinproperworkingcondition.
DANGER
Incertainconditionsduringfueling,static
electricitycanbereleasedcausingasparkwhich
canignitethegasolinevapors.Areorexplosion
fromgasolinecanburnyouandothersandcan
damageproperty.
•Alwaysplacegasolinecontainersontheground
awayfromyourvehiclebeforelling.
•Donotllgasolinecontainersinsideavehicleor
onatruckortrailerbedbecauseinteriorcarpets
orplastictruckbedlinersmayinsulatethe
containerandslowthelossofanystaticcharge.
•Ifagasolinedispensernozzlemustbeused,
keepthenozzleincontactwiththerimofthe
fueltankorcontaineropeningatalltimesuntil
fuelingiscomplete.
Important:Donotusemethanol,gasolinecontaining
methanol,orgasoholcontainingmorethan10%ethanol
becausethefuelsystemcouldbedamaged.Donotmix
oilwithgasoline.
UsingStabilizer/Conditioner
Useafuelstabilizer/conditionerinthemachinetoprovide
thefollowingbenets:
•Keepsgasolinefreshduringstorageof90daysorless.
Forlongerstorageitisrecommendedthatthefueltank
bedrained.
•Cleanstheenginewhileitruns.
•Eliminatesgum-likevarnishbuildupinthefuelsystem,
whichcauseshardstarting.
Important:Donotusefueladditivescontaining
methanolorethanol.
Addthecorrectamountofgasstabilizer/conditionertothe
gas.
Note:Afuelstabilizer/conditionerismosteffectivewhen
mixedwithfreshgasoline.Tominimizethechanceofvarnish
depositsinthefuelsystem,usefuelstabilizeratalltimes.
FillingtheFuelTank
1.Parkthemachineonalevelsurface,andstopthe
engine.
2.Allowtheenginetocool.
3.Cleanaroundthefueltankcapandremoveit(Figure7).
G016606
Figure7
1.Fueltankcap
4.Addunleadedgasolinetothefueltank,untilthelevel
is1/4to1/2inch(6to13mm)belowthebottomof
thellerneck.
Important:Thisspaceinthetankallowsgasoline
toexpand.Donotllthefueltankcompletelyfull.
5.Installthefueltankcapsecurely,turningituntilitclicks.
6.Wipeupanygasolinethatmayhavespilled.
HourMeter
Thehourmeterrecordsthenumberofhourstheenginehas
operated.Itoperateswhentheengineisrunning.
11

G016607
Figure8
1.Hourmeter
CheckingtheEngineOilLevel
ServiceInterval:Beforeeachuseordaily
1.Placethemachineonaatlevelsurface,andstopthe
engine.
2.Allowtheenginetocool.
3.Cleanaroundtheoildipstick.
4.Removethedipstickandwipetheendclean.
5.Slidethedipstickfullyintothedipsticktubewithout
threadingitintothellerneck.
6.Pullthedipstickoutandlookattheend.Theoil
shouldbetothetopoftheupperlimitrange(Figure9).
Figure9
1.Oildipstick3.Valvecover
2.Oilllcap4.Metalend
Important:Runningtheenginewithlowoillevel
cancauseenginedamage.Thistypeofdamageis
notcoveredbywarranty.
7.Iftheoillevelislow,slowlypouronlyenoughoilinto
thecrankcasetoraisetheleveltotheupperlimit.
Important:Donotoverllthecrankcasewithoil
becausetheenginemaybedamaged.
8.Replacethedipstick.
ChangingtheChutePosition
Thedischargechuteonthismachinecanberotatedtousein
variouspositions.Rotatetotheside,awayfromthehopper
whenusingthemachine.
1.Torotate,loosentheclampknob,thenpressthe
spring-loadedbuttononthelockingpinhandleinand
pullthelockingpinfromthechuteplate(Figure10).
G016608
Figure10
1.Lockingpinbutton2.Clampknob
2.Rotatethechuteintothepositiondesiredandsecure
withclampknob.
ChangingtheDeector
Position
Thedeectorontheendofthechutecanberotatedupand
downtodirectthedischargeofchips.
1.Loosenthedeectorknobandrotatethechuteinto
thedesiredposition(Figure11).
1
2
G017903
Figure11
1.Chutedeector2.Knob
12

2.Tightenthedeectorknob.
StartingandStoppingthe
Engine
StartingtheEngine
1.MovethechokelevertotheOnposition(Figure12).
Note:Awarmorhotenginemaynotrequirechoking.
G016610
Figure12
1.Choke2.Throttle
2.MovethethrottleleveronethirdofthewaytotheFast
position(Figure12).
3.TurntheengineignitionswitchtotheStartposition
(Figure13).
G01661 1
234
Figure13
1.Ignitionswitch3.Run
2.Off4.Start
4.Aftertheenginestarts,releasekeytotheRunposition
(Figure13).
5.GraduallymovethechokeleverbacktotheOff
position.Iftheenginestallsorhesitates,movethe
chokebacktoOnagainuntiltheenginewarmsup.
ThenmoveittotheOffposition.
6.Whenreadytochipbrush,movethethrottleleverto
theFastposition.
StoppingtheEngine
1.Movethethrottlelevertothemid-rangeposition.
Note:Iftheenginehasbeenworkinghardorishot,
letitrunforaminutebeforeturningitoff.Thishelps
tocooltheenginebeforestopping.Inanemergency,
theenginemaybestoppedimmediately.
2.TurntheignitionswitchtotheOffposition(Figure13).
UsingtheBrushChipper
ServiceInterval:Beforeeachuseordaily—Cleantheinside
ofthecuttingchambercover.
DANGER
Themachinewillcutandamputatehandsandfeet.
•Stayintheoperator'spositionwhilethemachine
isrunning.
•Keepallbystandersasafedistancefromthe
machine.
•Stopthemachineimmediatelyifanypeopleor
animalsentertheworkarea.
•Neverplaceanypartofyourbodyintoaposition
thatcausesanunsafeoperatingcondition.
WARNING
Usingthebrushchippermaythrowwoodchips,
soil,andotherdebrisintotheairwhichcouldinjure
youorbystanders.
•Alwayswearprotectivegear,suchassafety
gogglesorfaceshield,hearingprotection,
tight-ttinggloveswithoutdrawstringsorloose
cuffswhenusingthemachine.
•Keepfaceandbodyawayfromthefeedopening.
Donotoverreach.Keepproperbalanceand
footingatalltime.
•Keepallbystandersatleast50feet(15meters)
fromthemachineduringoperation.
1.Placethebrushchipperonlevel,dryground,
disconnectfromtowvehicle,andblockthefrontand
backofbothwheelstopreventanymovement.
2.Makesureyoureadalltherecommendationsfromthe
Safety(page3)sectionbeforeusingthebrushchipper.
3.Starttheengine;refertoStartingtheEngineandallow
enginetowarmupatidlefortwominutes.
4.Lowerthehopper(Figure14).
13

G016612
Figure14
•Donotforcematerialintothechipper.Ifthe
machinedoesnotchipwell,thechipperknifeor
cutterblockmayneedtobesharpenedorreplaced.
•Extremelyhardknotsofwoodwillnotprocessvery
well.Shortstubsthathavenotself-fedthrough
thechippercanbepushedthroughwiththenext
branchtobechipped,otherwisesimplyclosethe
upperchute.
•Overloadingthehopperwillcausetherotorspeed
todecrease.IfyouheartheengineRPMdecreasing,
stopfeedingmaterialintothehopperuntilthe
enginehasreturnedtofullspeed(Figure15).
G016613
Figure15
•Ifyoujamthemachineanddonotstoptheengine,
itcandamagethemachine.Forthisreason,itis
importantthatyouimmediatelystoptheengineif
themachinebecomesjammed,waitveminutesto
makecertaintheywheelandallmovingpartshave
cometoacompletestopandcool.Disconnect
thesparkplugwires,keepingthemawayfromthe
sparkplugstopreventaccidentalstarting.
•Neverallowprocessedmaterialtobuildupwithin3
in(76.2mm)ofthedischargechuteopening.Move
theBrushChipperorthepileasneeded.Failureto
dosocouldresultinunnecessaryjammingofthe
machine.
•Tomoveapileofprocessedmaterial,useaspade,
rake,orlonghandletool.Neveruseyouhandsor
feet!
•Limitthelengthoflargebranchesto3feetlong
orless;longerlengthscouldcausethechipperto
slowandjam.
•Washoutthecuttingchamberaftereachuseby
sprayingwaterfromagardenhoseintothehopper
whiletheengineisrunningatfullthrottle.Do
thisforafewminutestopreventaccumulationof
matterthatcandegradethechipperperformance.
•Tostopthemachine;referto
StoppingtheEngine(page13).
14

Maintenance
Important:Beforeperforminganymaintenanceprocedures,rststoptheengine,wait5minutestoallowallmoving
partstocometoacompletestopandcool,anddisconnectthesparkplugwires.
RecommendedMaintenanceSchedule(s)
MaintenanceService
IntervalMaintenanceProcedure
Aftertherst50hours•Changetheengineoil.
Beforeeachuseordaily
•Checktheengineoillevel.
•Cleantheinsideofthecuttingchambercover.
•Greasethemachine.
•Checkthedrivebelttension.
•Checkthecutterblock.
•Inspectthecutterblades.
Every25hours•Cleanthefoampre-lterontheairlter.
Every100hours
•Replacetheairlter.
•Changetheengineoil.
•Replacethedrivebelt.
•Inspectthetires.
Every200hours•Checkthesparkplugs.
•Replacethefuellter.
Every500hours•Lubricatewheelbearings.
•Replacethesparkplugs.
Yearlyorbeforestorage•Changetheengineoil.
Important:Refertoyour
Engine Operator's Man ual
foradditionalmaintenanceprocedures.
Lubrication
LubricatetheCutterWheel
Bearings
ServiceInterval:Beforeeachuseordaily
GreaseType:General-purposegrease.
1.Cleanaroundgreasezerkwitharagandlifttheplastic
capoffthegreasezerk.
2.Pumpseveralshotsofgreaseintothettinguntilit
startstooozeoutofthebearing(Figure16).
G016615
Figure16
1.Greasezerk2.Cutterwheelbearing
3.Wipeupanyexcessgrease.
Important:Pumpgreaseinslowlyandcarefully
topreventdamagetothebearingseals.
15

LubricatetheWheelBearings
ServiceInterval:Every500hours
LubricatethewheelbearingswithseveralpumpsofNo.2
generalpurposelithiumbasegrease(Figure17).
G016621
Figure17
1.Greasezerk
EngineMaintenance
ServicingtheAirCleaner
RemovingtheAirFilter
1.Unscrewtheknobandremovetheaircleanercover
(Figure18).
Figure18
1.Knob6.Foampre-lter
2.Aircleanercover7.Paperlter
3.Covernut8.Rubberseal
4.Spacer9.Aircleanerbase
5.Cover
2.Carefullyslidethefoampre-lteroffofthepaper
element.
3.Unscrewthecovernutandremovethecover,spacer
andpaperlter.
CleaningtheFoamPre-Filter
ServiceInterval:Every25hours
1.Cleanaroundtheaircleanertopreventdirtfrom
gettingintotheengineandcausingdamage.
2.Removethefoampre-lter;See
RemovingtheAirFilter(page16).
16

3.Washthefoampre-lterinliquidsoapandwarmwater.
Whenclean,rinseitthoroughly.
4.Drythepre-lterbysqueezingitinacleanclothand
allowittoairdry.
5.Putoneortwoouncesofengineoilonthepre-lter
(Figure19).
Figure19
1.Foamelement2.Oil
6.Squeezethepre-ltertodistributetheoil.
7.Carefullyslidethefoampre-lterontothepaperlter
(Figure18).
8.Installtheaircleanercoverandsecureitwiththeknob
(Figure18).
ReplacingtheAirFilter
ServiceInterval:Every100hours
Note:Donotcleanthepaperelement.Replacethepaper
elementifitisdirtyordamaged.
Topreventenginedamage,alwaysoperatetheenginewiththe
completefoamandpaperaircleanerassemblyinstalled.
1.Carefullyslidethefoampre-lterontothepaperlter
(Figure18).
2.Placetheaircleanerassemblyontotheaircleanerbase.
3.Installthecover,spacerandsecureitwiththecovernut.
4.Torquethenutto60in-lb(7Nm).
5.Installtheaircleanercoverandsecureitwiththeknob.
ServicingtheEngineOil
Note:Changetheoilmorefrequentlywhentheoperating
conditionsareextremelydustyorsandy.
OilType:DetergentoilwithanAPIserviceofSG,SH,SJ
orhigher.
CrankcaseCapacity:withlter2qt(1.9liters)
Viscosity:SAE10W-30isrecommendedforgeneraluse.
ChangingtheEngineOil
ServiceInterval:Aftertherst50hours
Every100hours
Yearlyorbeforestorage
1.Starttheengineandletitrunveminutes.Thiswarms
theoilsoitdrainsbetter.
2.Parkthemachinesothatthedrainsideisslightlylower
thantheoppositesidetoensurethattheoildrains
completely.
3.Placeoneendofahoseonthedrainvalveandthe
otherendinapan(Figure20).
Figure20
1.Oildrainvalve2.Hose
4.Openthedrainvalvebyturningitcounterclockwise,
pullingoutasyouturnit(Figure20).
5.Whentheoilhasdrainedcompletely,closethedrain
valvebypushinginandrotatingclockwise,andremove
thehose.Wipeupanyspilledoil.
Note:Disposeoftheusedoilatacertiedrecycling
center.
6.Removetheoldlterandwipethelteradaptergasket
surface(Figure21).
Figure21
1.Oillter3.Adapter
2.Gasket
7.Pournewoilofthepropertypeinthroughthecenter
holeofthelter.Stoppouringwhentheoilreaches
thebottomofthethreads.
8.Allowaminuteortwofortheoiltobeabsorbedby
ltermaterial,thenpourofftheexcessoil.
9.Applyathincoatofnewoiltotherubbergasketon
thereplacementlter.
10.Installthereplacementoilltertothelteradapter.
Turntheoillterclockwiseuntiltherubbergasket
contactsthelteradapter,thentightenthelteran
additional3/4turn.
17

11.Removetheoilllcapandslowlypourapproximately
80%ofthespeciedamountofoilinthroughthevalve
cover(Figure9).
12.Checktheoillevel;referto
CheckingtheEngineOilLevel(page12).
13.SlowlyaddadditionaloiltobringtheleveltotheF
(full)markonthedipstick.
14.Replacethellcap.
ServicingtheSparkPlug
ServiceInterval:Every200hours—Checkthesparkplugs.
Every500hours
Ensurethattheairgapbetweenthecenterandsideelectrodes
iscorrectbeforeinstallingthesparkplug.Useasparkplug
wrenchforremovingandinstallingthesparkpluganda
gappingtool/feelergaugetocheckandadjusttheairgap.
Installanewsparkplugifnecessary.
Type:ChampionXC12YC(RFItype)orequivalent
AirGap:0.030inch(0.76mm)
RemovingtheSparkPlug
1.Pullthewiresoffofthesparkplugs(Figure22).
Figure22
1.Sparkplugwire2.Sparkplug
2.Cleanaroundsparkplugs.
3.Removethesparkplugsandthemetalwashers.
CheckingtheSparkPlug
1.Lookatthecenterofthesparkplug(Figure23).Ifyou
seelightbrownorgrayontheinsulator,theengineis
operatingproperly.Ablackcoatingontheinsulator
usuallymeansthattheaircleanerisdirty.
Important:Nevercleanthesparkplug.Always
replacethesparkplugwhenithasablackcoating,
wornelectrodes,anoilylm,orcracks.
6
G017152
Figure23
1.Centerelectrodeinsulator3.Airgap(nottoscale)
2.Sideelectrode
2.Checkthegapbetweenthecenterandsideelectrodes
(Figure23).Bendthesideelectrode(Figure23)ifthe
gapisnotcorrect.
InstallingtheSparkPlug
1.Threadthesparkplugintothesparkplughole.
2.Tightenthesparkplugto18–22ft-lb(24.4–29.8N-m).
3.Pushthewireontothesparkplug.
18

FuelSystem
Maintenance
ChangingtheFuelFilter
ServiceInterval:Every200hours
1.Clampthefuellinebetweenthecarburetorandthefuel
ltertoblockthefuelow.
2.Squeezetheendsofthehoseclampstogetherandslide
awayfromthefuellter(Figure24).
G016676
Figure24
1.Fuellter3.Fuelhose
2.Hoseclamp
3.Placeadrainpanunderthefuellinestocatchanyleaks,
thenremovethelterfromthefuellines(Figure24).
4.Installanewlter,witharrowpointingtowardthe
carburetor,andmovethehoseclampsclosetothelter.
5.Removetheclampblockingfuelow .
BeltMaintenance
AdjustingtheDriveBelt
Tension
ServiceInterval:Beforeeachuseordaily—Checkthedrive
belttension.
Note:Inspectthedrivebelttensionbyinsertingametal
scalethroughtheslotontopofthebeltcover(Figure25)
andpressingdownonthescalewithaforcegage.Theforce
shouldmeasure15±.75lbs(6.5–7.5kg)at0.40inch(1cm)
beltdeection.Adjustasrequired.
1.Removetheboltsandwasherssecuringthebeltguard
tomachine.
2.Removethebeltguard(Figure25).
G016616
3
Figure25
1.Boltsandwashers3.Beltguard
2.Slotinbeltguard
3.Loosenthe4engineplatemountingboltsandthe4
boltssecuringtherearofthebeltguardtotheengine.
4.Loosenthebelttensionboltandjamnut(Figure26).
G016617
Figure26
1.Tensionboltandjamnut2.Engineplatemountingbolt
19

5.Adjustthedrivebelttensionbylooseningthejam
nutandtighteningthetensionboltagainsttheengine
mountingplate,pushingtheenginerearward.
6.Layastraightedgeacrossclutchandywheelpulleys,
tightenbelttensionboltsothereis0.40inch(1cm)of
exinthebeltwhenpushingdownwith15lbs(6.8
kg)force,atmid-span(whenre-tensioningabeltin
use)orwith18lbs(8kg)forcewheninstallinganew
belt(Figure27).
G016618
Figure27
1.Straightedge2.Flexof0.40inch(1cm)
7.Ensurethatthepulleysarealignedandtheengineis
parallelwiththeframe(notangledtowardtheside),
thentightenthe4engineplatemountingbolts,the4
boltssecuringtherearofthebeltguardtotheengine,
andthejamnut.
8.Installthebeltguardandsecureitwiththepreviously
removedwashersandbolts.
ReplacingtheDriveBelt
ServiceInterval:Every100hours
Note:Replacethebeltifitshowsanysignsofwear,cracks,
glazing,ordamage.
1.Removetheboltsandwasherssecuringthebeltguard
tomachine.
2.Removethebeltguard(Figure25).
3.Loosenthe4engineplatemountingboltsandthe4
boltssecuringtherearofthebeltguardtotheengine.
4.Loosenthebelttensionboltandjamnut,slidethe
enginetowardtheywheelhousingtoloosenbelt
(Figure26).
5.Replacedrivebelt.
6.Adjusttensionofnewbeltto18±0.9lb(7.8–8.6kg)
forceat0.40inch(1cm)beltdeectionatmid-span.
7.Tightenthe4engineplatemountingbolts,the4bolts
securingtherearofthebeltguardtotheengine,and
thejamnut.
8.Installthebeltguardandsecureitwiththepreviously
removedwashersandbolts.
CutterMaintenance
InspectingtheCutterBlock
ServiceInterval:Beforeeachuseordaily
Makesurethecutterblockhasacrispedgeandisnofarther
than1/8”(3.2mm)awayfromtheblade.Ifthecutterblock
iswornorchippeditshouldbereplaced(Figure28).
G016620
Figure28
1.Blade2.CutterBlock
ReplacingtheCutterBlades
ServiceInterval:Beforeeachuseordaily—Inspectthe
cutterblades.
Note:Usingadullbladewilldecreaseperformanceand
causeexcessivevibrationsthatwillcausedamagetotheBrush
Chipperorengine.
1.Removetheboltandwashersecuringtheywheel
housingcover,swingitforwardtoexposetheywheel.
2.Rotatetheywheelusingastickuntiltheboltsand
locknutsattachingthecutterbladestotheywheel
areaccessible(Figure29).
20
This manual suits for next models
3
Table of contents
Other Toro Chipper manuals
Popular Chipper manuals by other brands

YAAHKIEH
YAAHKIEH MC100 Series user manual
Hansa
Hansa C16 Operation, maintenance and safety manual

Tracmaster
Tracmaster Camon C275 Operating instructions & safety notes

GREEN TECHNOLOGY
GREEN TECHNOLOGY GTS 1300 manual

MTD
MTD Yard Machines 462 Series Operator's manual
DK2 Power
DK2 Power OPC503 Assembly guide
