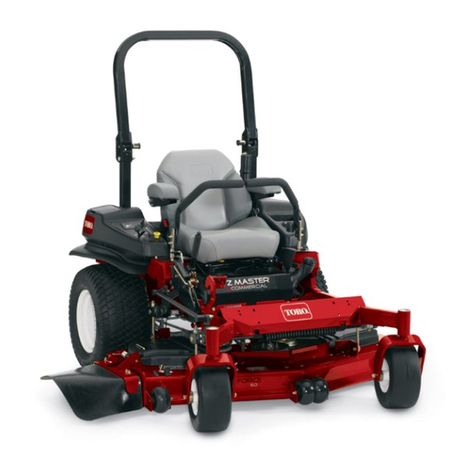
Toro 73570 Manual

1
All Rights Reserved
Printed in the USA
2001 by The Toro Company
8111 Lyndale Avenue South
Bloomington, MN 55420-1196
Form No. 3325-566
Setup
Instructions
Model No. 73570–220000001 & Up
520xi
Wheel HorseGarden Tractor
Loose Parts
Note: Use the chart below to identify parts for assembly.
DESCRIPTION QTY. USE
Rear Wheel
Wheel Bolt 2
10 Installing the rear wheels
R.H. Wheel Spindle
L.H. Wheel Spindle
Unplated Thrust Washer, 1.56 in. O.D x 0.06 in.
thick
Plated Wheel Washer, 1.5 in. O.D x 0.05 in.
thick
Bolt, 5/16-18 x 2.25 in.
Hex Nut, 5/16-18 in.
Spindle Cap
Front Wheel
Hubcap Washer, 2.5 in. O.D. x 0.05 in. thick
Cotter Pin, 1.5 in.
Shim Washer, 1.5 in. O.D. x 0.015 in. thick
Hubcap
1
1
2
4
2
2
2
2
2
2
2
2
Installing the front wheels
Steering Wheel
Boot Washer
Nut
Lock Washer
Trim Cover
1
1
1
1
1
Installing the steering wheel
Seat Assembly
Shoulder Bolt, 5/16 in.
Locknut, 5/16 in.
1
2
2Installing the seat
Bolt, 1/4-20 x 0.88 in.
Washer, 1/4 in.
Hex Nut, 1/4-20 in.
2
2
2Attaching the battery cables

2
DESCRIPTION USEQTY.
Grill Screw, #8 x 0.5 in.
Grill Washer, 0.75 in. O.D. 2
2Securing the grill
Hitch Pin
Hairpin Cotter
Flat Washer, 0.50 in. I.D.
1
1
1Installing the drawbar hitch pin
Key 2Use in ignition and KeyChoice switches
Installing the Rear Wheels
1. Remove the four wheel bolts holding the rear shipping
brackets to the rear hubs.
2. Using a jack or suitable hoist, raise the rear of the
tractor only high enough to install the rear wheels.
3. Install the wheels onto the hubs with the valve stems
facing inward (Fig. 1).
4. Install the wheel bolts and torque then to 75 to 80 ft-lb
(105 to 112 Nm).
m–1278
3
2
1
Figure 1
1. Hub
2. Rear wheel 3. Wheel bolt (5)
Installing the Front Wheels
Important Never raise the front of the tractor by
placing a jack under the bumper or front axle because the
tractor may be damaged. The front hood support braces
have two slots (Fig. 2) that may be used to lift the tractor
to install the front wheel spindles. To access these slots,
remove the front grill and raise the hood.
1. Remove the front grill and raise the hood.
m–3454
11
22
Figure 2
1. Slots 2. Grill Grommets
2. Remove, or be careful not to damage, the two upper
grill grommets (Fig. 2).
3. Using a suitable hoist, raise the front of the tractor
only high enough to install the front wheel spindles.
Important Do not pivot the weight of the tractor onto
the rear drawbar hitch because the hitch will be damaged.
4. Install a 1.56 in. O.D. x 0.06 in. thick unplated thrust
washer onto the splined shaft of the R.H. wheel
spindle (Fig. 4).
5. Install the splined end of the R.H. spindle through the
R.H. end of the front axle and into the steering arm
(Fig. 4).
Note: The L.H. and R.H. spindles are different. Assemble
the spindles as shown in figure 3.
Note: The outside edge of the spindle must be parallel to
the end of the steering arm (Fig. 3).
m–3610
3
2
1
4
Figure 3
1. R.H. Spindle
2. L.H. Spindle 3. Steering arm
4. Parallel relationship
6. Secure the spindle shaft to the steering arm with a
5/16–18 x 2.25 in. bolt and 5/16 in. nut (Fig. 4).
7. Torque the nut to 205 to 255 in–lbs (23 to 29 Nm).
8. Insert a 1.50 in. O.D x 0.05 in. thick plated wheel
washer onto the R.H. spindle (Fig. 4).
9. Install a front wheel onto the R.H. spindle with the
valve stem facing inward (Fig 4).

3
10.Insert another 1.50 in. O.D x 0.05 in. thick plated
wheel washer onto the R.H. spindle (Fig. 4).
11. Install a 2.50 in. O.D x 0.05 in thick hub cap washer
onto the spindle.
12.Insert a 1.50 in. long cotter pin into the hole in the
spindle (Fig. 4).
13.Check the front wheel end play.
14.Install shim washers inside the hubcap washer as
necessary so there is minimum end play.
1
5
2
6
8
8
11
m–3452
3
4
910
12
7
Figure 4
1. Wheelspindle
2. Unplated thrust washer,
1.56 x 0.06 in.
3. Front axle
4. Steering arm
5. Bolt, 5/16–18 x 2.25 in.
6. Nut, 5/16 in.
7. Spindle cap
8. Plated wheel washer, 1.50
x 0.05 in.
9. Hub cap washer, 2.50 x
0.05 in.
10. Shim washer, 1.50 x
0.015 in.
11. Cotter pin, 0.056 x 1.50 in.
12. Hubcap
15.Secure the wheel to the spindle with the cotter pin.
Bend the ends of the cotter pin completely around the
spindle.
16.Install a hubcap onto the hubcap washer until it snaps
in place (Fig. 4).
17.Look at the end of the steering arm and the inside edge
of the tire. The end of the steering arm and the inside
edge of the tire must be parallel (Fig. 5).
18.Adjust the steering arm if required.
m–3451
1
2
3
Figure 5
1. Wheel
2. Steeringarm 3. Parallel relationship
19.Insert a spindle cap into the steering arm (Fig. 4).
20.Repeat steps 4 through 19 on the opposite end of the
front axle.
21.Grease both spindles and the front axle pivot until
grease begins to come out of the bearings.
22.Lower the tractor to the ground.
23.Leave the front grill off until you have serviced the
battery.
Installing the Seat
1. Mount the seat to the seat base using two 5/16 in.
shoulder bolts and locknuts (Fig. 6).
2. Insert the seat switch wire through the center opening
in the seat base (Fig 6).
3. Push the seat switch wire connector into the wire
harness connector.

4
1
2
5
m–3453
3
4
6
Figure 6
1. Seat
2. Seat base
3. Shoulder bolt (2), 5/16 in.
4. Locknut (4), 5/16 in.
5. Seat switch wire
connector
6. Opening for seat switch
wire
Installing the Steering Wheel
1. Install the boot washer onto the steering shaft (Fig. 7).
2. Remove the plastic trim cover from the steering wheel
(Fig. 7)
3. Install the steering wheel onto the shaft, carefully
aligning the splines (Fig. 7).
Note: There is no fixed straight ahead position on power
steering models.
4. Secure the steering wheel to the shaft with a lock
washer and nut (Fig. 7).
5. Tighten the retaining nut to 45 to 50 ft–lbs (61 to
67 Nm)
6. Install the trim cover on the steering wheel.
m–2482
1
3
2
4
5
6
Figure 7
1. Boot washer
2. Steering shaft
3. Steering wheel
4. Lock washer
5. Nut
6. Trim cover
Checking Front Wheel Toe-In
With the tractor on a level surface, check to make sure the
front wheel toe-in is between 1/8 and 1/4 in. (3 to 6 mm).
For instructions on adjusting toe-in, refer to the
Maintenance section in Operator’s Manual.
Ensuring that the Steering
Linkage is Centered
1. With the tractor on a level surface, turn the steering
wheel fully to the left and check the clearance of the
left hand spindle stop to the stop on the front axle.
There should be a slight clearance between the stops
(Fig. 8).
m–4265
1
2
3
Front of Tractor
Figure 8
1. Left hand spindle stop
2. Axle stop 3. Clearance
2. Repeat for the right front tire in a right turn.

5
3. If the stops on one side hit, and on the other side have
clearance, shorten the tie rod on the side that hits, and
equally lengthen the tie rod on the opposite side until
both sides have clearance.
4. Recheck the toe in.
Checking Tire Pressure
Check front and rear tire pressure. The correct front and
rear tire pressure is 20 psi (138 kPa).
Activating the Battery
Battery posts, terminals, and related accessories
contain lead and lead compounds, chemicals
known to the State of California to cause cancer
and reproductive harm. Wash hands after
handling.
Warning
Bulk electrolyte with 1.265 specific gravity must be
purchased from a local battery supply outlet.
Danger
Battery electrolyte contains sulfuric acid which is
a deadly poison and causes severe burns.
•Do not drink electrolyte and avoid contact with
skin, eyes or clothing. Wear safety glasses to
shield your eyes and robber gloves to protect
your hands.
•Fill the battery where clean water is always
available for flushing the skin.
1. Remove the battery from the tractor.
2. Clean the top of the battery with a paper towel.
Note: Never fill the battery with electrolyte while the
battery installed in the tractor. Electrolyte could be
spilled on other parts and cause corrosion.
3. Remove the vent caps from the battery (Fig. 9).
4. Slowly pour electrolyte into each battery cell until the
level is up to the upper line (Fig. 9) on the battery
case.
Important Do not overfill the battery because
electrolyte (sulfuric acid) can cause severe corrosion and
damage to the chassis.
5. Wait five to ten minutes after filling the battery cells.
Add electrolyte, if necessary, until the electrolyte level
is up to the upper line (Fig. 9) on the battery case.
6. Install battery filler caps.
1
23
m-5004
Figure 9
1. Fillercaps
2. Upper line 3. Lower line
7. Charge battery for 10 to 15 minutes at 25 to 30
amps or 30 minutes at 4 to 6 amps.
Charging the battery produces gasses that can
explode.
Never smoke near the battery and keep sparks
and flames away from battery.
Warning
8. When the battery is fully charged, unplug the charger
from the electrical outlet, then disconnect the charger
leads from the battery posts (Fig. 10).
4
1
23
m-4970
Figure 10
1. Positive Battery Post
2. Negative Battery Post 3. Red (+) Charger Lead
4. Black (–) Charger Lead
9. Install the battery in the tractor and connect the battery
cables. (Refer to the Operator’s Manual – Installing
the Battery.)
Note: Do not run the tractor with the battery disconnected,
electrical damage may occur.
6
10.After servicing the battery, replace the front grill of the
tractor and secure the grill with two #8 x .50” long
grill screws and .75” O.D. grill washers in the upper
two grill mounting holes (Fig. 11).
m–3558
1
2
Figure 11
1. Grill screw (1 of 2) 2. Grill washer (1 of 2)
Installing the Drawbar Hitch
Pin
Insert the drawbar hitch pin into the drawbar hitch and
secure it with a 0.50 in. I.D. flat washer and hairpin cotter
(Fig. 12).
2
1
3m–2481
4Figure 12
1. Drawbarhitch pin
2. Drawbar hitch 3. Flat washer, 0.50 in. I.D.
4. Hairpin cotter
Checking the Wiring and
Fasteners
•Inspect the tractor for any loose electrical connections
and secure them as required.
•Check the wire routing to make sure moving parts do
not interfere with wires and cause a short.
•Ensure all fasteners are tight.
Test Driving the Tractor
1. Check the oil level in the crankcase (refer to the
Operator’s Manual for oil type, viscosity and
crankcase capacity).
2. Check the oil level in the transaxle (refer to the
Operator’s Manual for oil type, viscosity and
capacity).
3. Check the coolant level in the coolant recovery tank.
4. Ensure that all lubrication points have been greased as
shown in the Maintenance section of tractor Operator’s
Manual.
5. Fill the tank with unleaded regular gasoline with an
octane rating of at least 85.
6. Open the fuel shutoff valve and check the fuel hose
and fittings for leaks.
7. As applicable, check and test the operation of the
following:
•Engine, choke and throttle controls
•Gauges
•Headlights and taillights
•Indicator lights
•PTO clutch and brake
•Lift system
•Service and parking brakes
•Transmission controls
•Steering
•Tractor operation in forward and reverse
8. Test the operation of the safety interlock system (refer
to the Operator’s Manual for the correct procedure).

7

Other manuals for 73570
3
Table of contents
Other Toro Lawn Mower manuals

Toro
Toro TurfMaster 22235 User manual

Toro
Toro 30607A User manual

Toro
Toro 4520 User manual

Toro
Toro 74352 User manual

Toro
Toro 73542 User manual

Toro
Toro Titan ZX4875 User manual

Toro
Toro eTimeMaster eTM76 User manual

Toro
Toro 74665 User manual

Toro
Toro 22179TE User manual

Toro
Toro 74385 TimeCutter ZS 3200 User manual

Toro
Toro Super Bagger 20192 User manual

Toro
Toro 20351-Serial User manual

Toro
Toro Recycler 20010 User manual

Toro
Toro Greensmaster eFlex 1021 User manual

Toro
Toro 03540 Reelmaster 5200-D User manual

Toro
Toro Recycler 21469 User manual

Toro
Toro H132 Wheel Horse Manual

Toro
Toro GrandStand 74536 Manual

Toro
Toro Recycler 20779 User manual

Toro
Toro 144-0386 User manual