Toro 74955 User manual

FormNo.3394-324RevA
ZMaster®Commercial3000
SeriesRidingMower
with52inor72inTURBOFORCE®Side
DischargeMower
ModelNo.74955—SerialNo.315000001andUp
ModelNo.74959—SerialNo.315000001andUp
Registeratwww.Toro.com.
OriginalInstructions(EN)*3394-324*A

WARNING
CALIFORNIA
Proposition65Warning
Thisproductcontainsachemicalorchemicals
knowntotheStateofCaliforniatocausecancer,
birthdefects,orreproductiveharm.
Theengineexhaustfromthisproduct
containschemicalsknowntotheStateof
Californiatocausecancer,birthdefects,
orotherreproductiveharm.
ThissparkignitionsystemcomplieswithCanadianICES-002
Becauseinsomeareastherearelocal,state,orfederal
regulationsrequiringthatasparkarresterbeusedonthe
engineofthismachine,asparkarresterisavailableas
anoption.Ifyourequireasparkarrestor,contactyour
AuthorizedToroDealer.
GenuineTorosparkarrestersareapprovedbytheUSDA
ForestryService.
Note:ItisaviolationofCaliforniaPublicResource
CodeSection4442touseoroperatetheengineonany
forest-covered,brush-covered,orgrass-coveredlandwithout
asparkarrestermufermaintainedinworkingorder,or
theengineconstricted,equipped,andmaintainedforthe
preventionofre.Otherstatesorfederalareasmayhave
similarlaws.
WARNING
Removingstandardoriginalequipmentpartsand
accessoriesmayalterthewarranty,traction,and
safetyofthemachine.FailuretouseoriginalToro
partscouldcauseseriousinjuryordeath.Making
unauthorizedchangestotheengine,fuelorventing
system,mayviolateEPAandCARBregulations.
Replaceallpartsincluding,butnotlimitedto,tires,
belts,blades,andfuelsystemcomponentswith
originalToroparts.
Theenclosed
Engine Owner's Man ual
issuppliedfor
informationregardingtheUSEnvironmentalProtection
Agency(EPA)andtheCaliforniaEmissionControl
Regulationofemissionsystems,maintenance,and
warranty.Replacementsmaybeorderedthroughthe
enginemanufacturer.
Introduction
Thisrotary-blade,ridinglawnmowerisintendedtobeused
byresidentialhomeownersorprofessional,hiredoperators.
Itisdesignedprimarilyforcuttinggrassonwell-maintained
lawnsonresidentialorcommercialproperties.Itisnot
designedforcuttingbrushorforagriculturaluses.
Readthisinformationcarefullytolearnhowtooperateand
maintainyourproductproperlyandtoavoidinjuryand
productdamage.Youareresponsibleforoperatingthe
productproperlyandsafely.
YoumaycontactTorodirectlyatwww .Toro.comforproduct
safetyandoperationtrainingmaterials,accessoryinformation,
helpndingadealer,ortoregisteryourproduct.
Wheneveryouneedservice,genuineToroparts,oradditional
information,contactanAuthorizedServiceDealerorToro
CustomerServiceandhavethemodelandserialnumbersof
yourproductready.Figure1identiesthelocationofthe
modelandserialnumbersontheproduct.Writethenumbers
inthespaceprovided.
Figure1
1.Modelandserialnumberlocation
ModelNo.
SerialNo.
Thismanualidentiespotentialhazardsandhassafety
messagesidentiedbythesafetyalertsymbol(Figure2),
whichsignalsahazardthatmaycauseseriousinjuryordeath
ifyoudonotfollowtherecommendedprecautions.
©2015—TheToro®Company
8111LyndaleAvenueSouth
Bloomington,MN554202
Contactusatwww.Toro.com.
PrintedintheUSA
AllRightsReserved

Figure2
1.Safetyalertsymbol
Thismanualuses2wordstohighlightinformation.
Importantcallsattentiontospecialmechanicalinformation
andNoteemphasizesgeneralinformationworthyofspecial
attention.
Contents
Safety...........................................................................4
SafeOperatingPractices...........................................4
SlopeIndicator.......................................................6
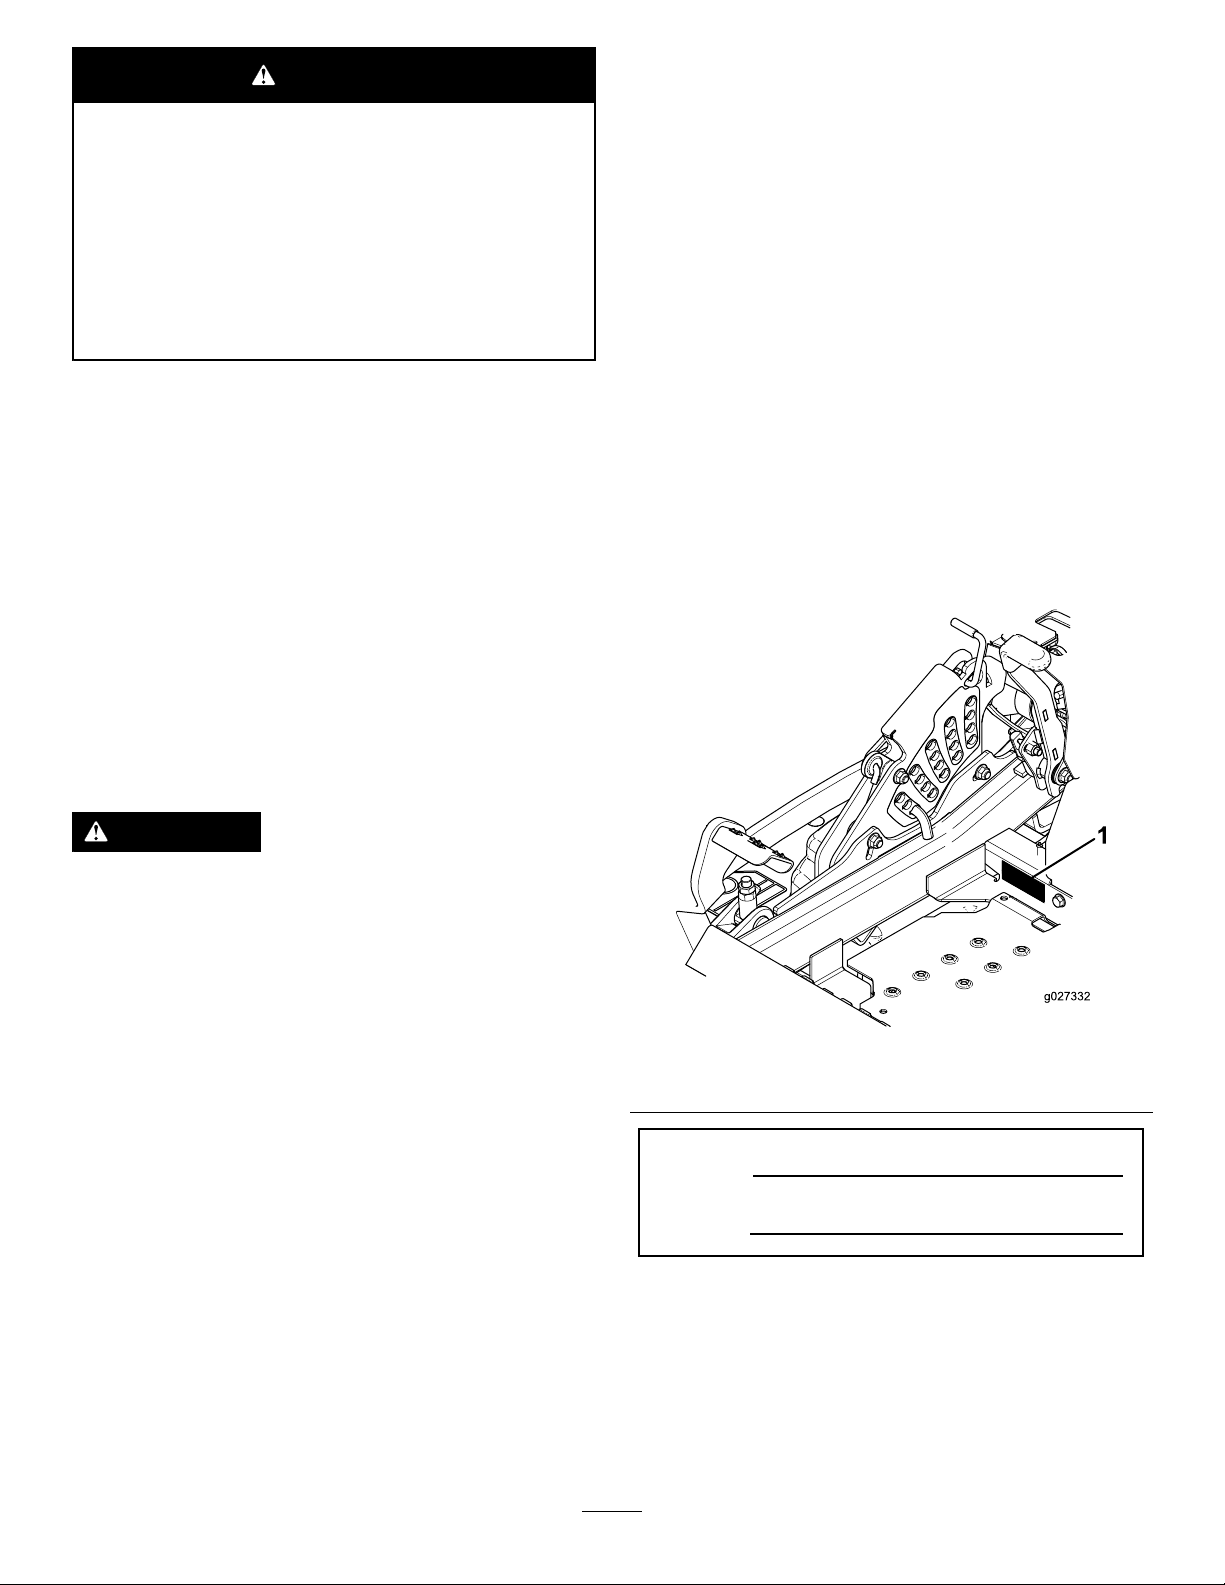
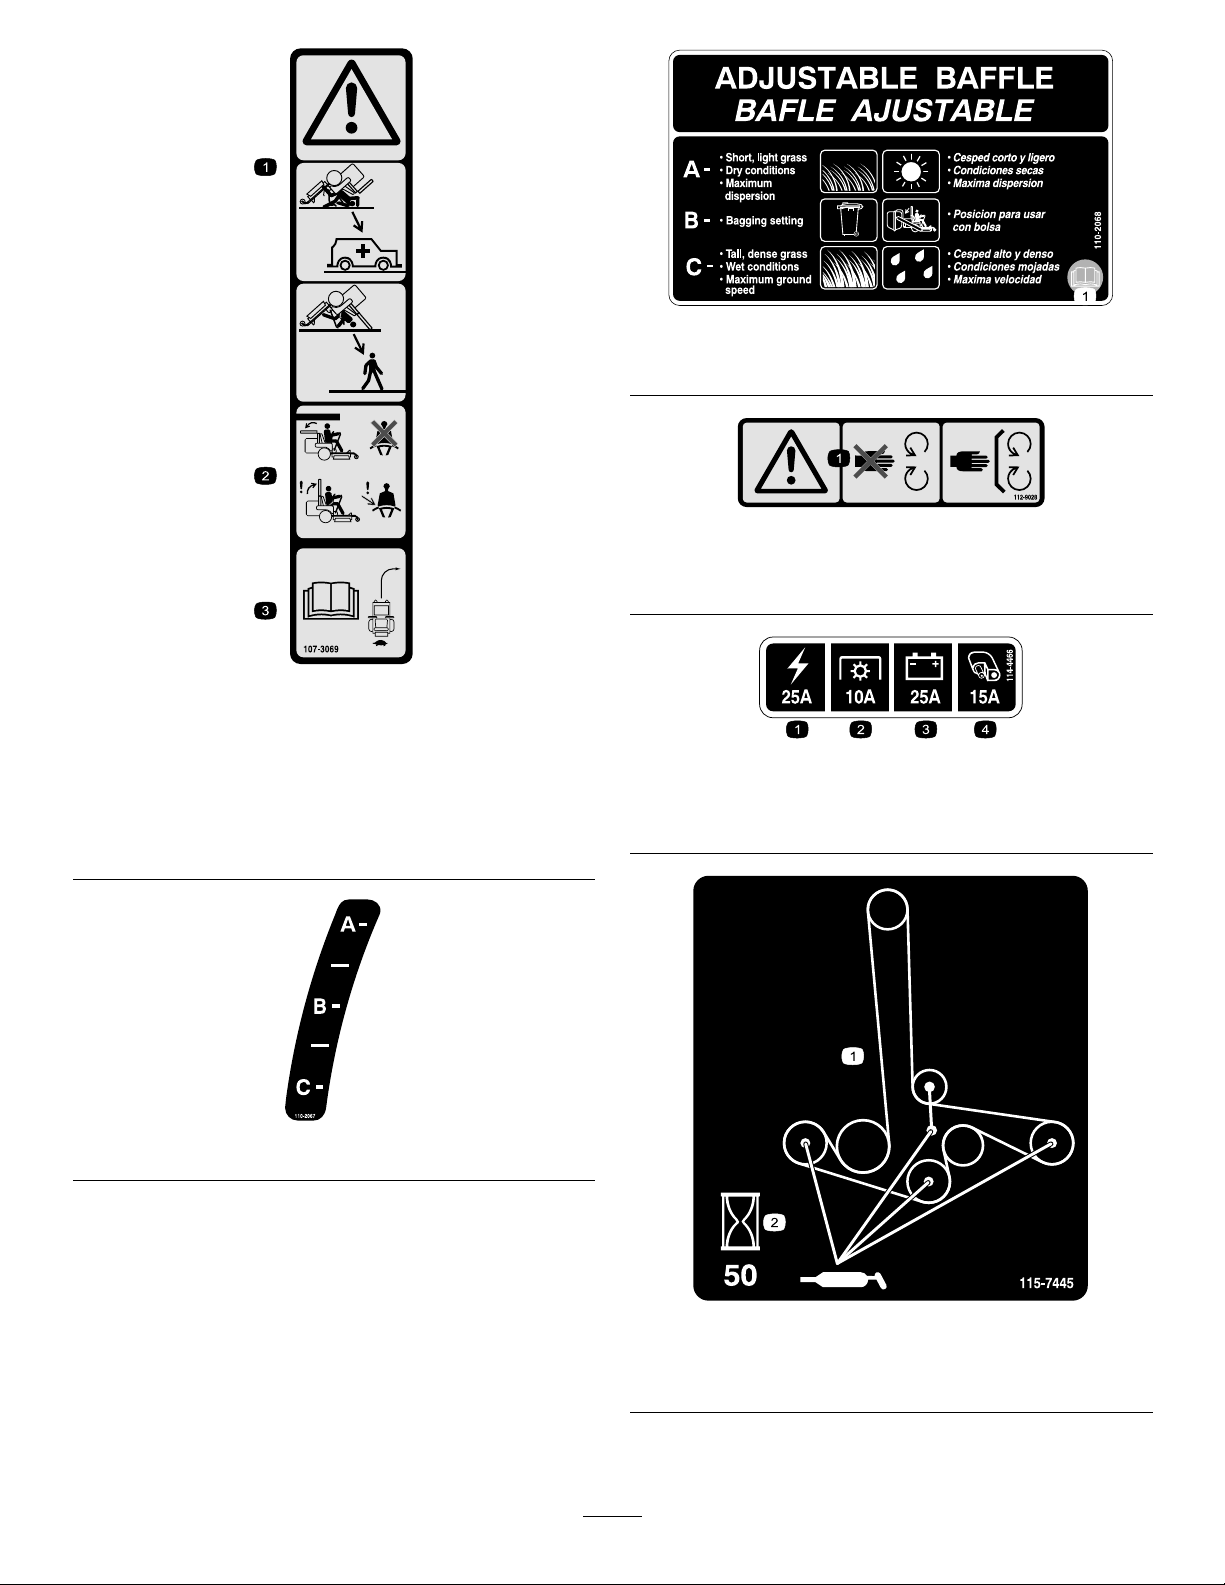
SafetyandInstructionalDecals.................................7
ProductOverview.........................................................14
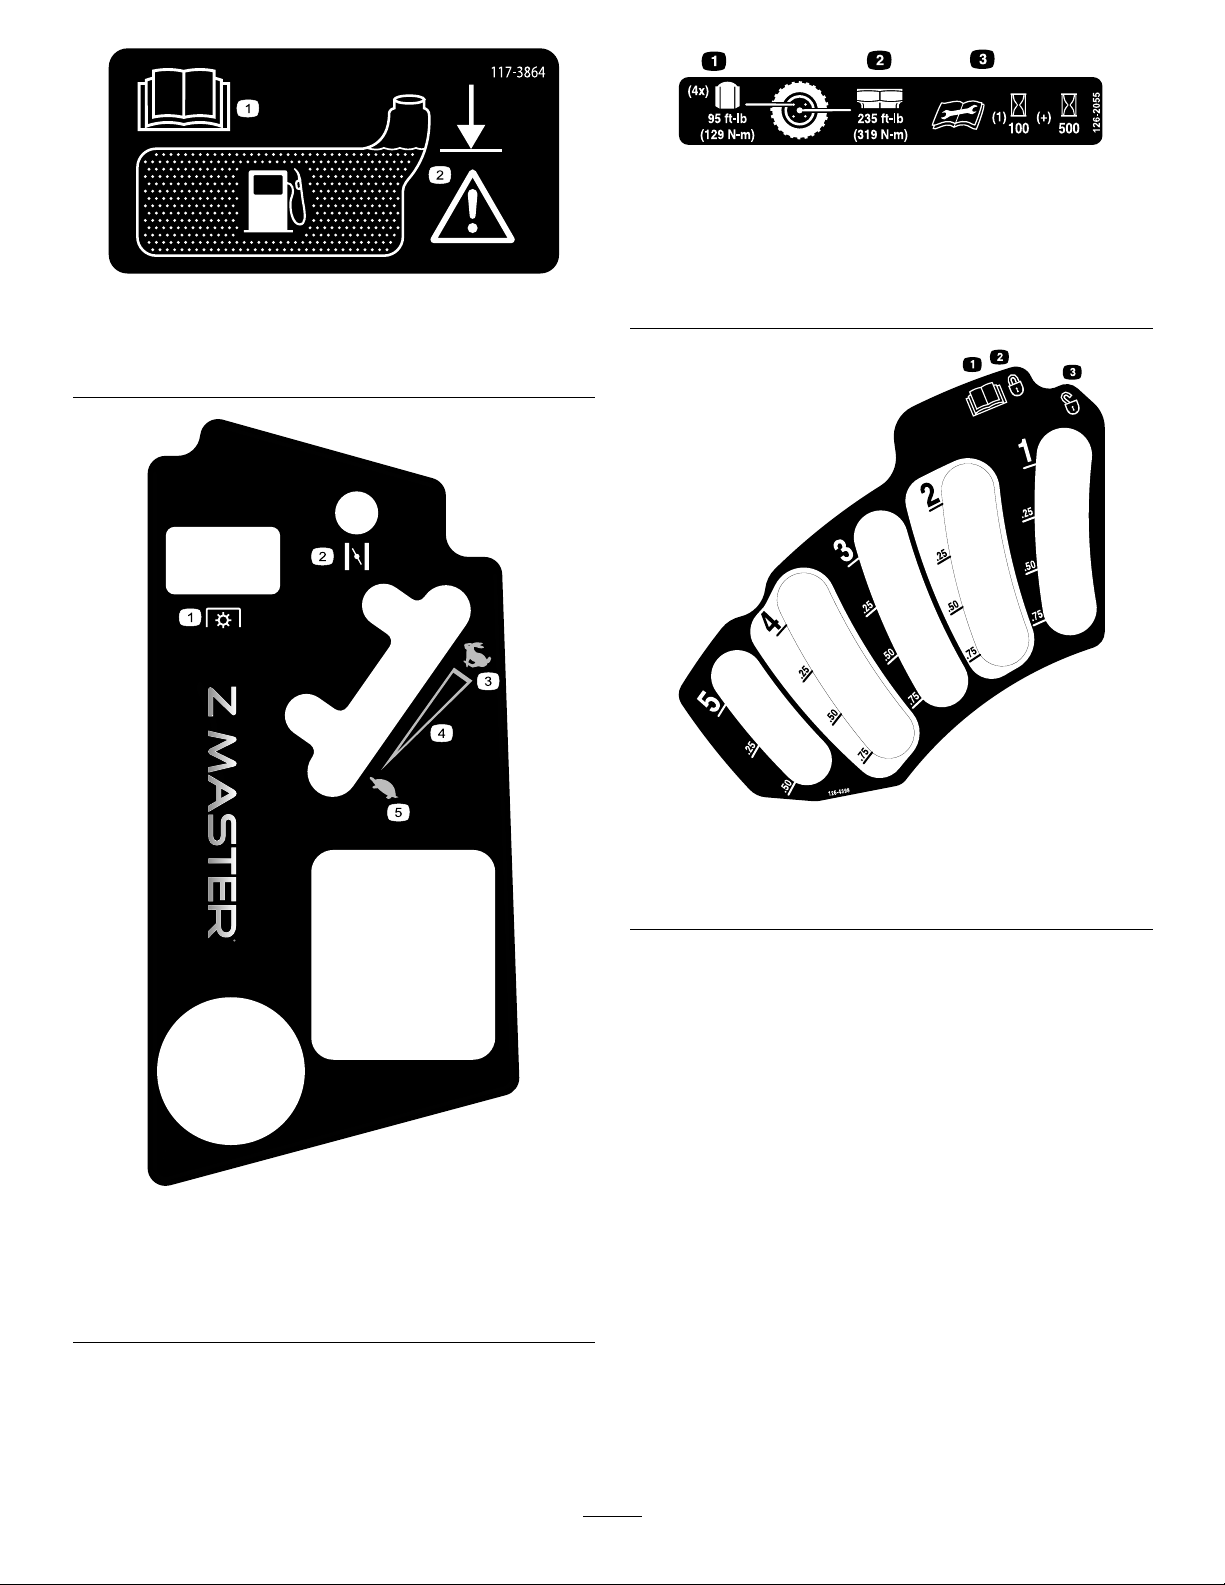
Controls...............................................................14
Specications........................................................15
Operation....................................................................16
AddingFuel...........................................................16
CheckingtheEngine-OilLevel.................................17
BreakinginaNewMachine......................................17
UsingtheRolloverProtectionSystem(ROPS)............17
ThinkSafetyFirst...................................................18
OperatingtheParkingBrake....................................18
OperatingtheMowerBlade-ControlSwitch
(PTO)...............................................................19
OperatingtheThrottle............................................19
OperatingtheIgnitionSwitch..................................19
UsingtheFuelShutoffValve....................................20
StartingandStoppingtheEngine..............................20
TheSafety-InterlockSystem....................................21
DrivingForwardorBackward..................................22
StoppingtheMachine.............................................23
AdjustingtheHeightofCut.....................................23
AdjustingtheAnti-scalpRollers................................24
AdjustingtheFlowBafeCamLocks........................25
PositioningtheFlowBafe......................................26
PositioningtheSeat................................................26
UsingtheDrive-Wheel-ReleaseValves.......................27
UsingtheSideDischarge.........................................27
TransportingtheMachine........................................27
LoadingtheMachine..............................................28
OperatingTips......................................................30
Maintenance.................................................................31
RecommendedMaintenanceSchedule(s)......................31
Lubrication...............................................................32
AddingLightOilorSprayLubrication.......................32
GreasingtheMower...............................................32
LubricatetheCaster-WheelHubs.............................33
EngineMaintenance..................................................34
ServicingtheAirCleaner.........................................34
ServicingtheEngineOil..........................................35
ServicingtheSparkPlug..........................................38
ChecktheSparkArrester(ifequipped)......................39
FuelSystemMaintenance...........................................40
ReplacingtheFuelFilter..........................................40
ServicingtheFuelTank...........................................40
ElectricalSystemMaintenance....................................41
ServicingtheBattery...............................................41
ServicingtheFuses.................................................42
DriveSystemMaintenance.........................................43
CheckingtheSeatBelt.............................................43
CheckingtheRolloverProtectionSystem(ROPS)
Knobs...............................................................43
AdjustingtheTracking............................................43
CheckingtheTirePressure......................................44
CheckingtheWheelLugNuts..................................44
CheckingtheWheelHubSlottedNut........................44
AdjustingtheCaster-PivotBearing............................44
UsingtheClutchShim............................................45
CoolingSystemMaintenance......................................47
CleaningtheEngineScreenandEngine-Oil
Cooler...............................................................47
CleaningtheEngine-CoolingFinsand
Shrouds.............................................................47
CheckandCleantheHydraulicUnits.........................48
BrakeMaintenance....................................................48
AdjustingtheParkingBrake.....................................48
BeltMaintenance......................................................49
InspectingtheBelts................................................49
ReplacingtheMowerBelt........................................49
ReplacingtheHydraulicPump-DriveBelt..................50
ControlsSystemMaintenance.....................................51
AdjustingtheControl-HandlePosition......................51
AdjustingtheMotion-ControlLinkage......................52
AdjustingtheMotion-ControlDamper.....................53
AdjustingtheMotion-ControlNeutral-Lock
Pivot.................................................................53
HydraulicSystemMaintenance....................................54
ServicingtheHydraulicSystem.................................54
MowerDeckMaintenance...........................................56
LevelingtheMowerDeck........................................56
ServicingtheCuttingBlades.....................................57
RemovingtheMowerDeck.....................................60
ReplacingtheGrassDeector..................................61
Cleaning...................................................................61
CleaningUndertheMower......................................61
DisposingofWaste.................................................61
Storage........................................................................62
CleaningandStorage..............................................62
Troubleshooting...........................................................63
Schematics...................................................................65
3

Safety
Improperuseormaintenancecanresultininjury.Toreduce
thepotentialforinjury,complywiththesesafetyinstructions
andalwayspayattentiontothesafetyalertsymbol,which
meansCAUTION,WARNING,orDANGER-“personal
safetyinstruction."Failuretocomplywiththeinstruction
mayresultinpersonalinjuryordeath.
Thisproductiscapableofamputatinghandsandfeetand
throwingobjects.Alwaysfollowallsafetyinstructionsto
avoidseriousinjuryordeath.
Thisproductisdesignedforcuttingandrecyclinggrassor,
whenequippedwithagrassbagger,forcatchingcutgrass.
Anyuseforpurposesotherthanthesecouldprovedangerous
touserandbystanders.
SafeOperatingPractices
ThefollowinginstructionsareadaptedfromANSIstandard
B71.4-2012.
Training
•ReadtheOperator'sManualandothertrainingmaterial.
Iftheoperator(s)ormechanic(s)cannotreadmanual
language,itistheowner'sresponsibilitytoexplainthis
materialtothem.
•Becomefamiliarwiththesafeoperationoftheequipment,
operatorcontrols,andsafetysigns.
•Alloperatorsandmechanicsshouldbetrained.The
ownerisresponsiblefortrainingtheusers.
•Neverletchildrenoruntrainedpeopleoperateorservice
theequipment.Localregulationsmayrestricttheageof
theoperator.
•Theowner/usercanpreventandisresponsiblefor
accidentsorinjuriesoccurringtopeopleordamageto
property.
Preparation
•Evaluatetheterraintodeterminewhataccessoriesand
attachmentsareneededtoproperlyandsafelyperform
thejob.Onlyuseaccessoriesandattachmentsapproved
bythemanufacturer.
•Wearappropriateclothingincludinghardhat,safety
glassesandhearingprotection.Longhair,looseclothing
orjewelrymaygettangledinmovingparts.
•Inspecttheareawheretheequipmentistobeusedand
removeallobjectssuchasrocks,toysandwirewhichcan
bethrownbythemachine.
•Checkthatoperator'spresencecontrols,safetyswitches
andshieldsareattachedandfunctioningproperly.Donot
operateunlesstheyarefunctioningproperly.
Operation
•Lightningcancausesevereinjuryordeath.Iflightning
isseenorthunderisheardinthearea,donotoperate
themachine;seekshelter.
•Neverrunanengineinanenclosedarea.
•Onlyoperateingoodlight,keepingawayfromholesand
hiddenhazards.
•Besurealldrivesareinneutralandparkingbrakeis
engagedbeforestartingengine.Onlystartenginefrom
theoperator'sposition.
•Slowdownanduseextracareonhillsides.Besureto
travelsidetosideonhillsides.Turfconditionscanaffect
themachine'sstability.Usecautionwhileoperatingnear
drop-offs.
•Slowdownandusecautionwhenmakingturnsandwhen
changingdirectionsonslopes.
•Neverraisedeckwiththebladesrunning.
•NeveroperatewiththePTOshield,orotherguardsnot
securelyinplace.Besureallinterlocksareattached,
adjustedproperly,andfunctioningproperly.
•Neveroperatewiththedischargedeectorraised,
removedoraltered,unlessusingagrasscatcher.
•Donotchangetheenginegovernorsettingoroverspeed
theengine.
•Stoponlevelground,disengagedrives,engageparking
brake(ifprovided),shutoffenginebeforeleavingthe
operator'spositionforanyreasonincludingemptyingthe
catchersoruncloggingthechute.
•Stopequipmentandinspectbladesafterstrikingobjects
orifanabnormalvibrationoccurs.Makenecessary
repairsbeforeresumingoperations.
•Keephandsandfeetawayfromthecuttingunit.
•Lookbehindanddownbeforebackinguptobesureof
aclearpath.
•Keeppetsandbystandersaway.
•Slowdownandusecautionwhenmakingturnsand
crossingroadsandsidewalks.Stopbladesifnotmowing.
•Beawareofthemowerdischargedirectionanddonot
pointitatanyone.
•Donotoperatethemowerundertheinuenceofalcohol
ordrugs.
•Usecarewhenloadingorunloadingthemachineinto
orfromatrailerortruck.
•Usecarewhenapproachingblindcorners,shrubs,trees,
orotherobjectsthatmayobscurevision.
RolloverProtectionSystem(ROPS)-
UseandMaintenance
•DonotremovetheROPS.
•TheROPSisanintegralandeffectivesafetydevice.Keep
theROPSonthemachineandusetheseatbeltwhen
operatingthemachine.
4

•Becertainthattheseatbeltcanbereleasedquicklyin
theeventofanemergency.
•Checktheareatobemowedwherethereareslopes,drop
offsorwater.
•Checkcarefullyforoverheadclearances(i.e.branches,
doorways,electricalwires)beforedrivingunderany
objectsanddonotcontactthem.
•KeeptheROPSinsafeoperatingconditionby
periodicallythoroughlyinspectingfordamageand
keepingallmountingfastenerstight.
•ReplaceadamagedROPS.Donotrepairorrevise.
•AnyalterationstoaROPSmustbeapprovedbythe
manufacturer.
SafeHandlingofFuels
•Toavoidpersonalinjuryorpropertydamage,use
extremecareinhandlinggasoline.Gasolineisextremely
ammableandthevaporsareexplosive.
•Extinguishallcigarettes,cigars,pipes,andothersources
ofignition.
•Useonlyanapprovedfuelcontainer.
•Neverremovefuelcaporaddfuelwiththeengine
running.
•Allowenginetocoolbeforerefueling.
•Neverrefuelthemachineindoors.
•Neverstorethemachineorfuelcontainerwherethereis
anopename,spark,orpilotlightsuchasonawater
heateroronotherappliances.
•Neverllcontainersinsideavehicleoronatruckor
trailerbedwithaplasticliner.Alwaysplacecontainerson
thegroundawayfromyourvehiclebeforelling.
•Removeequipmentfromthetruckortrailerandrefuelit
ontheground.Ifthisisnotpossible,thenrefuelsuch
equipmentwithaportablecontainer,ratherthanfroma
fueldispensernozzle.
•Keepthenozzleincontactwiththerimofthefueltank
orcontaineropeningatalltimesuntilfuelingiscomplete.
Donotuseanozzlelockopendevice.
•Iffuelisspilledonclothing,changeclothingimmediately.
•Neveroverllfueltank.Replacefuelcapandtighten
securely.
MaintenanceandStorage
•Disengagedrives,setparkingbrake,stopengineand
removekeyordisconnectspark-plugwire.Waitforall
movementtostopbeforeadjusting,cleaningorrepairing.
•Cleangrassanddebrisfromcuttingunit,drives,mufers,
andenginetohelppreventres.Cleanupoilorfuel
spillage.
•Letenginecoolbeforestoringanddonotstorenear
ame.
•Shutofffuelwhilestoringortransporting.Donotstore
fuelnearamesordrainindoors.
•Parkthemachineonlevelground.Settheparkingbrake.
Neverallowuntrainedpersonneltoservicethemachine.
•Usejackstandstosupportcomponentswhenrequired.
•Carefullyreleasepressurefromcomponentswithstored
energy.
•Disconnectthebatteryorremovespark-plugwirebefore
makinganyrepairs.Disconnectthenegativeterminalrst
andthepositivelast.Reconnectthepositiverstand
negativelast.
•Usecarewhencheckingblades.Wraptheblade(s)orwear
thickly-paddedgloves,andusecautionwhenservicing
them.Onlyreplaceblades.Neverstraightenorweld
them.
•Keephandsandfeetawayfrommovingparts.Ifpossible,
donotmakeadjustmentswiththeenginerunning.
•Keepallpartsingoodworkingconditionandallhardware
tightened.Replaceallwornordamageddecals.
Hauling
•Usecarewhenloadingorunloadingthemachineintoa
trailerortruck.
•Usefullwidthrampsforloadingmachineintotraileror
truck.
•Tiethemachinedownsecurelyusingstraps,chains,cable,
orropes.Bothfrontandrearstrapsshouldbedirected
downandoutwardfromthemachine.
5

SlopeIndicator
G01 1841
Figure3
Thispagemaybecopiedforpersonaluse.
1.Themaximumslopeyoucansafelyoperatethemachineonis15degrees.Usetheslopecharttodeterminethedegreeofslope
ofhillsbeforeoperating.Donotoperatethismachineonaslopegreaterthan15degrees.Foldalongtheappropriateline
tomatchtherecommendedslope.
2.Alignthisedgewithaverticalsurface,atree,building,fencepole,etc.
3.Exampleofhowtocompareslopewithfoldededge.
6

SafetyandInstructionalDecals
Safetydecalsandinstructionsareeasilyvisibletotheoperatorandarelocatednearanyareaofpotential
danger.Replaceanydecalthatisdamagedorlost.
58-6520
1.Grease
93-7818
1.Warning—readtheOperator'sManualforinstructionson
torquingthebladebolt/nutto115-149N-m(85-110ft-lb).
99-8936
1.Machinespeed4.Neutral
2.Fast5.Reverse
3.Slow
106-2655
1.Warning-donottouchorapproachmovingbelts;remove
theignitionkeyandreadtheinstructionsbeforeservicing
orperformingmaintenance.
106-5517
1.Warning—donottouchthehotsurface.
7

107-3069
1.Warning–thereisnorolloverprotectionwhentherollbaris
down.
2.Toavoidinjuryordeathfromarolloveraccident,keepthe
rollbarintheraisedandlockedpositionandweartheseat
belt.Lowertherollbaronlywhenabsolutelynecessary;do
notweartheseatbeltwhentherollbarisdown.
3.ReadtheOperator'sManual;driveslowlyandcarefully.
110-2067
110-2068
1.ReadtheOperator'sManual.
112-9028
1.Warning—stayawayfrommovingparts;keepallguardsin
place.
114-4466
1.Main,25A3.Charge,25A
2.PTO,10A4.Auxiliary,15A
115-7445
1.Greasepulleysandspindles
2.Maintenanceinterval—50hours
8

116-1716
1.Fuel6.Hourmeter
2.Empty7.PTO
3.Half8.Parkingbrake
4.Full9.Neutral
5.Battery10.Operatorpresenceswitch
116-4858
116-5988
1.Parkingbrake—engaged2.Parking
brake—disengaged
116-8726
1.ReadtheOperator’sManualforrecommendedhydrooil.
117-0346
1.Fuelleakhazard—readtheOperator'sManual;donot
attempttoremovetherollbar;donotweld,drillormodify
therollbarinanyway.
117-3848
1.Thrownobjecthazard—keepbystandersasafedistance
fromthemachine
2.Thrownobjecthazard,mower-donotoperatewithoutthe
deector,dischargecoverorgrasscollectionsystemin
place.
3.Cutting/dismembermentofhandorfoot—stayawayfrom
movingparts;keepallguardsandshieldsinplace.
9

117-3864
1.ReadtheOperator’s
Manual.
2.Filltobottomofllerneck;
warning—donotoverll
thetank.
121-7551
1.PowerTake-off(PTO)4.Continuousvariable
setting
2.Choke5.Slow
3.Fast
126-2055
1.Wheellugnuttorque95ft-lb(129N-m)(4x)
2.Wheelhubnuttorque235ft-lb(319N-m)
3.ReadandunderstandtheOperator’sManualbefore
performinganymaintenance,checktorqueafterrst100
hoursthenevery500hoursthereafter.
126-4398
1.ReadtheOperator’s
Manual
3.Unlock
2.Lock
10

127-0326
1.ReadtheOperator's
Manual.
3.Removethekeyfrom
theignitionandreadthe
Operator'sManualbefore
performingmaintenance
orservicingthemachine.
2.Height-of-cut
131-4036
1.Maximumdrawbarpull36
kg(80lb)
2.ReadtheOperator's
Manual.
BatterySymbols
Someorallofthesesymbolsareonyourbattery
1.Explosionhazard6.Keepbystandersasafe
distancefromthebattery.
2.Nore,opename,or
smoking.
7.Weareyeprotection;
explosivegasescan
causeblindnessandother
injuries
3.Causticliquid/chemical
burnhazard
8.Batteryacidcancause
blindnessorsevereburns.
4.Weareyeprotection9.Flusheyesimmediately
withwaterandgetmedical
helpfast.
5.ReadtheOperator's
Manual.
10.Containslead;donot
discard.
Manufacturer'sMark
1.Indicatesthebladeisidentiedasapartfromtheoriginal
machinemanufacturer.
11

116-8722
1.Warning-ReadtheOperator’sManual.Donotoperatethis
machineunlessyouaretrained.Wearhearingprotection.
4.Cutting/dismembermentofhandorfoot-stayawayfrom
movingparts;keepallguardsandshieldsinplace.
2.Warning-Stayawayfrommovingparts;keepallguards
inplace.Stopengineandremovekeybeforeadjusting,
servicing,orcleaning.
5.Thrownobjecthazard-Pickupobjectsthatcouldbethrown
bymower.Donotoperatewhenpeopleandpetsareinthe
area.Keepdeectorinplace.
3.Warning-DisengagePTO,movedriveleversouttoneutral
lockposition,engageparkingbrake,andstopenginebefore
leavingtheoperator’sposition.
6.Crushing/dismembermenthazardofbystanders-donotcarry
passengers,lookforwardanddownwhenoperatingthe
machine,lookbehindanddownwhenreversing.
125–9383
1.Checkhydraulicoilevery50operatinghours.3.Checkthetirepressureevery50operatinghours.
2.ReadtheOperator’sManualforinformationonlubricating
themachine.
4.ReadtheOperator’sManualbeforeservicingorperforming
maintenance.
12

127–0335
1.Tippinghazardonslopes—donotmakesudden,tightturns;
makeslow,wideturns;donotuseonslopesnearopenwater;
donotusethismachineonslopesgreaterthan15degrees.
2.Ramphazard—whenloadingontoatrailer,donotusedual
ramps;onlyuseasingularrampwideenoughforthemachine
andthathasaninclinelessthan15degrees;backupthe
ramp(inreverse)anddriveforwardofftheramp.
13

ProductOverview
g027333
Figure4
1.Height-of-cutdeck-lift
pedal
6.Rollbar
2.Transportlock7.Seatbelt
3.Parkingbrakelever8.Fuelcap
4.Controls9.Mowerdeck
5.Motion-controllevers10.Casterwheel
Controls
Becomefamiliarwithallthecontrolsbeforeyoustartthe
engineandoperatethemachine(Figure4andFigure5).
25
25
10
15
G008951
1
2
345
6
Figure5
1.PTOSwitch4.Hour
meter/Safety-interlock
display
2.Choke5.Ignitionswitch
3.Throttlecontrol6.Fuses
HourMeter
Thehourmeterrecordsthenumberofhourstheenginehas
operated.Itoperateswhentheengineisrunning.Usethese
timesforschedulingregularmaintenance(Figure6).
FuelGauge
Thefuelgaugeislocatedwiththehourmeterandthebars
lightupwhentheignitionswitchison(Figure6).
Theindicatorlightappearswhenthefuellevelislow
(approximatelyonegallonremaininginthefueltank).
Safety-InterlockIndicators
Therearesymbolsonthehourmeterandtheindicatewitha
blacktrianglethattheinterlockcomponentisinthecorrect
position(Figure6).
BatteryIndicatorLight
IftheignitionkeyisturnedtotheOnpositionforafew
seconds,thebatteryvoltagewillbedisplayedinthearea
wherethehoursarenormallydisplayed.
Thebatterylightturnsonwhentheignitionisturnedonand
whenthechargeisbelowthecorrectoperatinglevel(Figure
6).
Figure6
1.Fuelgauge(bars)4.Safety-interlocksymbols
2.Batterylight5.Lowfuelindicatorlight
3.Hourmeter
ThrottleControl
ThethrottlecontrolisvariablebetweentheFastandSlow
positions.
Blade-ControlSwitch(PTO)
Theblade-controlswitch(PTO)isusedtoengagetheelectric
clutchanddrivethemowerblades.Pulltheswitchupto
engagethebladesandrelease.Todisengagetheblades,
pushtheblade-controlswitch(PTO)downormovea
motion-controlleverintotheneutrallockposition.
14

IgnitionSwitch
Thisswitchisusedtostartthemowerengineandhas3
positions:Start,Run,andOff.
Motion-ControlLevers
Themotion-controlleversareusedtodrivethemachine
forward,reverse,andturneitherdirection.
Neutral-LockPosition
Theneutral-lockpositionisusedwiththesafety-interlock
systemtoengageandtodetermineneutralposition.
FuelShutoffValve
Closethefuelshutoffvalve(undertheseat)whentransporting
orstoringthemower.
Attachments/Accessories
AselectionofToroapprovedattachmentsandaccessoriesis
availableforusewiththemachinetoenhanceandexpand
itscapabilities.ContactyourAuthorizedServiceDealeror
Distributororgotowww .Toro.comforalistofallapproved
attachmentsandaccessories.
Specications
Note:Specicationsanddesignaresubjecttochange
withoutnotice.
Width:
52-inchDeck72-inchDeck
WithoutDeck119cm(47inches)150cm(59inches)
DeectorUp135cm(53inches)187cm(74inches)
DeectorDown172cm(67inches)222cm(88inches)
Length:
52-inchDeck72-inchDeck
RollBar-Up202cm(79inches)219cm(86inches)
RollBar-Down206cm(81inches)223cm(88inches)
Height:
52-inchDeck72-inchDeck
RollBar-Up178cm(70inches)179cm(71inches)
RollBar-Down118cm(47inches)119cm(47inches)
Weight:
ModelWeight
74955495kg(1092lb)
74959588kg(1296lb)
15

Operation
Note:Determinetheleftandrightsidesofthemachine
fromthenormaloperatingposition.
AddingFuel
•Forbestresults,useonlyclean,fresh(lessthan30days
old),unleadedgasolinewithanoctaneratingof87or
higher((R+M)/2ratingmethod).
•Ethanol:Gasolinewithupto10%ethanol(gasohol)
or15%MTBE(methyltertiarybutylether)byvolume
isacceptable.EthanolandMTBEarenotthesame.
Gasolinewith15%ethanol(E15)byvolumeisnot
approvedforuse.Neverusegasolinethatcontains
morethan10%ethanolbyvolume,suchasE15
(contains15%ethanol),E20(contains20%ethanol),or
E85(containsupto85%ethanol).Usingunapproved
gasolinemaycauseperformanceproblemsand/orengine
damagewhichmaynotbecoveredunderwarranty.
•Donotusegasolinecontainingmethanol.
•Donotstorefueleitherinthefueltankorfuelcontainers
overthewinterunlessafuelstabilizerisused.
•Donotaddoiltogasoline.
DANGER
Incertainconditions,gasolineisextremely
ammableandhighlyexplosive.Areorexplosion
fromgasolinecanburnyouandothersandcan
damageproperty.
•Fillthefueltankoutdoors,inanopenarea,
whentheengineiscold.Wipeupanygasoline
thatspills.
•Neverllthefueltankinsideanenclosedtrailer.
•Donotllthefueltankcompletelyfull.Add
gasolinetothefueltankuntilthelevelis6to13
mm(1/4to1/2inch)belowthebottomofthe
llerneck.Thisemptyspaceinthetankallows
gasolinetoexpand.
•Neversmokewhenhandlinggasoline,andstay
awayfromanopenameorwheregasoline
fumesmaybeignitedbyaspark.
•Storegasolineinanapprovedcontainerand
keepitoutofthereachofchildren.Neverbuy
morethana30-daysupplyofgasoline.
•Donotoperatewithoutentireexhaustsystemin
placeandinproperworkingcondition.
DANGER
Incertainconditionsduringfueling,static
electricitycanbereleasedcausingasparkwhich
canignitethegasolinevapors.Areorexplosion
fromgasolinecanburnyouandothersandcan
damageproperty.
•Alwaysplacegasolinecontainersontheground
awayfromyourvehiclebeforelling.
•Donotllgasolinecontainersinsideavehicleor
onatruckortrailerbedbecauseinteriorcarpets
orplastictruckbedlinersmayinsulatethe
containerandslowthelossofanystaticcharge.
•Whenpractical,removegas-poweredequipment
fromthetruckortrailerandrefueltheequipment
withitswheelsontheground.
•Ifthisisnotpossible,thenrefuelsuch
equipmentonatruckortrailerfromaportable
container,ratherthanfromagasolinedispenser
nozzle.
•Ifagasolinedispensernozzlemustbeused,
keepthenozzleincontactwiththerimofthe
fueltankorcontaineropeningatalltimesuntil
fuelingiscomplete.
WARNING
Gasolineisharmfulorfatalifswallowed.Long-term
exposuretovaporscancauseseriousinjuryand
illness.
•Avoidprolongedbreathingofvapors.
•Keepfaceawayfromnozzleandgastankor
conditionerbottleopening.
•Avoidcontactwithskin;washoffspillagewith
soapandwater.
UsingStabilizer/Conditioner
Useafuelstabilizer/conditionerinthemachinetoprovide
thefollowingbenets:
•Keepsgasolinefreshduringstorageof90daysorless.
Forlongerstorageitisrecommendedthatthefueltank
bedrained.
•Cleanstheenginewhileitruns
•Eliminatesgum-likevarnishbuildupinthefuelsystem,
whichcauseshardstarting
Important:Donotusefueladditivescontaining
methanolorethanol.
Addthecorrectamountofgasstabilizer/conditionerto
thegas.
Note:Afuelstabilizer/conditionerismosteffective
whenmixedwithfreshgasoline.Tominimizethechance
16

ofvarnishdepositsinthefuelsystem,usefuelstabilizer
atalltimes.
FillingtheFuelTank
1.Shuttheengineoffandsettheparkingbrake.
2.Cleanaroundthefueltankcapandremovethecap.
Addunleadedregulargasolinetothefueltank,untilthe
levelis6to13mm(1/4to1/2inch)belowthebottom
ofthellerneck.Thisspaceinthetankallowsthe
gasolinetoexpand.Donotllthefueltankcompletely
full.
3.Installthefueltankcapsecurely.Wipeupanygasoline
thatmayhavespilled.
CheckingtheEngine-OilLevel
Beforeyoustarttheengineandusethemachine,check
theoillevelintheenginecrankcase;refertoCheckingthe
Engine-OilLevel(page36).
BreakinginaNewMachine
Newenginestaketimetodevelopfullpower.Mowerdecks
anddrivesystemshavehigherfrictionwhennew,placing
additionalloadontheengine.Allow40to50hoursof
break-intimefornewmachinestodevelopfullpowerand
bestperformance.
UsingtheRolloverProtection
System(ROPS)
WARNING
Toavoidinjuryordeathfromrollover:keeptheroll
barinthefullyraisedlockedpositionandusethe
seatbelt.
Ensurethattheseatissecuredtothemachine.
WARNING
Thereisnorolloverprotectionwhentherollbaris
inthedownposition.
•Lowertherollbaronlywhenabsolutely
necessary.
•Donotweartheseatbeltwhentherollbaris
inthedownposition.
•Driveslowlyandcarefully.
•Raisetherollbarassoonasclearancepermits.
•Checkcarefullyforoverheadclearances(i.e.
branches,doorways,electricalwires)before
drivingunderanyobjectsanddonotcontact
them.
Important:Lowertherollbaronlywhenabsolutely
necessary.
Important:Ensurethattheseatissecuredtothe
machine.
1.Tolowertherollbar,applyforwardpressuretothe
upperpartoftherollbar.
2.Pullbothknobsoutandrotatethem90°sothatthey
arenotengaged(Figure7).
3.Lowertherollbartothedownposition(Figure7).
Figure7
1.ROPSknob3.Rollbarintheupright
position
2.PullROPSknoboutand
rotate90degrees
4.Rollbarinthefolded
position
4.Toraisetherollbar,raisetherollbartotheoperate
position,rotatetheknobssotheymovepartiallyinto
thegrooves(Figure7).
5.Raisetherollbartothefulluprightpositionwhile
pushingontheupperrollbarandthepinswillsnap
intopositionwhentheholesalignwiththepins(Figure
7).Pushontherollbarandensurethatbothpinsare
engaged.
17

Important:Alwaysusetheseatbeltwiththeroll
barinthefullyraisedposition.
ThinkSafetyFirst
Pleasereadallsafetyinstructionsandsymbolsinthesafety
section.Knowingthisinformationcouldhelpyouor
bystandersavoidinjury.
DANGER
Operatingonwetgrassorsteepslopescancause
slidingandlossofcontrol.
Wheelsdroppingoveredgescancauserollovers,
whichmayresultinseriousinjury,deathor
drowning.
Thereisnorolloverprotectionwhentherollbaris
down.
Alwayskeeptherollbarinthefullyraisedand
lockedpositionandusetheseatbelt.
Readandfollowtherolloverprotectioninstructions
andwarnings.
Toavoidlossofcontrolandpossibilityofrollover:
•Donotoperateneardrop-offsornearwater.
•Donotoperateonslopesgreaterthan15degrees.
•Reducespeedanduseextremecautionon
slopes.
•Avoidsuddenturnsorrapidspeedchanges.
Figure8
1.SafeZone—usethe
ZMasterhereonslopes
lessthan15degreesor
atareas.
3.Water
2.DangerZone—useawalk
behindmowerand/ora
handtrimmeronslopes
greaterthan15degrees,
neardrop-offsandwater.
CAUTION
Thismachineproducessoundlevelsinexcessof
85dBAattheoperatorsearandcancausehearing
lossthroughextendedperiodsofexposure.
Wearhearingprotectionwhenoperatingthis
machine.
Theuseofprotectiveequipmentforeyes,ears,feet,andhead
isrecommended.
G009027
12
Figure9
1.Wearsafetyglasses2.Wearhearingprotection
OperatingtheParkingBrake
Alwayssettheparkingbrakewhenyoustopthemachineor
leaveitunattended.
SettingtheParkingBrake
WARNING
Parkingbrakemaynotholdmachineparkedona
slopeandcouldcausepersonalinjuryorproperty
damage.
Donotparkonslopesunlesswheelsarechocked
orblocked
g027334
Figure10
18

ReleasingtheParkingBrake
g027335
Figure11
OperatingtheMower
Blade-ControlSwitch(PTO)
Theblade-controlswitch(PTO)startsandstopsthemower
bladesandanypoweredattachments.
EngagingtheBlade-ControlSwitch
(PTO)
Note:Engagingtheblade-controlswitch(PTO)withthe
throttlepositionathalforlesswillcauseexcessivewearto
thedrivebelts.
G008945
Figure12
DisengagingtheBlade-ControlSwitch
(PTO)
G009174
Figure13
OperatingtheThrottle
ThethrottlecontrolcanbemovedbetweentheFastand
Slowpositions(Figure14).
Alwaysusethefastpositionwhenturningonthemowerdeck
withtheblade-controlswitch(PTO).
G008946
Figure14
OperatingtheIgnitionSwitch
1.TurntheignitionkeytotheStartposition(Figure15).
Whentheenginesstarts,releasethekey.
Important:Donotengagestarterformorethan5
secondsatatime.Iftheenginefailstostartallow
a15secondcool-downperiodbetweenattempts.
Failuretofollowtheseinstructionscanburnout
thestartermotor.
Note:Additionalstartingcyclesmayberequired
whenstartingtheengineforthersttimeafterthefuel
systemhasbeenwithoutfuelcompletely.
START
RUN
ST OP
G008947
Figure15
2.Turntheignitionkeytostoptostoptheengine.
19

UsingtheFuelShutoffValve
Thefuelshutoffvalveislocatedundertheseat.Movethe
seatforwardtoaccessit.
Closethefuelshutoffvalvefortransport,maintenance,and
storage.
Ensurethefuelshutoffvalveisopenwhenstartingtheengine.
G008948
1
2
Figure16
1.On2.Off
StartingandStoppingthe
Engine
StartingtheEngine
1.RaisetheROPSupandlockintoplace,sitontheseat
andfastentheseatbelt.
2.Movethemotioncontrolstoneutrallockedposition.
3.Settheparkingbrake;refertoSettingtheParking
Brake(page18).
4.Movethebladecontrolswitch(PTO)totheoff
position(Figure17).
5.Movethethrottlelevermidwaybetweentheslowand
fastpositions.
AB
CD
D
g027336
Figure17
6.TurntheignitionkeytotheStartposition(Figure15).
Whentheenginesstarts,releasethekey.
Important:Donotengagestarterformorethan5
secondsatatime.Iftheenginefailstostartallow
a15secondcool-downperiodbetweenattempts.
Failuretofollowtheseinstructionscanburnout
thestartermotor.
Note:Additionalstartingcyclesmayberequired
whenstartingtheengineforthersttimeafterthefuel
systemhasbeenwithoutfuelcompletely.
START
RUN
ST OP
G008947
Figure18
1.Off3.Start
2.Run
20
This manual suits for next models
1
Table of contents
Other Toro Lawn Mower manuals

Toro
Toro TimeCutter 74701 User manual

Toro
Toro 74790 User manual

Toro
Toro 4383 User manual

Toro
Toro 22164TE User manual

Toro
Toro 30140 User manual

Toro
Toro 74997 User manual

Toro
Toro 74920 TITAN ZX4820 User manual

Toro
Toro 30031 User manual

Toro
Toro Z400 Series Z-Master User manual

Toro
Toro 30366 User manual

Toro
Toro 74268 User manual

Toro
Toro 21385 User manual

Toro
Toro 3780 User manual

Toro
Toro Greensmaster 3000 Series User manual

Toro
Toro 03966 User manual

Toro
Toro Z Master Professional 5000 Series User manual

Toro
Toro 70171 User manual

Toro
Toro 30071 User manual

Toro
Toro 20713 User manual

Toro
Toro Groundsmaster 1000L User manual