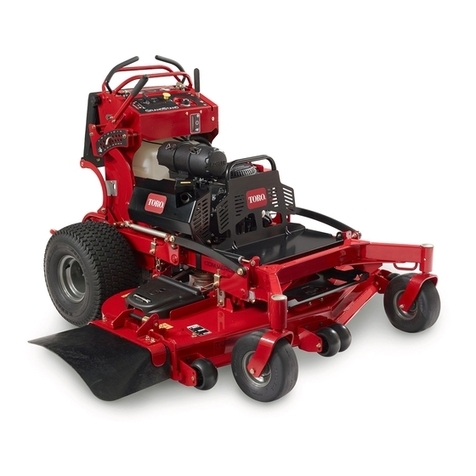
Toro GrandStand 134-3259 User manual

FormNo.3431-158RevC
MulchingKit
GrandStand®MowerWith122cmRearDischargeTURBOFORCE®
CuttingUnit
ModelNo.134-3259
InstallationInstructions
Safety
RearDischargeorMulch
Grass
WARNING
Withoutthegrassdeectormountedinplace,
youandothersareexposedtobladecontact
andthrowndebris.Contactwithrotating
mowerblade(s)andthrowndebriswillcause
injuryordeath.
•Neverremovethegrassguardfromthe
mowerbecausethegrassguardroutes
materialdowntowardtheturf.Ifthe
grassguardiseverdamaged,replaceit
immediately.
•Neverputyourhandsorfeetunderthe
mower.
•Nevertrytoclearthedischargeareaor
mowerbladesunlessyouengagethe
parkingbrake,disengagethepowertake
off(PTO)lever,shutofftheengine,remove
theignitionkey,andwaitforallmotion
tostop.Alsopullthewireoffthespark
plug(s).
Ensurethatthemowerhasthereargrassguardto
dispersesclippingstotherearwardanddowntoward
theturf,whileinreardischargemode.
Tomulchgrassclippings,installthebafesonthe
mowerdeckasinstructedinthefollowingprocedures.
©2019—TheToro®Company
8111LyndaleAvenueSouth
Bloomington,MN55420
Registeratwww.Toro.com.OriginalInstructions(EN)
PrintedintheUSA
AllRightsReserved*3431-158*C

Installation
LooseParts
Usethechartbelowtoverifythatallpartshavebeenshipped.
ProcedureDescriptionQty.Use
1Nopartsrequired–Preparethemower.
2Nopartsrequired–Opentheengineguard.
3Nopartsrequired–Removetheleftbeltcover.
4Nopartsrequired–Removetheexistingblades.
5Nopartsrequired–Drillthemowerdeck.
Leftbafesupport1
Center/rightbafesupport2
Flangedcapscrew(5/16x3/4inch)2
Flangelocknut(5/16inch)6
6
Carriagebolt(5/16x1-1/4inches)4
Installthebafesupports.
Bafe(right)1
Bafe(center)1
Bafe(left)1
Carriagebolt(3/8x1inch)9
7
Flangelocknut(3/8inch)9
Installthebafes.
Kickertting3
Carriagebolt(3/8x1inch)6
8Flangelocknut(3/8inch)6
Installthekickerttings.
9Recyclerblades(soldseparately)3Installtherecyclerblades.
10Nopartsrequired–Installtheleftbeltcover.
11Nopartsrequired–Installtheguardextensionandclose
theengineguard.
12Flange-headcapscrew(3/8x1inch)8Convertthedeckforrear-discharge
operation.
Note:Recyclerblades(soldseparately)arerequiredtoinstallthiskit;refertothePartsCatalogforyour
machine.
2

1
PreparingtheMower
NoPartsRequired
Procedure
Note:Determinetheleftandrightsidesofthe
machinefromthenormaloperatingposition.
1.Parkthemachineonalevelsurface;disengage
thecuttingunit(s)andlowerthecuttingunit;
engagetheparkingbrake;shutofftheengine
andremovethekey;andwaitforallmovement
tostop.
2.Thoroughlycleanthemowerdeck.Remove
alldebristoensurethatthebafestproperly
againstthemowerdeck.
3.Repairallbentordamagedareasofthemower
deckandreplaceanymissingordamagedparts.
2
OpeningtheEngineGuard
andRemovingtheGuard
Extension
NoPartsRequired
OpeningtheEngineGuard
1.Removetheboltandshouldernutsecuringthe
engineguardtotheguardextension(Figure1).
g279539
Figure1
1.Boltandshouldernut2.Engineguard
2.Rotatetheengineguardforwardasshownin
Figure2.
g279542
Figure2
DisconnectingtheSpark-Plug
Wire
Removethespark-plugwirefromthesparkplug.
3

RemovingtheGuardExtension
1.Removethe2bolts(5/16x1inch)andbelt
guard(Figure3).
g279540
Figure3
1.Bolt(5/16x1inch)2.Beltguard
2.Removethehexnut(5/16inch)nut(5/16inch)
securingtheguardextensiontothecarriage
bolts(Figure4).Removetheguardextension.
g288411
Figure4
1.Hexnut(5/16inch)3.Nut(5/16)
2.Guardextension4.Carriagebolt(5/16x4
inches)
3
RemovingtheLeftBelt
Cover
NoPartsRequired
Procedure
1.Removethe2ange-headscrewsthatsecure
thetensionercovertotheleftbeltcover,and
removethetensionercover(Figure5).
g270487
Figure5
1.Flange-headscrews(1/4
x5/8inch)
3.Leftbeltcover
2.Tensionercover
2.Removetheboltthatsecurethebeltcover
angesasshowninFigure6.
4

g270486
Figure6
1.Rightbeltcover3.Flange-headscrew(left
andrightbeltcover)
2.Flange(leftbeltcover)
3.Removethe2carriageboltsand2locknutsthat
securetheleftsideCEcovertotheleftbelt
cover(Figure7).
g270474
Figure7
1.Carriagebolt3.Leftbeltcover
2.LeftsideCEcover4.Flangelocknut
4.Removethe3boltsthatsecuretheleftbeltcover
tothedeck,andremovethecover(Figure8).
g270488
Figure8
1.Bolts2.Leftbeltcover
4
RemovingtheExisting
Blades
NoPartsRequired
Procedure
1.Liftthemachinesothatyoucanaccessthe
bottomofthemowerdeck.
2.Removetheexistingbladesfromthespindles;
refertotheOperator’sManualforyourmachine.
Note:Savethebladesforusewhencuttinggrass
inreardischargemode.
Youwillusethebladeboltandwasherforinstalling
therecyclerbladesin9InstallingtheRecyclerBlades
(page14).
5

5
DrillingtheMowerDeck
NoPartsRequired
DrillingtheCenterBafeSupport
Holes
1.Atthebottomofthemowerdeck,drillthe2pilot
holesinthedeckwithan8mm(5/16inch)drill
bitasshowninFigure9.
g284195
g284196
Figure9
1.Pilothole(mowerdeck)2.8mm(5/16inch)drillbit
2.Removeanyburrsfromtheholesthatyou
drilled.
DrillingtheBafeandKicker
FittingHoles
Note:Determinetheleftandrightsidesofthe
machinefromthenormaloperatingposition.
1.Attheleftsideofthemowerdeck,drillthepilot
holeinthedeckwitha10mm(3/8inch)drillbit
asshowninFigure10.
g284199
g284200
Figure10
1.10mm(3/8inch)drillbit2.Pilothole(mowerdeck)
2.Removeanyburrsfromtheholes.
3.Attherightsideofthemowerdeck,drillthepilot
holeinthedeckwitha10mm(3/8inch)drillbit
asshowninFigure11.
6

g284201
g284202
Figure11
1.Pilothole(mowerdeck)2.10mm(3/8inch)drillbit
4.Atthebottomofthemowerdeck,drillthe6pilot
holesinthedeckwitha10mm(3/8inch)drillbit
asshowninFigure12.
g284197
g284198
Figure12
1.Pilotholes(mowerdeck)2.10mm(3/8inch)drillbit
5.Attheleftdivider,drillthepilotholeinthedivider
witha10mm(3/8inch)drillbitasshownin
Figure13.
g284266
Figure13
1.Frontofthemachine3.10mm(3/8inch)drillbit
2.Pilotholes(leftdivider)
7

6.Removeanyburrsfromtheholesthatyou
drilled.
6
InstallingtheBafe
Supports
Partsneededforthisprocedure:
1Leftbafesupport
2Center/rightbafesupport
2Flangedcapscrew(5/16x3/4inch)
6Flangelocknut(5/16inch)
4Carriagebolt(5/16x1-1/4inches)
IdentifyingtheBafeSupports
Identifytheleftbafesupportandthe2center/right
bafesupports(Figure14).
g284108
Figure14
1.Leftbafesupport2.Center/rightbafe
supports
InstallingtheLeftBafeSupport
Note:Determinetheleftandrightsidesofthe
machinefromthenormaloperatingposition.
1.Removethe2outboardcarriagebolts(5/16x
7/8inch)and2outboardangelocknuts(5/16
inch)thatsecurethedeectorbrackettothe
mowerdeck(Figure15).
g284228
Figure15
1.Frontofthemachine3.Deectorbracket
2.Carriagebolt(5/16x7/8
inch)
4.Flangelocknut(5/16inch)
2.Aligntheholesintheleftbafesupportwiththe
holesonthemowerdeckanddeectorbracket
(Figure16).
g284224
g284225
Figure16
1.Frontofthemachine4.Deectorbracket
2.Leftbafesupport5.Flangelocknut(5/16inch)
3.Carriagebolt(5/16x1-1/4
inch)
3.Assembletheleftbafesupporttothemower
deckanddeectorbracket(Figure16)with2
8

carriagebolts(5/16x1-1/4inch)and2ange
locknuts(5/16inch).
4.Torquethe2angelocknutsto20to25N∙m(15
to18ft-lb).
InstallingtheRightBafeSupport
Note:Determinetheleftandrightsidesofthe
machinefromthenormaloperatingposition.
1.Removethe2outboardcarriagebolts(5/16x
7/8inch)and2outboardangelocknuts(5/16
inch)thatsecurethedeectorbrackettothe
mowerdeck(Figure17).
g284229
Figure17
1.Flangelocknut(5/16inch)3.Carriagebolt(5/16x7/8
inch)
2.Deectorbracket4.Frontofthemachine
2.Aligntheholesinthecenter/rightbafesupport
withtheholesonthemowerdeckanddeector
bracket(Figure18).
g284226
g284227
Figure18
1.Flangelocknut(5/16inch)4.Deectorbracket
2.Carriagebolt(5/16x1-1/4
inch)
5.Frontofthemachine
3.Center/rightbafesupport
3.Assembleacenter/rightbafesupporttothe
mowerdeckanddeectorbracket(Figure18)
with2carriagebolts(5/16x1-1/4inch)and2
angelocknuts(5/16inch).
4.Torquethe2angelocknutsto20to25N∙m(15
to18ft-lb).
9

InstallingtheCenterBafe
Support
Note:Determinetheleftandrightsidesofthe
machinefromthenormaloperatingposition.
1.Atthetopofthemowerdeck,insert2
ange-headbolts(5/16x3/4inch)throughthe8
mm(5/16inch)holesthatyoudrilledinDrilling
theCenterBafeSupportHoles(page6).
g284246
g284247
Figure19
1.Flange-headbolts(5/16x
3/4inch)
2.Mowerdeckhole—8mm
(5/16inch)
2.Atthebottomofthemowerdeck,assemblea
center/rightbafesupportontotheange-head
boltswith2angelocknuts(5/16inch).
g284248
g284249
Figure20
1.Flange-headbolts(5/16x
3/4inch)
3.Flangelocknut(5/16inch)
2.Frontofthemachine4.Center/rightbafesupport
3.Torquethe2angelocknutsto20to25N∙m(15
to18ft-lb).
7
InstallingtheBafes
Partsneededforthisprocedure:
1Bafe(right)
1Bafe(center)
1Bafe(left)
9Carriagebolt(3/8x1inch)
9Flangelocknut(3/8inch)
IdentifyingtheBafes
Identifytheleft,center,andrightbafes(Figure21).
10

g284121
Figure21
1.Leftbafe3.Rightbafe
2.Centerbafe
InstallingtheBafes
Note:Determinetheleftandrightsidesofthe
machinefromthenormaloperatingposition.
1.Aligntheholesintherightbafewiththeholein
therightsideplateofthemowerdeck,thehole
inthecenter/rightbafesupport,andtheholein
therightdividerasshowninFigure22.
g284292
g284293
Figure22
1.Rightsideplate(mower
deck)
5.Rightbafe
2.Rightdivider6.Carriagebolt(3/8x1inch)
3.Center/rightbafesupport7.Frontofthemachine
4.Flangelocknut(3/8inch)
2.Assembletherightbafetothemowerdeckside
plate,thebafesupport,andthedivider(Figure
22)with3carriagebolts(3/8x1inch)and3
angelocknuts(3/8inch).
3.Aligntheholesinthecenterbafewiththe
holeintherightdivider,theholeintheother
center/rightbafesupport,andtheleftdivider
asshowninFigure23.
g284289
g284288
Figure23
1.Flangelocknut(3/8inch)5.Leftdivider
2.Rightdivider6.Centerbafe
3.Carriagebolt(3/8x1inch)7.Frontofthemachine
4.Center/rightbafesupport
4.Assemblethecenterbafetotherightandleft
dividers(Figure23)with3carriagebolts(3/8x1
inch)and3angelocknuts(3/8inch).
5.Aligntheholesintheleftbafewiththeholein
theleftsideplateofthemowerdeck,theholein
theleftbafesupport,andtheholeintheleft
dividerasshowninFigure24.
11

g284291
g284290
Figure24
1.Flangelocknut(3/8inch)5.Frontofthemachine
2.Leftdivider6.Leftbafe
3.Leftbafesupport7.Carriagebolt(3/8x1inch)
4.Leftsideplate(mower
deck)
6.Assembletheleftbafetothemowerdeckside
plate,thebafesupport,andthedivider(Figure
24)with3carriagebolts(3/8x1inch)and3
angelocknuts(3/8inch).
7.Torquethe9angelocknuts(3/8inch)to27to
33N∙m(37to45ft-lb).
8
InstallingtheKickerFittings
Partsneededforthisprocedure:
3Kickertting
6Carriagebolt(3/8x1inch)
6Flangelocknut(3/8inch)
Procedure
Note:Determinetheleftandrightsidesofthe
machinefromthenormaloperatingposition.
1.Attherightsideofthemowerdeck,alignthe
slotsinthekickerttingwiththe2holes10mm
(3/8inch)thatyoudrilledintothemowerdeck
(Figure25).
g284382
g284383
Figure25
1.Flangelocknut(3/8inch)4.Carriagebolt(3/8x1inch)
2.10mm(3/8inch)
holes—mowerdeck
5.Frontofthemachine
3.Kickertting
2.Assemblethekickerttingtothedeck(Figure
25)with2carriagebolts(3/8x1inch)and2
angelocknuts(3/8inch).
3.Atthemiddleofthemowerdeck,aligntheslots
inthekickerttingwiththe2holes10mm
12

(3/8inch)thatyoudrilledintothemowerdeck
(Figure26).
g284378
g284379
Figure26
1.Kickertting4.10mm(3/8inch)
holes—mowerdeck
2.Flangelocknut(3/8inch)5.Frontofthemachine
3.Carriagebolt(3/8x1inch)
4.Assemblethekickerttingtothedeck(Figure
26)with2carriagebolts(3/8x1inch)and2
angelocknuts(3/8inch).
5.Attheleftsideofthemowerdeck,alignthe
slotsinthekickerttingwiththe2holes10mm
(3/8inch)thatyoudrilledintothemowerdeck
(Figure27).
g284380
g284381
Figure27
1.Kickertting4.Carriagebolt(3/8x1inch)
2.Flangelocknut(3/8inch)5.10mm(3/8inch)
holes—mowerdeck
3.Frontofthemachine
6.Assemblethekickerttingtothedeck(Figure
27)with2carriagebolts(3/8x1inch)and2
angelocknuts(3/8inch).
7.Torquethe2angelocknutsto37to45N∙m(27
to33ft-lb).
13

9
InstallingtheRecycler
Blades
Partsneededforthisprocedure:
3Recyclerblades(soldseparately)
Procedure
WARNING
Abladeissharp.Contactwithasharpblade
cancauseseriouspersonalinjury.
Wearglovesorwrapsharpedgesoftheblade
witharag.
Installtherecyclerbladesontothemower;referto
thePartsCatalogforyourmachineforthebladepart
numberandtheOperator’sManualforyourmachine
forinstallationinstructions.
10
InstallingtheLeftBelt
Cover
NoPartsRequired
Procedure
1.Assembletheleftbeltcovertothedeck(Figure
28)withthe3boltsthatyouremovedin3
RemovingtheLeftBeltCover(page4).
g270503
Figure28
1.Bolts2.Leftbeltcover
2.AssembletheleftsideCEcovertotheleftbelt
cover(Figure29)withthe2carriageboltsand
2locknutsthatyouremovedin3Removingthe
LeftBeltCover(page4).
g270474
Figure29
1.Carriagebolt3.Leftbeltcover
2.LeftsideCEcover4.Flangelocknut
3.Securethebeltcoverangeswiththe
ange-headscrew(Figure30)thatyouremoved
in3RemovingtheLeftBeltCover(page4).
14

g270486
Figure30
1.Rightbeltcover3.Flange-headscrew(left
andrightbeltcover)
2.Flange(leftbeltcover)
4.Assemblethetensionercovertotheleftbelt
coverwiththe2ange-headscrewsthatyou
removedin3RemovingtheLeftBeltCover
(page4),asshowninFigure31.
g270487
Figure31
1.Flange-headscrews(1/4
x5/8inch)
3.Leftbeltcover
2.Tensionercover
11
InstallingtheGuard
ExtensionandClosing
theEngineGuard
NoPartsRequired
InstallingtheGuardExtension
1.InstalltheextensionguardasshowninFigure
32.T orquethenutsto20to25N∙m(15to18
ft-lb).
g288411
Figure32
1.Hexnut(5/16inch)3.Nut(5/16)
2.Guardextension4.Carriagebolt(5/16x4
inches)
2.InstallthebeltguardasshowninFigure33.
Torquetheboltsto20to25N∙m(15to18ft-lb).
15

g279540
Figure33
1.Bolt(5/16x1inch)2.Beltguard
ConnectingtheSpark-PlugWire
Connectthespark-plugwiretothesparkplug.
ClosingtheEngineGuard
1.Rotatetheengineguardbackasshownin
Figure34.
g279543
Figure34
2.Securetheengineguardtotheextensionguard
usingtheboltandshouldernutasshownin
Figure35.
g279539
Figure35
1.Boltandshouldernut2.Engineguard
12
ConvertingtheMower
DeckforRear-Discharge
Operation
Partsneededforthisprocedure:
8Flange-headcapscrew(3/8x1inch)
PreparingtoRemovetheMulching
Kit
1.Preparethemower;referto1Preparingthe
Mower(page3).
2.Opentheengineguardandremovetheguard
extension;referto2OpeningtheEngineGuard
andRemovingtheGuardExtension(page3).
3.Removethebeltcover;referto3Removingthe
LeftBeltCover(page4).
4.Removetherecyclingblades;refertothe
Operator’sManualforyourmachine.
16

RemovingtheKickerFittings
Note:Determinetheleftandrightsidesofthe
machinefromthenormaloperatingposition.
1.Atthebottomleftsideofthemowerdeck,
removethe2carriagebolts(3/8x1inch)and2
angelocknuts(3/8inch)thatsecurethekicker
ttingtothedeck,andremovethekickertting
(Figure36).
g284380
Figure36
1.Kickertting4.Carriagebolt(3/8x1inch)
2.Flangelocknut(3/8inch)5.10mm(3/8inch)
hole—mowerdeck
3.Frontofthemachine
2.Atthebottom,centersideofthemowerdeck,
removethe2carriagebolts(3/8x1inch)and2
angelocknuts(3/8inch)thatsecurethekicker
ttingtothedeck,andremovethekickertting
(Figure37).
g284378
Figure37
1.Kickertting4.10mm(3/8inch)
hole—mowerdeck
2.Flangelocknut(3/8inch)5.Frontofthemachine
3.Carriagebolt(3/8x1inch)
3.Install2ange-headcapscrews(3/8x1inch)
intothe10mm(3/8inch)holesinthemower
deck(Figure38)andsecurethecapscrewswith
2angelocknuts(3/8inch)thatyouremoved
instep2.
g284405
Figure38
1.Flangelocknut(3/8inch)3.10mm(3/8inch)—mower
deck
2.Flange-headcapscrew
(3/8x1inch)
4.Atthebottom,rightsideofthemowerdeck,
removethe2carriagebolts(3/8x1inch)and2
angelocknuts(3/8inch)thatsecurethekicker
ttingtothedeck,andremovethekickertting
(Figure39).
g284382
Figure39
1.Flangelocknut(3/8inch)4.Carriagebolt(3/8x1inch)
2.10mm(3/8inch)
holes—mowerdeck
5.Frontofthemachine
3.Kickertting
5.Install2ange-headcapscrews(3/8x1inch)
intothe10mm(3/8inch)holesinthemower
deck(Figure39)andsecurethecapscrewswith
2angelocknuts(3/8inch)thatyouremoved
instep4.
17

g284406
Figure40
1.Flangelocknut(3/8inch)3.Flange-headcapscrew
(3/8x1inch)
2.10mm(3/8inch)
holes—mowerdeck
Note:Retainthecarriageboltsandkickerttingfor
installation.
RemovingtheBafes
Note:Determinetheleftandrightsidesofthe
machinefromthenormaloperatingposition.
1.Atthebottom,leftsideofthemowerdeck,
removethe3carriagebolts(3/8x1inch)and3
angelocknuts(3/8)thatsecuretheleftbafe
tothemowerdecksideplate,theleftbafe
support;andtheleftdivider;andremovetheleft
bafe(Figure41).
g284291
Figure41
1.Flangelocknut(3/8inch)5.Frontofthemachine
2.Leftdivider6.Leftbafe
3.Leftbafesupport7.Carriagebolt(3/8x1inch)
4.Leftsideplate(mower
deck)
2.Installaange-headcapscrew(3/8x1inch)
intothe10mm(3/8inch)holesinthemower
deck(Figure42)andsecurethecapscrewswith
theangelocknut(3/8inch)thatyouremoved
instep1.
g284407
Figure42
1.Flangelocknut(3/8inch)3.Flange-headcapscrew
(3/8x1inch)
2.Rightsideplate(mower
deck)
3.Atthebottom,centersideofthemowerdeck,
removethe3carriagebolts(3/8x1inch)and3
angelocknuts(3/8)thatsecurethecenterbafe
totheleftdivider,center/rightbafesupport,
andrightdivider;andremovethecenterbafe
(Figure43).
g284289
Figure43
1.Flangelocknut(3/8inch)5.Leftdivider
2.Rightdivider6.Centerbafe
3.Carriagebolt(3/8x1inch)7.Frontofthemachine
4.Center/rightbafesupport
4.Atthebottom,rightsideofthemowerdeck,
removethe3carriagebolts(3/8x1inch)and3
angelocknuts(3/8)thatsecuretherightbafe
tothemowerdecksideplate,thecenter/right
bafesupport;andtherightdivider;andremove
therightbafe(Figure44).
18

g284292
Figure44
1.Rightsideplate(mower
deck)
5.Rightbafe
2.Rightdivider6.Carriagebolt(3/8x1inch)
3.Center/rightbafesupport7.Frontofthemachine
4.Flangelocknut(3/8inch)
5.Installaange-headcapscrew(3/8x1inch)
intothe10mm(3/8inch)holesinthemower
deck(Figure45)andsecurethecapscrewswith
theangelocknut(3/8inch)thatyouremoved
instep4.
g284408
Figure45
1.Flangelocknut(3/8inch)3.Flange-headcapscrew
(3/8x1inch)
2.Leftsideplate(mower
deck)
Note:Retainthecarriageboltsandbafesfor
installation.
RemovingtheBafeBrackets
1.Removethe2angelocknuts(5/16inch)that
securetheleftbafesupport(Figure46).
g287227
Figure46
1.Flangelocknut(5/16inch)2.Carriagebolt(bafe
support)
2.Removethe2angelocknuts(5/16inch)that
securetherightbafesupport(Figure46).
3.Removetheleftbafesupportand2carriage
bolt(5/16x1-1/4inch)fromthebottomofthe
mowerdeckasshowninFigure47.
19

g287228
Figure47
1.Flange-headbolts(5/16x
3/4inch)
4.Flangelocknut(5/16inch)
2.Carriagebolts(5/16x
1-1/4inch)
5.Frontofthemachine
3.Centerandrightbafe
supports
6.Leftbafesupport
4.Removetherightbafesupportand2carriage
bolt(5/16x1-1/4inch)fromthebottomofthe
mowerdeckasshowninFigure47.
5.Removethe2angelocknut(5/16inch)that
securethecenterbafesupporttothe2
ange-headbolts(5/16x3/4inch),andremove
thecentersupport(Figure47).
Note:Donotremovetheange-headbolts.
6.Installthe4carriagebolts(Figure48)thatyou
removeinsteps3and4intotheholesinthe
mowerdeck,andsecurethecarriageboltswith
the4angelocknutsthatyouremovedinsteps
1and2.
g287226
Figure48
1.Holes(mowerdeck)3.Carriagebolt(5/16x1-1/4
inch)
2.Flange-headbolts(5/16x
3/4inch)
4.Flangelocknut(5/16inch)
7.Installthe2angelocknut(Figure48)thatyou
removedinstep5ontothe2ange-headbolts
(5/16x3/4inch).
Note:Retainthe3bafesupportsforinstallation.
20
Table of contents
Other Toro Lawn Mower manuals

Toro
Toro TimeCutter SS 5060 User manual

Toro
Toro ProLine 22031 User manual

Toro
Toro ProStripe 560 User manual

Toro
Toro 29641 User manual

Toro
Toro Groundsmaster 360 Series User manual

Toro
Toro 20319 User manual

Toro
Toro 30487TC User manual

Toro
Toro 71285 User manual

Toro
Toro TurfMaster 22225 User manual

Toro
Toro TimeCutter Z5040 User manual

Toro
Toro eTimeMaster 21491 User manual

Toro
Toro Recycler 21050B User manual

Toro
Toro Recycler 21445 User manual

Toro
Toro Z597 Z Master Manual

Toro
Toro GREENSMASTER 3000-D User manual

Toro
Toro Groundsmaster 328-D 30630 User manual

Toro
Toro 4021 User manual

Toro
Toro Z Master Professional 7500-DSeries User manual

Toro
Toro 79108 User manual

Toro
Toro 75934 User manual