Toro Greensmaster 1610 User manual

FormNo.3378-438RevA
Greensmaster®1010and1610
Mower
ModelNo.04038—SerialNo.313000601andUp
ModelNo.04039—SerialNo.313000601andUp
Registeratwww.Toro.com.
OriginalInstructions(EN)*3378-438*A

ThisproductcomplieswithallrelevantEuropeandirectives,
fordetailspleaseseetheseparateproductspecicDeclaration
ofConformity(DOC)sheet.
WARNING
CALIFORNIA
Proposition65Warning
Thisproductcontainsachemicalorchemicals
knowntotheStateofCaliforniatocausecancer,
birthdefects,orreproductiveharm.
Theengineexhaustfromthisproduct
containschemicalsknowntotheStateof
Californiatocausecancer,birthdefects,
orotherreproductiveharm.
ThissparkignitionsystemcomplieswithCanadianICES-002.
Introduction
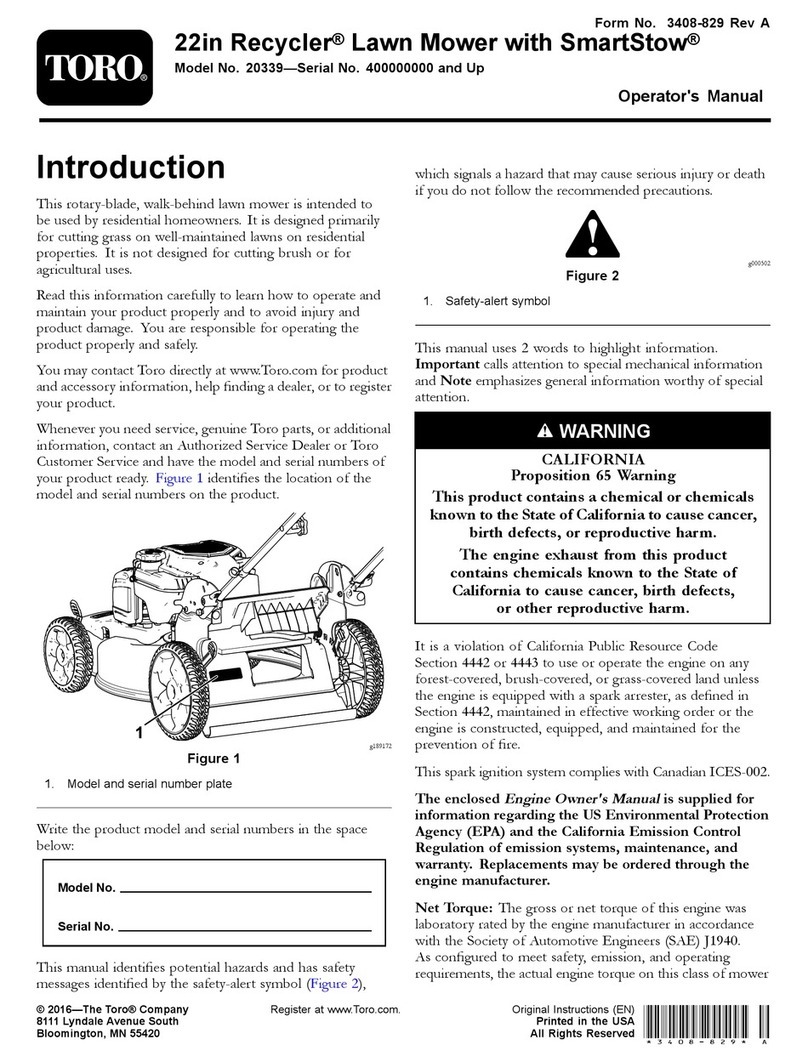
Thismachineisawalkbehind,reel-bladelawnmower
intendedtobeusedbyprofessional,hiredoperatorsin
commercialapplications.Itisprimarilydesignedforcutting
grassonwell-maintainedlawnsinparks,golfcourses,sports
elds,andoncommercialgrounds.Itisnotdesignedfor
cuttingbrush,mowinggrassandothergrowthalongside
highways,orforagriculturaluses.
Readthisinformationcarefullytolearnhowtooperateand
maintainyourproductproperlyandtoavoidinjuryand
productdamage.Youareresponsibleforoperatingthe
productproperlyandsafely.
YoumaycontactTorodirectlyatwww.Toro.comforproduct
andaccessoryinformation,helpndingadealer,ortoregister
yourproduct.
Wheneveryouneedservice,genuineToroparts,oradditional
information,contactanAuthorizedServiceDealerorToro
CustomerServiceandhavethemodelandserialnumbers
ofyourproductready.Themodelandserialnumbersare
locatedonaplateontherearframe.Writethenumbersin
thespaceprovided.
ModelNo.
SerialNo.
Thismanualidentiespotentialhazardsandhassafety
messagesidentiedbythesafetyalertsymbol(Figure1),
whichsignalsahazardthatmaycauseseriousinjuryordeath
ifyoudonotfollowtherecommendedprecautions.
Figure1
1.Safetyalertsymbol.
Thismanualusestwowordstohighlightinformation.
Importantcallsattentiontospecialmechanicalinformation
andNoteemphasizesgeneralinformationworthyofspecial
attention.
©2013—TheToro®Company
8111LyndaleAvenueSouth
Bloomington,MN554202
Contactusatwww.Toro.com.
PrintedintheUSA
AllRightsReserved

Contents
Introduction..................................................................2
Safety...........................................................................4
SafeOperatingPractices...........................................4
ToroMowerSafety..................................................5
ForModel04038.....................................................6
ForModel04039.....................................................6
SafetyandInstructionalDecals.................................7
Setup............................................................................9
1InstallingandAdjustingtheHandle.........................9
2InstallingtheKickstand(ForGR1610)....................10
3InstallingtheTransportWheelShafts......................11
4InstallingtheTransportWheels(Optional)..............11
5AdjustingtheCuttingUnit....................................12
6InstallingtheGrassBasket....................................12
ProductOverview.........................................................13
Controls...............................................................13
Specications........................................................14
Attachments/Accessories........................................15
Operation....................................................................15
ThinkSafetyFirst...................................................15
CheckingtheEngineOilLevel.................................15
FillingtheFuelTank...............................................15
Break-inPeriod......................................................16
CheckingtheInterlockSwitchOperation...................16
StartingandStoppingtheEngine..............................16
DrivingtheMachineinTransport.............................17
PreparingtoMow...................................................17
Mowing................................................................17
OperatingTips......................................................17
Maintenance.................................................................19
RecommendedMaintenanceSchedule(s)......................19
DailyMaintenanceChecklist....................................20
Lubrication...............................................................21
GreasingtheMachine.............................................21
EngineMaintenance..................................................22
ServicingtheEngineOil..........................................22
ServicingtheAirCleaner.........................................23
ReplacingtheSparkPlug.........................................23
FuelSystemMaintenance...........................................24
CleaningtheFuelFilter...........................................24
ElectricalSystemMaintenance....................................25
ServicingtheInterlockSwitch.................................25
BrakeMaintenance....................................................25
AdjustingtheService/ParkingBrake.........................25
BeltMaintenance......................................................27
AdjustingtheBelts.................................................27
ReplacingtheDifferentialBelt..................................29
ControlsSystemMaintenance.....................................30
AdjustingtheTractionControl.................................30
CuttingUnitMaintenance...........................................30
LevelingtheRearDrumtotheReel...........................30
AdjustingtheBedknifetotheReel............................31
AdjustingtheHeightofCut.....................................31
AdjustingtheGrassShieldHeight.............................32
AdjustingtheCut-OffBar.......................................33
BedbarIdentication..............................................33
SettingtheMachinetoMatchTurfConditions............34
ServicingtheBedbar...............................................35
BacklappingtheReel...............................................36
Storage........................................................................36
3

Safety
SafeOperatingPractices
ThefollowinginstructionsarefromtheCENstandardEN
836:1997,ISOstandard5395:1990,andANSIB71.4-2004.
Training
•ReadtheOperator'sManualandothertrainingmaterial
carefully.Befamiliarwiththecontrols,safetysigns,and
theproperuseoftheequipment.
•Iftheoperatorormechaniccannotreadthelanguage
oftheOperator'sManualitistheowner’sresponsibilityto
explainthismaterialtothem.
•Neverallowchildrenorpeopleunfamiliarwiththese
instructionstouseorservicethemower.Local
regulationsmayrestricttheageoftheoperator.
•Nevermowwhilepeople,especiallychildren,orpetsare
nearby.
•Keepinmindthattheoperatororuserisresponsiblefor
accidentsorhazardsoccurringtootherpeopleortheir
property.
•Theowner/usercanpreventandisresponsiblefor
accidentsorinjuriesoccurringtohimselforherself,other
people,orproperty.
•Alloperatorsormechanicsmustbetrained.Itisthe
owner’sresponsibilityfortrainingusers.
Preparation
•Whilemowing,alwayswearsubstantialfootwear,long
trousers,hardhat,safetyglasses,andhearingprotection.
Longhair,looseclothing,orjewelrymaygettangled
inmovingparts.Donotoperatetheequipmentwhen
barefootorwearingopensandals.
•Thoroughlyinspecttheareawheretheequipmentisto
beusedandremoveallobjectswhichmaybethrownby
themachine.
•Warning—Fuelishighlyammable.Takethefollowing
precautions:
–Storefuelincontainersspecicallydesignedforthis
purpose.
–Refueloutdoorsonlyanddonotsmokewhile
refuelling.
–Addfuelbeforestartingtheengine.Neverremove
thecapofthefueltankoraddfuelwhiletheengineis
runningorwhentheengineishot.
–Iffuelisspilled,donotattempttostarttheengine
butmovethemachineawayfromtheareaofspillage
andavoidcreatinganysourceofignitionuntilfuel
vaporshavedissipated.
–Secureallfueltanksandcontainercaps.
•Replacefaultysilencers.
•Evaluatetheterraintodeterminewhataccessoriesand
attachmentsareneededtoproperlyandsafelyperform
thejob.Onlyuseaccessoriesandattachmentsapproved
bythemanufacturer.
•Checkthatoperator'spresencecontrols,safetyswitches
andshieldsareattachedandfunctioningproperly.Donot
operateunlesstheyarefunctioningproperly.
Operation
•Donotoperatetheengineinaconnedspacewhere
dangerouscarbonmonoxidefumescancollect.
•Mowonlyindaylightoringoodarticiallight.
•Beforeattemptingtostarttheengine,disengageallblade
attachmentclutches,shiftintoneutral,andengagethe
parkingbrake.
•Stayalertforholesintheterrainandotherhiddenhazards.
•Watchoutfortrafcwhencrossingornearroadways.
•Stopthebladesrotatingbeforecrossingsurfacesother
thangrass.
•Whenusinganyattachments,neverdirectdischargeof
materialtowardbystandersnorallowanyonenearthe
machinewhileinoperation.
•Neveroperatethemachinewithdamagedguards,shields,
orwithoutsafetyprotectivedevicesinplace.Besureall
interlocksareattached,adjustedproperly,andfunctioning
properly.
•Donotchangetheenginegovernorsettingsoroverspeed
theengine.Operatingtheengineatexcessivespeedmay
increasethehazardofpersonalinjury.
•Beforeleavingtheoperator'sposition:
–stoponlevelground;
–disengagethecuttingunitandtractiondrive;
–settheparkingbrake;
–stoptheengine.
•Disengagedrivetoattachmentswhentransportingornot
inuse.
•Stoptheengineanddisengagedrivetoattachment:
–beforerefuelling;
–beforeremovingthegrasscatcher;
–beforemakingheightadjustments;
–beforeclearingblockages;
–beforechecking,cleaningorworkingonthemower;
–afterstrikingaforeignobjectorifanabnormal
vibrationoccurs.Inspectthemowerfordamage
andmakerepairsbeforerestartingandoperatingthe
equipment.
•Reducethethrottlesettingbeforestoppingengineand,if
theengineisprovidedwithafuelshut-offvalve,turnthe
valveoffattheconclusionofmowing.
4

•Keephandsandfeetawayfromthecuttingunit.
•Slowdownandusecautionwhenmakingturnsand
crossingroadsandsidewalks.Stopreelsifnotmowing.
•Donotoperatethemowerundertheinuenceofalcohol
ordrugs
•Lightningcancausesevereinjuryordeath.Iflightning
isseenorthunderisheardinthearea,donotoperate
themachine;seekshelter.
•Usecarewhenloadingorunloadingthemachineintoa
trailerortruck.
•Usecarewhenapproachingblindcorners,shrubs,trees,
orotherobjectsthatmayobscurevision.
MaintenanceandStorage
•Keepallnuts,boltsandscrewstighttobesurethe
equipmentisinsafeworkingcondition.
•Neverstoretheequipmentwithfuelinthetankinsidea
buildingwherefumesmayreachanopenameorspark.
•Allowtheenginetocoolbeforestoringinanyenclosure.
•Toreducetherehazard,keeptheengine,silencer,and
fuelstorageareafreeofgrass,leaves,orexcessivegrease.
•Checkthegrasscatcherfrequentlyforwearor
deterioration.
•Keepallpartsingoodworkingconditionandallhardware
andhydraulicttingstightened.Replaceallwornor
damagedpartsanddecals.
•Ifthefueltankhastobedrained,dothisoutdoors.
•Becarefulduringadjustmentofthemachinetoprevent
entrapmentofthengersbetweenmovingbladesand
xedpartsofthemachine.
•Disengagedrives,disengagethecuttingunit,setparking
brake,stopengineanddisconnectsparkplugwire.Wait
forallmovementtostopbeforeadjusting,cleaningor
repairing.
•Cleangrassanddebrisfromcuttingunit,drives,mufers,
andenginetohelppreventres.Cleanupoilorfuel
spillage.
•Carefullyreleasepressurefromcomponentswithstored
energy.
•Removethesparkplugwirebeforemakinganyrepairs.
•Usecarewhencheckingthereel.Wearglovesanduse
cautionwhenservicingthem.
•Keephandsandfeetawayfrommovingparts.Ifpossible,
donotmakeadjustmentswiththeenginerunning.
ToroMowerSafety
ThefollowinglistcontainssafetyinformationspecictoToro
productsorothersafetyinformationthatyoumustknowthat
isnotincludedintheCEN,ISO,orANSIstandard.
Thisproductiscapableofamputatinghandsandfeetand
throwingobjects.Alwaysfollowallsafetyinstructionsto
avoidseriousinjuryordeath.
Useofthisproductforpurposesotherthanitsintendeduse
couldprovedangeroustouserandbystanders.
•Knowhowtostoptheenginequickly.
•Donotoperatethemachinewhilewearingtennisshoes
orsneakers.
•Wearingsafetyshoesandlongpantsisadvisableand
requiredbysomelocalordinancesandinsurance
regulations.
•Handlegasolinecarefully.Wipeupanyspills.
•Checkthesafetyinterlockswitchesdailyforproper
operation.Ifaswitchshouldfail,replacetheswitch
beforeoperatingthemachine.
•Usingthemachinedemandsattention.Topreventloss
ofcontrol:
–Donotoperateclosetosandtraps,ditches,creeks,or
otherhazards.
–Reducespeedwhenmakingsharpturns.Avoid
suddenstopsandstarts.
–Whennearorcrossingroads,alwaysyieldthe
right-of-way.
–Reduceenginespeedandapplytheservicebrakes
whengoingdownhilltokeepforwardspeedslowand
tomaintaincontrolofthemachine.
•Donottouchtheengine,mufer,orexhaustpipewhile
theengineisrunningorsoonafterithasstoppedbecause
theseareascouldbehotenoughtocauseburns.
•Whenapersonorpetappearsunexpectedlyinornearthe
mowingarea,stopmowing.Carelessoperation,combined
withterrainangles,ricochets,orimproperlypositioned
guardscanleadtothrownobjectinjuries.Donotresume
mowinguntiltheareaiscleared.
MaintenanceandStorage
•Checkallfuellinesfortightnessandwearonaregular
basis.Tightenorrepairthemasneeded.
•Iftheenginemustberunningtoperformamaintenance
adjustment,keephands,feet,clothing,andanypartsof
thebodyawayfromthecuttingunit,attachments,andany
movingparts.Keepeveryoneaway.
•Toensuresafetyandaccuracy,haveanAuthorizedToro
Distributorcheckthemaximumenginespeedwitha
tachometer.Maximumgovernedenginespeedshould
be3475±100rpm.
•Ifmajorrepairsareeverneededorifassistanceisdesired,
contactanAuthorizedToroDistributor.
•UseonlyToro-approvedattachmentsandreplacement
parts.Thewarrantymaybevoidedifusedwith
unapprovedattachments.
5

ForModel04038
SoundPowerLevel
Thisunithasaguaranteedsoundpowerlevelof92dBA,
whichincludesanUncertaintyValue(K)of1dBA.
Soundpowerlevelwasdeterminedaccordingtothe
proceduresoutlinedinISO11094.
SoundPressureLevel
Thisunithasasoundpressurelevelattheoperator’searof84
dBA,whichincludesanUncertaintyValue(K)of1dBA.
Soundpressurelevelwasdeterminedaccordingtothe
proceduresoutlinedinEN836.
VibrationLevel
Hand-Arm
Measuredvibrationlevelforrighthand=2.31m/s2
Measuredvibrationlevelforlefthand=2.55m/s2
UncertaintyValue(K)=1.28m/s2
Measuredvaluesweredeterminedaccordingtotheprocedures
outlinedinEN836.
ForModel04039
SoundPowerLevel
Thisunithasaguaranteedsoundpowerlevelof94dBA,
whichincludesanUncertaintyValue(K)of1dBA.
Soundpowerlevelwasdeterminedaccordingtothe
proceduresoutlinedinISO11094.
SoundPressureLevel
Thisunithasasoundpressurelevelattheoperator’searof86
dBA,whichincludesanUncertaintyValue(K)of1dBA.
Soundpressurelevelwasdeterminedaccordingtothe
proceduresoutlinedinEN836.
VibrationLevel
Hand-Arm
Measuredvibrationlevelforrighthand=2.76m/s2
Measuredvibrationlevelforlefthand=2.85m/s2
UncertaintyValue(K)=1.42m/s2
Measuredvaluesweredeterminedaccordingtotheprocedures
outlinedinEN836.
6

SafetyandInstructionalDecals
Safetydecalsandinstructionsareeasilyvisibletotheoperatorandarelocatednearanyareaofpotential
danger.Replaceanydecalthatisdamagedorlost.
93-9356
1.Entanglementhazard—stayawayfrommovingparts.
93-7346
1.Reeldrive3.Disengage
2.Engage
93-6085
1.Fast3.Slow
2.Continuousvariable
setting
120–2769
1.Toxicgasinhalation
hazard—donotoperate
indoors.
4.Warning—disconnectthe
sparkplugwireandread
theinstructionbefore
servicingorperforming
maintenance.
2.Explosionhazard—stop
theengineandkeepaway
fromopenameswhen
refueling.
5.Hotsurface/burn
hazard—donottouch
hotsurfaces.
3.Warning—stoptheengine
andturnoffthefuelbefore
leavingthemachine.
6.Warning—readthe
Operator’sManual;when
addingfueltothetank,
onlylltothebottomof
thelltube.
93-8064
1.Warning—readtheinstructionsbeforeservicingor
performingmaintenance.
2.Cuttinghazardoffootorhand—stoptheengineandwait
formovingpartstostop.
125–5245
1.Cuttinghazardofhandorfoot—keepawayfrommoving
parts;keepallguardsandshieldsinplace.
7

115-1720
1.Forward3.Neutral
2.Drivewheel
120-2727
1.Brake—toengage,pullthe
levertowardthehandle;
todisengage,releasethe
lever.
2.Parkingbrake—tolock,
pullthelevertowardthe
handle,pressthebutton
inandreleasethelever
againstthelockingbutton;
torelease,pullthelever
towardthehandleuntil
thebuttonreleasesand
releasethelever.
120–2761
1.Warning—readtheOperator’sManual.4.Thrownobjecthazard—keepbystandersawayfromthe
machine.
2.Warning—donotoperatethemachineunlesstheyaretrained.5.Warning—keepawayfrommovingparts;keepallguardsin
place.
3.Warning—wearhearingprotection.
8

Setup
LooseParts
Usethechartbelowtoverifythatallpartshavebeenshipped.
ProcedureDescriptionQty.Use
Handle1
1Cabletie2Installthehandle.
Kickstandassembly1
2Spring1Installthekickstand.
Wheelshaft,right1
3Wheelshaft,left1Installthetransportwheelshafts.
4Transportwheels(optional)2Installthetransportwheels(optional).
5Nopartsrequired–Adjustthecuttingunit.
6Grassbasket1Installthegrassbasket.
MediaandAdditionalParts
DescriptionQty.Use
Operator'sManual1
EngineOperator'sManual1
PartsCatalog1
OperatorTrainingMaterial1
CerticateofCompliance1
Readorviewbeforeoperatingthemachine
Note:Determinetheleftandrightsidesofthemachine
fromthenormaloperatingposition.
1
InstallingandAdjustingthe
Handle
Partsneededforthisprocedure:
1Handle
2Cabletie
InstallingtheHandle
1.Removethebolts,locknutsandwasherssecuringthe
bottomofthehandlearmstoeachsideofthemower
(Figure2).
1
2
3
4
g021285
Figure2
1.Handlearms3.Bolt,locknutandwasher
2.Mountingpins4.Hairpincotterandringpin
2.Removethehairpincottersandringpinssecuringthe
handlearmstotherearoftheframe(Figure2).
3.Insertthehandleendsthroughtheholesinthehandle
armsandaligntheholeswiththemountingpins
(Figure2).
9

4.Squeezethehandleendsinwardandinstallthemonthe
mountingpins(Figure3).
g021288
1
2
3
4
Figure3
1.Handleend
2.Bolt,washer,andlockwasher
3.Hairpincotterandringpin
4.Handlearm
5.Securethehandleendstothemountingpinswiththe
bolts,washers,andlockwasherspreviouslyremoved
(Figure3).
6.Securethehandlearmstotherearoftheframewith
thehairpincottersandringpinspreviouslyremoved
(Figure3).
7.Securethecablesandwireharnesstothehandlewith
cableties(Figure4).
G017590
1
Figure4
1.Cableties
AdjustingtheHandle
1.Removethehairpincottersfromtheringpinsoneach
sideofthemower(Figure2).
2.Whilesupportingthehandle,removetheringpins
fromeachsideandraiseorlowerthehandletothe
desiredoperatingposition(Figure2).
3.Installtheringpinsandhairpincotters.
2
InstallingtheKickstand(For
GR1610)
Partsneededforthisprocedure:
1Kickstandassembly
1Spring
Procedure
Note:Thefastenersareshippedlooselyinstalledonthe
kickstandassembly.
1.Connectthespringstudtotherighthandsideof
thekickstand(Figure5)usingthebolt,washer,and
ange-headnutprovided.
G017948
1
2
34
Figure5
1.Bolt3.Washer
2.Springstud4.Flange-headnut
2.Hookthespringintotheholeinthespringbracketand
ontothespringstudwhilealigningthekickstandwith
themountingholesintherearframe(Figure6).
10

Figure6
1.Kickstand3.Springstud
2.Springbracket4.Spring
3.Mountthekickstandtoeachsideoftheframewith
abolt,lockwasher,spacer,atwasherandlocknut
(Figure6).Positionthespacerinthekickstand
mountinghole.
3
InstallingtheTransportWheel
Shafts
Partsneededforthisprocedure:
1Wheelshaft,right
1Wheelshaft,left
Procedure
1.Pushthekickstanddownwithyourfootandpullup
onthehandletosupportthemoweronthekickstand.
2.Apply#242Loctitetothethreadsofthewheelshafts.
3.Threadtherightwheelshaftintothedrivepulleyon
therightsideofthemachine(Figure7).
Note:Therightwheelshafthaslefthandthreads.
Figure7
1.Rightwheelshaft
4.Torquetheshaftto688to101N-m(5to75ft-lb).
5.Repeatontheleftside.
4
InstallingtheTransport
Wheels(Optional)
Partsneededforthisprocedure:
2Transportwheels(optional)
Procedure
1.Slidethewheelontotheaxle(Figure8).
2.Pivotthewheellockingclipawayfromcenterof
thewheelallowingittoslidefartherontotheaxle
(Figure8).
11

G017591
Figure8
1.Lockingclip
3.Rotatethewheelbackandforthuntilitslides
completelyontotheaxleandthelockingclipissecured
inthegrooveontheaxleshaft.
4.Repeattheprocedureontheoppositesideofthe
machine.
5.Inatethetiresto574to718Pa(12to15psi.).
5
AdjustingtheCuttingUnit
NoPartsRequired
Procedure
Beforeoperatingthemachine,completethefollowing
adjustments:
•LevelingtheRearDrumtotheReel(page30).
•AdjustingtheBedknifetotheReel(page31).
•AdjustingtheHeightofCut(page31).
•AdjustingtheGrassShieldHeight(page32).
•AdjustingtheCut-OffBar(page33).
RefertotheCuttingUnitMaintenancesectioninMaintenance
forinstructionsonperformingtheseprocedures.
6
InstallingtheGrassBasket
Partsneededforthisprocedure:
1Grassbasket
Procedure
Graspthebasketbythetoplipandslideitontothebasket
mountingrods(Figure9).
Figure9
1.Grassbasket2.Basketmountingrod
Note:Model04039only—Whencuttinginhigher
heights-of-cut,thebasketmaybeloweredbyremovingeach
basketmountingrodandinstallingeachontheoppositeside
ofthemachine.
12

ProductOverview
Controls
1234567
G017592
Figure10
1.Tractiondrivelever5.Servicebrake
2.Throttlecontrol6.Parkingbrake
3.On/offswitch7.Operatorpresencecontrol
(optional)
4.Hourmeter
ThrottleControl
Thethrottlecontrol(Figure10)islocatedontherear
rightsideofthecontrolpanel.Theleverconnectsto
andoperatesthethrottlelinkagetothecarburetor.See
Specications(page14)forenginespeed.
TractionDriveLever
Thetractiondrivelever(Figure10)islocatedonthefront
rightsideofthecontrolpanel.Ithastwopositions:Neutral
andForward.Pushingtheleverforwardengagesthetraction
drive.
ServiceBrake
Theservicebrake(Figure11)islocatedonthetopleftfront
sideofthecontrolpanel.Youcanusethebraketoslowor
stopthemachine.
G016976
Figure11
ParkingBrake
Theparkingbrake(Figure12)islocatedatthebaseofthe
servicebrake.Fullyengagetheservicebrakeandpushthe
parkingbrakeknobtoallowtheservicebraketorestonthe
parkingbrakepin.Engagetheservicebraketoreleasethe
parkingbrake.Youmustreleasethebrakebeforethetraction
driveisengaged.
G016977
Figure12
On/OffSwitch
Theon/offswitch(Figure10)islocatedonthetopofthe
controlpanel.MovetheswitchtotheOnpositiontostartthe
engineandtheOffpositiontostoptheengine.
OperatorPresenceControl(Optional)
Ifequipped,theoperatorpresencecontrol(Figure10)is
locatedontherearofthehandle.Pushtheoperatorpresence
controlagainstthehandle.Ifequipped,theoperatorpresence
controlmustbeengagedbeforemovingthetractiondrive
leverortheenginewillstop.
13

ReelDriveLever
Thereeldrivelever(Figure13)islocatedontherightfront
cornerofthemachine.Theleverhastwopositions:Engage
andDisengage.Movetheleverforwardtoengagethereelor
rearwardtodisengagethereel.
G016978
1
Figure13
1.Reeldrivelever
ChokeLever
Thechokelever(Figure14)islocatedontheleftfrontofthe
engine.Theleverhastwopositions:RunandChoke.Move
thelevertotheChokepositionwhenstartingacoldengine.
Aftertheenginestarts,movethelevertotheRunposition.
1
G019637
2
Figure14
1.Chokelever2.Fuelshut-offvalve
FuelShut-OffValve
Thefuelshut-offvalve(Figure14)islocatedontheleft
frontoftheenginenearthechokelever.Thevalvehastwo
positions:ClosedandOpen.Movetheleveruptotheclosed
positionwhenstoringortransportingthemachine.Openthe
valvebeforestartingtheenginebyrotatingtheleverdown.
RecoilStarter
Pulltherecoilstarterhandle(Figure15)tostarttheengine.
Figure15
1.Recoilstarter2.Kickstand
Kickstand
Thekickstand(Figure15)ismountedtotherearofthe
machineandisusedtoraisetherearofthemachinefor
installationorremovalofthetransportwheels.
Specications
Model04038Model04039
Width91cm(36inches)104cm(41inches)
Height99cm(39inches)99cm(39inches)
Lengthwithbasket140cm(55inches)142cm(56inches)
Dryweight(with
basketandWiehle
roller;without
wheelsorgrooming
reel)
100kg(220lb)105kg(232lb)
Widthofcut53cm(21inches)66cm(26inches)
Heightofcut1.6mmto31.8
mm(0.063to1.25
inches)
3.1mmto31.7
mm(0.125to1.25
inches)
Clip3.6mm(0.14inch)3.6mm(0.14inch)
EnginespeedLowidle–1565
±150rpm,Highidle
–3375±100rpm
Lowidle–1565
±150rpm,Highidle
–3375±100rpm
14

Attachments/Accessories
AselectionofToroapprovedattachmentsandaccessoriesis
availableforusewiththemachinetoenhanceandexpand
itscapabilities.ContactyourAuthorizedServiceDealeror
Distributororgotowww .Toro.comforalistofallapproved
attachmentsandaccessories.
Operation
Note:Determinetheleftandrightsidesofthemachine
fromthenormaloperatingposition.
ThinkSafetyFirst
Pleasecarefullyreadallofthesafetyinstructionsanddecals
inthesafetysection.Knowingthisinformationcouldhelp
youorbystandersavoidinjury.
CheckingtheEngineOilLevel
Checktheengineoillevelbeforeeachuseorevery8operating
hours,refertoCheckingtheEngineOilLevel(page22)in
EngineMaintenance(page22).
FillingtheFuelTank
Important:Neverusemethanol,gasolinecontaining
methanol,gasoholcontainingmorethan10%ethanol,
gasolineadditives,premiumgasoline,orwhitegas
becausethefuelsystemcouldbedamaged.Donotmix
oilwithgasoline.
G017594
1
Figure16
1.Fueltankcap
WARNING
Gasolineisharmfulorfatalifswallowed.Long-term
exposuretovaporscancauseseriousinjuryand
illness.
•Avoidprolongedbreathingofvapors.
•Keepfaceawayfromnozzleandgastankor
conditioneropening.
•Keepgasawayfromeyesandskin.
Note:Thefueltankcapacityis2.7liters(2-3/4quarts).
1.Cleanaroundthefueltankcapandremovethecap
fromthetank(Figure16).
2.Usingunleadedgasoline,llthefueltanknohigher
thanthebottomofthelterscreen.Thisspaceallows
15

thegasolinetoexpand.Donotllthefueltank
completelyfull.
3.Installfueltankcapandwipeupanyspilledgasoline.
DANGER
Incertainconditions,gasolineisextremely
ammableandhighlyexplosive.Areorexplosion
fromgasolinecanburnyouandothersandcan
damageproperty.
•Fillthefueltankoutdoors,inanopenarea,
whentheengineiscold.Wipeupanygasoline
thatspills.
•Neverllthefueltankinsideanenclosedtrailer.
•Donotllthefueltankcompletelyfull.Add
gasolinetothefueltankuntilthelevelis2.5
cm(1inch)belowthebottomofthellerneck.
Thisemptyspaceinthetankallowsgasolineto
expand.
•Neversmokewhenhandlinggasoline,andstay
awayfromanopenameorwheregasoline
fumesmaybeignitedbyaspark.
•Storegasolineinanapprovedcontainerand
keepitoutofthereachofchildren.Neverbuy
morethana30-daysupplyofgasoline.
•Donotoperatewithoutentireexhaustsystemin
placeandinproperworkingcondition.
DANGER
Incertainconditionsduringfueling,static
electricitycanbereleasedcausingasparkwhich
canignitethegasolinevapors.Areorexplosion
fromgasolinecanburnyouandothersandcan
damageproperty.
•Alwaysplacegasolinecontainersontheground
awayfromyourvehiclebeforelling.
•Donotllgasolinecontainersinsideavehicleor
onatruckortrailerbedbecauseinteriorcarpets
orplastictruckbedlinersmayinsulatethe
containerandslowthelossofanystaticcharge.
•Whenpractical,removegas-poweredequipment
fromthetruckortrailerandrefueltheequipment
withitswheelsontheground.
•Ifthisisnotpossible,thenrefuelsuch
equipmentonatruckortrailerfromaportable
container,ratherthanfromagasolinedispenser
nozzle.
•Ifagasolinedispensernozzlemustbeused,
keepthenozzleincontactwiththerimofthe
fueltankorcontaineropeningatalltimesuntil
fuelingiscomplete.
Break-inPeriod
RefertotheEngineManualsuppliedwiththemachineforoil
changeandmaintenanceproceduresrecommendedduring
thebreak-inperiod.
Only8hoursofmowingoperationisrequiredforthebreak-in
period.
Sincethersthoursofoperationarecriticaltofuture
dependabilityofthemachine,monitoritsfunctionsand
performancecloselysothatminordifculties,whichcould
leadtomajorproblems,arenotedandcanbecorrected.
Inspectthemachinefrequentlyduringbreak-inforsignsof
oilleakage,loosefasteners,oranyothermalfunction.
Toensureoptimumperformanceofthebrakesystem,
burnish(break-in)thebrakesbeforeusingthemachine.
Toburnishthebrakes,rmlyapplythebrakesand
drivethemachineatmowingspeeduntilthebrakes
arehot,asindicatedbytheirsmell.Anadjustment
tothebrakesmayberequiredafterbreak-in;refer
toAdjustingtheService/ParkingBrake(page25).
CheckingtheInterlockSwitch
Operation
CAUTION
Ifsafetyinterlockswitchesaredisconnectedor
damagedthemachinecouldoperateunexpectedly
causingpersonalinjury.
•Donottamperwiththeinterlockswitches.
•Checktheoperationoftheinterlockswitches
dailyandreplaceanydamagedswitchesbefore
operatingthemachine.
1.Pushthekickstanddownwithyourfootandpullup
andbackonthehandletoraisethewheelsoffofthe
ground.
2.PlacethetractionleverintotheEngagepositionand
theenginecontrolsinthestartingposition.
3.Attempttostarttheengine.
Theengineshouldnotstart.Iftheengine
starts,theinterlockswitchneedsservice.
Correcttheproblembeforeoperating.Referto
ServicingtheInterlockSwitch(page25).
4.Carefullyliftuponthehandletoreleasethekickstand.
StartingandStoppingthe
Engine
Note:Forillustrationsanddescriptionsofthe
controlsreferencedinthissection,refertothe
Controls(page13)sectioninProductOverview(page13).
16

StartingtheEngine
Note:Ensurethatthesparkplugwireisinstalledonthe
sparkplug.
1.Ensurethatthetractionandreeldriveleversareinthe
Disengagedposition.
Note:Theenginewillnotstartifthetractionleveris
intheEngagedposition.
2.Openthefuelshut-offvalveontheengine.
3.Movetheon/offswitchtotheOnposition.
4.MovethethrottlecontroltotheFastposition.
5.MovethechokeleverhalfwaybetweentheOnandOff
positionswhenstartingacoldengine.Thechokemay
notberequiredwhenstartingawarmengine.
6.Pulltherecoilstarterhandleoutuntilpositive
engagementresults,thenpullitvigorouslytostartthe
engine.
Important:Donotpullrecoilropetoitslimitor
letgoofstarterhandlewhenropeispulledout
becauseropemaybreakorrecoilassemblymay
bedamaged.
7.MovethechoketotheOffpositionastheengine
warmsup.
StoppingtheEngine
1.Movethetractionandreeldrivecontrolstothe
Disengagedposition,thethrottlecontroltotheSlow
position,andtheOn/OffswitchtotheOffposition.
2.Pullthesparkplugwireoffofthesparkplugtoprevent
thepossibilityofaccidentalstartingbeforestoringthe
machine.
3.Closethefuelshut-offvalvebeforestoringor
transportingthemowerinavehicle.
DrivingtheMachinein
Transport
1.Ifthemachineisequippedwiththeoptionaltransport
wheels,pushthekickstanddownwithyourfootand
pulluponthehandletoraisetherearofthemower
andinstallthetransportwheels.
2.Toreleasethekickstand,pulluponthehandle,push
themowerforward,andthenlowertherearofthe
mowerontothetransportwheels.
3.Ensurethatthetractionandreeldrivecontrolsarein
theDisengagedpositionandstarttheengine.
4.SetthethrottlecontroltoSlow ,raisethefrontofthe
machineupslightly,graduallyengagethetractiondrive
andslowlyincreasetheenginespeed.
5.Adjustthethrottletooperatethemoweratthedesired
groundspeedandtransportthemowertothedesired
destination.
6.ReturnthetractioncontrollevertotheDisengage
position,thethrottletotheSlowposition,andstop
theengine.
PreparingtoMow
1.Ifthemachineisequippedwiththeoptionaltransport
wheels,pushthekickstanddownwithyourfootand
pullupandbackonthehandletoraisethewheelsoff
oftheground.
2.Pushthelockingclipsonthewheelsoutofthegrooves
intheshafts.
3.Slidethewheelsoffoftheshafts.
4.Movetheunitoffofthekickstand.
Mowing
Properuseofthemachineprovidesthesmoothestturf
cuttingavailable.ReferalsotoOperatingTips(page17)for
fundamentalsuggestionstoobtaintheutmostperformance
fromyourmower.
Important:Excessiveoperationofthecuttingunitwith
theabsenceofgrassclippings(lubricant)candamage
thecuttingunit.
1.Starttheengine,setthethrottleatareducedspeed,
pushdownonthehandletoraisethecuttingunit,
movethetractionlevertotheEngagedposition,and
transportthemowerontothecollarofthegreen.
2.MovethetractionlevertotheDisengagedpositionand
movethereeldrivelevertotheEngagedposition.
3.MovethetractionlevertotheEngagedposition,
increasethethrottlespeeduntilthemoweristraveling
atthedesiredgroundspeed,drivethemowerontothe
green,lowerthefrontofthemower,andcommence
operation.
4.Whennishedmowing,driveoffofthegreen,move
thetractioncontrollevertotheDisengageposition,
stoptheengineandpushthereeldriveleverintothe
Disengageposition.
5.Emptythegrassbasketofclippings,installthegrass
basket,andcommencetransportoperation.
OperatingTips
BeforeMowing
•Ensurethatthemoweriscarefullyadjustedandisset
evenlyonbothsidesofthereel.Impropermower
adjustmentismagniedmanytimesoverinthe
appearanceoftheclippedturf.
•Removeallforeignobjectsfromtheturfpriortomowing.
•Ensurethateveryone,especiallychildrenandpets,are
clearoftheworkarea.
17

MowingTechniques
•Mowagreeninastraightbackandforthdirection,across
thegreen.
•Avoidcircularmowingorturningthemoweronagreen
becausescufngmayoccur.Turnthemoweroffofthe
greenbyraisingthecuttingreel(pushingthehandle
down)andturningonthetractiondrum.
•Mowatanormalwalkingpace.Fastspeedsavesvery
littletimeandwillresultinaninferiormowingjob.
18

Maintenance
Note:Determinetheleftandrightsidesofthemachinefromthenormaloperatingposition.
RecommendedMaintenanceSchedule(s)
MaintenanceService
IntervalMaintenanceProcedure
Aftertherst20hours•Changetheengineoil.
•Cleanthefuellterandcup.
Beforeeachuseordaily•Checktheinterlockswitchoperation.
•Checktheengineoillevel.
Every25hours•Greasethemachine.(Greasethettingsimmediatelyaftereverywashingregardless
oftheintervallisted.)
Every50hours•Changetheengineoil.(Morefrequentlyindustyordirtyconditions)
•Cleanandoiltheaircleanerfoamelement.(Moreoftenindirtyordustyconditions)
Every100hours
•Replacethepaperairlterelement.(Moreoftenindirtyordustyconditions)
•Checkthesparkplug.
•Cleanthefuellterandcup.
Every500hours•Checkintakeandexhaustvalves.Adjustasnecessary.
•Cleanthecarburetor.
Every1,000hours
•Replacethefuelline.
•Checkthetransmissiondrivebelts.
•Checkthetransmissionbearings.
Important:Refertoyour
Engine Operator's Man ual
foradditionalmaintenanceprocedures.
19

DailyMaintenanceChecklist
Important:Duplicatethispageforroutineuse.
Fortheweekof:
Maintenance
CheckItemMon.Tues.Wed.Thurs.Fri.Sat.Sun.
Checkthe
safetyinterlock
operation.
Checktheparking
brakeoperation.
Checkthefuel
level.
Checktheengine
oillevel.
Checktheair
lter.
Cleantheengine
coolingns.
Checkforunusual
enginenoises.
Checkforunusual
operatingnoises.
Checkthe
reel-to-bedknife
adjustment.
Checkthe
height-of-cut
adjustment.
Greaseallttings.
Touchup
damagedpaint.
NotationforAreasofConcern
Inspectionperformedby:
ItemDateInformation
20
This manual suits for next models
3
Table of contents
Other Toro Lawn Mower manuals

Toro
Toro Z Master 74141 User manual

Toro
Toro Recycler 20961 User manual

Toro
Toro GrandStand 18560 User manual

Toro
Toro Groundsmaster 4500-D User manual

Toro
Toro Grandstand 78524 User manual

Toro
Toro 30821 User manual

Toro
Toro 78360 User manual

Toro
Toro 02617 User manual

Toro
Toro 3550 User manual

Toro
Toro TimeCutter 74750 User manual

Toro
Toro ProCore User manual

Toro
Toro 30789 User manual

Toro
Toro Super Recycler 20092 User manual

Toro
Toro Eurocycler 21080 User manual

Toro
Toro 4357 User manual

Toro
Toro 74702 User manual

Toro
Toro Groundsmaster 360 User manual

Toro
Toro Greensmaster e1021 User manual

Toro
Toro 74200 User manual

Toro
Toro Recycler 20999 User manual