Toro Groundsmaster 4010 User manual

FormNo.3386-530RevC
Groundsmaster®4010Rotary
Mower
ModelNo.30636—SerialNo.315000001andUp
Registeratwww.Toro.com.
OriginalInstructions(EN)*3386-530*C

ThisproductcomplieswithallrelevantEuropean
directives;fordetailspleaseseetheseparateproduct
specicDeclarationofConformity(DOC)sheet.
WARNING
CALIFORNIA
Proposition65Warning
Thisproductcontainsachemical
orchemicalsknowntotheStateof
Californiatocausecancer,birthdefects,
orreproductiveharm.
Dieselengineexhaustandsomeofits
constituentsareknowntotheStateof
Californiatocausecancer,birthdefects,
andotherreproductiveharm.
Becauseinsomeareastherearelocal,state,or
federalregulationsrequiringthatasparkarresterbe
usedontheengineofthismachine,asparkarrester
isincorporatedwiththemuferassembly.
GenuineT orosparkarrestersareapprovedbythe
USDAForestryService.
Important:Thisengineisequippedwithaspark
arrestermufer.ItisaviolationofCalifornia
PublicResourceCodeSection4442touse
oroperatetheengineonanyforest-covered,
brush-covered,orgrass-coveredlandwithout
asparkarrestermufermaintainedinworking
order,ortheengineconstricted,equipped,and
maintainedforthepreventionofre.Otherstates
orfederalareasmayhavesimilarlaws.
ThissparkignitionsystemcomplieswithCanadian
ICES-002.
TheenclosedEngineOwner'sManualis
suppliedforinformationregardingtheUS
EnvironmentalProtectionAgency(EPA)and
theCaliforniaEmissionControlRegulationof
emissionsystems,maintenance,andwarranty.
Replacementsmaybeorderedthroughtheengine
manufacturer.
Introduction
Thismachineisaride-on,rotary-bladelawnmower
intendedtobeusedbyprofessional,hiredoperators
incommercialapplications.Itisprimarilydesigned
forcuttinggrassonwell-maintainedlawnsinparks,
sportselds,andoncommercialgrounds.Itisnot
designedforcuttingbrush,mowinggrassandother
growthalongsidehighways,orforagriculturaluses.
Readthisinformationcarefullytolearnhowtooperate
andmaintainyourproductproperlyandtoavoid
injuryandproductdamage.Youareresponsiblefor
operatingtheproductproperlyandsafely.
YoumaycontactT orodirectlyatwww.Toro.comfor
productandaccessoryinformation,helpndinga
dealer,ortoregisteryourproduct.
Wheneveryouneedservice,genuineT oroparts,or
additionalinformation,contactanAuthorizedService
DealerorToroCustomerServiceandhavethemodel
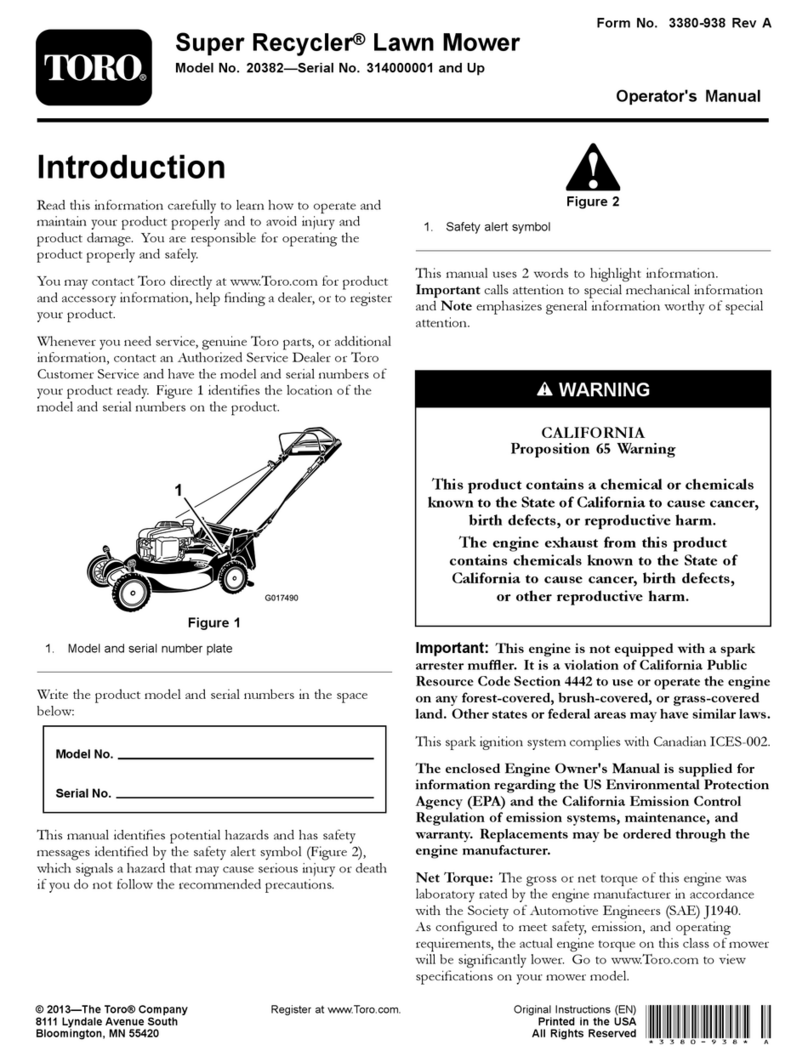
andserialnumbersofyourproductready.Figure1
identiesthelocationofthemodelandserialnumbers
ontheproduct.Writethenumbersinthespace
provided.
g028455
Figure1
1.Modelandserialnumberlocation
ModelNo.
SerialNo.
Thismanualidentiespotentialhazardsandhas
safetymessagesidentiedbythesafety-alertsymbol
(Figure2),whichsignalsahazardthatmaycause
seriousinjuryordeathifyoudonotfollowthe
recommendedprecautions.
g000502
Figure2
1.Safety-alertsymbol
Thismanualuses2wordstohighlightinformation.
Importantcallsattentiontospecialmechanical
informationandNoteemphasizesgeneralinformation
worthyofspecialattention.
©2017—TheToro®Company
8111LyndaleAvenueSouth
Bloomington,MN554202
Contactusatwww.Toro.com.
PrintedintheUSA
AllRightsReserved

Contents
Safety.......................................................................4
SafeOperatingPractices....................................4
ToroMowerSafety..............................................6
SoundPowerLevel............................................7
SoundPressureLevel........................................7
VibrationLevel....................................................7
EngineEmissionCertication.............................7
SafetyandInstructionalDecals..........................8
Setup......................................................................17
1GreasingtheMachine....................................17
2ReplacingtheWarningDecal.........................17
ProductOverview...................................................18
Controls...........................................................18
CabControls.................................................20
Specications..................................................25
Attachments/Accessories.................................25
Operation................................................................26
BeforeOperating..............................................26
AdjustingtheMirrors.........................................35
AimingtheHeadlights.......................................35
StartingandStoppingtheEngine......................36
SmartPower.....................................................36
ReversingFanOperation..................................36
AutoIdle...........................................................36
CuttingGrasswiththeMachine........................36
DieselParticulateFilterRegeneration...............37
CruiseControl..................................................45
EngineSpeedSwitch........................................45
MowSpeed......................................................45
TransportSpeed...............................................45
CheckingtheInterlockSwitches.......................45
PushingorT owingtheMachine........................46
JackingPoints..................................................46
TieDowns.........................................................46
OperatingCharacteristics.................................46
OperatingTips.................................................47
Maintenance...........................................................49
RecommendedMaintenanceSchedule(s)...........49
ServiceIntervalChart.......................................51
Lubrication..........................................................52
GreasingtheBearingsandBushings................52
EngineMaintenance...........................................54
AirCleanerMaintenance..................................54
ServicingtheEngineOil....................................55
ServicingtheDiesel-OxidationCatalyst
(DOC)andtheSootFilter..............................57
FuelSystemMaintenance...................................57
ServicingtheWaterSeparator.........................57
ServicingtheEngineFuelFilter........................57
ServicingtheFuelSystem................................58
ElectricalSystemMaintenance...........................59
BatteryCare.....................................................59
Fuses................................................................60
DriveSystemMaintenance..................................61
AdjustingtheTractionPedalAngle...................61
ChangingthePlanetaryGearDrive
Oil.................................................................61
ChangingtheRearAxleLubricant....................62
CheckingtheRearWheelToe-In......................62
CoolingSystemMaintenance..............................63
ServicingtheEngineCoolingSystem...............63
BrakeMaintenance.............................................64
AdjustingtheServiceBrakes............................64
BeltMaintenance................................................65
ServicingtheAlternatorBelt.............................65
ServicingtheCompressorBelt..........................65
TensioningtheBladeDriveBelts.......................65
ReplacingtheBladeDriveBelt..........................66
HydraulicSystemMaintenance...........................67
ChangingtheHydraulicFluid............................67
ReplacingtheHydraulicFilters.........................67
CheckingtheHydraulicLinesand
Hoses............................................................68
AdjustingtheCounterbalancePressure............68
MowerMaintenance.............................................69
Pivoting(Tilting)theFrontCuttingUnit
Upright..........................................................69
PivotingtheFrontCuttingUnitDown.................69
AdjustingtheCuttingUnitPitch.........................69
ServicingtheCastorArmBushings...................70
ServicingtheCastorWheelsand
Bearings........................................................70
BladeMaintenance..............................................71
CheckingforaBentBlade................................71
RemovingandInstallingtheCutter
Blade(s)........................................................71
InspectingandSharpeningtheCutter
Blade(s)........................................................72
CorrectingCuttingUnitMismatch.....................73
CabMaintenance.................................................74
CleaningtheCabAirFilters..............................74
CleaningtheAirConditioningCoil....................74
Pressure-WashingtheCab...............................75
Storage...................................................................76
PreparingforSeasonalStorage........................76
3

Safety
Thismachinehasbeendesignedinaccordance
withENISO5395:2013andANSIB71.4-2012.
Improperuseormaintenancebytheoperator
orownercanresultininjury.Toreducethe
potentialforinjury,complywiththesesafety
instructionsandalwayspayattentiontothesafety
alertsymbol,whichmeansCaution,Warning,or
Danger—personalsafetyinstruction.Failureto
complywiththeinstructionmayresultinpersonal
injuryordeath.
SafeOperatingPractices
Training
•ReadtheOperator'sManualandothertraining
materialcarefully.Befamiliarwiththecontrols,
safetysigns,andtheproperuseoftheequipment.
•Neverallowchildrenorpeopleunfamiliarwith
theseinstructionstousethemower.Local
regulationsmayrestricttheageoftheoperator.
•Nevermowwhilepeople,especiallychildren,or
petsarenearby.
•Keepinmindthattheoperatororuseris
responsibleforaccidentsorhazardsoccurringto
himselforherself,otherpeople,orproperty.
•Donotcarrypassengers.
•Alldriversandmechanicsshouldseekandobtain
professionalandpracticalinstruction.Theowneris
responsiblefortrainingtheusers.Suchinstruction
shouldemphasize:
–theneedforcareandconcentrationwhen
workingwithride-onmachines;
–controlofaride-onmachineslidingonaslope
willnotberegainedbytheapplicationofthe
brake.Themainreasonsforlossofcontrolare:
◊insufcientwheelgrip;
◊beingdriventoofast;
◊inadequatebraking;
◊thetypeofmachineisunsuitableforits
task;
◊lackofawarenessoftheeffectofground
conditions,especiallyslopes;
◊incorrecthitchingandloaddistribution.
Preparation
•Whilemowing,alwayswearsubstantial,
slip-resistantfootwear,longtrousers,hardhat,
safetyglasses,andhearingprotection.Long
hair,looseclothingorjewelrymaygettangledin
movingparts.Donotoperatetheequipmentwhen
barefootorwearingopensandals.
•Thoroughlyinspecttheareawheretheequipment
istobeusedandremoveallobjectswhichmaybe
thrownbythemachine.
•Warning–fuelishighlyammable.T akethe
followingprecautions:
–Storefuelincontainersspecicallydesigned
forthispurpose.
–Refueloutdoorsonlyanddonotsmokewhile
refuelling.
–Addfuelbeforestartingtheengine.Never
removethecapofthefueltankoraddfuel
whiletheengineisrunningorwhentheengine
ishot.
–Iffuelisspilled,donotattempttostartthe
enginebutmovethemachineawayfromthe
areaofspillageandavoidcreatinganysource
ofignitionuntilfuelvaporshavedissipated.
–Replaceallfueltankandcontainercaps
securely.
•Replacefaultysilencers/mufers.
•Beforeusing,alwaysvisuallyinspecttoseethat
theblades,bladebolts,andcuttingassemblyare
notwornordamaged.Replacewornordamaged
bladesandboltsinsetstopreservebalance.
•Onmulti-bladedmachines,takecareasrotating
onebladecancauseotherbladestorotate.
•Evaluatetheterraintodeterminewhataccessories
andattachmentsareneededtoproperlyand
safelyperformthejob.Onlyuseaccessoriesand
attachmentsapprovedbythemanufacturer.
•Checkthatoperatorspresencecontrols,safety
switches,andshieldsareattachedandfunctioning
properly.Donotoperateunlesstheyare
functioningproperly.
Operation
•Donotoperatetheengineinaconnedspace
wheredangerouscarbonmonoxideandother
exhaustgassescancollect.
•Mowonlyindaylightoringoodarticiallight.
•Beforeattemptingtostarttheengine,disengage
allbladeattachmentclutchesandengagethe
parkingbrake.Onlystarttheenginefromthe
operator'sposition.Alwaysusetheseatbeltand
ROPStogether.
•Rememberthereisnosuchthingasasafeslope.
Travelongrassslopesrequiresparticularcare.To
guardagainstoverturning:
–Donotstoporstartsuddenlywhengoingup
ordownhill.
–Themachinespeedshouldbekeptlowon
slopesandduringtightturns.
4

–Stayalertforhumpsandhollowsandother
hiddenhazards.
–Nevermowacrossthefaceoftheslope,unless
themachineisdesignedforthatpurpose.
•Stayalertforholesintheterrainandotherhidden
hazards.
•Usecarewhenusingheavyequipment.
–Donotturnsharply.Usecarewhenreversing.
–Usecounterweight(s)orwheelweightswhen
suggestedintheOperator'sManual.
•Watchoutfortrafcwhencrossingornear
roadways.
•Stopthebladesfromrotatingbeforecrossing
surfacesotherthangrass.
•Whenusinganyattachments,neverdirect
dischargeofmaterialtowardbystandersnorallow
anyonenearthemachinewhileinoperation.
•Neveroperatethemachinewithdamagedguards,
shields,orwithoutsafetyprotectivedevicesin
place.Besureallinterlocksareattached,adjusted
properly,andfunctioningproperly.
•Beforeleavingtheoperatorsposition:
–Stoponlevelground.
–Disengagethepowertake-off.
–Settheparkingbrake.
–Stoptheengineandremovethekey.
•Disengagedrivetoattachments,stoptheengine,
andremovetheignitionkey:
–beforeclearingblockages;
–beforechecking,cleaning,orworkingonthe
machine;
–afterstrikingaforeignobject.Inspectthe
machinefordamageandmakerepairsbefore
restartingandoperatingtheequipment.Torque
allthespindlepulleynutsto176to203N-m
(130to150ft.-lbs.);
–ifthemachinestartstovibrateabnormally
(checkimmediately).
•Disengagedrivetoattachmentswhentransporting
ornotinuse.
•Stoptheengineanddisengagedriveto
attachment:
–beforerefuelling;
–beforemakingheightadjustment.
•Reducethethrottletolowidlebeforestopping
engine.
•Keephandsandfeetawayfromthecuttingunits.
•Lookbehindbeforebackinguptobesureofa
clearpath.
•Slowdownandusecautionwhenmakingturns
andcrossingroadsandsidewalks.
•Donotoperatethemowerundertheinuenceof
alcoholordrugs.
•Lightningcancausesevereinjuryordeath.If
lightningisseenorthunderisheardinthearea,do
notoperatethemachine;seekshelter.
•Usecarewhenloadingorunloadingthemachine
intoatrailerortruck.
•Theoperatorshallturnonashingwarninglights,
ifprovided,whenevertravelingonapublicroad,
exceptwheresuchuseisprohibitedbylaw.
MaintenanceandStorage
•Keepallnuts,bolts,andscrewstighttobesure
theequipmentisinsafeworkingcondition.
•Neverstoretheequipmentwithfuelinthetank
insideabuildingwherefumesmayreachanopen
ameorspark.
•Allowtheenginetocoolbeforestoringinany
enclosureanddonotstorenearame.
•Toreducetherehazard,keeptheengine,
silencer/mufer,batterycompartment,cutting
units,drives,andfuelstorageareafreeofgrass,
leaves,orexcessivegrease.Cleanupoilorfuel
spillage.
•Replacewornordamagedpartsforsafety.
•Ifthefueltankhastobedrained,dothisoutdoors.
•Onmulti-bladedmachines,takecareasrotating
onebladecancauseotherbladestorotate.
•Whenmachineistobeparked,stored,orleft
unattended,lowerthecuttingunitsunlessa
positivemechanicallockisprovided.
•Disengagedrives,lowerthecuttingunits,move
tractionpedaltoNeutral,setparkingbrake,stop
engineandremovekey.Waitforallmovementto
stopbeforeadjusting,cleaningorrepairing.
•Parkmachineonlevelground.Neverallow
untrainedpersonneltoservicemachine.
•Usejackstandstosupportcomponentswhen
required.
•Carefullyreleasepressurefromcomponentswith
storedenergy.
•Disconnectbatterybeforemakinganyrepairs.
Disconnectthenegativeterminalrstandthe
positivelast.Reconnectpositiverstandnegative
last.
•Usecarewhencheckingblades.Wraptheblades
orweargloves,andusecautionwhenservicing
them.Onlyreplaceblades.Neverstraightenor
weldthem.
•Keephandsandfeetawayfrommovingparts.If
possible,donotmakeadjustmentswiththeengine
running.
5

•Chargebatteriesinanopenwellventilatedarea,
awayfromsparkandames.Unplugcharger
beforeconnectingordisconnectingfrombattery.
Wearprotectiveclothinganduseinsulatedtools.
•Makesureallhydrauliclineconnectorsaretight
andallhydraulichosesandlinesareingood
conditionbeforeapplyingpressuretothesystem.
•Keepyourbodyandhandsawayfrompinhole
leaksornozzlesthatejecthydraulicuidunder
highpressure.Usepaperorcardboard,not
yourhands,tosearchforleaks.Hydraulicuid
escapingunderpressurecanhavesufcientforce
topenetratetheskinandcauseseriousinjury.If
uidisinjectedintotheskinitmustbesurgically
removedwithinafewhoursbyadoctorfamiliar
withthisformofinjuryorgangrenemayresult.
ToroMowerSafety
Thefollowinglistcontainssafetyinformationspecic
toToroproductsorothersafetyinformationthatyou
mustknowthatisnotincludedintheCEN,ISO,or
ANSIstandards.
Thisproductiscapableofamputatinghandsand
feetandthrowingobjects.Alwaysfollowallsafety
instructionstoavoidseriousinjuryordeath.
Useofthisproductforpurposesotherthanitsintended
usecouldprovedangeroustouserandbystanders.
WARNING
Engineexhaustcontainscarbonmonoxide,
whichisanodorless,deadlypoisonthatcan
killyou.
Donotrunengineindoorsorinanenclosed
area.
Operation
•ThecabistheROPS(rolloverprotectionsystem).
BeforeoperatingamachinewithROPS,becertain
thattheseatbeltsareattachedandtheseatis
latchedtopreventtheseatfrompivotingforward.
•Knowhowtostopthemachineandenginequickly.
•Donotoperatethemachinewhilewearingtennis
shoesorsneakers.
•Wearingsafetyshoesandlongpantsisadvisable
andrequiredbysomelocalordinancesand
insuranceregulations.
•Keephands,feet,andclothingawayfrommoving
partsandthemowerdischargeareaandunderside
ofthemowerwhiletheengineisrunning.
•Fillfueltankuntillevelis25mm(1inch)belowthe
bottomofthellerneck.Donotoverll.
•Checkthesafetyinterlockswitchesdailyforproper
operation.Ifaswitchshouldfail,replacethe
switchbeforeoperatingthemachine.
•Checkcarefullyforoverheadclearances(i.e.
branches,doorways,electricalwires)before
drivingunderanyobjectsanddonotcontactthem.
•Donotmowinreverseunlessabsolutely
necessary.
•Reducespeedwhenmakingsharpturns.
•Avoidstartingorstoppingonaslope.Iftireslose
traction,disengagethebladesandproceedslowly
straightdowntheslope.Avoidraisingtheside
cuttingunitsonaslope.
•Avoidturningonslopes.Ifyoumustturn,turn
slowlyandgraduallydownhill,ifpossible.
•WhenoperatingamachinewithaROPS,always
useaseatbelt.
•Becertainthattheseatbeltcanbereleased
quicklyifthemachineisdrivenorrollsintoapond
orwater.
•Watchfortrafcwhennearorcrossingroads.
Alwaysyieldtheright-of-way.
•Thismachineisnotdesignedorequippedfor
on-roaduseandisa“slow-movingvehicle”.Ifyou
mustcrossortravelonapublicroad,youshould
beawareofandcomplywithlocalregulations,
suchasrequiredlights,slowmovingvehiclesigns,
andreectors.
•Donotmowneardrop-offs,ditches,or
embankments.Themachinecouldsuddenlyturn
overifawheelgoesovertheedgeofacliffor
ditch,orifanedgecavesin.
•Donotmowonwetgrass.Reducedtractioncould
causesliding.
•Useextracarewithotherattachments.Thesecan
changethestabilityofthemachine.
•Turnoffthebladeswhennotmowing.
MaintenanceandStorage
•Donottouchequipmentorattachmentpartswhich
maybehotfromoperation.Allowtocoolbefore
attemptingtomaintain,adjust,orservice.
•Neverstorethemachineorfuelcontainerinside
wherethereisanopename,suchasneara
waterheaterorfurnace.
•Keepnutsandboltstight,especiallytheblade
attachmentbolts.Keepequipmentingood
condition.
•Iftheenginemustberunningtoperforma
maintenanceadjustment,keephands,feet,
clothing,andanypartsofthebodyawayfromthe
6

cuttingunits,attachments,andanymovingparts.
Keepeveryoneaway.
•Checkbrakeoperationfrequently.Adjustand
serviceasrequired.
•Batteryacidispoisonousandcancauseburns.
Avoidcontactwithskin,eyes,andclothing.Protect
yourface,eyes,andclothingwhenworkingwitha
battery.
•Batterygasescanexplode.Keepcigarettes,
sparks,andamesawayfromthebattery.
•Theenginemustbeshutoffbeforecheckingthe
oiloraddingoiltothecrankcase.
•Ifmajorrepairsareeverneededorifassistanceis
desired,contactanAuthorizedToroDistributor.
•Tomakesureofoptimumperformanceand
continuedsafetycerticationofthemachine,
useonlygenuineT ororeplacementpartsand
accessories.Replacementpartsandaccessories
madebyothermanufacturerscouldbedangerous,
andsuchusecouldvoidtheproductwarranty.
SoundPowerLevel
Thisunithasaguaranteedsoundpowerlevelof104
dBA,whichincludesanUncertaintyValue(K)of1
dBA.
Soundpowerlevelwasdeterminedaccordingtothe
proceduresoutlinedinISO11094.
SoundPressureLevel
Thisunithasasoundpressurelevelattheoperator’s
earof85dBA,whichincludesanUncertaintyValue
(K)of1dBA.
Soundpressurelevelwasdeterminedaccordingto
theproceduresoutlinedinENISO5395:2013.
VibrationLevel
Hand-Arm
Measuredvibrationlevelforrighthand=0.58m/s2
Measuredvibrationlevelforlefthand=0.63m/s2
UncertaintyValue(K)=0.32m/s2
Measuredvaluesweredeterminedaccordingtothe
proceduresoutlinedinENISO5395:2013.
WholeBody
Measuredvibrationlevel=0.26m/s2
UncertaintyValue(K)=0.13m/s2
Measuredvaluesweredeterminedaccordingtothe
proceduresoutlinedinENISO5395:2013.
EngineEmission
Certication
TheengineinthismachineisEPATier4Finaland
stage3bcompliant.
7

SafetyandInstructionalDecals
Safetydecalsandinstructionsareeasilyvisibletotheoperatorandarelocatednearanyarea
ofpotentialdanger.Replaceanydecalthatisdamagedorlost.
decal93-7818
93-7818
1.Warning—readtheOperator'sManualforinstructionson
torquingthebladebolt/nutto115-149N-m(85-110ft-lb).
decal100-5622
100-5622
1.Heightofcutadjustment
decal100-5623
100-5623
1.Lowheightofcut
adjustment
2.Highheightofcut
adjustment
decal100-5624
100-5624
1.Heightofcutadjustment
decal100-5693
100-5693
1.Heightofcutadjustment
decal100-5694
100-5694
1.Heightofcutadjustment
8

decal104-3578
104-3578
1.Heightofcutadjustment
decal100-6578
100-6578
1.Entanglementhazard,belt—donotoperatethemachine
withtheshieldsorguardsremoved;alwayskeeptheshields
andguardsinplace;stayawayfrommovingparts.
decal117-2754
117–2754
1.Warning—readtheOperator'sManual.
2.Warning—donotoperatethismachineunlessyouaretrained.
3.Warning—weartheseatbeltwhenseatedintheoperator'sposition.
4.Warning—wearhearingprotection.
5.Thrownobjecthazard—keepbystandersasafedistancefromthemachine.
6.Cuttinghazardofhandorfoot—stayawayfrommovingparts;keepallguardsinplace.
7.Tippinghazard—lowerthecuttingunitwhendrivingdownslopes;slowmachinebeforeturning,donotturnathighspeeds
8.Warning—locktheparkingbrake,stoptheengineandremovetheignitionkeybeforeleavingthemachine.
9

decal117-2766
117–2766
(Afxoverpartno.117–2754forCE*)
*ThissafetydecalincludesaslopewarningrequiredonthemachineforcompliancetotheEuropeanLawnMowerSafetyStandardEN836:1997.Theconservativemaximum
slopeanglesindicatedforoperationofthismachineareprescribedbyandrequiredbythisstandard.
1.Warning—readtheOperator'sManual.
2.Warning—donotoperatethismachineunlessyouaretrained.
3.Warning—weartheseatbeltwhenseatedintheoperator'sposition.
4.Warning—wearhearingprotection.
5.Thrownobjecthazard—keepbystandersasafedistancefromthemachine.
6.Cuttinghazardofhandorfoot—stayawayfrommovingparts;keepallguardsinplace.
7.Tippinghazard—lowerthecuttingunitwhendrivingdownslopes;donotoperatemachineonslopesgreaterthan15degrees.
8.Warning—locktheparkingbrake,stoptheengineandremovetheignitionkeybeforeleavingthemachine.
decal120-4159
120–4159
1.Off8.High
2.Lights9.Tractiondrive
3.On10.Low
4.Lightswitchlocation11.Powertake-off(PTO)
5.Fast12.Lowerleftdeck
6.Variablespeedadjustment13.Lowercenterdeck
7.Slow14.Lowerrightdeck
decal121-3887
121–3887
1.ReadtheOperator’sManual.
decal58-6520
58-6520
1.Grease
10

decal121-3884
121–3884
1.Engine—stop3.Engine—start
2.Engine—preheat
decal104-3579
104-3579
1.Lowheightofcut
adjustment
2.Highheightofcut
adjustment
decal93-7272
93-7272
1.Cutting/dismembermenthazard;fan—stayawayfrom
movingparts.
decal117-2718
117–2718
decalbatterysymbols
BatterySymbols
Someorallofthesesymbolsareonyourbattery
1.Explosionhazard6.Keepbystandersasafe
distancefromthebattery.
2.Nore,opename,or
smoking.
7.Weareyeprotection;
explosivegasescan
causeblindnessandother
injuries
3.Causticliquid/chemical
burnhazard
8.Batteryacidcancause
blindnessorsevereburns.
4.Weareyeprotection9.Flusheyesimmediately
withwaterandgetmedical
helpfast.
5.ReadtheOperator's
Manual.
10.Containslead;donot
discard.
decal117-2787
117–2787
(Cabmodels)
1.Headlights,15Afuse4.Windshieldwipers,15A
fuse
2.Heater,15Afuse5.Domelight,15Afuse
3.Airconditioning,30Afuse
decal119-0124
119–0124
(Cabmodels)
1.Warning—whenthecabwindowsareopenwearhearing
protection.
2.Closetherearwindowbeforeattemptingtoopenthehood.
11

decal106-6754
106-6754
1.Warning—donottouchthehotsurface.
2.Cutting/dismembermenthazard,fanandentanglement
hazard,belt—stayawayfrommovingparts.
decal106-6755
106-6755
1.Enginecoolantunder
pressure.
3.Warning—donottouchthe
hotsurface.
2.Explosionhazard—read
theOperator'sManual.
4.Warning—readthe
Operator'sManual.
decal120-6604
120-6604
1.Thrownobjecthazard—keepbystandersawayfromthe
machine.
2.Cutting/dismembermenthazardofhand,mower
blade—stayawayfrommovingparts,keepallguardsand
shieldsinplace.
3.Cutting/dismembermenthazardoffoot,mowerblade—stay
awayfrommovingparts,keepallguardsandshieldsin
place.
12

decal120-8947
120–8947
1.Warning—readthe
Operator’sManual.
4.Iftherollbarisraised,
weartheseatbelt.
2.Thereisnorollover
protectionwhentheroll
barisdown.
5.Iftherollbarislowered,
donotweartheseatbelt.
3.Thereisrolloverprotection
whentherollbarisup.
6.Driveslowlywhenturning.
decal127-3700
127–3700
1.Raisetheleftdeck4.Lockenginespeed
2.Raisethecenterdeck5.Unlockenginespeed
3.Raisetherightdeck
decal120-4129
120–4129
1.Beacon3.Leftturnsignal
2.Hazardlight4.Rightturnsignal
decal120-4130
120–4130
1.ReadtheOperator’s
Manual.
3.Parkingbrake
2.Toengagetheparking
brake—1)Lockthepedals
together;2)Pushdownon
thebrake;3)Pulloutthe
parkingbrakeknob.
4.Todisengagetheparking
brake,pushdownonthe
brakepedal.
13

decal121-1599
121–1599
1.ReadtheOperator’sManualforinformationonfuses.
decal114-0849
114–0849
1.Warning—1)Disengage
thePTO;2)Raisethedeck
4.Forwarddirection
2.Donotplaceyourfoot
here.
5.Reversedirection
3.Directionpedal
decal114-0846
114–0846
1.ReadtheOperator’s
Manualforinformationon
startingtheengine—1)Set
toneutral;2)Engagethe
brake;3)Settheengine
speedtoslow;4)Turnthe
ignitionkeytopreheat;
5)Turntheignitionkeyto
enginestart.
4.Pulltheknoboutto
engagethePTO.
2.ReadtheOperator’s
Manualforinformation
onstoppingthe
engine—1)Setthe
enginespeedtoslow;
2)Disengagethedeck;
3)Locktheparkingbrake;
4)Wait5minutes;5)Turn
theignitionkeytoengine
stop;6)Removethekey
fromtheignition.
5.Pushtheknobinto
disengagethePTO.
3.ReadtheOperator’s
Manual.
6.RaisethedeckstogotoH
range.
14

decal130-6046
130–6046
1.ReadtheOperator’sManual.
decal114-0845
114–0845
1.Steeringwheeltiltlever2.Horn
15

decal120-0250
120–0250
(Cabmodels)
1.Slowmovingvehicle
decal93-7275
93-7275
1.ReadtheOperator'sManual.
2.Donotusestartingaids.
16

Setup
LooseParts
Usethechartbelowtoverifythatallpartshavebeenshipped.
ProcedureDescriptionQty.Use
1Nopartsrequired–Greasethemachine.
2Warningdecal1Usedonlyonmachinesrequiring
EuropeanCEcompliance.
MediaandAdditionalParts
DescriptionQty.Use
Operator'sManual1Reviewbeforeoperatingmachine
Engineoperator'smanual1Usetoreferenceengineinformation
PartsCatalog1Usetoreferencepartnumbers
Operatortrainingmaterials1Reviewbeforeoperatingmachine
Declarationofconformity1
Note:Determinetheleftandrightsidesofthe
machinefromthenormaloperatingposition.
1
GreasingtheMachine
NoPartsRequired
Procedure
Beforethemachineisoperated,itmustbegreased
toensureproperlubricatingcharacteristics;refer
toGreasingtheBearingsandBushings(page52).
Failuretoproperlygreasethemachinewillresultin
prematurefailureofcriticalparts.
2
ReplacingtheWarning
Decal
Partsneededforthisprocedure:
1Warningdecal
Procedure
OnmachinesrequiringEuropeanCEcompliance,
replacethewarningdecal,partno.117–2754withthe
warningdecalpartno.117–2766.
17

ProductOverview
Controls
Note:Determinetheleftandrightsidesofthe
machinefromthenormaloperatingposition.
CAUTION
Thismachineproducessoundlevelsin
excessof85dBAattheoperatorsearandcan
causehearinglossthroughextendedperiods
ofexposure.
Wearhearingprotectionwhenoperatingthis
machine.
TractionPedal
Tostop,reduceyourfootpressureonthetraction
pedalandallowittoreturntothecenterposition
(Figure3).
g020756
Figure3
1.Brakepedals6.Hazardlightswitch
(optional)
2.Pedallockinglatch7.Turnsignalswitch
(optional)
3.Parkingbrakelatch8.Hornbutton(optional)
4.Spaceforoptional
accessory
9.Tractionpedal
5.Beaconswitch(optional)10.Tiltsteeringlever
BrakePedals
Twofootpedals(Figure3)operateindividualwheel
brakesforturningassistance,parking,andtoaidin
obtainingbettersidehilltraction.Alatchconnectsthe
pedalsforparkingbrakeoperationandtransport.
PedalLockingLatch
Thepedallockinglatch(Figure3)connectsthepedals
togethertoengagetheparkingbrake.
TiltSteeringLever
Pressthelever(Figure3)downtotiltthesteering
wheeltothedesiredposition.Thenreleasethelever
tolocktheadjustment.
ParkingBrakeLatch
Aknobontheleftsideoftheconsoleactuatesthe
parkingbrakelock(Figure3).T oengagetheparking
brake,connectthepedalswiththelockinglatch,push
downonbothpedals,andpulltheparkingbrakelatch
out.Toreleasetheparkingbrake,pressbothpedals
untiltheparkingbrakelatchretracts.
HazardLightSwitch
Pressthehazardlightswitch(Figure3)toactivate
thehazardlights.
TurnSignalSwitch
Presstheleftsideoftheturnsignalswitch(Figure
3)toactivatetheleftturnsignalandtherightsideof
theswitchtoactivatetherightturnsignal.Thecenter
positionisoff.
KeySwitch
Thekeyswitch(Figure4)hasthreepositions:Off,
On/Preheat,andStart.
g028453
Figure4
1.Liftswitches5.Hi-Lospeedcontrol
2.PTOswitch6.Enginespeedswitch
3.Keyswitch7.Lightswitch(optional)
4.InfoCenter
18

EngineSpeedSwitch
Theenginespeedswitch(Figure4)hastwomodes
tochangetheenginespeed.Bymomentarilytapping
theswitch,theenginespeedcanbeincreasedor
decreasedin100rpmincrements.Byholdingthe
switchdowntheenginewillautomaticallymoveto
HighorLowidle,dependingonwhichoftheswitchis
depressed.
PTOSwitch
ThePTOswitch(Figure4)has2positions:Out(start)
andIn(stop).PullthePTObuttonouttoengagethe
cuttingunitblades.Pushinthebuttontodisengage
thecuttingunitblades.
Hi-LowSpeedControl
Theswitch(Figure4)allowsthespeedrangeto
increasefortransportofthemachine.Cuttingdecks
willnotoperateinhighrange.T oswitchbetweenthe
HighandLowrange,thedecksmustberaised,PTO
disengaged,cruisecontroldisengaged,tractionpedal
inneutralpositionandthemachinemustbemovingat
aslowspeed.
LiftSwitches
Theliftswitches(Figure4)raiseandlowerthecutting
units.Presstheswitchesforwardtolowerthecutting
unitsandbackwardtoraisethecuttingunits.When
startingthemachine,withthecuttingunitsinthedown
position,presstheliftswitchdowntoallowthecutting
unitstooatandmow.
Note:ThedeckswillnotlowerwhileintheHIspeed
rangeandtheywillnotraiseorloweriftheoperatoris
outoftheseatwhentheengineisrunning.Also,the
deckswilllowerwiththekeyintheOnpositionand
theoperatorintheseat.
CruiseControlSwitch
Thecruisecontrolswitch(Figure4)locksinthe
pedalpositiontomaintainthedesiredgroundspeed.
Pressingtherearoftheswitchturnsoffthecruise
control,themiddlepositionoftheswitchenablesthe
cruisecontrolfunctionandthefrontoftheswitchsets
thedesiredgroundspeed.
Note:Pressingeitherbrakepedalormovingthe
tractionpedalintothereverseposition,forone
second,willalsodisengagethepedalposition.
PowerPoint
Thepowerpoint(Figure5)isusedtopoweroptional
electricalaccessories.
g028454
Figure5
1.Powerpoint2.Cruisecontrolswitch
SeatAdjustments
ForeandAftAdjustingLever
Pulloutonthelevertoslidetheseatforeoraft(Figure
6).
SeatArmRestAdjustingKnob
Rotatetheknobtoadjusttheseatarmrestangle
(Figure6).
SeatBackAdjustingLever
Movethelevertoadjusttheseatbackangle(Figure
6).
WeightGauge
Indicateswhentheseatisadjustedtotheweightof
theoperator(Figure6).Heightadjustmentismade
bypositioningthesuspensionwithintherangeofthe
greenregion.
19

g008837
Figure6
1.Weightgauge4.Seatbackadjustinglever
2.Weightadjustinglever5.Armrestadjustingknob
(notshown-locatedunder
armrest)
3.ForeandAftadjusting
lever
WeightAdjustingLever
Adjustforoperatorweight(Figure6).Pulluponthe
levertoincreasetheairpressureandpushdownto
decreasetheairpressure.Theproperadjustmentis
attainedwhentheweightgaugeisinthegreenregion.
CabControls
g028431
Figure7
1.Airrecirculationcontrol6.Lightsswitch
2.Fancontrol7.Turnsignal
3.Temperaturecontrol8.Flashersswitch
4.Windshieldwiperswitch9.Airconditioningswitch
5.Poweroutlet
AirRecirculationControl
Setsthecabtoeitherrecirculatetheairinthecabinor
todrawairintothecabinfromoutside(Figure7).
•Setittorecirculatetheairwhenusingthe
air-conditioning.
•Setittodrawairinwhenusingtheheaterorfan.
FanControl
Rotatethefancontrolknobtoregulatethespeedof
thefan(Figure7).
TemperatureControl
Rotatethetemperaturecontrolknobtoregulatethe
airtemperatureinthecab(Figure7).
WindShieldWiperSwitch
Usethisswitchtoturnthewindshieldwipersonor
off(Figure7).
PowerOutlet
Usethis15amp,12VDCpoweroutlettopower
compatibledevices(Figure7).
LightsSwitch
Usethisswitchtoturntheheadlightsandtaillight
onoroff(Figure7).
20
This manual suits for next models
1
Table of contents
Other Toro Lawn Mower manuals

Toro
Toro 29645 User manual

Toro
Toro 30074 User manual

Toro
Toro Reelmaster 5610-D User manual

Toro
Toro GrandStand 18850TE User manual

Toro
Toro Recycler 20370 User manual

Toro
Toro 78442 User manual

Toro
Toro 78476 User manual

Toro
Toro 30645 User manual

Toro
Toro Groundsmaster 580-D User manual

Toro
Toro 30856 User manual

Toro
Toro TimeMaster 21199HD User manual

Toro
Toro Z Master Professional 7500-DSeries Manual

Toro
Toro Recycler 21771 User manual

Toro
Toro 03664 User manual

Toro
Toro 20380 User manual

Toro
Toro 04510 Greensmaster 3300 TriFlex User manual

Toro
Toro Recycler 20656 User manual

Toro
Toro 412690000 User manual

Toro
Toro 74402 User manual

Toro
Toro Recycler 21767 User manual