5
ENGLISH
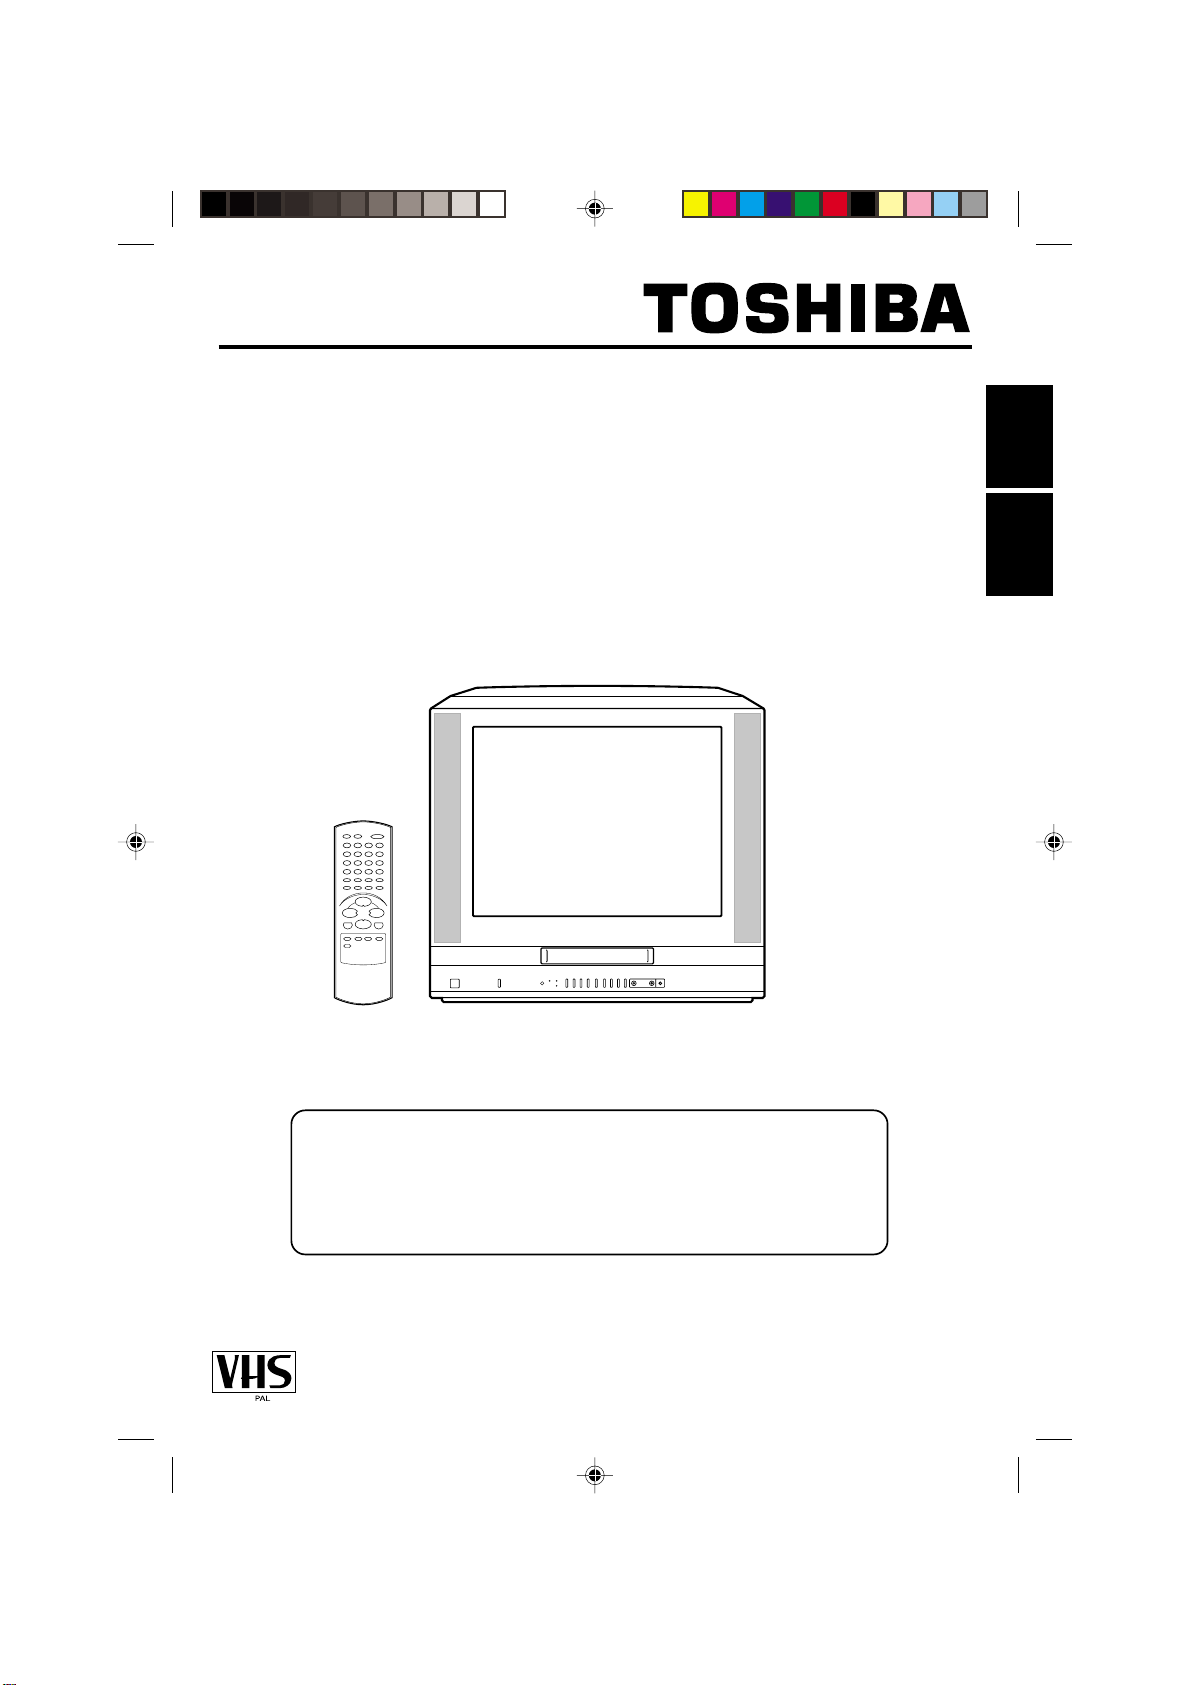
REMOTE CONTROL
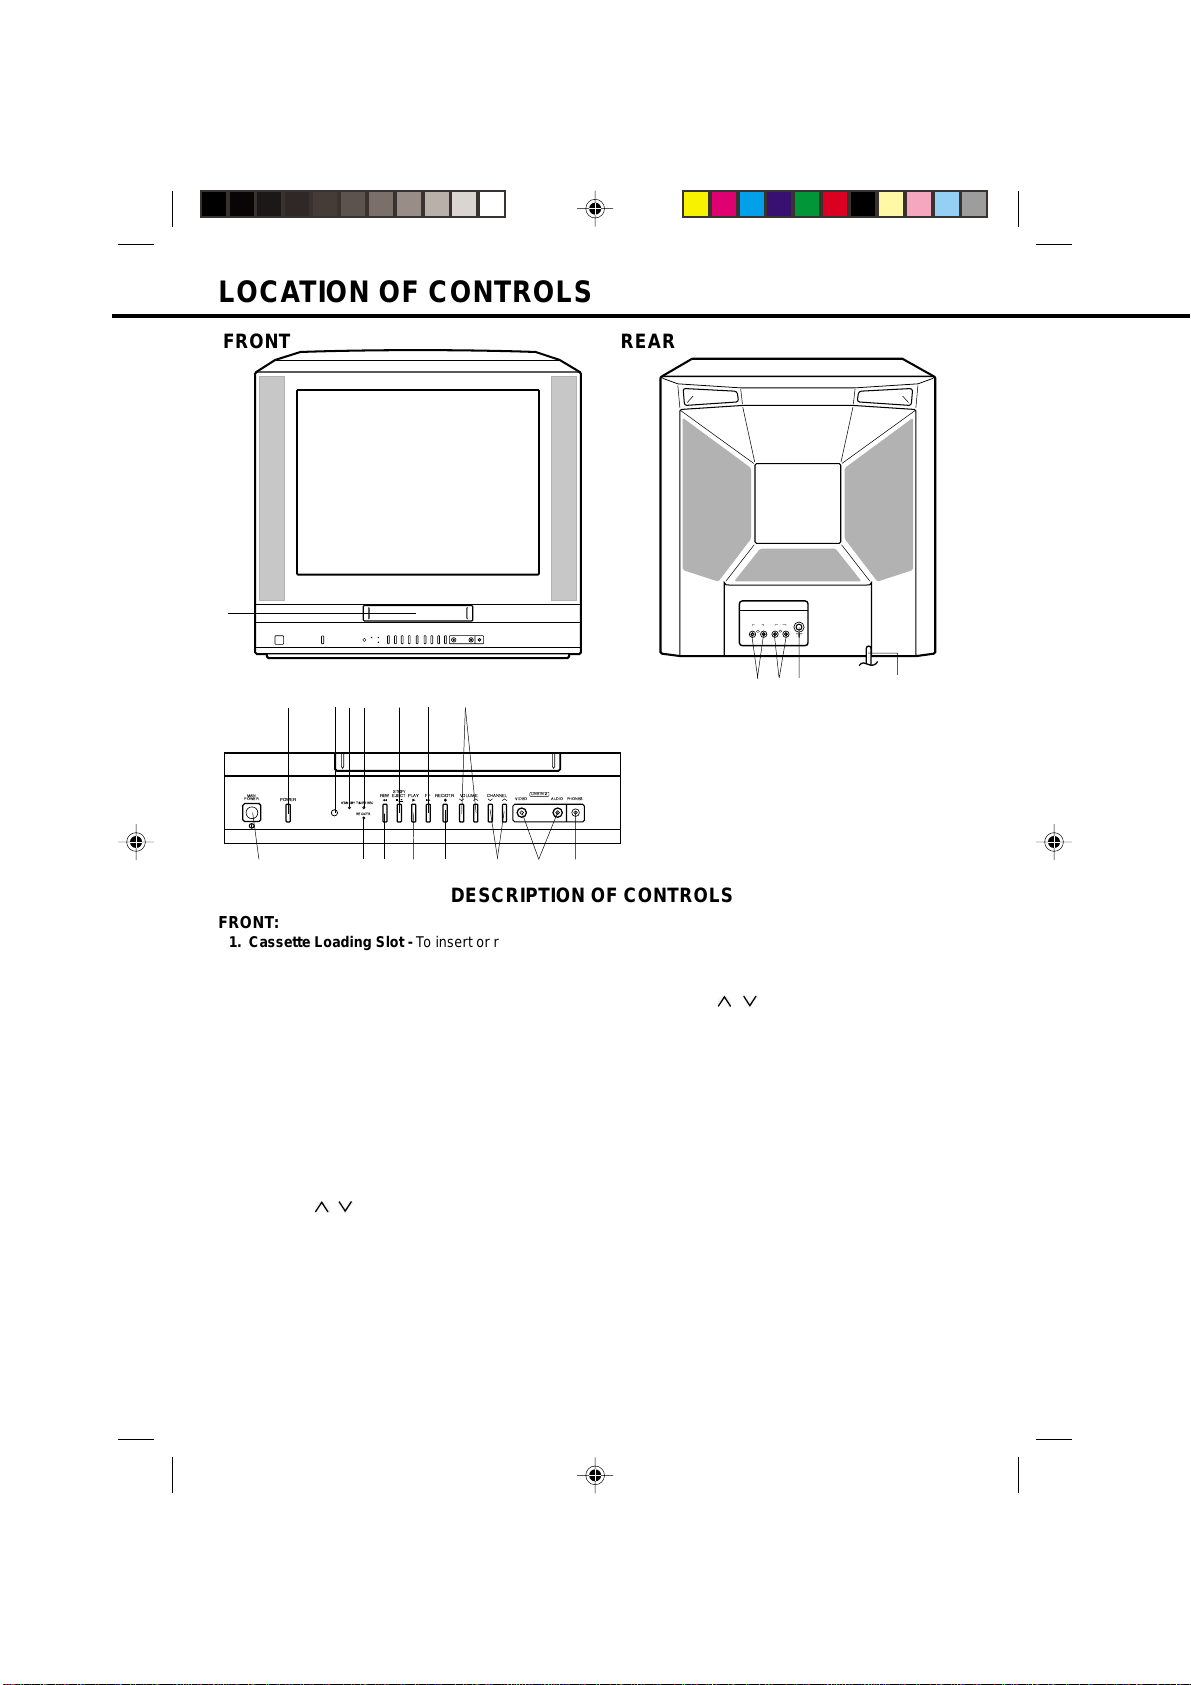
DESCRIPTION OF CONTROLS
1
2
10
15
3
6
7
8
9
11
12
5
4
14
13
16
17
18
19
20
21
22
23
24
26
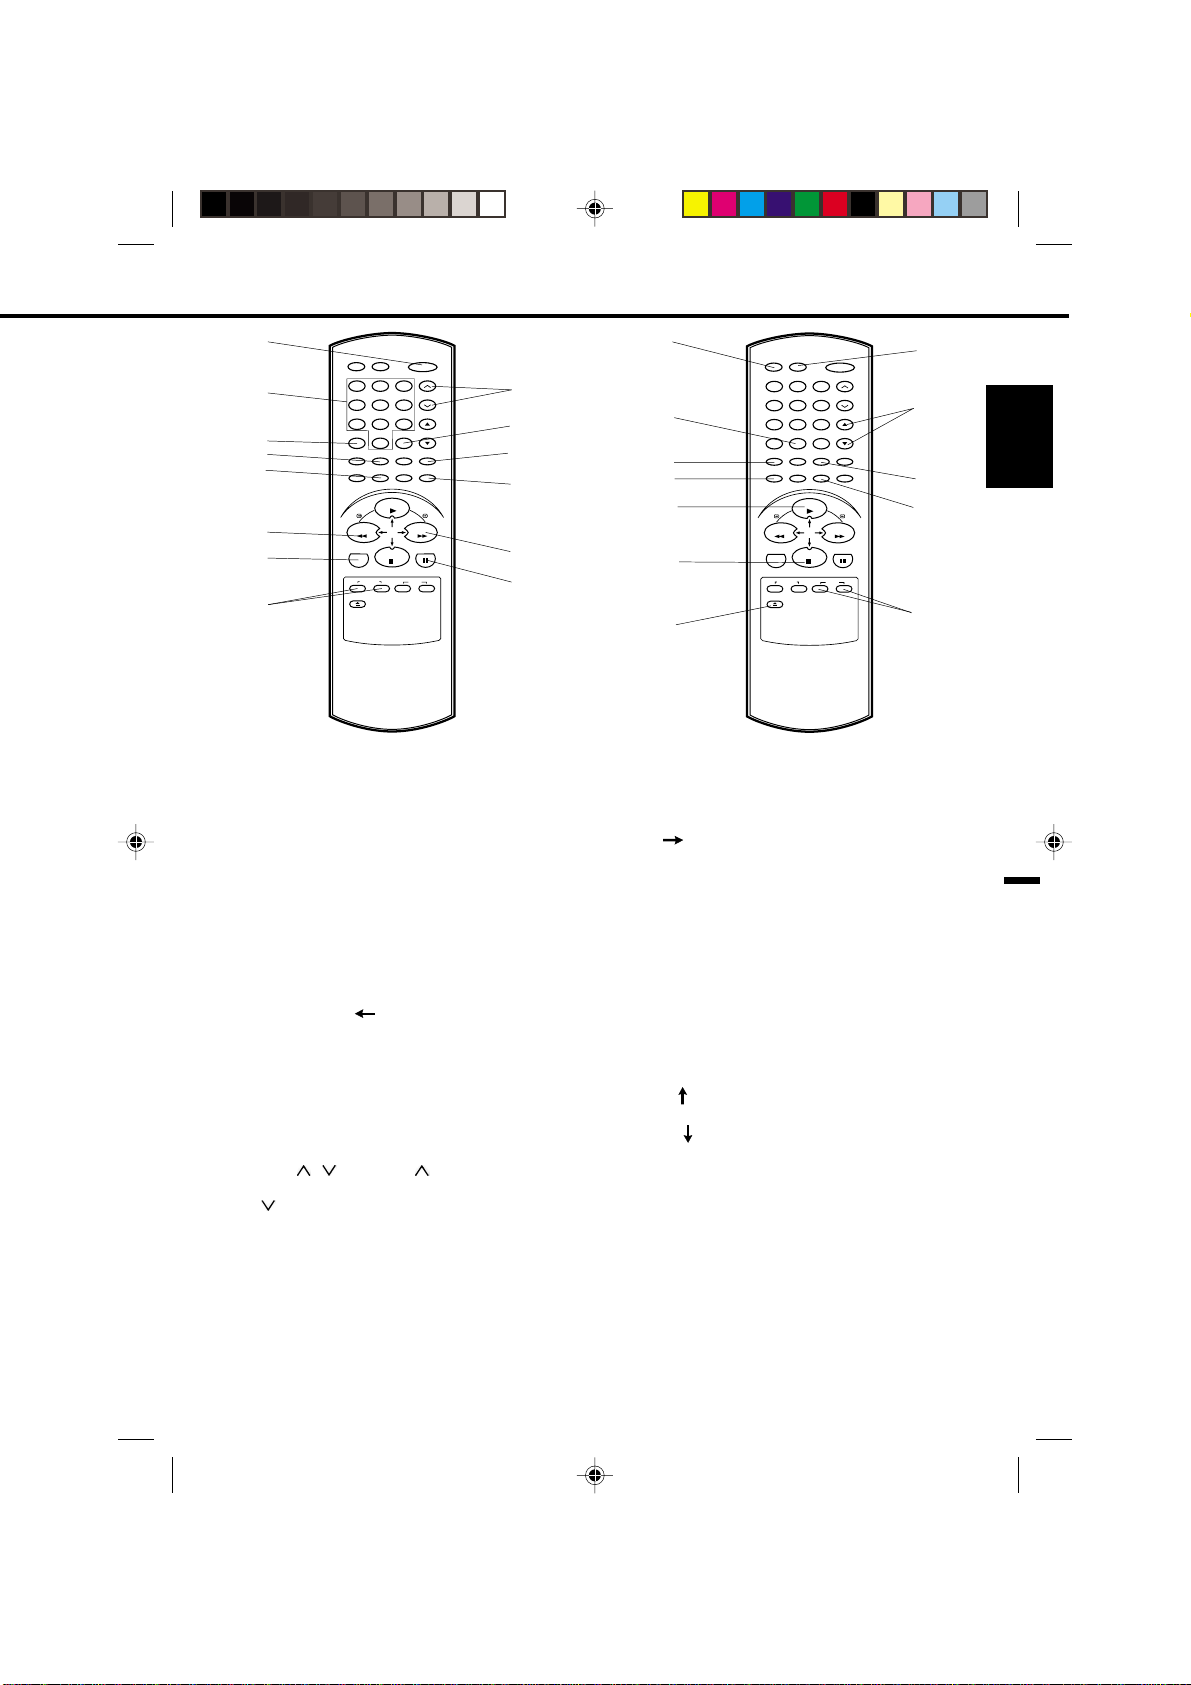
13. FF / Button - In the Stop mode, this button
rapidly winds the tape forward. In the Play mode,
this button activates forward search.Used to set or
adjust in the menu mode.
14. PAUSE/STILL Button - During recording, this button
temporarily stops the tape.During playback, it stops
the tape and displays a still image on theTV screen.
15. TV MONI. Button - Used to temporarily view a TV
channel selected on the TV/VCR while in the
playback mode.
16. AV Button - Select input signal source when
recording from an external unit.
17. COUNTER RESET Button - Used to reset the
counter to 00:00:00.
18. PROGRAM Button - Press to confirm the pro-
grammed timer recording and ON/OFF timer.
19. PLAY/ Button - Press to play a prerecorded
tape.Used to set or adjust in the menu mode.
20. STOP / Button - Press once to stop the tape.
Used to set or adjust in the menu mode.
21. EJECT Button - Press to eject the tape.
22. SLEEP Button - Sets theTV to turn off automatically
after up to 120 minutes.
23. VOLUME ▲/ ▼Buttons - Press the ▲button to
increase, or the ▼button to decrease the volume
level.
24. INDEX Button - Used to search for the INDEX mark.
25. ENTER Button - Use to enter information in the
menu mode.
26. TIMER REC Buttons - Used to set the TV/VCR to
start recording at a preset time.
1. ON/STANDBY Button - Press to turn the TV/VCR
on. Press again to turn theTV/VCR off.
2. Direct Channel Selection Buttons (0-9) - Allows
direct access to any channel.
3. CALL Button - Displays the present time/day of the
week, channel, counter, speed selection (and VCR
mode if VCR is operating) on the TV screen.
4. ZERO RETURN Button - Used to stop the tape
when the counter reaches 00:00:00.
5. SP/LP Button - Sets the tape speed for recording.
6. REW (Rewind) / Button - In the Stop mode,
this button rapidly winds the tape backwards. In the
Play mode, this button activates reverse search.
Used to set or adjust in the menu mode.
7. MENU Button - Press to display the On-Screen
menu function.
8. REC/OTR Buttons - Press both buttons at the
same time once to start normalrecording. Additional
presses activate One Touch Timer Recording.
9. CH/TRK / -Press the button to change a
higher numbered channel set into memory. Press
the button to change to a lower numbered
channel set into memory. During playback, they are
used to adjust tracking manually.
10. MUTE Button - Press to turn off the sound. Press
again to turn the sound back on.
11. AUTOTRACKING Button - Automatic adjustment of
tracking to minimize picture noise during playback.
12. CANCEL Button - Used to clear the selected
program and to move the cursor backward.
25
FFREW
STOP
MENU PAUSE/STILL
TIMER
REC
REC/OTR
EJECT
PROGRAM SP/LP
CALL 0 / AV MUTE
SLEEP
CH/TRK
ON/
STANDBYTV MONI.
VOLUME
ENTER CANCEL
INDEX AUTO
TRACKING
COUNTER
RESET ZERO
RETURN
PLAY
0
879
654
321
FFREW
STOP
MENU PAUSE/STILL
TIMER
REC
REC/OTR
EJECT
PROGRAM SP/LP
CALL 0 / AV MUTE
SLEEP
CH/TRK
ON/
STANDBYTV MONI.
VOLUME
ENTER CANCEL
INDEX AUTO
TRACKING
COUNTER
RESET ZERO
RETURN
PLAY
0
879
654
321
5960101A/E/01-10 1/6/01, 6:36 PM5